Philadelphia Food Network and Recipes
  • Home
    • Main Website
  • Recipes
  • Meals
    • 30 Minute Meals
    • Beef Meals
    • Breakfast & Pastries
    • Chicken Meals
    • Fish Meals
    • Pork Meals
    • Seafood Meals
    • Turkey Meals
    • Vegan & Vegetarian Meals
    • Other Meals
  • Categories
    • Barbecue
    • Casseroles
    • Cheesesteak
    • Cultural Dishes
    • Desserts & Treats
    • Featured
    • Fresh Baked Breads
    • Grilling
    • Pasta
    • Pizza
    • Popular Recipes
    • Side Dishes
    • Soul Food
    • Soups & Salads
  • About Us
  • Contact Us
  • Submit Your Recipe
Top Posts
Asparagus & Cheese Stuffed Chicken
Asian Cabbage Stir Fry
High Protein Broccoli Cheddar Soup
Homemade Popeyes Cajun Fries
Immune Boosting Vegetable Soup
Creamy Crab Bisque
Garlic Parmesan Pizza
Green Bean Bundles
Cheesy Scalloped Potatoes
Garlic Parmesan Roasted Potatoes
Philadelphia Food Network and Recipes
  • Home
    • Main Website
  • Recipes
  • Meals
    • 30 Minute Meals
    • Beef Meals
    • Breakfast & Pastries
    • Chicken Meals
    • Fish Meals
    • Pork Meals
    • Seafood Meals
    • Turkey Meals
    • Vegan & Vegetarian Meals
    • Other Meals
  • Categories
    • Barbecue
    • Casseroles
    • Cheesesteak
    • Cultural Dishes
    • Desserts & Treats
    • Featured
    • Fresh Baked Breads
    • Grilling
    • Pasta
    • Pizza
    • Popular Recipes
    • Side Dishes
    • Soul Food
    • Soups & Salads
  • About Us
  • Contact Us
  • Submit Your Recipe
Copyright 2021 - All Right Reserved
30 Minute MealsPastaVegetarian

Pesto Pasta with Mushrooms

by myphillyconnection October 20, 2021
written by myphillyconnection

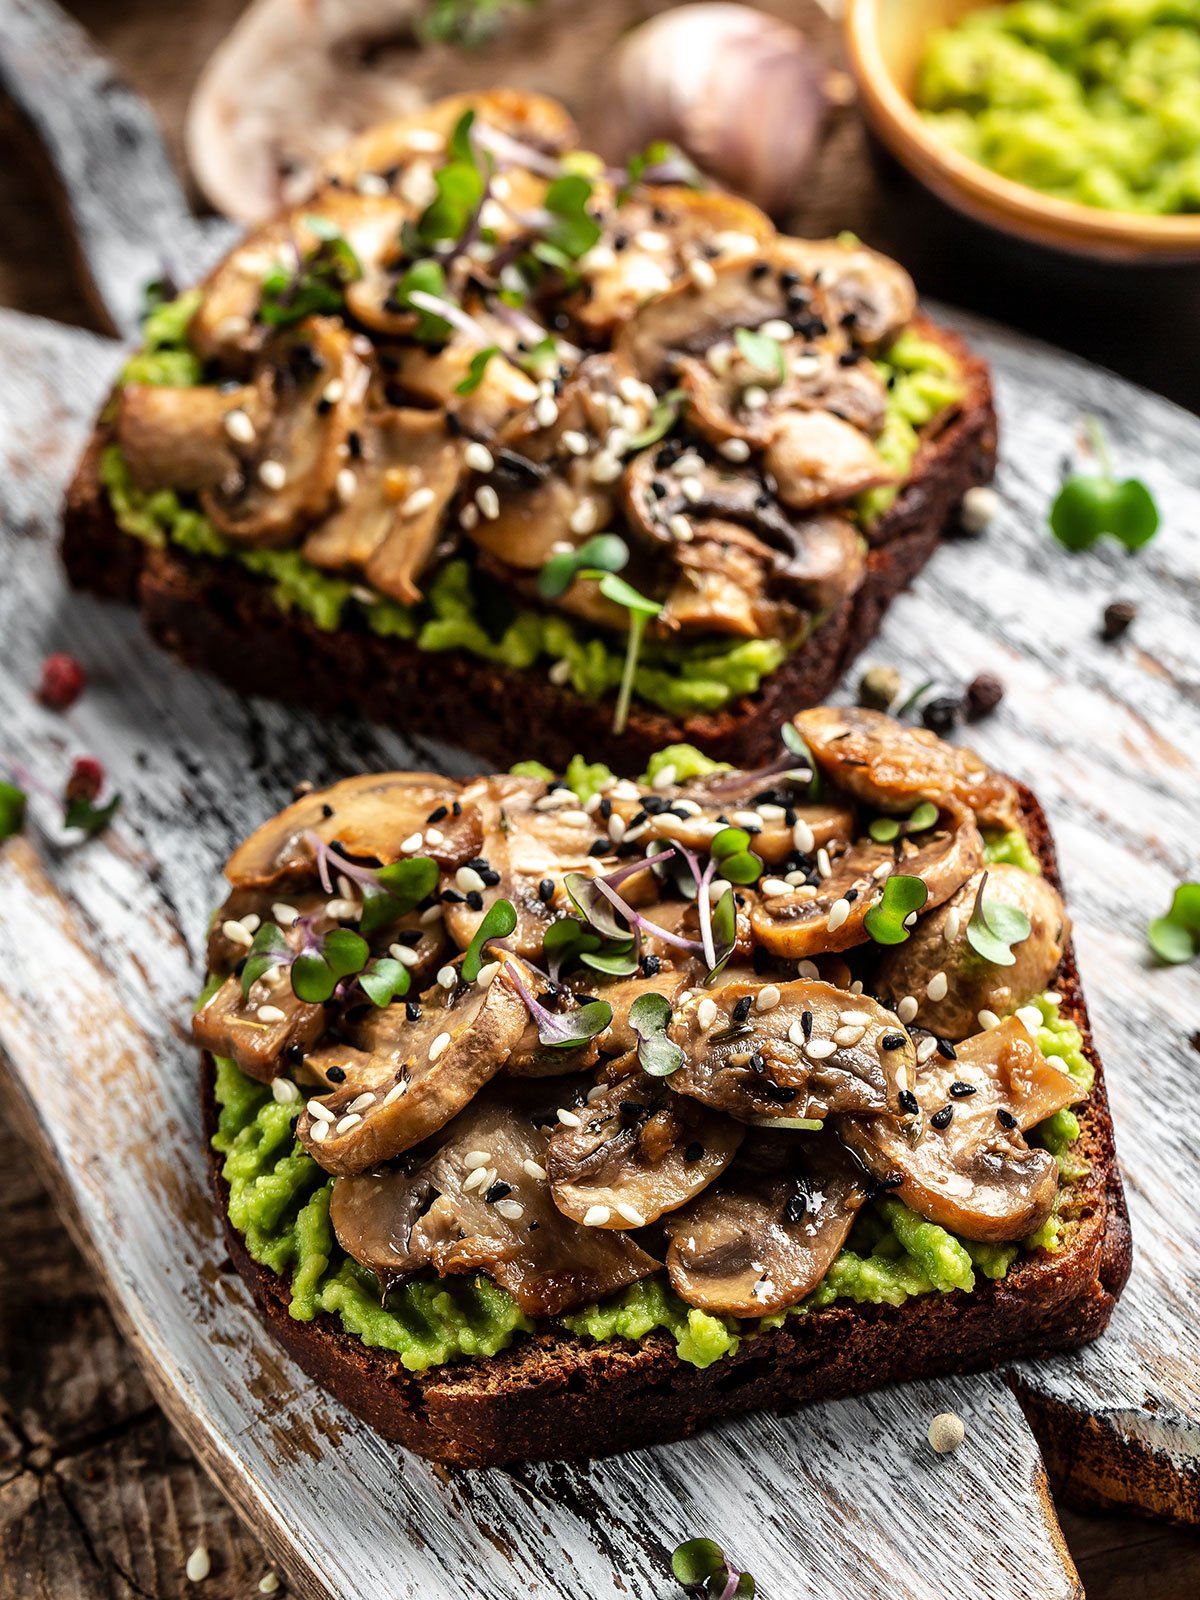
Pesto pasta with mushrooms is a fresh, vibrant dish that marries the bright, herbaceous notes of classic basil pesto with the deep, earthy flavor of sautéed mushrooms. Tender pasta—often linguine, spaghetti, or penne—gets tossed in homemade or store-bought pesto, creating a glossy, green coating. Golden-brown mushrooms add meaty texture and umami, while garlic, olive oil, and a touch of lemon brighten everything up. Finished with grated Parmesan, toasted pine nuts, and fresh basil, it’s a simple yet elegant meal that’s quick to prepare and full of Italian-inspired freshness.

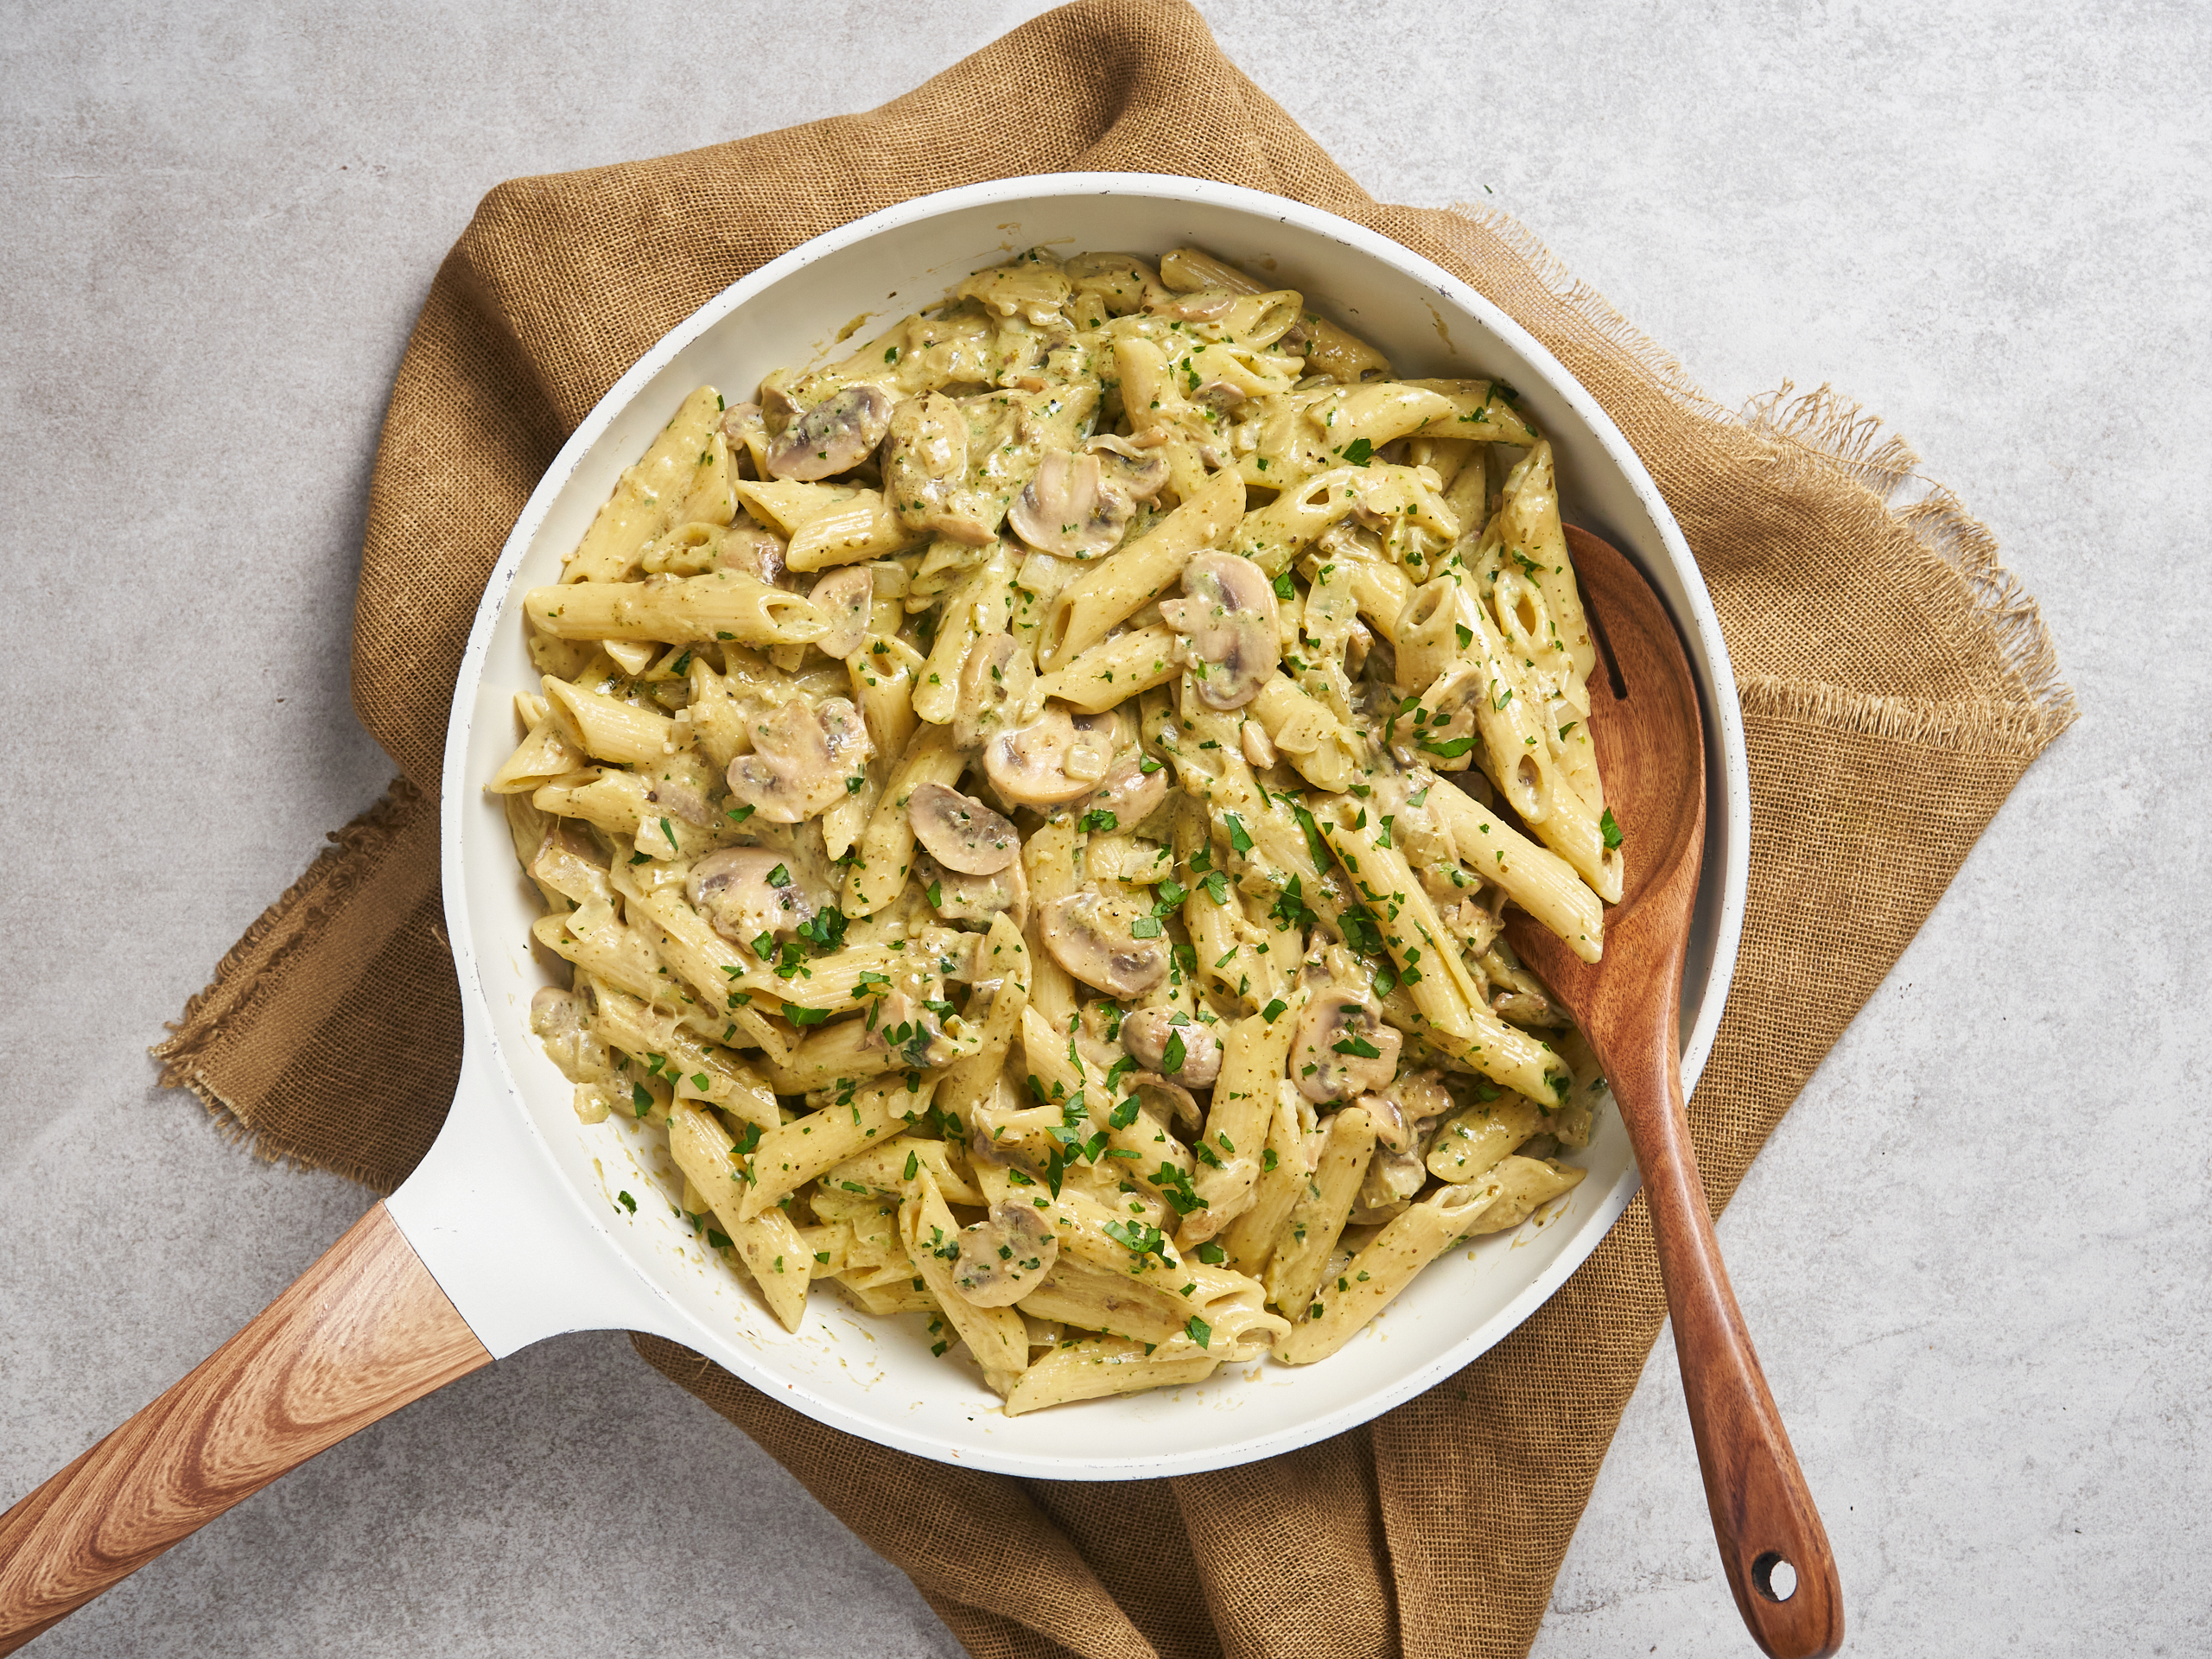
The mushrooms—cremini, button, or shiitake—release their juices as they cook, infusing the dish with rich savoriness that complements the nutty, garlicky pesto perfectly. This combination elevates a basic pesto pasta into something more substantial and satisfying, ideal for vegetarians or anyone craving a lighter alternative to heavy cream sauces. Optional add-ins like cherry tomatoes, spinach, or a splash of cream turn it into a customizable favorite. The vibrant green color from the pesto makes it visually appealing, while the contrast of crisp-tender mushrooms and al dente pasta delivers great texture in every forkful.

Rooted in Italian cuisine, pesto originates from Genoa, but pairing it with mushrooms is a modern, everyday twist popular in home cooking and casual restaurants. The dish highlights seasonal ingredients—fresh basil in summer, hearty mushrooms year-round—and comes together in under 30 minutes. It’s versatile enough for weeknight dinners, lunch leftovers, or even cold pasta salad variations. Nutritionally, it offers healthy fats from olive oil and nuts, vitamins from greens, and fiber from mushrooms, making it both delicious and nourishing.

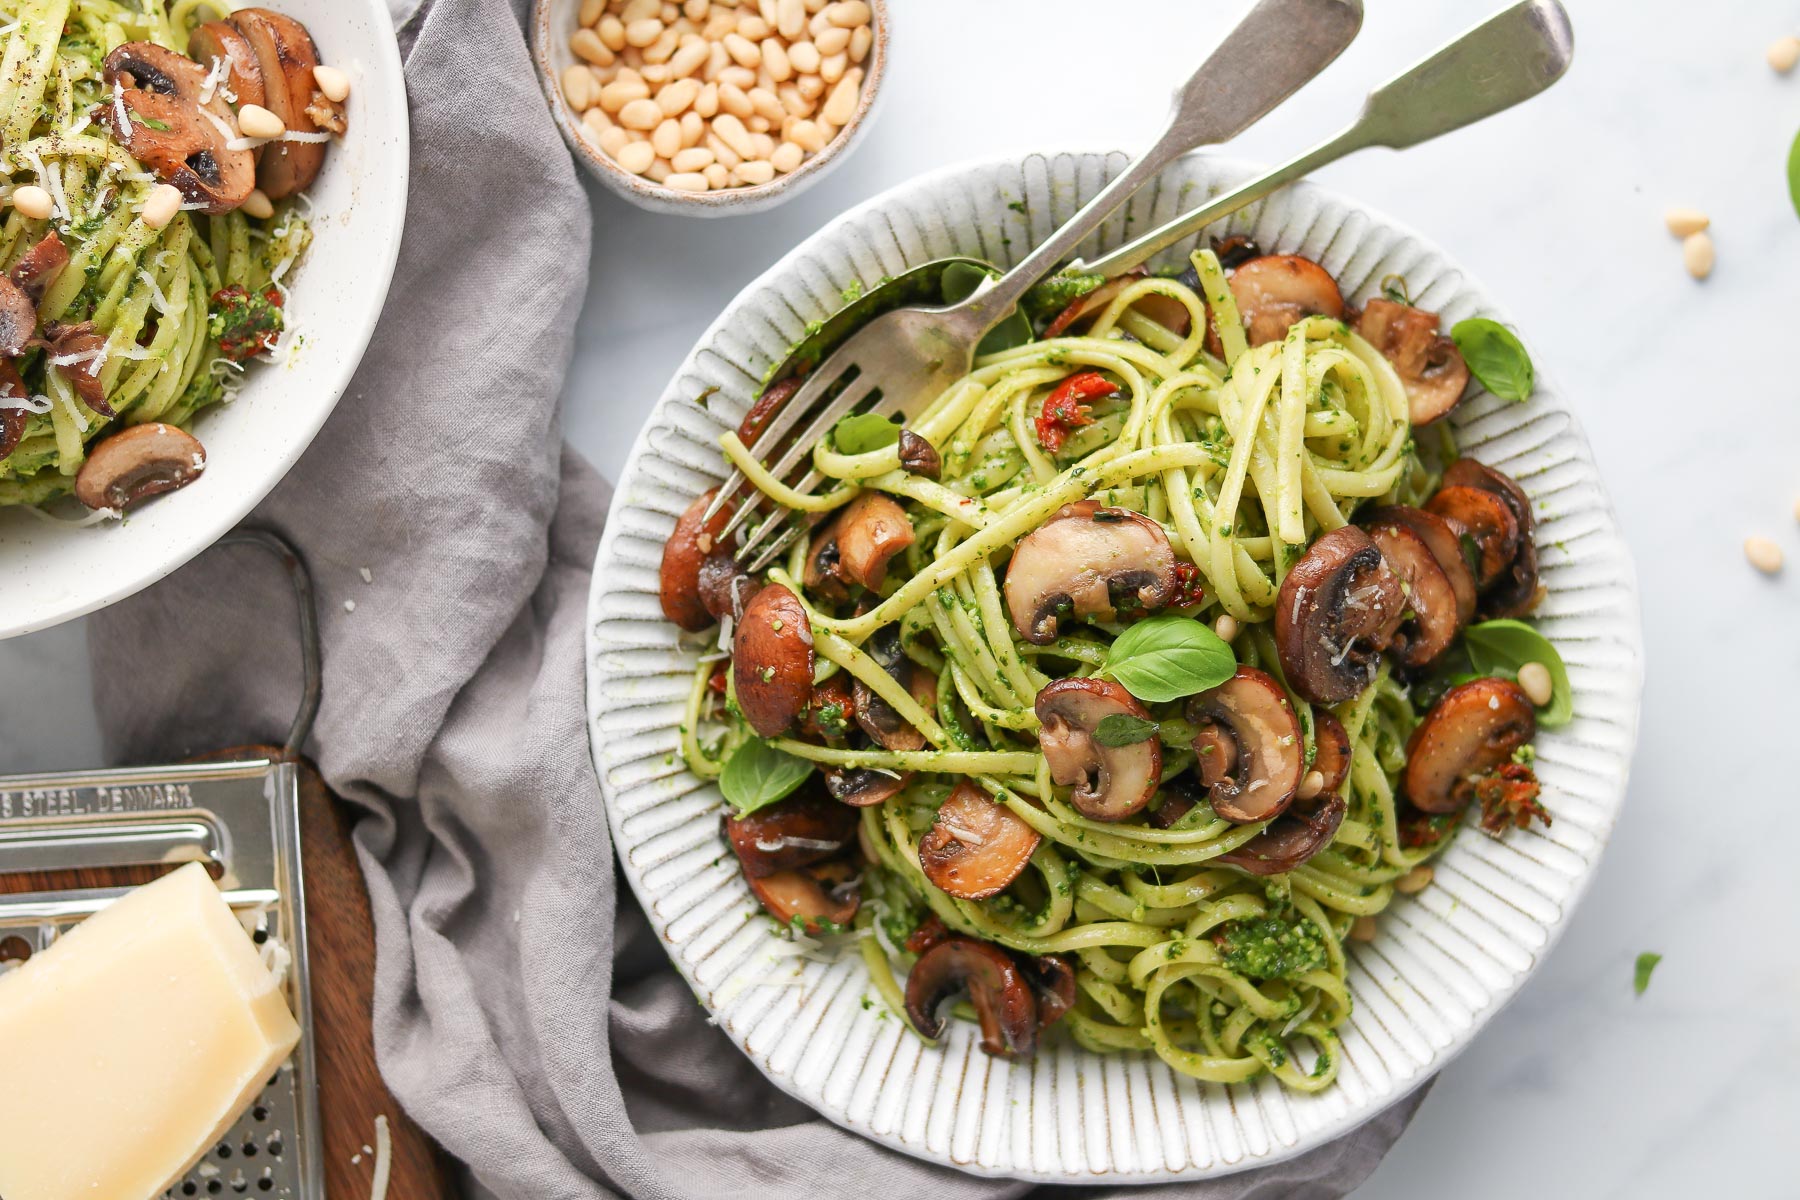
This pasta shines with its balance of flavors: the peppery bite of black pepper, the aromatic punch of garlic, and the subtle tang of lemon zest or juice. It pairs beautifully with a simple side salad, crusty bread, or grilled vegetables for a complete meal. Leftovers reheat gently with a drizzle of oil to revive the sauce, and it’s easily made vegan by skipping cheese or using a dairy-free pesto. The dish proves that minimal ingredients can create maximum flavor when quality pesto and well-cooked mushrooms lead the way.

In short, pesto pasta with mushrooms is bright, earthy, and effortlessly elegant—perfect for when you want Italian comfort without complexity. It’s a go-to recipe that feels special yet requires little effort, delivering restaurant-worthy taste with pantry staples. Whether served family-style or plated for one, it captures the joy of fresh, flavorful cooking in one satisfying bowl.

Pesto Pasta with Mushrooms

Serves: 4 Prep Time: 10 minutes Cooking Time: 20 minutes 20 minutes
Nutrition facts: 450 calories 28 grams fat
Rating: 5.0/5
( 1 voted )
Pin
Print

Ingredients

Ingredients (4 servings):

  • 12 oz pasta (linguine, spaghetti, or penne)
  • 8–10 oz mushrooms (cremini or button), sliced
  • ½ cup basil pesto (homemade or store-bought)
  • 2–3 tbsp olive oil
  • 3 cloves garlic, minced
  • Salt and black pepper to taste
  • Juice of ½ lemon (optional)
  • ¼ cup grated Parmesan cheese (optional, plus extra for serving)
  • Toasted pine nuts or walnuts, for garnish
  • Fresh basil or parsley, chopped, for garnish

Instructions

  • Cook pasta in salted boiling water until al dente; reserve ½ cup pasta water, then drain.
  • Heat 2 tbsp olive oil in a large skillet over medium-high; add mushrooms, season with salt and pepper, and sauté 5–7 minutes until golden and tender.
  • Add garlic; cook 1 minute until fragrant.
  • Reduce heat; stir in pesto and a splash of pasta water to loosen sauce.
  • Toss in cooked pasta, adding more pasta water as needed for silky texture. Stir in lemon juice if using.
  • Serve topped with Parmesan, nuts, and fresh herbs.

Notes

  • For creamier version, stir in ¼ cup heavy cream or plant-based alternative.
  • Use vegan pesto and skip cheese for dairy-free.
  • Don't overcrowd mushrooms for best browning.
  • Stores well in fridge 2–3 days; reheat with a bit of oil or water.
0 comments
0 FacebookTwitterPinterestLinkedin
Cultural DishesVegetarian

Vegan Indian Balti Curry

by myphillyconnection October 20, 2021
written by myphillyconnection

Vegan Indian Balti Curry is a vibrant, flavorful dish that brings the bold spices and hearty textures of British-Indian restaurant cuisine into a completely plant-based format. Originating from the Baltistan region but popularized in UK curry houses, the classic Balti features a tangy, tomato-based sauce cooked quickly in a wok-like balti bowl for a distinctive stir-fry-like finish. In its vegan version, meat is replaced with an abundance of colorful vegetables, legumes like chickpeas or lentils, or plant-based proteins, all simmered with a signature blend of garam masala, cumin, coriander, turmeric, and chili. The result is a richly spiced, slightly tangy curry that’s both comforting and invigorating, with layers of aromatic depth from fresh ginger, garlic, and onions. Served steaming hot, often straight from the pan, it captures the essence of lively Indian flavors in an accessible, cruelty-free way.

The beauty of vegan Balti lies in its versatility and nutrient-packed profile. Common vegetables such as cauliflower, bell peppers, potatoes, carrots, broccoli, and green beans soak up the spices beautifully, while additions like spinach or kale add freshness and color. The sauce achieves its characteristic brightness from chopped tomatoes or passata, often balanced with a touch of coconut milk or yogurt alternative for creaminess without dairy. This dish is inherently healthy, relying on whole foods and minimal oil, making it ideal for those seeking satisfying meals that support plant-based eating. The quick cooking method preserves the vegetables’ crunch and vibrancy, contrasting with the thick, flavorful gravy that clings to every bite. It’s a crowd-pleaser that proves vegan curries can rival their traditional counterparts in taste and excitement.

Balti curries emerged in the 1970s and 1980s in Birmingham, England, where Pakistani and Kashmiri chefs created fast-cooked, one-pan dishes served in the same metal bowl used for preparation. The vegan adaptation fits seamlessly into modern dining trends, emphasizing seasonal produce and bold seasoning over animal products. Home cooks love it for its forgiving nature—substitute whatever veggies are on hand—and it reheats wonderfully, with flavors often deepening overnight. Garnished with fresh cilantro and perhaps a squeeze of lemon, it offers a burst of freshness that cuts through the richness. This curry embodies fusion at its best: Indian spices meet British curry-house style in a wholesome, inclusive package.

One of the standout features of vegan Balti is its balance of textures and heat levels, customizable to personal preference. Mild versions suit families, while extra chilies or fresh green peppers amp up the spice for bolder palates. Pairing it with fluffy basmati rice, naan, or roti turns it into a complete meal, and sides like mango chutney or vegan raita provide cooling contrast. Nutritionally, it’s loaded with fiber from vegetables and legumes, vitamins from the colorful mix, and antioxidants from the spices, supporting everything from digestion to immune health. As plant-based eating grows, dishes like this highlight how traditional recipes can evolve sustainably without losing their soul.

In essence, Vegan Indian Balti Curry is more than a meal—it’s a celebration of spice, color, and simplicity. It invites experimentation, whether roasting veggies first for extra char or adding tofu for protein. Quick enough for weeknights yet impressive enough for guests, it delivers restaurant-quality flavor with everyday ingredients. This dish reminds us that great curries thrive on balance: heat and tang, earthiness and brightness, all coming together in one aromatic pot. Enjoy it piping hot for the ultimate comforting experience.

Here are some delicious images of vegan Indian Balti curry to inspire your cooking—the vibrant colors and hearty veggie chunks really shine through!

Greek Marinated Chickpea Salad

Serves: 4 Prep Time: 15 minutes Cooking Time: 40 minutes 40 minutes
Nutrition facts: 280 calories 18 grams fat
Rating: 5.0/5
( 1 voted )
Pin
Print

Ingredients

Ingredients (for 4 servings):

  • 2 tablespoons vegetable oil or coconut oil
  • 1 large onion, thinly sliced
  • 4 cloves garlic, minced
  • 1-inch piece fresh ginger, minced
  • 1 red bell pepper, chopped
  • 1 green bell pepper, chopped
  • 2 cups mixed vegetables (e.g., cauliflower florets, carrots, potatoes, broccoli)
  • 1 can (14 oz) chopped tomatoes
  • 1 can (14 oz) chickpeas, drained (or lentils/tofu for variation)
  • 2 teaspoons garam masala
  • 1 teaspoon ground cumin
  • 1 teaspoon ground coriander
  • 1 teaspoon turmeric
  • ½-1 teaspoon chili powder or fresh chilies (adjust for heat)
  • Salt to taste
  • ½ cup vegetable broth or water
  • Fresh cilantro, chopped, for garnish
  • Optional: splash of coconut milk for creaminess

Instructions

    • Heat oil in a large pan or wok over medium-high heat.
    • Add onions and sauté until golden, about 5 minutes.
    • Stir in garlic and ginger; cook 1-2 minutes until fragrant.
    • Add bell peppers and mixed vegetables; stir-fry 5-7 minutes.
    • Add spices (garam masala, cumin, coriander, turmeric, chili); cook 1 minute to bloom.
    • Pour in tomatoes, chickpeas, broth, and salt; bring to a simmer.
    • Cover and cook 15-20 minutes until vegetables are tender but not mushy, stirring occasionally. Add more liquid if needed.
    • Garnish with cilantro and serve hot.

Notes

  • For authentic Balti style, cook on high heat for a slightly charred edge.
  • Roast veggies first at 425°F for 15 minutes for deeper flavor.
  • Gluten-free and nut-free; adjust spices to taste.
  • Leftovers store well in the fridge for 3-4 days; flavors improve.
0 comments
0 FacebookTwitterPinterestLinkedin
Soups & SaladsVegetarian

Hearty Pumpkin Soup

by myphillyconnection October 20, 2021
written by myphillyconnection

Pumpkin Soup is a comforting, velvety classic that embodies the cozy essence of fall and winter, transforming humble pumpkin into a silky, flavorful bowl of warmth. This dish typically features roasted or simmered pumpkin blended with aromatic onions, garlic, and warm spices like nutmeg, cinnamon, or ginger, creating a naturally sweet yet savory base. A splash of cream, coconut milk, or broth adds luxurious creaminess, while toppings such as toasted pumpkin seeds (pepitas), a swirl of cream, and fresh herbs elevate it from simple to elegant. Often served as a starter or light main, it’s both nourishing and indulgent, with the pumpkin’s earthy sweetness shining through in every spoonful. Perfect for chilly evenings or holiday gatherings, this soup brings a sense of seasonal comfort to the table.

The preparation of Pumpkin Soup highlights the versatility of pumpkin, whether using fresh roasted chunks for deeper caramelized flavor or canned puree for quicker convenience. Roasting intensifies the natural sugars, while sautéing aromatics builds a flavorful foundation before blending everything smooth. Variations abound—from vegan versions with coconut milk and vegetable broth to richer ones with heavy cream and chicken stock—allowing customization for dietary needs or taste preferences. A touch of maple syrup or honey can enhance sweetness, and spices provide subtle warmth without overpowering the pumpkin’s delicate profile. The result is a smooth, velvety texture that feels sophisticated yet homey.

What makes Pumpkin Soup so beloved is its balance of flavors: mildly sweet from the pumpkin, savory from onions and broth, and creamy from the finishing touch. Garnishes like crunchy pepitas add texture contrast, while a drizzle of cream creates an inviting visual swirl. This dish draws from global inspirations, including American fall traditions and influences from curried or spiced soups worldwide, yet remains approachable for home cooks. It’s an excellent way to use seasonal pumpkins, turning them into something far more elegant than pie filling.

Pumpkin Soup also offers nutritional perks, packed with vitamins A and C from the pumpkin, fiber for satiety, and low calories when kept light on cream. It’s a wholesome option for those seeking comforting food without excess heaviness, easily made vegetarian or vegan. The quick simmering or roasting time fits busy schedules, and leftovers reheat beautifully, often tasting even better as flavors meld. As autumn staples go, few dishes capture cozy season vibes as perfectly as this golden bowl.

Hearty Pumpkin Soup

Serves: 4 Prep Time: 15 minutes Cooking Time: 30 minutes 30 minutes
Nutrition facts: 200 calories 10 grams fat
Rating: 5.0/5
( 1 voted )
Pin
Print

Ingredients

  • 2-2.5 lbs fresh pumpkin (or butternut squash), peeled, seeded, and cubed (or 2 cans/30 oz pumpkin puree for quicker version)
  • 1 large onion, chopped
  • 2-3 garlic cloves, minced
  • 4 cups vegetable or chicken broth (low-sodium)
  • ½-¾ cup heavy cream, half-and-half, coconut milk, or milk (for creaminess)
  • 2 tbsp olive oil or butter
  • ½ tsp ground nutmeg
  • ½ tsp ground cinnamon or ginger (optional for warmth)
  • Salt and black pepper to taste
  • Optional toppings: toasted pepitas (pumpkin seeds), swirl of cream, fresh parsley or chives, croutons

Instructions

  1. If using fresh pumpkin: Preheat oven to 425°F, toss pumpkin cubes with 1 tbsp oil, salt, and pepper; roast 25-35 minutes until tender and caramelized.
  2. In a large pot, heat remaining oil or butter over medium heat; sauté onion until soft (5 minutes), add garlic and cook 1 minute more.
  3. Add roasted pumpkin (or canned puree), broth, spices, salt, and pepper; bring to a boil, then simmer 15-20 minutes.
  4. Use an immersion blender (or transfer to blender in batches) to puree until smooth and creamy.
  5. Stir in cream or coconut milk; heat gently without boiling. Adjust seasoning and serve hot with toppings.

Notes

  • For vegan: Use vegetable broth and coconut milk or plant-based cream.
  • Roasting fresh pumpkin adds richer flavor; canned works well for speed.
  • Adjust spices to taste; add a pinch of cayenne for subtle heat.
  • Soup thickens as it cools—thin with extra broth if needed when reheating.
  • Stores in fridge up to 4 days or freezes up to 3 months; reheat gently to avoid curdling cream.
0 comments
0 FacebookTwitterPinterestLinkedin
Beef Meals

Classic Beef Stew with Vegetables

by myphillyconnection October 20, 2021
written by myphillyconnection

Classic beef stew with vegetables is the ultimate comfort food, a timeless one-pot wonder that fills homes with rich, savory aromas and delivers deep, hearty satisfaction on cold days. Tender chunks of beef—typically from chuck roast—are slowly simmered until melt-in-your-mouth tender, mingling with hearty vegetables like carrots, potatoes, onions, and celery in a thick, flavorful broth. The stew builds layers of taste through browning the meat first for caramelization, then deglazing with broth or wine, and allowing herbs like thyme, bay leaves, and sometimes a touch of tomato paste to infuse everything. This dish is rustic yet elegant, perfect as a main course with crusty bread for sopping up the gravy-like sauce. It embodies home cooking at its best: simple ingredients transformed by time and patience into something profoundly nourishing.

The slow-cooking process is what makes classic beef stew shine, breaking down tough connective tissues in the beef while allowing the vegetables to absorb the rich flavors without turning mushy. Potatoes and carrots add natural sweetness and starch that thickens the broth naturally, while onions and celery provide an aromatic base. Many versions include a flour coating on the meat for extra body or a splash of red wine for complexity, but the essence remains straightforward and forgiving. It’s a dish rooted in frugality and resourcefulness, using affordable cuts and seasonal produce to create something luxurious in taste.

What draws people back to beef stew again and again is the perfect harmony of textures: fork-tender beef contrasting with slightly firm veggies, all swimming in a glossy, savory gravy that’s neither too thin nor too heavy. Fresh herbs added at the end bring brightness, cutting through the richness. This stew evokes nostalgia for family gatherings or cozy winter nights, often tasting even better the next day as flavors meld. It’s versatile too—add peas toward the end for color, or adjust seasonings for personal preference—yet it stays true to its comforting, no-fuss character.

Beyond its soul-warming appeal, classic beef stew offers solid nutrition, packing protein from the beef, fiber and vitamins from the vegetables, and sustained energy from the potatoes. When made with leaner cuts and minimal added fat, it can be surprisingly balanced for a hearty meal. It’s an excellent choice for batch cooking or meal prep, as it reheats beautifully and freezes well. In a fast-paced world, this slow-simmered classic reminds us of the value in taking time to create something truly satisfying.

In the end, classic beef stew with vegetables is more than a recipe—it’s a tradition of warmth, simplicity, and flavor that stands the test of time. Whether cooked on the stovetop, in a Dutch oven, or slow cooker, it delivers consistent comfort with every bowl. Ideal for feeding a crowd or enjoying leftovers, this dish celebrates humble ingredients elevated through careful cooking. Few meals capture the essence of homey, hearty eating quite like it.

Classic Beef Stew with Vegetables

Serves: 4 Prep Time: 20 minutes Cooking Time: 3 hours 3 hours
Nutrition facts: 450 calories 20 grams fat
Rating: 5.0/5
( 1 voted )
Pin
Print

Ingredients

  • 2-2.5 lbs beef chuck roast, cut into 1-1½ inch cubes (trim excess fat)
  • ¼ cup all-purpose flour
  • Salt and black pepper to taste
  • 3 tbsp olive oil or vegetable oil
  • 1 large onion, chopped
  • 3-4 garlic cloves, minced
  • 4 medium carrots, peeled and cut into 1-inch pieces
  • 3-4 celery stalks, chopped
  • 1-1½ lbs potatoes (Yukon gold or russet), peeled and cubed
  • 4 cups beef broth (low-sodium)
  • ½ cup dry red wine (optional, or more broth)
  • 2 tbsp tomato paste
  • 2 bay leaves
  • 1 tsp dried thyme (or 2-3 fresh sprigs)
  • Optional: 1 cup frozen peas (added at end), fresh parsley for garnish

Instructions

  1. Season beef cubes with salt, pepper, and toss in flour to coat lightly; shake off excess.
  2. Heat oil in a large Dutch oven or heavy pot over medium-high heat; brown beef in batches (5-7 minutes per batch) until golden; remove and set aside.
  3. In the same pot, sauté onion, celery, and carrots until softened (5-7 minutes); add garlic and tomato paste, cook 1-2 minutes.
  4. Deglaze with wine (if using), scraping up browned bits; add broth, bay leaves, thyme, beef, and potatoes. Bring to a boil, then reduce to low simmer.
  5. Cover and cook 2-3 hours until beef is tender and vegetables are soft (or use oven at 325°F or slow cooker on low 6-8 hours). Stir occasionally; add peas in last 10 minutes if using. Adjust seasoning and serve garnished with parsley

Notes

    • Browning the meat builds deep flavor—don't skip this step.
    • For thicker stew, mash a few potatoes into the broth or add a cornstarch slurry at the end.
    • Wine adds richness but is optional; substitute with more broth.
    • Stew tastes better the next day; store in fridge up to 4 days or freeze up to 3 months.
    • Use chuck for best tenderness; avoid lean cuts that dry out.


0 comments
0 FacebookTwitterPinterestLinkedin
PastaSeafood Meals

Creamy Pasta with Shrimp

by myphillyconnection October 20, 2021
written by myphillyconnection

Creamy pasta with shrimp is a luxurious, comforting dish that combines tender, succulent shrimp with al dente pasta enveloped in a rich, velvety sauce. Often inspired by classic Alfredo but elevated with garlic, lemon, and herbs, it features plump shrimp sautéed until pink and juicy, then tossed in a creamy base of heavy cream, Parmesan cheese, and butter. The sauce clings perfectly to fettuccine, linguine, or spaghetti, creating a silky texture with every bite. Bright notes from fresh parsley, black pepper, and a squeeze of lemon cut through the richness, making it indulgent yet balanced. This crowd-pleasing meal feels restaurant-quality but comes together quickly at home.

The dish shines with its simplicity and elegant flavors—garlic and shallots build an aromatic foundation, while shrimp cook in minutes to avoid toughness. Variations might include sun-dried tomatoes for tang, spinach for color and nutrition, or a pinch of red pepper flakes for subtle heat. The cream sauce reduces slightly to coat everything lusciously without being overly heavy. High-protein shrimp pair beautifully with carbs from the pasta, offering satisfying fullness. It’s a go-to for date nights, special occasions, or when craving something decadent without hours in the kitchen.

Rooted in Italian-American cuisine, creamy shrimp pasta draws from fettuccine Alfredo traditions but incorporates seafood for a coastal twist. Popular in coastal regions and Italian eateries, it highlights fresh ingredients like wild-caught shrimp for superior sweetness and texture. The quick sauté method preserves the shrimp’s delicate flavor, while the sauce emulsifies into glossy perfection. Garnished with extra Parmesan and herbs, it looks as impressive as it tastes, often served family-style straight from the pan.

Everyone realizes why a new common language would be desirable: one could refuse to pay expensive translators. To achieve this, it would be necessary to have uniform grammar, pronunciation and more common words. If several languages coalesce, the grammar of the resulting language is more simple and regular than that of the individual languages. The new common language will be more simple and regular than the existing European languages. It will be as simple as Occidental; in fact, it will be Occidental.

This pasta excels as a versatile main course, pairing wonderfully with a crisp green salad, garlic bread, or steamed vegetables to balance the creaminess. Leftovers reheat gently with a splash of milk or broth to revive the sauce. Nutritionally, it provides lean protein from shrimp, calcium from cheese, and energy from pasta, though portion control helps with its richer profile. Customizable for spice levels or add-ins, it’s forgiving for home cooks while delivering consistent wow factor.

In essence, creamy pasta with shrimp is pure comfort elevated—silky, garlicky, and shrimp-forward with irresistible appeal. It captures the joy of simple yet sophisticated cooking, turning basic ingredients into something memorable. Whether for a cozy dinner or entertaining, it consistently delights with its creamy indulgence and fresh seafood brightness.

Creamy Pasta with Shrimp

Serves: 4 Prep Time: 10 minutes Cooking Time: 20 minutes 20 minutes
Nutrition facts: 650 calories 45 grams fat
Rating: 5.0/5
( 2 voted )
Pin
Print

Ingredients

Ingredients (4 servings):

  • 12 oz fettuccine or linguine
  • 1 lb large shrimp, peeled and deveined
  • 2 tbsp butter
  • 1 tbsp olive oil
  • 4 cloves garlic, minced
  • 1 cup heavy cream
  • ¾ cup grated Parmesan cheese
  • Salt and black pepper to taste
  • ½ tsp red pepper flakes (optional)
  • Juice of ½ lemon
  • Fresh parsley, chopped, for garnish

Instructions

  1. Cook pasta in salted boiling water until al dente; reserve ½ cup pasta water, then drain.
  2. Season shrimp with salt and pepper. Heat butter and oil in a large skillet over medium-high; sauté shrimp 1–2 minutes per side until pink. Remove and set aside.
  3. In the same skillet, add garlic; cook 30 seconds until fragrant.
  4. Pour in cream; simmer 2–3 minutes. Stir in Parmesan until melted and smooth. Add lemon juice, red pepper flakes, and pasta water as needed to thin sauce.
  5. Toss in cooked pasta and shrimp; coat evenly. Adjust seasoning.
  6. Garnish with parsley and extra Parmesan; serve immediately.

Notes

  • Use fresh shrimp for best flavor; thaw frozen ones fully and pat dry.
  • Add spinach or cherry tomatoes for extra veggies.
  • For lighter version, substitute half-and-half, but sauce may be thinner.
  • Avoid overcooking shrimp to prevent toughness.

0 comments
0 FacebookTwitterPinterestLinkedin
Chicken MealsFeaturedMain Dishes

Baked Chicken Drumsticks

by myphillyconnection October 20, 2021
written by myphillyconnection

Baked chicken drumsticks are a classic comfort food that delivers juicy, flavorful meat with crispy skin achieved through simple oven roasting. This dish highlights the natural richness of dark meat chicken, enhanced by a blend of spices that create a savory, aromatic crust. Popular in home kitchens worldwide, baked drumsticks offer an easy alternative to fried versions, requiring minimal hands-on effort while producing tender results every time. The drumsticks bake slowly, allowing the fat to render and the seasonings to penetrate deeply, resulting in meat that pulls easily from the bone. Whether seasoned with basic pantry staples or bold rubs like Cajun or BBQ-inspired mixes, this dish remains endlessly adaptable and family-friendly.

One of the greatest appeals of baked chicken drumsticks lies in their versatility and forgiving nature. They pair beautifully with sides ranging from roasted vegetables and mashed potatoes to fresh salads or rice pilafs, making them suitable for weeknight dinners or casual gatherings. The skin crisps up nicely in a hot oven, providing satisfying texture contrast to the succulent interior without the need for deep frying. Home cooks often experiment with marinades—such as honey-garlic, lemon-herb, or spicy chili—to customize flavors, turning a humble cut into something special. Nutritionally, drumsticks provide high-quality protein along with essential nutrients like iron and B vitamins, making them a satisfying option for balanced meals.

This preparation method draws from various culinary traditions, including American Southern-style baking, where drumsticks are often spiced generously and served at picnics or barbecues. In many households, it’s a go-to for budget-conscious cooking, as chicken drumsticks tend to be affordable and yield generous portions. The baking process also allows for healthier tweaks, like using minimal oil or skinless variations, without sacrificing much flavor. When done right, the exterior turns golden and slightly caramelized, locking in juices for maximum tenderness. It’s a dish that evokes nostalgia—think childhood family dinners or backyard cookouts—while being straightforward enough for beginners to master.

Beyond everyday meals, baked chicken drumsticks shine in meal prep scenarios, holding up well for leftovers that reheat beautifully. They can be shredded for tacos, salads, or wraps, extending their usefulness throughout the week. The low-effort cooking—mostly passive oven time—frees up the cook for other tasks, and the minimal cleanup (especially with foil-lined sheets) adds to the appeal. Sustainable aspects include chicken’s relatively efficient production compared to red meats, appealing to eco-conscious eaters. Creative variations might incorporate global twists, such as Asian-inspired soy-ginger glazes or Mediterranean herb blends, keeping the dish exciting over repeated preparations.

In summary, baked chicken drumsticks represent straightforward, delicious cooking at its best: accessible ingredients, reliable techniques, and rewarding results. They offer comfort without complexity, protein-packed satisfaction, and room for personalization that keeps the recipe fresh. Perfect for busy evenings or relaxed weekends, this dish proves that great flavor often comes from simplicity and patience in the oven. Whether enjoyed plain or dressed up, baked drumsticks consistently deliver on taste, texture, and nourishment.

Baked Chicken Drumsticks

Serves: 4 Prep Time: 10 minutes Cooking Time: 45 minutes 45 minutes
Nutrition facts: 280 calories 18 grams fat
Rating: 5.0/5
( 1 voted )
Pin
Print

Ingredients

  • 8-10 chicken drumsticks (about 2-3 pounds, bone-in, skin-on)
  • 2 tablespoons olive oil or avocado oil
  • 1 teaspoon smoked paprika
  • 1 teaspoon garlic powder
  • 1 teaspoon onion powder
  • 1 teaspoon salt (kosher or sea salt preferred)
  • ½ teaspoon black pepper
  • ½ teaspoon dried oregano or thyme (optional)
  • ¼ teaspoon cayenne pepper (optional, for heat)

Instructions

  1. Preheat the oven to 425°F (220°C). Line a large baking sheet with foil or parchment paper for easy cleanup, and place a wire rack on top if available (for crispier skin).
  2. Pat the drumsticks dry with paper towels to remove excess moisture.
  3. In a small bowl, mix the oil, paprika, garlic powder, onion powder, salt, pepper, and any optional spices.
  4. Rub the spice mixture evenly over the drumsticks, ensuring they are well coated.
  5. Arrange the drumsticks on the baking sheet in a single layer, skin-side up.
  6. Bake for 40-45 minutes, flipping halfway through, until the internal temperature reaches 175°F (80°C) near the bone and the skin is golden and crispy. For extra crispiness, broil for 2-3 minutes at the end.
  7. Let rest for 5 minutes before serving.

Notes

  • Always use a meat thermometer to ensure safe doneness (165°F minimum, but 175°F for juicier dark meat).
  • For BBQ-style, brush with barbecue sauce during the last 10 minutes.
  • Skinless versions reduce fat but may be less crispy; oil helps with browning.
  • Store leftovers in the fridge for up to 4 days; reheat in the oven to maintain crispiness.

0 comments
0 FacebookTwitterPinterestLinkedin
30 Minute MealsBreakfast & PastriesVegetarian

Toast with Fried Mushrooms

by myphillyconnection October 20, 2021
written by myphillyconnection

Toast with fried mushrooms is a simple yet delightful dish that combines the earthy flavors of sautéed mushrooms with the comforting crunch of toasted bread. Originating as a quick breakfast or snack option, it draws from various culinary traditions where mushrooms are celebrated for their umami-rich profile. The mushrooms, often button or cremini varieties, are fried in butter or oil until golden and tender, absorbing seasonings like garlic, herbs, and a splash of soy sauce for depth. This topping is then generously piled onto slices of toasted bread, which could be sourdough for a tangy contrast or whole grain for added nutrition. The result is a harmonious blend of textures: the soft, juicy mushrooms against the crisp toast, making it an appealing choice for vegetarians or anyone seeking a light meal.

What makes toast with fried mushrooms particularly versatile is its adaptability to different tastes and dietary needs. For instance, adding fresh thyme or rosemary during frying infuses an aromatic herbal note, while a sprinkle of parmesan cheese on top introduces a savory, cheesy element. In some variations, a poached egg is placed atop the mushrooms, turning the dish into a more substantial brunch item reminiscent of eggs Benedict without the hollandaise. The dish’s appeal lies in its simplicity—requiring minimal ingredients and time—yet it can be elevated with gourmet touches like truffle oil or wild mushrooms such as shiitake or oyster for a more sophisticated flavor profile. It’s a testament to how everyday ingredients can create something unexpectedly satisfying.

Historically, mushrooms have been foraged and used in cooking across cultures, from European forests to Asian stir-fries, and this dish echoes that heritage. In British cuisine, for example, mushrooms on toast is a classic pub fare or teatime treat, often enjoyed with a cup of tea. The frying process caramelizes the mushrooms’ natural sugars, enhancing their meaty texture and making them a popular meat substitute in plant-based diets. Nutritionally, mushrooms provide vitamins like B and D, along with antioxidants, pairing well with the fiber from the toast to create a balanced bite. This dish not only satisfies hunger but also offers a moment of mindfulness in its preparation and enjoyment.

Beyond its taste, toast with fried mushrooms is eco-friendly, as mushrooms have a low carbon footprint compared to many proteins. They grow quickly and require little water, aligning with sustainable eating trends. Creative twists might include incorporating spices like paprika for smokiness or balsamic vinegar for a tangy glaze, allowing home cooks to experiment endlessly. Whether served as an appetizer at a gathering or a solo midnight snack, it evokes comfort and warmth. The dish’s popularity has surged with the rise of social media, where visually appealing photos of golden mushrooms on rustic toast inspire countless recreations.

In essence, toast with fried mushrooms embodies the beauty of minimalist cooking, where quality ingredients shine without overcomplication. It’s a dish that bridges seasons—using fresh summer mushrooms or preserved ones in winter—and appeals to all ages with its straightforward appeal. Pairing it with a side salad or soup transforms it into a full meal, while keeping it plain highlights the pure flavors. Ultimately, this humble creation reminds us that great food often comes from the simplest combinations, inviting endless personalization and rediscovery.

Toast with Fried Mushrooms

Serves: 4 Prep Time: 20 minutes Cooking Time: 10 minutes 10 minutes
Nutrition facts: 250 calories 12 grams fat
Rating: 5.0/5
( 1 voted )
Pin
Print

Ingredients

Ingredients (for 2 servings):

  • 8 oz fresh mushrooms (button or cremini), sliced
  • 4 slices of bread (sourdough or whole grain preferred)
  • 2 tbsp butter or olive oil
  • 2 cloves garlic, minced
  • 1 tsp fresh thyme or rosemary, chopped (optional)
  • Salt and pepper to taste
  • Splash of soy sauce or balsamic vinegar (optional)
  • Grated parmesan cheese for topping (optional)

Instructions

  • Heat the butter or oil in a skillet over medium heat.
  • Add the sliced mushrooms and cook for 5-7 minutes, stirring occasionally, until they release their moisture and turn golden brown.
  • Stir in the minced garlic, herbs, salt, pepper, and any optional flavorings; cook for another 1-2 minutes until fragrant.
  • Meanwhile, toast the bread slices in a toaster or under a broiler until crisp and golden.
  • Spoon the fried mushrooms evenly onto the toasted bread and serve immediately.

Notes

  • For a vegan version, use olive oil instead of butter and skip the cheese.
  • Avoid overcrowding the skillet to ensure mushrooms fry rather than steam.
  • Experiment with mushroom varieties for different textures and flavors; wild mushrooms add an earthy depth but may require cleaning.

0 comments
0 FacebookTwitterPinterestLinkedin
Breakfast & PastriesFeaturedVegetarian

Bread with Beetroot Hummus

by myphillyconnection October 20, 2021
written by myphillyconnection

Bread with Beetroot Hummus is a stunning and nutritious appetizer or light meal that combines the earthy sweetness of roasted beets with the creamy, classic texture of traditional hummus. The vibrant pink hue from the beets makes this dish visually striking, turning a simple dip into an eye-catching centerpiece on any table. Spread generously on toasted bread, it offers a delightful contrast of flavors: the nutty, garlicky hummus paired with the subtle crunch and mild taste of fresh bread. This fusion elevates everyday ingredients into something special, perfect for parties, picnics, or a healthy snack.

The beetroot hummus itself draws from Middle Eastern origins, where hummus is a staple, but adds a modern twist with beets for extra nutrition and color. Beets bring natural sweetness, antioxidants, and folate, while chickpeas provide plant-based protein and fiber. Tahini adds richness, and lemon juice brightens the whole mixture. When served on bread—whether crusty sourdough, pita, or whole-grain toast—it becomes a balanced bite with carbs, healthy fats, and veggies. It’s vegan, gluten-free adaptable (with the right bread), and appeals to those seeking colorful, wholesome eats.

What sets Bread with Beetroot Hummus apart is its versatility and health benefits. The beets not only tint the hummus a gorgeous magenta but also enhance its nutrient profile without overpowering the traditional flavors. It’s lower in calories than many dips yet feels indulgent thanks to the tahini and olive oil. Toppings like fresh herbs, pomegranate seeds, or a drizzle of olive oil add texture and elegance. This dish is ideal for sharing, as the bright color invites curiosity and compliments.

Preparing this dish is straightforward, requiring minimal cooking if using pre-roasted or canned beets. The result is a smooth, spreadable hummus that’s far fresher than store-bought versions. Paired with warm or toasted bread, it creates an irresistible combination that’s both satisfying and light. It’s a great way to incorporate more vegetables into meals subtly, especially for picky eaters drawn in by the fun pink color.

Overall, Bread with Beetroot Hummus represents creative, health-conscious cooking at its best. It’s flavorful, beautiful, and nourishing—proving that simple ingredients can produce impressive results. Whether as a starter, lunch component, or party platter feature, it delivers on taste, nutrition, and wow factor.

  • Ingredients (for about 6-8 servings of hummus, enough for bread accompaniment):
    • 1 medium roasted beet (about 1 cup cooked, peeled and chopped; or use pre-cooked)
    • 1 (15-ounce) can chickpeas, drained and rinsed
    • 2-3 tablespoons tahini
    • 2 tablespoons extra virgin olive oil (plus more for drizzling)
    • 2 tablespoons fresh lemon juice (from about 1 lemon)
    • 1-2 garlic cloves, minced
    • ½ teaspoon ground cumin
    • ¼-½ teaspoon salt, to taste
    • Black pepper, to taste
    • For serving: Sliced or toasted bread (sourdough, pita, or baguette), optional toppings like fresh parsley, pomegranate seeds, olive oil drizzle
  • Cooking instructions:
    • If roasting beets: Preheat oven to 400°F (200°C). Wrap beet in foil and roast for 40-60 minutes until tender. Cool, peel, and chop.
    • In a food processor, combine roasted beet, chickpeas, tahini, olive oil, lemon juice, garlic, cumin, salt, and pepper.
    • Blend until smooth and creamy, scraping down sides as needed (add 1-2 tablespoons water or aquafaba if too thick).
    • Taste and adjust seasoning (more lemon for brightness, salt, or tahini for creaminess).
    • Transfer to a bowl, drizzle with olive oil, and garnish if desired.
    • Toast or slice bread and serve hummus alongside or spread on top.
  • Notes:
    • Use pre-cooked beets to save time.
    • For smoother hummus, remove chickpea skins or blend longer.
    • Store in fridge up to 5 days; stir before serving as it may thicken.
    • Customize spice with paprika or za’atar.
    • Vegan and gluten-free (choose GF bread).
  • Serving size: About ¼ cup hummus with 1-2 slices bread per person
  • Cuisine type: Middle Eastern-inspired (with modern fusion elements)
  • Calories: Approximately 150-200 per serving (¼ cup hummus ~120-160 calories + bread ~50-80 calories, varies by bread type)
  • Fat grams: Approximately 8-10 grams per serving (mostly healthy fats from tahini and olive oil)
  • Prep time: 10-15 minutes (longer if roasting beets fresh)
  • Cooking time: 0 minutes active (or 40-60 minutes if roasting beets)

Bread with Beetroot Hummus

Serves: 4 Prep Time: 20 minutes Cooking Time: 5 minutes 5 minutes
Nutrition facts: 150 calories 8g fat
Rating: 5.0/5
( 1 voted )
Pin
Print

Ingredients

  • 1 medium roasted beet (about 1 cup cooked, peeled and chopped; or use pre-cooked)
  • 1 (15-ounce) can chickpeas, drained and rinsed
  • 2-3 tablespoons tahini
  • 2 tablespoons extra virgin olive oil (plus more for drizzling)
  • 2 tablespoons fresh lemon juice (from about 1 lemon)
  • 1-2 garlic cloves, minced
  • ½ teaspoon ground cumin
  • ¼-½ teaspoon salt, to taste
  • Black pepper, to taste
  • For serving: Sliced or toasted bread (sourdough, pita, or baguette), optional toppings like fresh parsley, pomegranate seeds, olive oil drizzle

Instructions

  1. If roasting beets: Preheat oven to 400°F (200°C). Wrap beet in foil and roast for 40-60 minutes until tender. Cool, peel, and chop.
  2. In a food processor, combine roasted beet, chickpeas, tahini, olive oil, lemon juice, garlic, cumin, salt, and pepper.
  3. Blend until smooth and creamy, scraping down sides as needed (add 1-2 tablespoons water or aquafaba if too thick).
  4. Taste and adjust seasoning (more lemon for brightness, salt, or tahini for creaminess).
  5. Transfer to a bowl, drizzle with olive oil, and garnish if desired.
  6. Toast or slice bread and serve hummus alongside or spread on top.

Notes

  • Use pre-cooked beets to save time.
  • For smoother hummus, remove chickpea skins or blend longer.
  • Store in fridge up to 5 days; stir before serving as it may thicken.
  • Customize spice with paprika or za'atar.
  • Vegan and gluten-free (choose GF bread).

0 comments
0 FacebookTwitterPinterestLinkedin
Soups & SaladsVegetarian

Spicy Mexican Soup

by myphillyconnection October 20, 2021
written by myphillyconnection

Spicy Mexican Chicken Soup is a vibrant and hearty dish that captures the essence of bold Mexican flavors in a comforting bowl. Infused with the warmth of chili powder, cumin, and fresh jalapeños, this soup combines tender shredded chicken, beans, corn, and a rich tomato-based broth for a satisfying meal that’s perfect for chilly evenings or when you’re craving something with a kick. It’s a versatile recipe that balances spice with subtle sweetness from vegetables like bell peppers and onions, making it a crowd-pleaser for family dinners or casual gatherings. Whether you’re new to Mexican cuisine or a seasoned fan, this soup offers an easy way to bring authentic tastes to your table without needing exotic ingredients.

What makes Spicy Mexican Chicken Soup particularly appealing is its adaptability to different spice levels and dietary preferences. Originating from traditional Mexican soups like caldo de pollo but amped up with extra heat, it draws from regional influences where chiles and herbs play starring roles. You can dial up the spiciness with serrano peppers for an intense burn or keep it milder for broader appeal, all while enjoying the nutritional benefits of lean protein and fiber-rich veggies. It’s not just food—it’s a cultural experience that evokes the lively markets of Mexico, where fresh produce and aromatic spices come together in simple yet flavorful ways.

The cooking process is straightforward and can be done in one pot for minimal cleanup. Start by preheating the oil in a large pot over medium heat. Sauté the diced onion, minced garlic, and jalapeño until the onion becomes translucent, about 3-4 minutes. Add the chicken breast, red bell pepper, black beans, corn, chicken broth, tomato passata, and all the spices (chili powder, paprika, cumin, curry powder, salt, and pepper). Bring the mixture to a boil, then reduce the heat to low, cover, and let it simmer for 25 minutes until the chicken is fully cooked. Remove the chicken, shred it using two forks, and return it to the pot. Stir well, taste, and adjust seasonings if needed. Serve hot with your chosen toppings for added texture and flavor.

Prep time for this recipe is about 5 minutes, mainly for chopping vegetables, while cook time is 30 minutes, making the total time around 35 minutes. Each serving clocks in at approximately 441 calories, with about 9 grams of total fat (1 gram saturated), providing a balanced meal that’s relatively low in fat but high in protein at 39 grams per serving.

A few notes to enhance your experience: Drain the canned beans and corn to avoid excess sodium, and squeeze lime over the soup before eating to cut through the spice and brighten the flavors. For a vegetarian twist, swap the chicken for extra beans or tofu and use vegetable broth. Store leftovers in the fridge for up to 3 days or freeze for 2-3 months—reheat gently on the stove with a splash of water if it thickens. This soup pairs wonderfully with warm tortillas or a side salad, and remember, the spice level can be customized; start mild and add more chili if desired.

Spicy Mexican Soup

Serves: 4 Prep Time: 10 minutes Cooking Time: 30 minutes 30 minutes
Nutrition facts: 300 calories 10g fat
Rating: 5.0/5
( 1 voted )
Pin
Print

Ingredients

  • 1 tablespoon extra virgin olive oil or avocado oil
  • 1 onion, finely diced
  • 3 garlic cloves, minced
  • 1 jalapeño pepper or serrano pepper, minced (adjust for spice level)
  • 1 lb chicken breast
  • 1 red bell pepper, diced
  • 1 (15-ounce) can black beans, drained and rinsed
  • 1 (15-ounce) can corn, drained
  • 2 cups chicken broth
  • 2 cups tomato passata (or diced tomatoes for a chunkier texture)
  • 2 teaspoons chili powder
  • 1 teaspoon paprika powder
  • ½ teaspoon ground cumin
  • ½ teaspoon curry powder
  • Salt and pepper, to taste
  • Optional toppings: fresh cilantro, avocado slices, shredded cheese, tortilla chips, lime wedges

Instructions

  1. Heat the oil in a large pot over medium heat.
  2. Sauté the diced onion, minced garlic, and jalapeño until the onion is translucent, about 3-4 minutes.
  3. Add the chicken breast, diced red bell pepper, black beans, corn, chicken broth, tomato passata, and all spices (chili powder, paprika, cumin, curry powder, salt, and pepper).
  4. Bring to a boil, then reduce heat to low, cover, and simmer for 25 minutes until the chicken is fully cooked.
  5. Remove the chicken, shred it with two forks, and return it to the pot.
  6. Stir well, taste, and adjust seasonings as needed.
  7. Serve hot with desired toppings for extra flavor and texture.

Notes

A few notes to enhance your experience: Drain the canned beans and corn well to control sodium levels, and add a squeeze of fresh lime at serving to brighten the flavors and balance the heat. For a vegetarian version, substitute chicken with extra beans or plant-based protein and use vegetable broth. Leftovers store in the fridge for up to 3 days or freeze for 2-3 months—reheat on the stove with a bit of added liquid if it thickens. This soup pairs great with warm corn tortillas or a simple side salad, and feel free to customize the spice—start conservative and build up for your preferred level of heat.

0 comments
0 FacebookTwitterPinterestLinkedin
FeaturedFish MealsPopular Recipes

Salmon Skewers with Zucchini

by myphillyconnection October 20, 2021
written by myphillyconnection

Salmon and Zucchini skewers are a delightful, healthy grilling staple that combines the rich, flaky texture of fresh salmon with the crisp, mild flavor of zucchini. This dish is perfect for summer barbecues, quick weeknight dinners, or even meal prep, offering a burst of omega-3 fatty acids from the salmon paired with the low-calorie, hydrating qualities of zucchini. Often marinated in simple herbs, garlic, lemon, and olive oil, the skewers develop a charred exterior while staying tender inside, creating a harmonious balance of smoky, zesty, and earthy notes. It’s a versatile recipe that highlights fresh, seasonal ingredients, making it a favorite among health-conscious eaters who crave something light yet satisfying.

The origins of skewered dishes like this trace back to various global cuisines, from Mediterranean kebabs to Asian yakitori-inspired grills, but Salmon and Zucchini skewers have gained popularity in modern wellness-focused cooking. Salmon, a fatty fish prized for its heart-healthy benefits, pairs beautifully with zucchini’s subtle sweetness and ability to absorb marinades without overpowering the meal. The alternating layers on the skewer ensure even cooking and a visually appealing presentation—pink salmon chunks nestled between vibrant green zucchini slices. This combination not only looks stunning on the plate but also promotes balanced nutrition, with protein from the fish and fiber from the veggie.

What sets these skewers apart is their simplicity and adaptability. You can customize the marinade with miso for an umami twist, Dijon mustard for tanginess, or even pineapple for a tropical flair, as seen in some variations. Grilling imparts a subtle smokiness that enhances the natural oils in salmon, while zucchini adds a refreshing crunch that contrasts the fish’s buttery mouthfeel. Served with a side of cucumber dill sauce, lemon wedges, or tartar sauce, it transforms into a complete meal that’s low in carbs but high in flavor. It’s an ideal option for those following anti-inflammatory, gluten-free, or high-protein diets.

Beyond taste, Salmon and Zucchini skewers are a nutritional powerhouse. Salmon provides essential nutrients like vitamin D and B12, supporting brain health and energy levels, while zucchini contributes vitamins A and C for immune support. The dish’s quick preparation makes it accessible for beginners, yet it’s elegant enough for entertaining. Imagine threading the ingredients onto skewers during a sunny afternoon in Philadelphia—perhaps sourcing fresh salmon from local markets like Reading Terminal—and enjoying the aroma as they sizzle on the grill.

The beauty of this recipe lies in its minimalism: fresh ingredients shine without heavy sauces or frying, keeping it light and summery. Variations abound—add scallions for extra bite, bell peppers for color, or even red onions for sharpness. Whether grilled outdoors or broiled indoors during cooler months, the result is always juicy salmon with perfectly tender zucchini, evoking a sense of coastal freshness. It’s a go-to for anyone seeking a quick, wholesome meal that feels indulgent without the guilt.

Culturally, skewers like these evoke communal eating traditions, from street food in the Mediterranean to backyard gatherings in the US. In Philly, you might spot similar dishes at seafood spots or farmers’ markets, adapted with local twists. The key is using high-quality, wild-caught salmon for the best texture and sustainability—avoid overcooking to preserve its moistness. Paired with a simple salad or rice, it becomes a balanced plate that’s as nourishing as it is delicious.

Finally, this dish exemplifies “eating the rainbow” with its vibrant colors and nutrient density. It’s family-friendly, kid-approved when mildly seasoned, and scalable for crowds. Experiment with herbs like thyme or dill to elevate the flavors, and don’t forget a squeeze of lemon at the end for that bright finish. Now, let’s dive into the recipe details.

Salmon Skewers with Zucchini

Serves: 4 Prep Time: 20 minutes Cooking Time: 5 minutes 5 minutes
Nutrition facts: 231 calories 9g fat
Rating: 5.0/5
( 1 voted )
Pin
Print

Ingredients

MAIN INGREDIENTS

  • 1 pound skinless salmon fillet, cut into 1-1.5 inch cubes
  • 2 medium zucchini, sliced into 3/4-inch thick half-moons or rounds
  • 1 small red onion, cut into chunks (optional for extra flavor)
  • 2 tablespoons olive oil
  • 2 tablespoons fresh lemon juice (plus zest from 1 lemon)
  • 2 cloves garlic, minced
  • 1 teaspoon Dijon mustard
  • 1 teaspoon honey or maple syrup
  • 1 teaspoon fresh thyme or dill, chopped (or 1/2 tsp dried)
  • Salt and black pepper to taste
  • Wooden or metal skewers (soak wooden ones in water for 30 minutes)
  • Lemon wedges and fresh herbs for garnish

Instructions

  1. Prepare the marinade: In a bowl, whisk together olive oil, lemon juice and zest, garlic, Dijon mustard, honey, thyme, salt, and pepper until well combined.
  2. Marinate the ingredients: Add the salmon cubes, zucchini slices, and onion chunks to the marinade. Toss gently to coat. Cover and refrigerate for 30 minutes to 1 hour (don't marinate longer to avoid "cooking" the salmon in the acid).
  3. Assemble the skewers: Thread the marinated salmon, zucchini, and onion alternately onto skewers (about 4-5 pieces of each per skewer, making 4-6 skewers total). Reserve any leftover marinade for basting.
  4. Grill or broil: Preheat grill to medium-high heat (or broiler to high). Oil the grates or a baking sheet. Grill skewers for 8-10 minutes, turning every 2-3 minutes and basting with reserved marinade, until salmon is opaque and flakes easily (internal temp 145°F) and zucchini is tender with char marks. If broiling, place 5 inches from heat and cook 3-4 minutes per side.
  5. Serve: Remove from heat, squeeze fresh lemon over top, and garnish with herbs. Enjoy hot with a side sauce or salad!

Notes

  • Use fresh, wild-caught salmon for the best flavor and nutrition; farmed works but may have higher fat content.
  • Soak wooden skewers to prevent burning; metal ones conduct heat better for even cooking.
  • Adjust marinade for preferences: Add miso paste for umami or chili flakes for heat.
  • Leftovers store in the fridge for up to 2 days; reheat gently to avoid drying out the salmon.
  • For indoor cooking, use a grill pan on the stovetop over medium heat. This dish pairs well with a yogurt-based dill sauce or quinoa for a complete meal.

0 comments
0 FacebookTwitterPinterestLinkedin
  • 1
  • …
  • 9
  • 10
  • 11

Search

Follow Us

facebook
twitter
instagram
pinterest

Recent Posts

  • Asparagus & Cheese Stuffed Chicken

    May 29, 2026
  • Asian Cabbage Stir Fry

    May 29, 2026
  • High Protein Broccoli Cheddar Soup

    May 29, 2026
  • Homemade Popeyes Cajun Fries

    May 28, 2026
  • Immune Boosting Vegetable Soup

    May 25, 2026
  • Creamy Crab Bisque

    May 25, 2026
  • Garlic Parmesan Pizza

    May 25, 2026

Categories

  • 30 Minute Meals (38)
  • Barbecue (2)
  • Beef Meals (11)
  • Breakfast & Pastries (15)
  • Casseroles (11)
  • Cheesesteak (2)
  • Chicken Meals (20)
  • Cultural Dishes (13)
  • Featured (8)
  • Featured Sides (5)
  • Fish Meals (6)
  • Fresh Baked Breads (2)
  • Main Dishes (7)
  • Other Meals (2)
  • Pasta (21)
  • Pizza (5)
  • Popular Recipes (9)
  • Pork Meals (8)
  • Seafood Meals (19)
  • Side Dishes (6)
  • Soups & Salads (15)
  • Turkey Meals (7)
  • Vegetarian (22)

Popular Posts

  • 1

    Creamy Tomato and Spinach Pasta

    February 15, 2026
  • 2

    Buddha Bowl with Tofu

    October 22, 2024
  • 3

    Chicken Garlic Parmesan Pasta

    February 16, 2026
  • 4

    Classic Spicy Barbecued Ribs

    October 20, 2021
  • 5

    Easy Creamy Garlic Shrimp

    February 15, 2026

About Me

At MyPhillyConnection, we specialize in recipes for Philly favorites and lots of other popular dishes and cuisines.

Phone: (215) 554-7326
Email: info@myphillyconnection.com

Useful Links

  • Beef Meals
  • Chicken Meals
  • Fish Meals
  • Recipes
  • Recipe Submission

Breakfast Recipes

  • Asparagus & Cheese Stuffed Chicken

    May 29, 2026
  • Asian Cabbage Stir Fry

    May 29, 2026

Recent Posts

  • Asparagus & Cheese Stuffed Chicken

    May 29, 2026
  • Asian Cabbage Stir Fry

    May 29, 2026
  • Facebook
  • Twitter
  • Instagram
  • Pinterest
  • Linkedin
  • Tiktok

Copyright © 2026 - MyPhillyConnection / All Rights Reserved.

Philadelphia Food Network and Recipes
  • Home
    • Main Website
  • Recipes
  • Meals
    • 30 Minute Meals
    • Beef Meals
    • Breakfast & Pastries
    • Chicken Meals
    • Fish Meals
    • Pork Meals
    • Seafood Meals
    • Turkey Meals
    • Vegan & Vegetarian Meals
    • Other Meals
  • Categories
    • Barbecue
    • Casseroles
    • Cheesesteak
    • Cultural Dishes
    • Desserts & Treats
    • Featured
    • Fresh Baked Breads
    • Grilling
    • Pasta
    • Pizza
    • Popular Recipes
    • Side Dishes
    • Soul Food
    • Soups & Salads
  • About Us
  • Contact Us
  • Submit Your Recipe
Sign In
or
Login with HostGator

Keep me signed in until I sign out

Forgot your password?

Do not have an account ? Register here

Password Recovery

A new password will be emailed to you.

Have received a new password? Login here

Register New Account

I Agree to the Terms of Service and Privacy Policy

Have an account? Login here