Philadelphia Food Network and Recipes
  • Home
    • Main Website
  • Recipes
  • Meals
    • 30 Minute Meals
    • Beef Meals
    • Breakfast & Pastries
    • Chicken Meals
    • Fish Meals
    • Pork Meals
    • Seafood Meals
    • Turkey Meals
    • Vegan & Vegetarian Meals
    • Other Meals
  • Categories
    • Barbecue
    • Casseroles
    • Cheesesteak
    • Cultural Dishes
    • Desserts & Treats
    • Featured
    • Fresh Baked Breads
    • Grilling
    • Pasta
    • Pizza
    • Popular Recipes
    • Side Dishes
    • Soul Food
    • Soups & Salads
  • About Us
  • Contact Us
  • Submit Your Recipe
Top Posts
Immune Boosting Vegetable Soup
Creamy Crab Bisque
Garlic Parmesan Pizza
Green Bean Bundles
Cheesy Scalloped Potatoes
Garlic Parmesan Roasted Potatoes
Brisket Loaded Twice Baked Potatoes
Southern Baked Mac and Cheese
Sweet Potato Casserole with Marshmallows
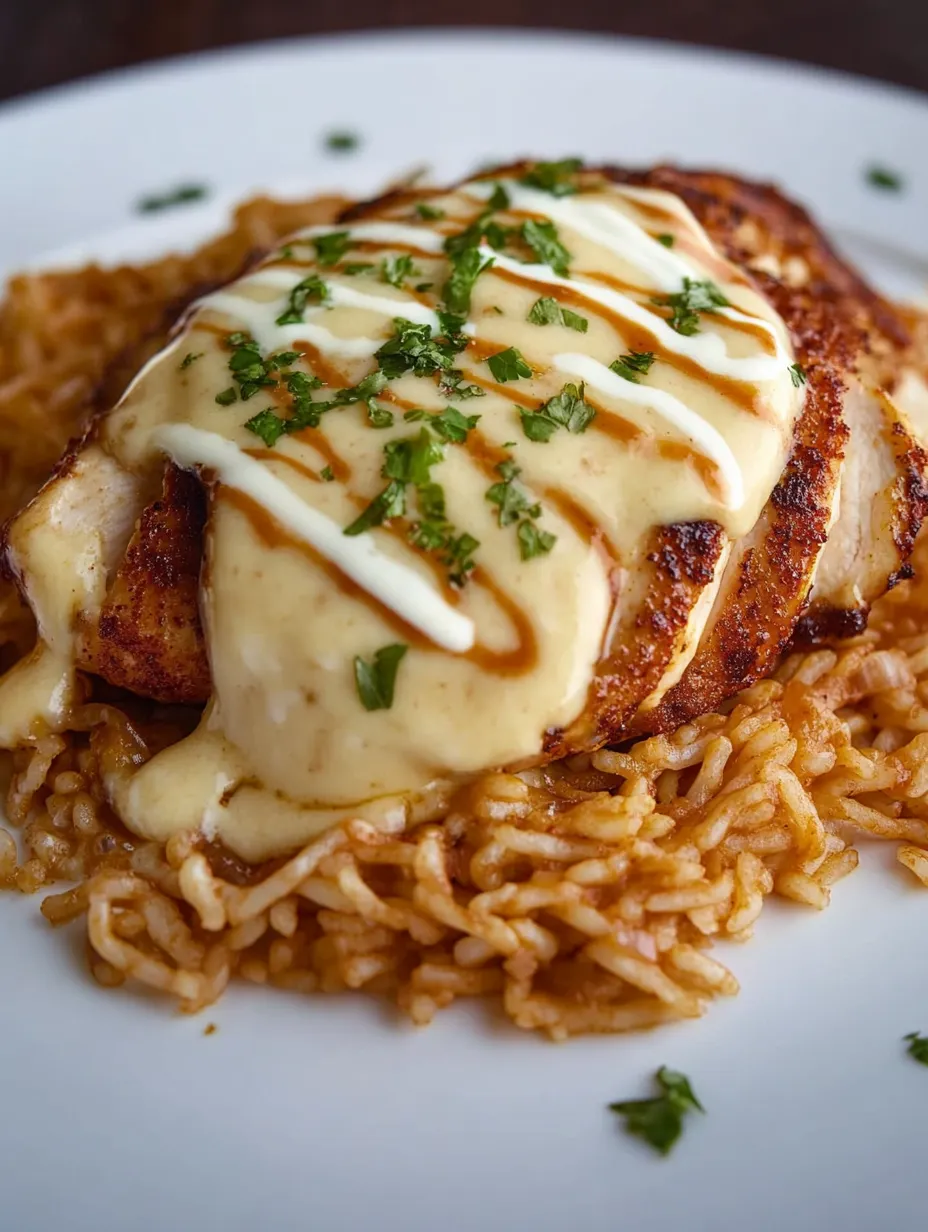
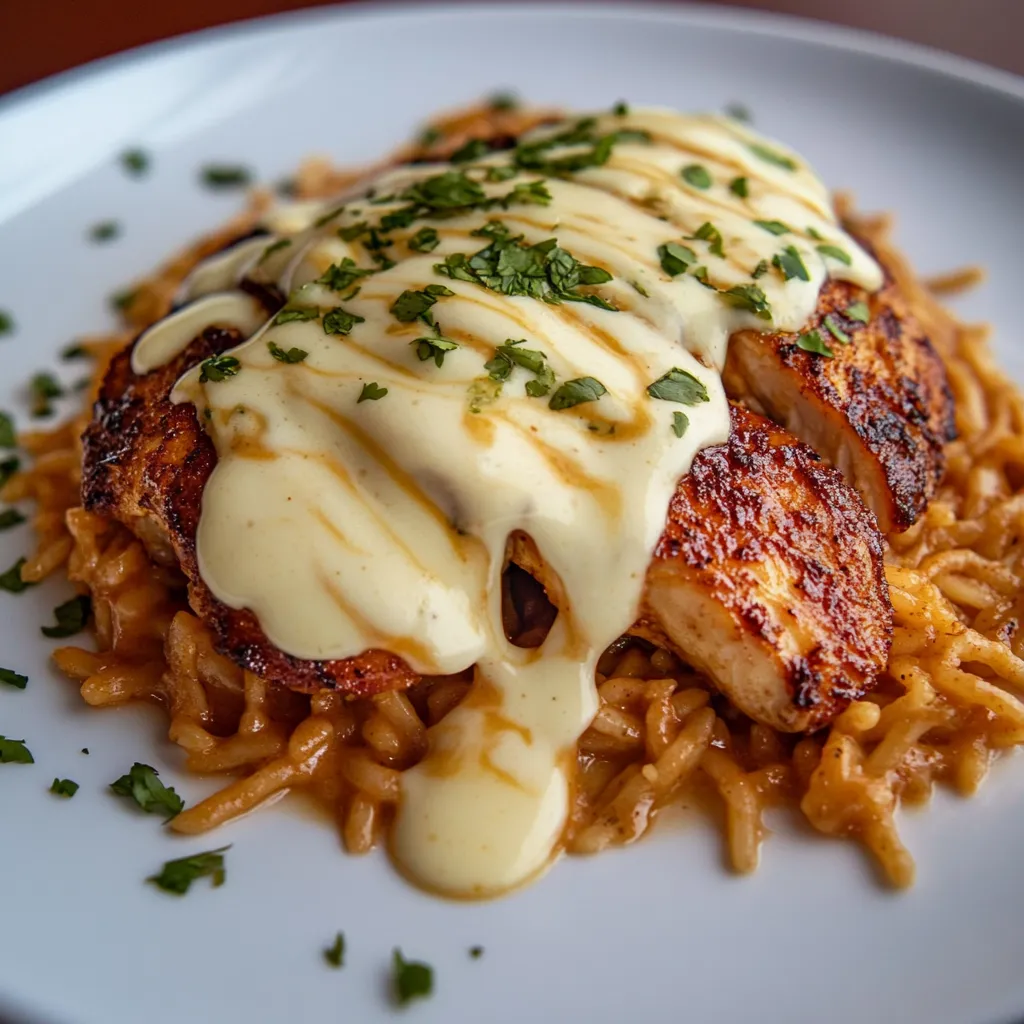
Mexican Chicken With Cheese Sauce
Philadelphia Food Network and Recipes
  • Home
    • Main Website
  • Recipes
  • Meals
    • 30 Minute Meals
    • Beef Meals
    • Breakfast & Pastries
    • Chicken Meals
    • Fish Meals
    • Pork Meals
    • Seafood Meals
    • Turkey Meals
    • Vegan & Vegetarian Meals
    • Other Meals
  • Categories
    • Barbecue
    • Casseroles
    • Cheesesteak
    • Cultural Dishes
    • Desserts & Treats
    • Featured
    • Fresh Baked Breads
    • Grilling
    • Pasta
    • Pizza
    • Popular Recipes
    • Side Dishes
    • Soul Food
    • Soups & Salads
  • About Us
  • Contact Us
  • Submit Your Recipe
Philadelphia Food Network and Recipes
  • Home
    • Main Website
  • Recipes
  • Meals
    • 30 Minute Meals
    • Beef Meals
    • Breakfast & Pastries
    • Chicken Meals
    • Fish Meals
    • Pork Meals
    • Seafood Meals
    • Turkey Meals
    • Vegan & Vegetarian Meals
    • Other Meals
  • Categories
    • Barbecue
    • Casseroles
    • Cheesesteak
    • Cultural Dishes
    • Desserts & Treats
    • Featured
    • Fresh Baked Breads
    • Grilling
    • Pasta
    • Pizza
    • Popular Recipes
    • Side Dishes
    • Soul Food
    • Soups & Salads
  • About Us
  • Contact Us
  • Submit Your Recipe
Copyright 2021 - All Right Reserved
Soups & SaladsVegetarian

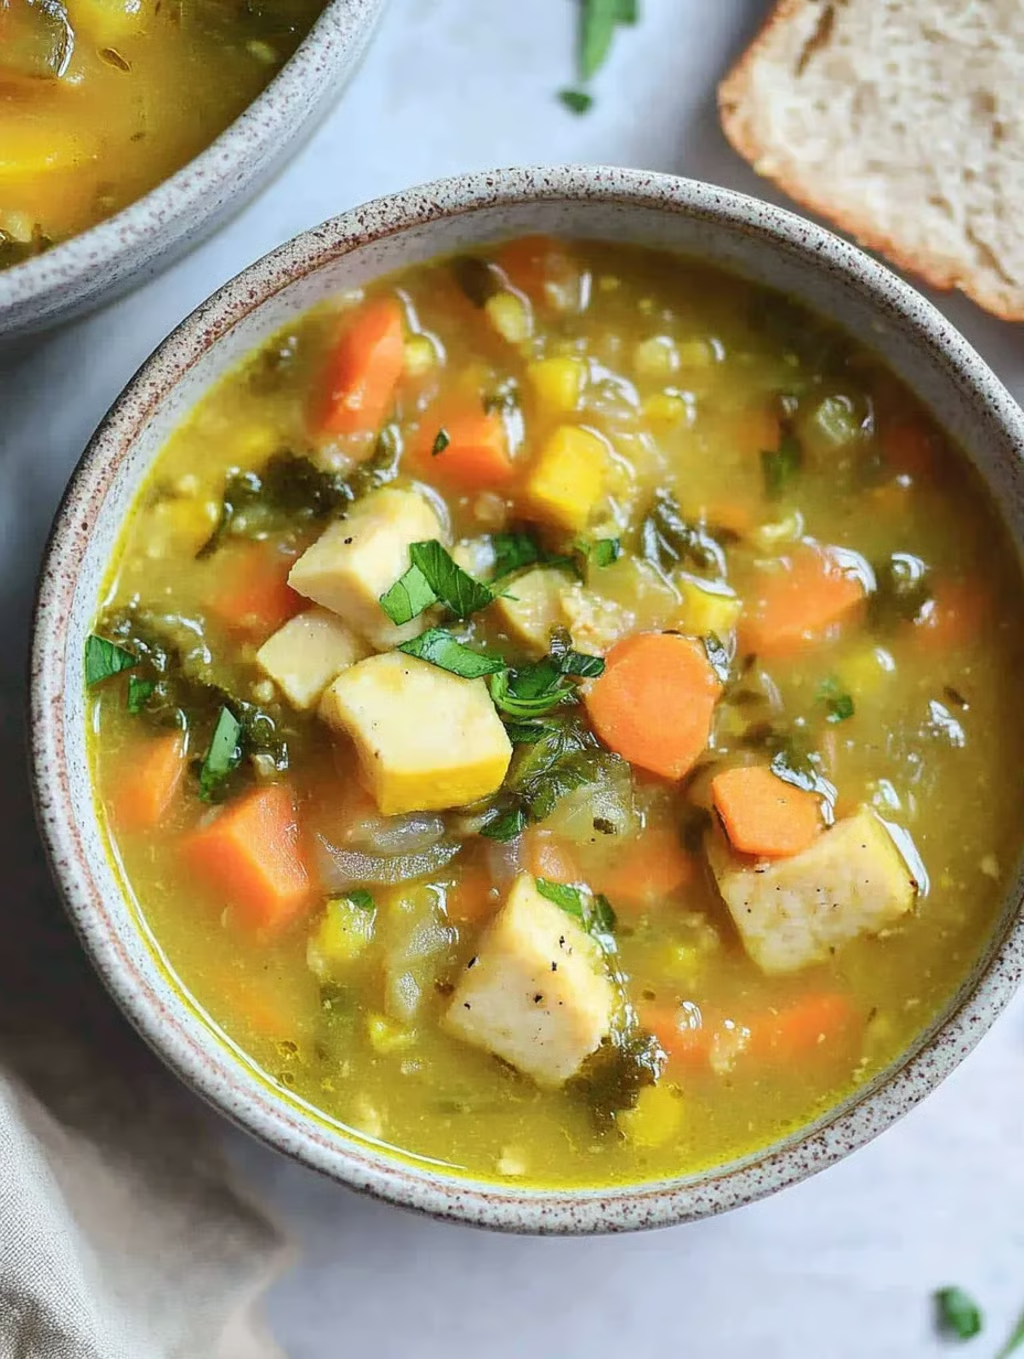
Immune Boosting Vegetable Soup

by myphillyconnection May 25, 2026
written by myphillyconnection

Quick 35-minute healthy soup packed with vegetables, lentils, and immune-supporting ingredients. Naturally vegan and gluten-free, perfect for cold days.
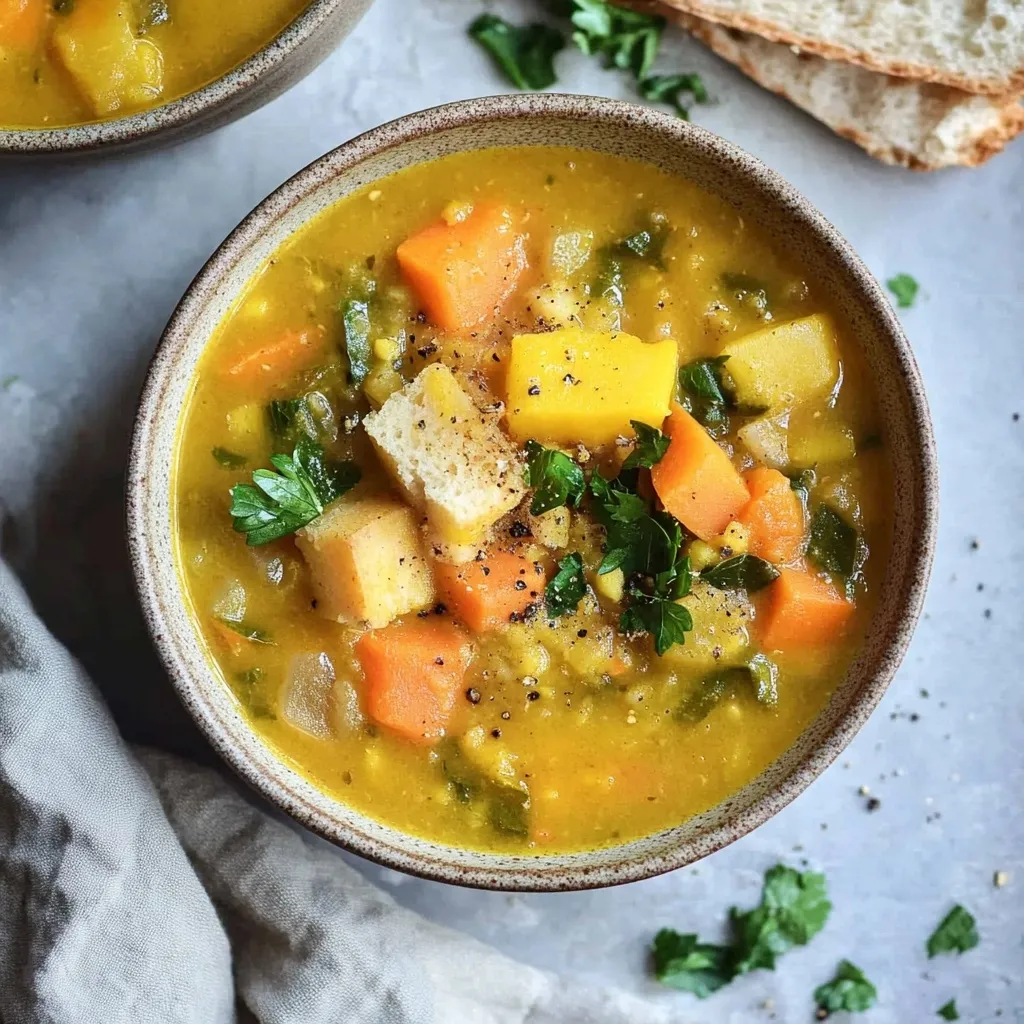
Immune Boosting Soup Recipe

This nourishing soup came to life during a particularly nasty cold season when I needed something to warm me from the inside out. Packed with immune-boosting ingredients like fresh ginger, turmeric, and plenty of garlic, it’s become my go-to remedy when feeling under the weather. The red lentils melt into a velvety broth, while the rainbow of vegetables adds both flavor and healing properties to every spoonful.

Why You’ll Love This Recipe:

  • Perfect one-pot meal that’s both filling and cleansing
  • Takes less than an hour to make, mostly hands-off time
  • Freezes beautifully for future sick days
  • Customizable with whatever vegetables you have on hand
  • Naturally gluten-free and dairy-free

Last winter, this soup became a weekly staple in my kitchen. My elderly neighbor caught the flu, and I started bringing her containers of it. She swears the ginger-turmeric combo helped her recover faster than usual.

Key Ingredients:

  • Fresh ginger root: Look for firm pieces with smooth skin
  • Turmeric: Fresh is amazing, but high-quality powder works well too
  • Red lentils: These break down naturally to thicken the soup
  • Mirepoix (onion, celery, carrot): The fresher, the better flavor
  • Garlic: Don’t hold back, use those extra cloves
  • Leafy greens: The darker the color, the more nutrients

Building the Base (15 minutes):

Heat olive oil in a large pot over medium heat
Dice onion, carrots, celery into similar-sized pieces
Add to pot with a pinch of salt, cook until onions are translucent
Mince garlic and ginger, let sit 10 minutes to activate compounds
Add to pot with turmeric, cook until fragrant

Pour in vegetable broth
Add red lentils after rinsing
Drop in parsnips, cut into chunks
Bring to gentle boil, then reduce to simmer
Cover and let magic happen for 20 minutes
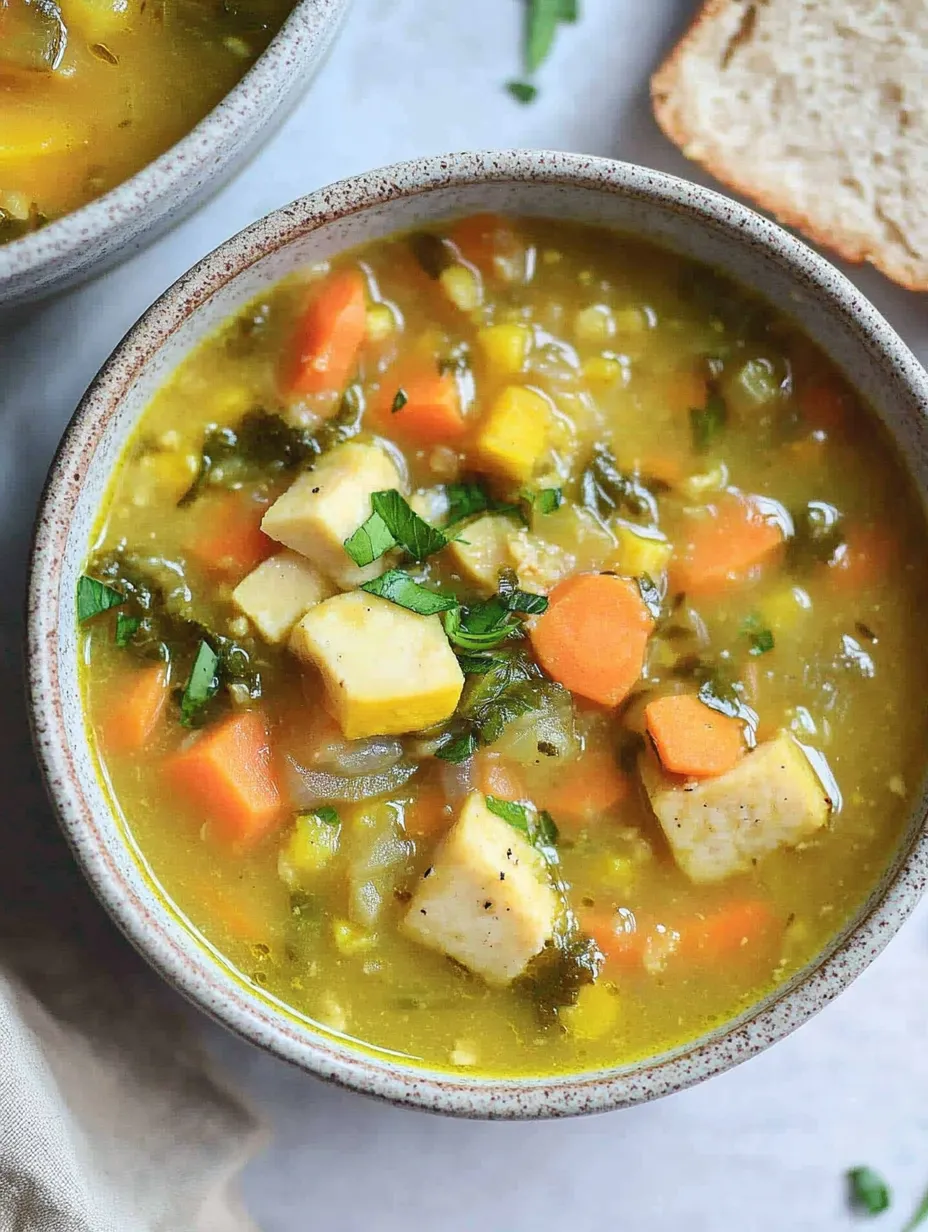
Immune Boosting Soup

Finishing Touches (5 minutes):

Add chopped greens
Squeeze in fresh lemon juice
Season with salt and pepper
Let greens wilt slightly
Taste and adjust seasonings

You Must Know:

  • Fresh turmeric stains everything – wear gloves!
  • Don’t skip the lemon – it helps absorb iron from greens
  • Red lentils will naturally thicken your soup
  • The broth gets better the next day

My grandmother always said soup was medicine in a bowl. She’d add extra ginger when anyone had a sore throat, claiming it was her secret weapon against winter colds.

Extra Nourishing Add-ins:

Fresh shiitake mushrooms for immune support
Chunk of peeled ginger to sip around
Handful of fresh herbs at the end
Drizzle of good olive oil when serving

Chef’s Helpful Tips:

Chop vegetables in similar sizes for even cooking
Don’t add salt until lentils are soft
Stock up on ingredients during cold season
Make double batch – freezes perfectly

Making this soup feels like wrapping yourself in a warm blanket. It’s become my Sunday ritual during cold months, filling the house with aromas that promise comfort and healing.

The soup will keep fresh in the fridge for 5 days, perfect for warming up whenever you need a healing meal. For storage, let it cool completely before transferring to containers. The lentils will continue to thicken the soup – add a splash of broth when reheating if needed.

Quick Storage Tips:

Freezes well for 3 months in airtight containers
Thaw overnight in fridge
Reheat gently on stovetop, stirring occasionally
Add fresh herbs after reheating
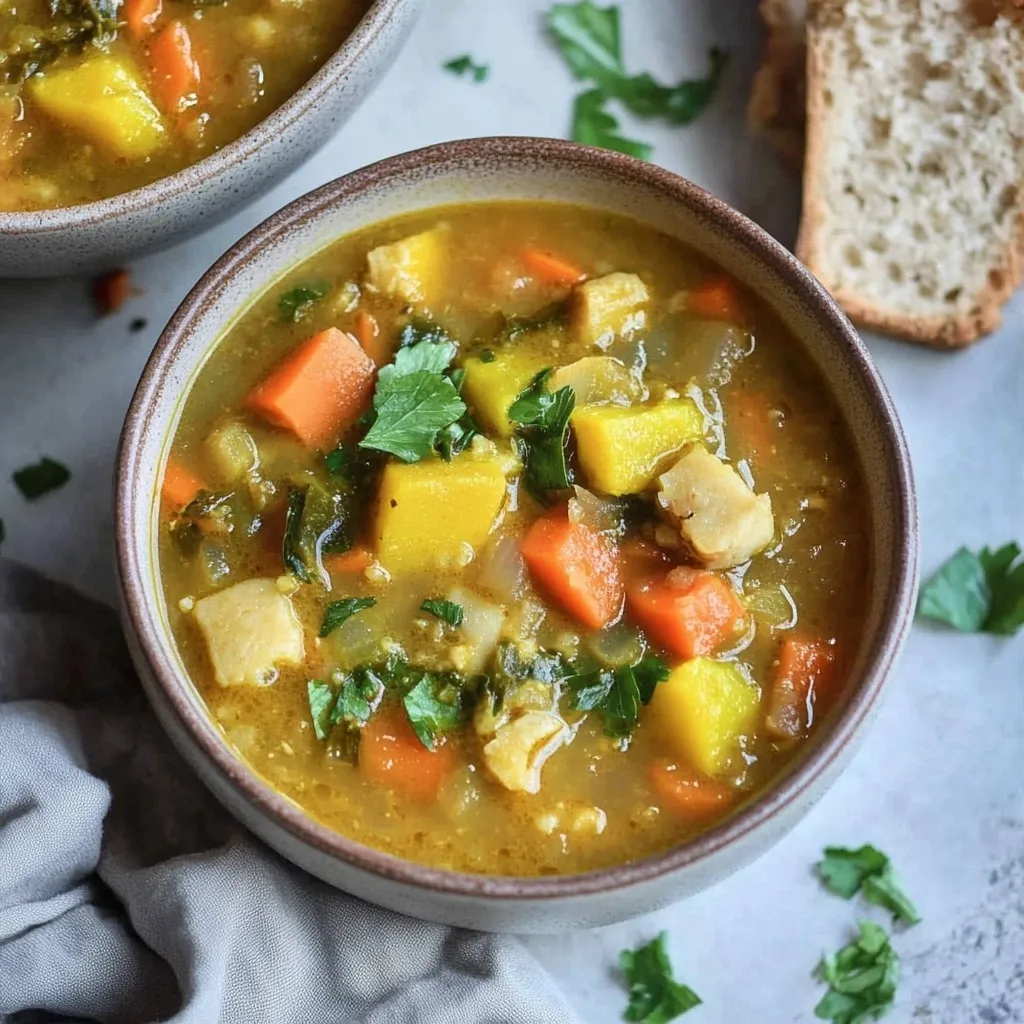
Easy Immune Boosting Soup Recipe

Serving Suggestions:

This soup begs for a chunk of crusty sourdough bread for dipping. When I’m really fighting something off, I’ll float a few slices of fresh ginger and let them steep in my bowl. Sometimes I’ll add a scoop of brown rice or quinoa to make it even heartier.

Variations I Love:

Coconut milk for creaminess
Sweet potatoes instead of parsnips
Curry powder for extra warmth
Fire-roasted tomatoes for depth

Chef’s Final Tips:

Make it spicier when congested – add cayenne
Toast spices before adding liquid
Use homemade stock when possible
Let garlic and ginger sit after chopping

After years of making this soup, I’ve learned that the healing power isn’t just in the ingredients – it’s in the care you take while making it. There’s something truly therapeutic about chopping vegetables and stirring a pot of soup when you’re under the weather. Each bowl feels like a warm hug from the inside out.

Those Were Simple Days:

Living in the countryside taught me about the simplicity of wholesome food. This soup reminds me of seasonal ingredients simmering on my grandmother’s stove. Looking back, these healing broths weren’t just about feeling better – they brought the whole family together around steaming bowls of comfort.

Kitchen Wisdom:

Save veggie scraps in freezer for homemade stock
Boost immune support by adding astragalus root
Consider miso paste for gut-healthy probiotic boost

I learned this from an elderly neighbor who’d bring over her version whenever someone was under the weather. Her secret? She’d add a whole head of roasted garlic and let it melt into the broth.
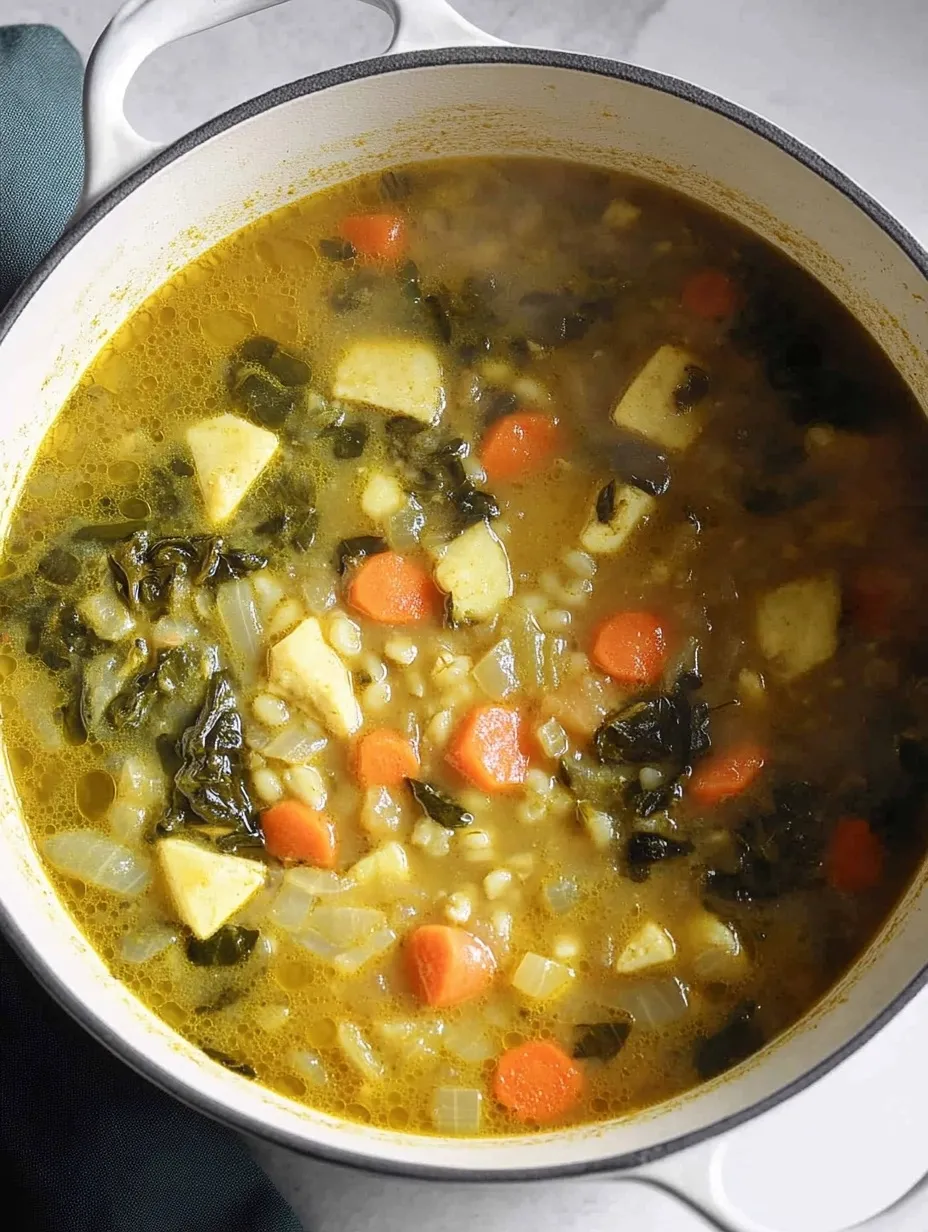
Healing Immune Boosting Soup

Extra Healing Touches:

Try stirring in some fresh turmeric just before serving, or float thin slices of fresh ginger in your bowl. For extra mineral boost, add a strip of kombu seaweed while cooking – just remove before serving.

Final Chef’s Tips:

Trust your instincts with seasoning
Give ingredients time to release their goodness
Don’t rush the simmer – patience brings out the flavors

Whether you’re fighting off a cold or just need some comfort, this soup delivers both nourishment and nostalgia. It’s amazing how a simple pot of soup can hold so much healing power, warming both body and soul with each spoonful.

Frequently Asked Questions

→ Can I freeze this soup? Yes! It freezes well for up to 3 months. Let cool completely before freezing in airtight containers.

→ How long does it keep in the fridge? Store in an airtight container for up to 5 days. The flavors often improve the next day.

→ Can I use different vegetables? Yes, feel free to use what you have. Sweet potatoes, butternut squash, or turnips work well.

→ Is fresh turmeric better than dried? While fresh turmeric can be used, dried is more convenient and works perfectly in this recipe.

→ Why add lemon at the end? Fresh lemon brightens the flavors and helps your body absorb the iron from the lentils and greens.
Immune Boosting Vegetable Soup

Serves: 6 Prep Time: 10 minutes Cooking Time: 25 minutes 25 minutes
Nutrition facts: 200 calories 20 grams fat
Rating: 5.0/5
( 1 voted )
Pin
Print

Ingredients

→ Base Ingredients
2 tablespoons extra virgin olive oil
1 large onion, diced
3 large carrots, chopped
2 parsnips, chopped (or sweet potatoes)
3 stalks celery, finely chopped
→ Aromatics & Seasonings
6 cloves garlic, minced (about 3 tablespoons)
2 tablespoons fresh ginger, minced
1 teaspoon dried turmeric
2 tablespoons fresh parsley
½ teaspoon sea salt, plus more to taste
→ Remaining Ingredients
¾ cup red lentils
4 cups vegetable broth
2 cups water
2 cups kale or spinach, finely chopped
1 small lemon, juiced

Instructions

Heat olive oil in a large pot over medium heat. Cook onion for 3 minutes, then add carrots, parsnips, and celery. Cook for another 5 minutes

Stir in garlic, turmeric, and ginger. Cook for 1 minute until fragrant

Add broth, water, lentils, salt and black pepper. Bring to boil, then reduce heat and simmer covered for 15 minutes

Remove from heat. Stir in kale, parsley, and lemon juice. Cover and let greens steam for a few minutes. Season to taste

Notes

Can be made in Instant Pot - cook on high pressure for 8 minutes with quick release
Sweet potatoes can be substituted for parsnips

Tools You'll Need
Large pot or Dutch oven
Sharp knife and cutting board
Measuring cups and spoons

0 comments
0 FacebookTwitterPinterestLinkedin
Soups & Salads

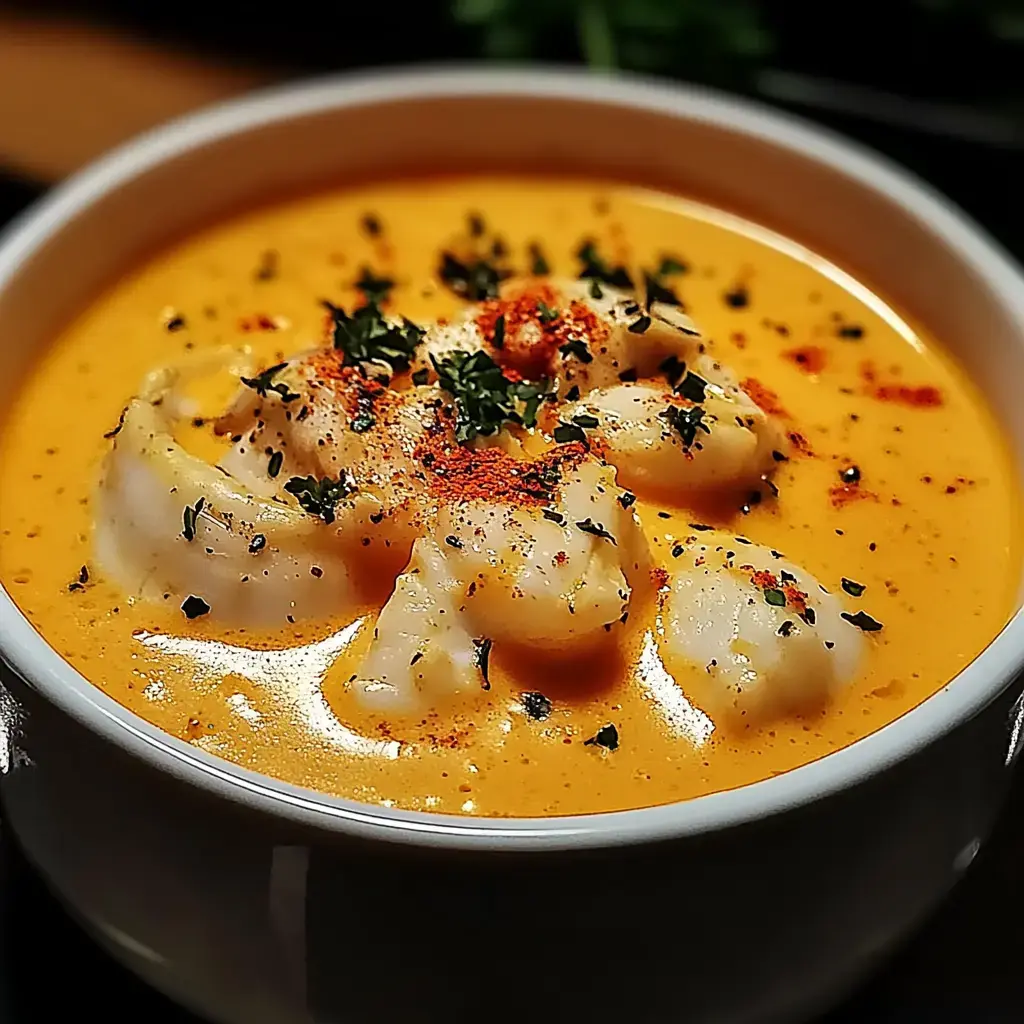
Creamy Crab Bisque

by myphillyconnection May 25, 2026
written by myphillyconnection

This elegant bisque combines fresh crab with a rich cream base, enhanced with aromatics and subtle spices. Restaurant quality made simple at home.

A bowl of creamy orange soup topped with pieces of seafood, parsley, and a sprinkle of paprika.

My crab bisque recipe has become legendary in our family. Every special occasion my kitchen fills with the sweet aroma of this velvety soup. After years of tweaking I’ve perfected this indulgent dish that combines fresh sweet crab with the creamiest most flavorful broth you’ll ever taste.

A Little History

Did you know this elegant soup has been around since the 1600s? My grandmother taught me that bisque means ‘twice cooked’ in French. Those clever French chefs really knew what they were doing when they created this luxurious way to showcase sweet delicate crab.

What You’ll Need

  • Fresh Crab Meat: 1 lb splurge on the good stuff it makes all the difference.
  • The Base: Onions garlic and celery create magic together.
  • White Wine: ½ cup use something you’d drink.
  • Seafood Broth: 1 cup I make my own but store bought works too.
  • Heavy Cream: 1 cup this is what makes it luxurious.
  • My Spice Blend: Paprika thyme cayenne and bay leaves trust me.

Let’s Start Cooking

First things first get your butter melting and start those aromatics. I love watching the onions garlic and celery become translucent and fragrant. When you add the spices the whole kitchen starts smelling amazing.

A bowl of creamy soup topped with chunks of seafood, sprinkled with paprika and fresh parsley.

The Secret to Silky Soup

Here’s where the magic happens. Sprinkle that flour over your veggies and keep stirring. Slowly add your broth and wine don’t rush this part. This creates that dreamy creamy base we’re looking for.

Adding Our Star Ingredient

Now comes the best part adding that sweet crab meat. I like to blend just part of the soup keeping some chunks of crab for texture. My immersion blender is my best friend here no need for fancy equipment.

Making It Perfect

The heavy cream goes in last making everything silky smooth. Take your time tasting and adjusting the seasonings. Sometimes I add an extra pinch of cayenne we like a little kick in our family.

Special Diet Options

Can’t do dairy? Coconut milk works beautifully here. Need it gluten free? I use cornstarch instead of flour. The bisque turns out just as creamy and delicious.

Make It Extra Special

Want to really wow your guests? Add some lobster or shrimp along with the crab. I do this for special occasions and everyone goes crazy for it. It’s like the ocean’s finest in a bowl.

A bowl of creamy soup topped with sliced fish, herbs, and red pepper flakes.

Perfect Partners

Nothing beats dunking crusty bread into this bisque. I love serving it with a chilled glass of Chardonnay. Having friends over? Set up a little bread and wine bar alongside your bisque it’s always a hit.

My Kitchen Tips

Always use the freshest crab you can find. If you’re blending start slow and keep some texture. When reheating do it gently over low heat. A watched bisque never separates.

Keeping It Fresh

Your bisque will stay good in the fridge for 3 days but honestly it rarely lasts that long in my house. Just remember to reheat it slowly no bubbling or boiling or you’ll break that beautiful creamy texture.

Lighter Options

Want something a bit lighter? Try half and half instead of cream. Sometimes I sneak in some pureed veggies too. You still get that silky texture but with fewer calories.

Make It Special

For dinner parties I serve the bisque in little bread bowls or fancy cups. A sprinkle of chives fresh crab on top or a tiny drizzle of truffle oil makes it look restaurant worthy.

Quick Answers

Yes you can use good quality canned crab in a pinch. The soup thickens naturally as it simmers. Making it ahead actually improves the flavor just reheat gently when ready to serve.

Mix It Up

Summer’s perfect for adding fresh corn. Winter calls for roasted red peppers. Don’t be afraid to play with seasonal ingredients that’s how great recipes evolve.

Sweet Endings

After a rich bisque keep dessert light. My family loves ending with lemon sorbet or fresh berries. It cleanses the palate perfectly.

A creamy soup garnished with tender pieces of seafood, herbs, and spices.

Feeding a Crowd

This recipe doubles beautifully for bigger groups. I serve it in warm mugs with tiny crostini on the side. Everyone loves walking around with their little cup of luxury.

Why You’ll Love It

There’s something magical about crab bisque its rich history and even richer flavor. Whether you’re celebrating something special or just craving comfort this soup delivers every time.

Time to Cook

Ready to try it? This bisque might seem fancy but it’s actually pretty simple to make. The hardest part is waiting for it to be ready. Trust me though it’s worth every minute.

Frequently Asked Questions

→ What type of crab meat is best? Fresh lump or claw meat is ideal. Lump gives larger pieces, while claw meat has bolder flavor. High-quality canned works if fresh isn’t available.

→ Can I make this dairy-free? Yes, substitute heavy cream with coconut milk or cashew cream for similar richness without dairy.

→ How long does it keep? Store in airtight container in refrigerator up to 3 days. Reheat gently to maintain texture.

→ Can I blend the soup? Blend about ⅓ of soup while leaving some crab pieces whole for perfect texture balance.

→ How do I reheat leftovers? Reheat gently over low heat, avoiding boiling to prevent crab from becoming tough and cream from separating.

Conclusion

A classic seafood bisque that brings restaurant-quality flavors directly to your home kitchen, featuring rich, creamy textures and premium crab meat.

Creamy Crab Bisque

Serves: 6 Prep Time: 15 minutes Cooking Time: 30M 30M
Nutrition facts: 310 calories 22 fat
Rating: 5.0/5
( 1 voted )
Pin
Print

Ingredients

 1 pound lump crab meat.
 2 tablespoons butter.
 1 medium onion, finely chopped.
 2 cloves garlic, minced.
 2 tablespoons tomato paste.
 2 cups seafood broth.
 1 cup heavy cream.
 1 teaspoon paprika.
 1 teaspoon fresh thyme, chopped.
 Salt and pepper to taste.
 Fresh parsley for garnish.
 Red pepper flakes (optional).

Instructions

Cook onion and garlic in melted butter until soft, 3-4 minutes.

Stir in tomato paste and cook 2 minutes until caramelized.

Pour in broth and simmer, then stir in cream.

Add crab, spices and simmer 10-15 minutes until thickened.

Notes

    1. Use fresh crab if possible.
    2. Can blend partially for creamier texture.
    3. Keeps 3 days refrigerated.
  • Allergy Information

    Please check ingredients for potential allergens and consult a health professional if in doubt.

    Shellfish (crab).
    Dairy (cream, butter).

    Nutrition Facts (Per Serving)

    It is important to consider this information as approximate and not to use it as definitive health advice.

    Calories: 310
    Total Fat: 22g
    Total Carbohydrate: 8g
    Protein: 24g

0 comments
0 FacebookTwitterPinterestLinkedin
30 Minute MealsPizzaVegetarian

Garlic Parmesan Pizza

by myphillyconnection May 25, 2026
written by myphillyconnection

This restaurant-style pizza combines a rich garlic parmesan sauce with melted mozzarella on a crispy crust, garnished with fresh basil. Ready in 90 minutes.

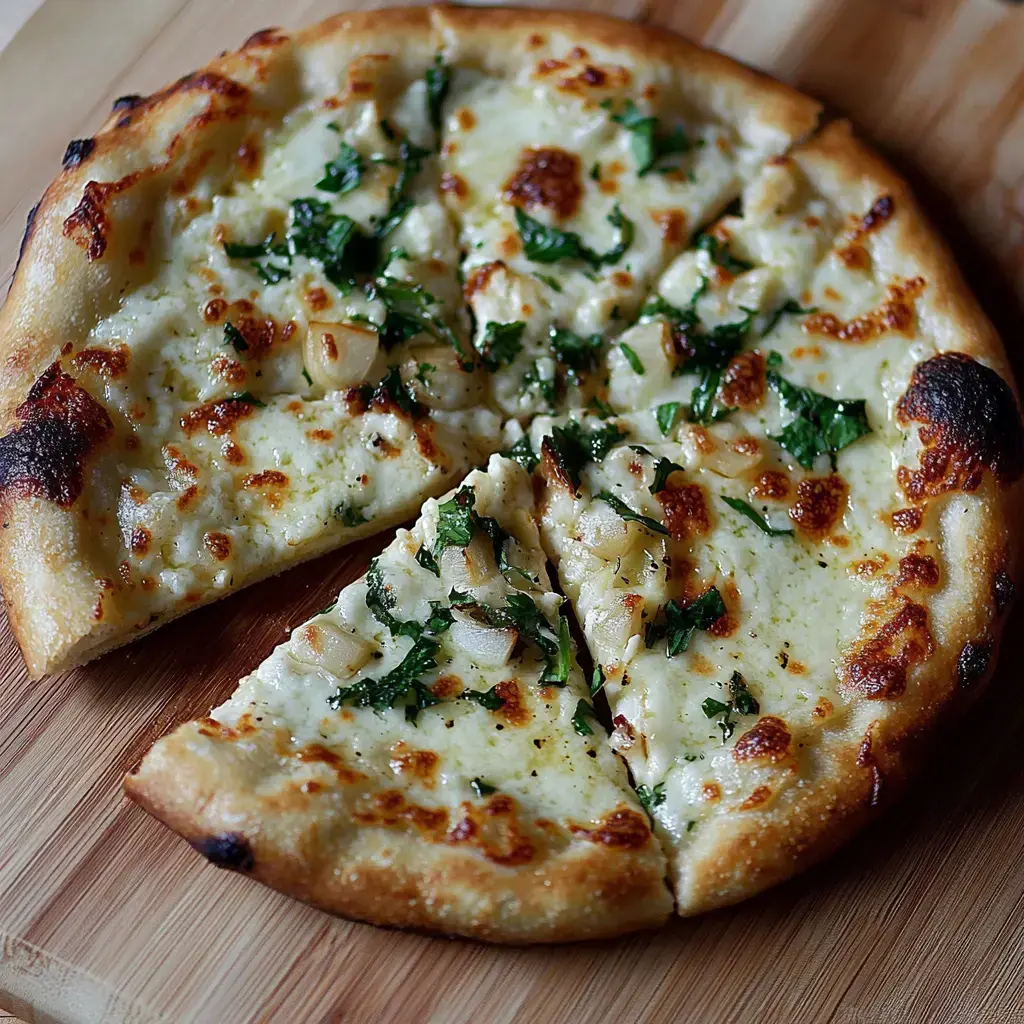
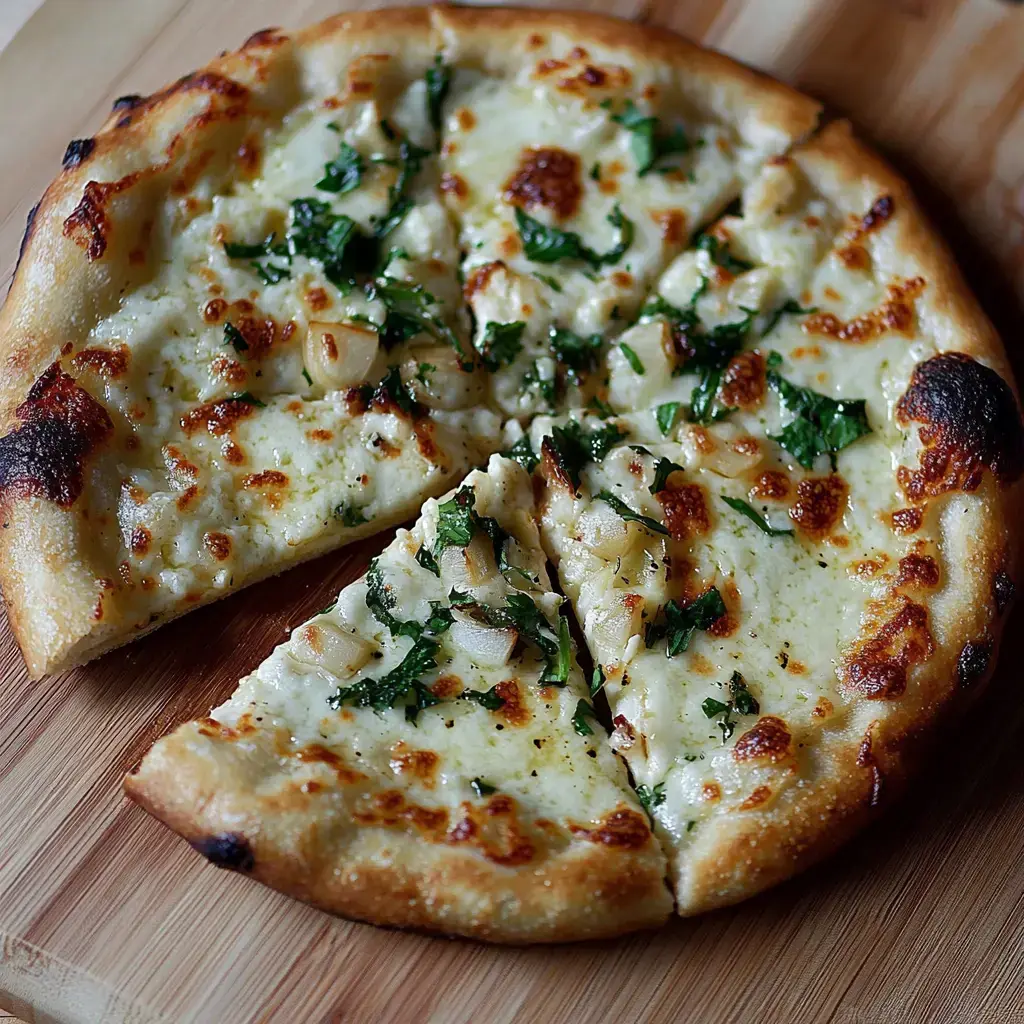
A freshly baked flatbread topped with melted cheese and scattered green herbs, with one slice partially removed, rests on a wooden cutting board.

The first time I made this White Garlic Parmesan Pizza in my kitchen I knew it would become a family favorite. This pizza brings together a buttery garlic parmesan sauce with stretchy mozzarella on a perfectly crispy crust. I’ve spent years perfecting this recipe and now it’s our most requested weekend dinner. Trust me you won’t believe how quickly it comes together.

Why This Pizza Works in My Kitchen

When my kids ask for pizza this is always their first choice. The combination of garlicky sauce and melty cheese creates pure comfort food magic. I love how versatile it is sometimes we make it for a quick weeknight dinner other times it becomes the star of our weekend gatherings. My favorite part? It takes just 30 minutes from start to finish.

‘Mandalorian and Grogu’ Soars to Record-Breaking Global Box Office Debut, While ‘Obsession’ Enjoys Robust Second Weekend

What You’ll Need in Your Kitchen

  • Pizza Dough: I use one 12-16 ounce ball. Store bought works great when I’m busy homemade when I have time.
  • Butter: 2 tablespoons of melted butter creates the perfect sauce base.
  • Garlic: Fresh garlic is a must I use 2-3 plump cloves.
  • Flour: Just 2 tablespoons to thicken our sauce.
  • Milk: A cup of whole milk makes the sauce extra rich.
  • Parmesan: Fresh grated half cup no pre grated here.
  • Mozzarella: 1½ cups freshly shredded it melts beautifully.
  • Basil: I snip this fresh from my windowsill herbs.
  • Italian Seasoning: My own blend but store bought works too.
  • Salt and Pepper: Just enough to make the flavors pop.

Let’s Make Pizza Together

Get Your Oven Ready

I always start by putting my pizza stone in a cold oven then crank it up to 550°F. Trust me that extra 30 minutes of heating makes all the difference for a crispy crust.

Making Our Special Sauce

Start the sauce with melted butter and garlic until your kitchen smells amazing. Whisk in flour let it get golden then slowly pour in milk. Keep stirring until it thickens then add parmesan and seasonings. This sauce is pure gold.
Time to Build

I love stretching pizza dough by hand it’s so therapeutic. Spread our creamy sauce leaving a little edge for the crust then cover with mozzarella. A sprinkle of Italian seasoning makes it perfect.

The Magic Happens

Slide that beauty onto your hot stone and watch it transform in about 8-10 minutes. The cheese should be bubbly and golden.

Final Touches

Fresh basil goes on right when it comes out. Give it a few minutes to settle then slice it up.

My Kitchen Secrets

Want to know what I’ve learned after countless pizza nights? Give that oven plenty of time to heat up. I always grate cheese fresh it makes such a difference. The dough needs gentle hands to stay light and airy. A little rest after baking keeps all those toppings right where they belong.

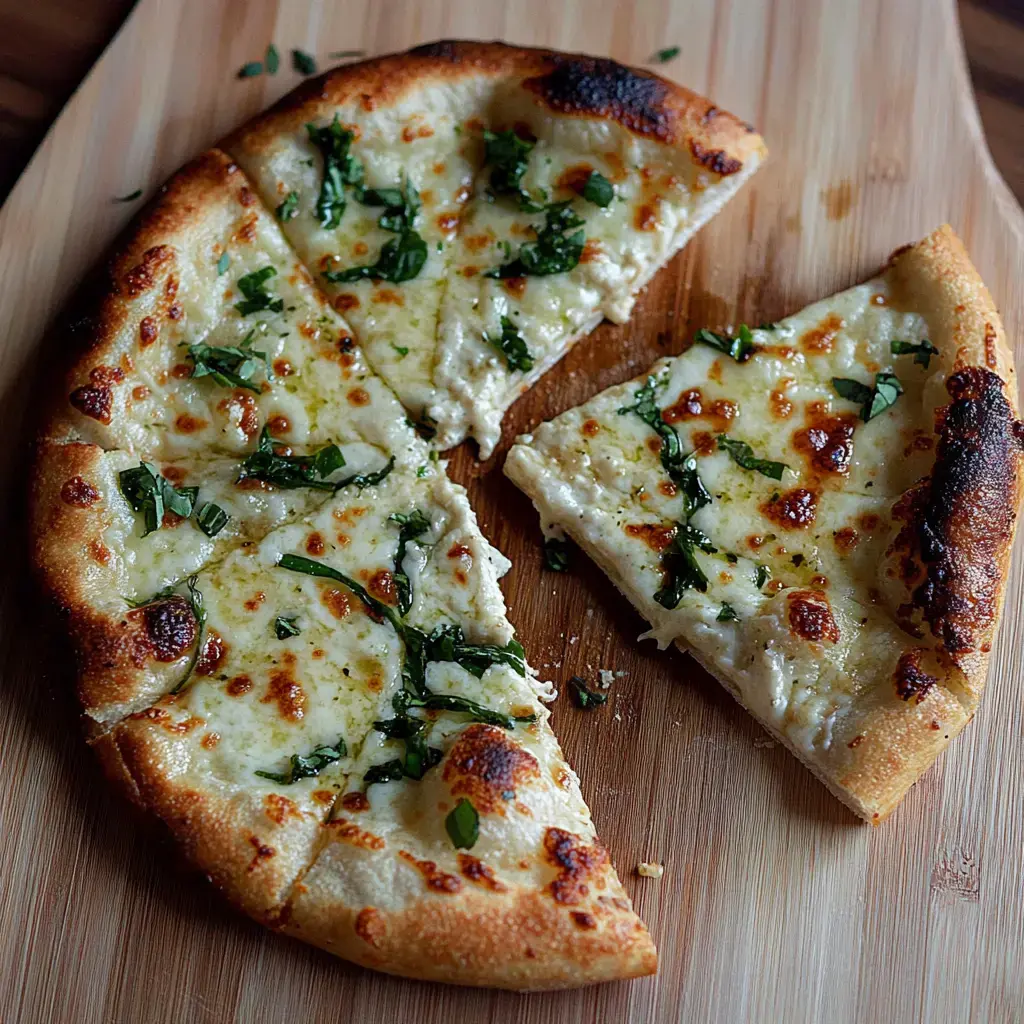
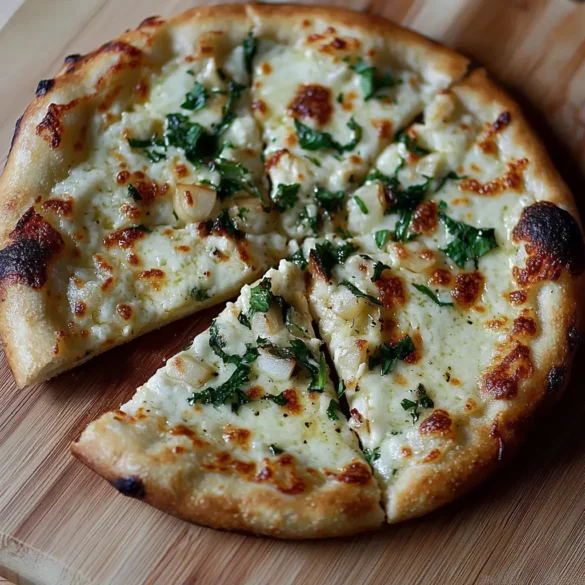
A freshly baked cheese pizza topped with chopped parsley, displayed on a wooden cutting board.

Ways to Make It Your Own

In my house everyone has their favorite version. My husband loves his with grilled chicken on top. The kids go crazy for extra cheese and I love adding mushrooms and spinach from the farmers market. Sometimes I switch up the cheese blend using goat cheese or provolone. A sprinkle of red pepper flakes gives it a nice kick when we’re craving some heat.

Keeping Your Pizza Fresh

Let me share my storage tricks. If you have leftovers pop them in an airtight container they’ll stay good in the fridge for about 4 days. When it’s time to reheat use your oven at 350°F for 10 minutes it brings back that crispy crust. A hot skillet works too. I wouldn’t freeze this one though the creamy sauce just isn’t the same after thawing.

From Casual Dinners to Special Moments

This pizza has seen it all in my kitchen. It’s perfect for those casual Friday nights when we’re all tired but still want something special. It’s also become our go to for game nights with friends. Something about that garlic parmesan combo just brings people together.

Smart Prep for Busy Days

Life gets crazy so I’ve learned some shortcuts. I often make extra sauce and keep it in the fridge for three days. The dough can be prepped ahead too. When dinner time rolls around I just need to assemble and bake. These little tricks have saved dinner more times than I can count.

What Goes Well with This Pizza

We love pairing this pizza with simple sides. A crisp Caesar salad is our usual go to. Sometimes I’ll throw together a quick spinach salad with strawberries and nuts. On cozy nights we dip garlic bread in tomato soup alongside our pizza slices. Pour a glass of crisp white wine if you’re feeling fancy.

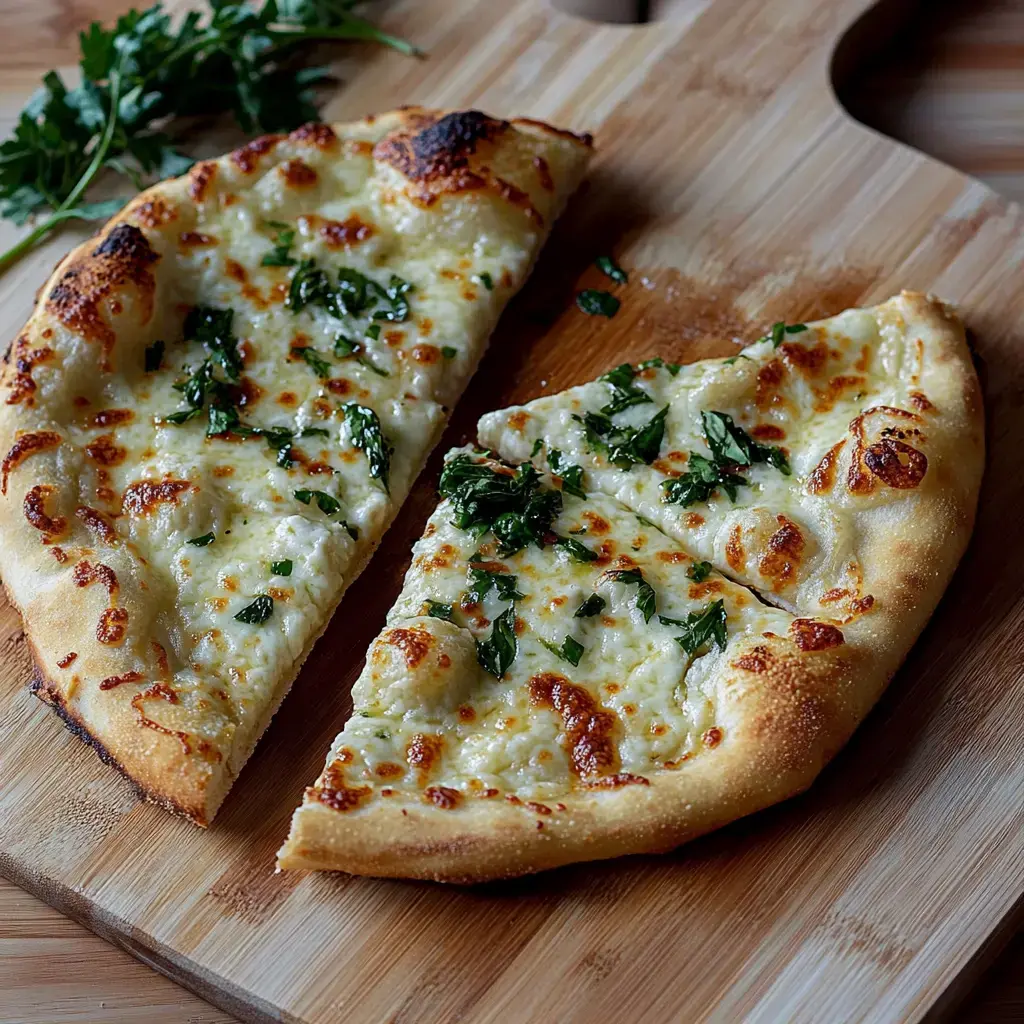
A freshly baked pizza cut into eight slices, topped with melted cheese and garnished with fresh green herbs, displayed on a wooden serving board.

Tools That Make a Difference

My pizza stone is probably my most treasured kitchen tool for this recipe. If you don’t have one don’t worry I started with an upside down baking sheet. A pizza peel makes life easier but parchment paper works great too. Just make sure your pizza cutter is nice and sharp.

Choose Your Ingredients Wisely

After years of pizza making I’ve learned fresh ingredients make all the difference. I always grate my own cheese it melts like a dream. Fresh garlic gives that punch you just can’t get from the jarred stuff. And those fresh basil leaves on top? They make every slice feel special.

Spicing Things Up

Some nights we’re in the mood for extra heat. I love adding a pinch of red pepper flakes right into the sauce. My teenage son got me hooked on drizzling hot honey over the finished slices. When friends come over I set out chili oil so everyone can add their own kick of heat. The creamy sauce balances the spice perfectly.

A Gluten Free Version That Works

When my best friend was diagnosed with celiac disease I was determined to make this work for her. I’ve tested countless gluten free pizza doughs and finally found one that delivers. The trick is swapping the sauce flour for cornstarch. Now we can all enjoy pizza night together no one feels left out.

Making the Most of Each Season

The farmers market inspires how I top this pizza throughout the year. Spring brings tender asparagus and wild mushrooms. Summer means garden fresh tomatoes and basil. Fall is all about roasted butternut squash and caramelized onions. Each season adds its own magic to our pizza nights.

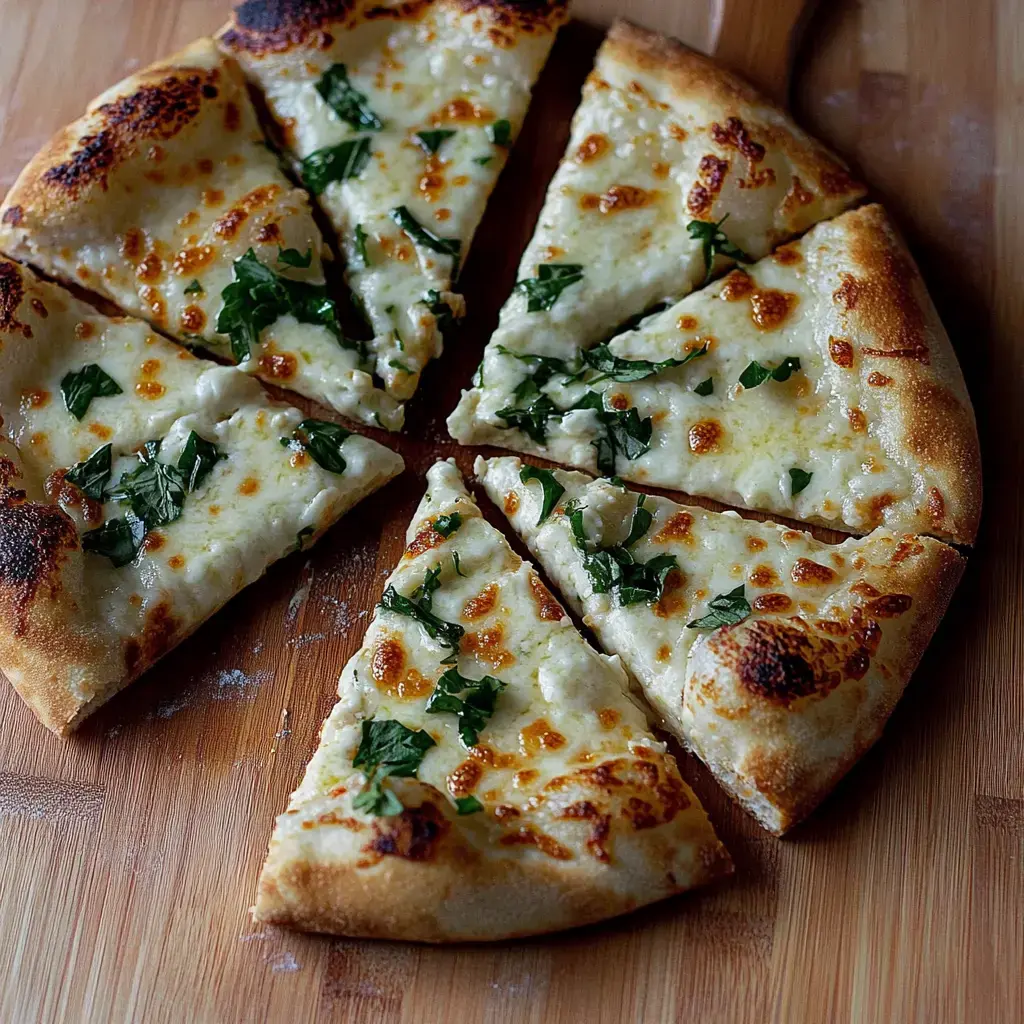
A freshly baked white pizza topped with melted cheese, garlic, and fresh herbs, sliced into eight pieces.

Pizza Party Success Tips

Pizza parties have become my signature thing. I prep several balls of dough and make a double batch of sauce. Everyone gets their own section of counter space to create their masterpiece. Even my pickiest friends love customizing their pizzas. It’s become such a fun tradition that friends keep asking when the next pizza night is happening.

Clever Ways to Use Leftovers

My favorite morning-after trick is turning leftover slices into the most amazing breakfast quesadillas. Just fold them in half and crisp them up in a skillet. Sometimes I’ll chop up leftover pizza and toss it into a grilled sandwich. Trust me these reimagined leftovers disappear fast in my house.

The Magic of Our Sauce

This garlic parmesan sauce is my kitchen gold. I discovered it one night when I was craving something different from traditional tomato sauce. Now friends beg for the recipe. It’s rich and creamy but not heavy. The perfect canvas for any toppings you can dream up.

Making It Work for Everyone

After my niece became dairy free I experimented until I got a version that worked for her too. Oat milk makes the creamiest sauce and vegan butter works perfectly. There are some amazing plant based cheeses now that melt beautifully. Everyone deserves great pizza.

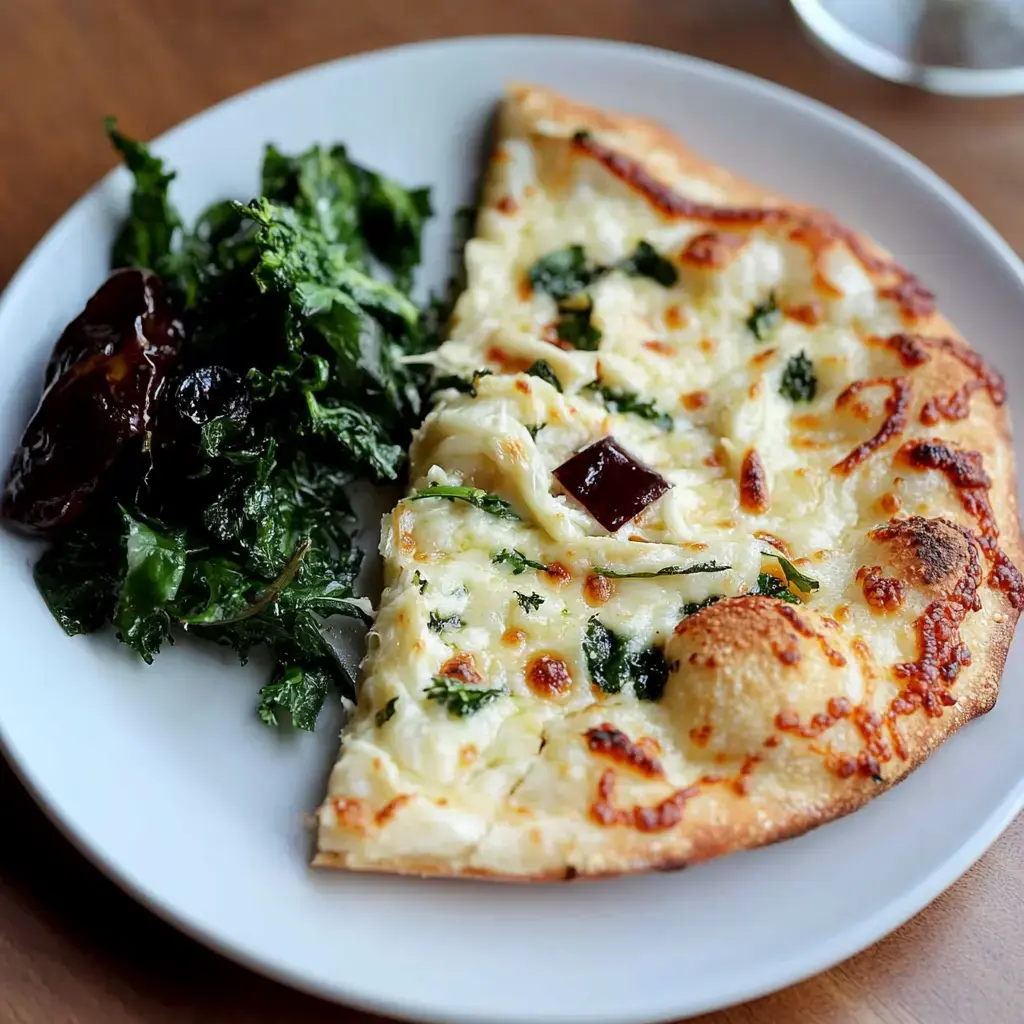
A slice of cheesy pizza topped with herbs is served alongside a portion of sautéed greens on a white plate.

Perfect for Busy Weeknights

On those crazy days when I’m running between work and kids’ activities this pizza saves dinner. Everything comes together in just 30 minutes. While it bakes I throw together a quick salad. Suddenly we’re all sitting down to a home cooked meal that feels special even on a hectic Tuesday.

Frequently Asked Questions

→ What if I don’t have a pizza stone? Use an upside-down baking sheet preheated in the oven as an alternative to a pizza stone.

→ How much sauce should I use? The recipe makes ¾ cup sauce. Use ½ to ¾ cup per pizza, depending on preference for sauce coverage.

→ Can I prepare this ahead? Make the garlic parmesan sauce ahead and refrigerate. Assemble and bake pizza just before serving.

→ How do I store leftovers? Store in an airtight container in the refrigerator for up to 4 days or freeze for up to 2 months.

→ Why preheat the stone so long? A fully heated stone ensures a crispy crust. The 30-minute preheat allows the stone to reach proper temperature throughout.

Garlic Parmesan Pizza

Serves: 8 Prep Time: 10 minutes Cooking Time: 30 minutes 30 minutes
Nutrition facts: 253 calories 10 fat
Rating: 5.0/5
( 1 voted )
Pin
Print

Ingredients

1 tablespoon unsalted butter.
2 cloves garlic, minced.
1 tablespoon all-purpose flour.
¾ cup 2% milk.
½ cup grated parmesan cheese.
¼ teaspoon kosher salt.
¼ teaspoon black pepper.
1 large pizza dough, room temperature.
8 ounces mozzarella cheese, shredded.
½ teaspoon Italian seasoning.
¼ cup fresh basil leaves, chiffonade.

Instructions

Place stone in lower third of oven, heat to 550°F for 30 minutes.

Sauté garlic in butter 2 minutes, whisk in flour for roux. Add milk, simmer 5 minutes, stir in parmesan and seasonings.

Stretch dough on parchment, spread ½-¾ cup sauce leaving border, top with cheese and seasoning.

Slide onto stone, bake 8-10 minutes until cheese bubbles and browns.

Remove to cooling rack, add basil, rest 10 minutes before slicing.

Notes

  1. Can use baking sheet instead of stone.
  2. Makes ¾ cup sauce - adjust amount to taste.
  3. Stores 4 days refrigerated, 2 months frozen

Tools You'll Need

  • Pizza stone or baking sheet.
  • Pizza peel.
  • Small saucepan.
  • Parchment paper.


Allergy Information

Please check ingredients for potential allergens and consult a health professional if in doubt.
    • Dairy (cheese, milk).
    • Wheat (flour, dough).
0 comments
0 FacebookTwitterPinterestLinkedin
Other Meals

Green Bean Bundles

by myphillyconnection May 24, 2026
written by myphillyconnection

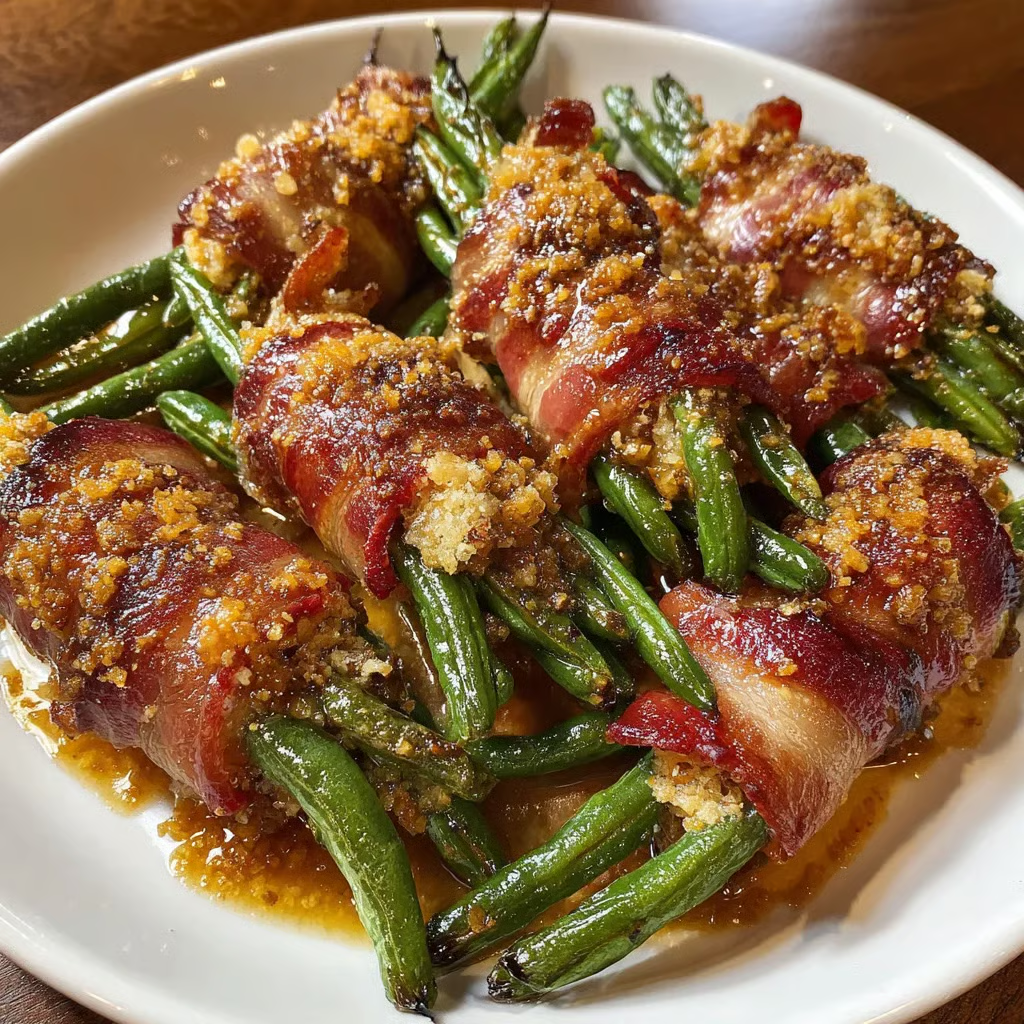
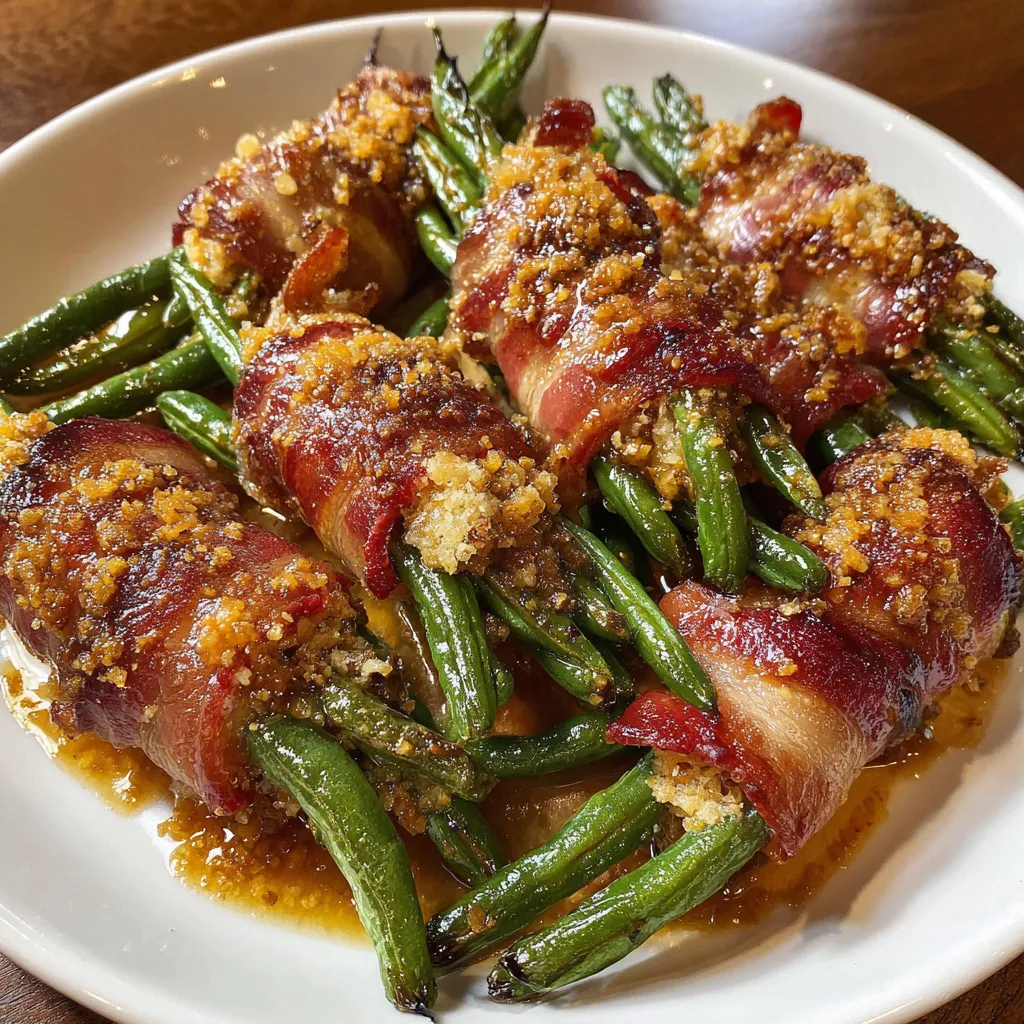
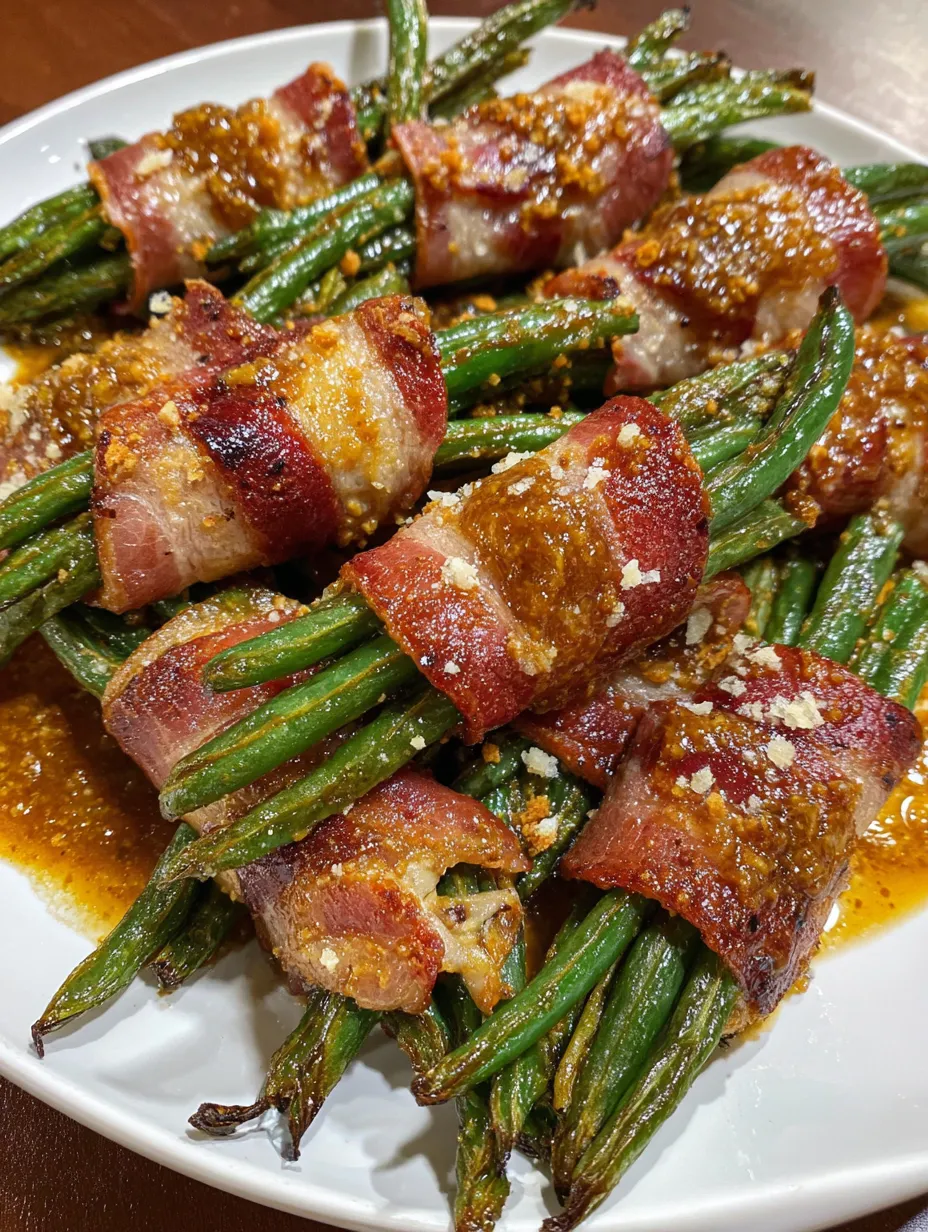
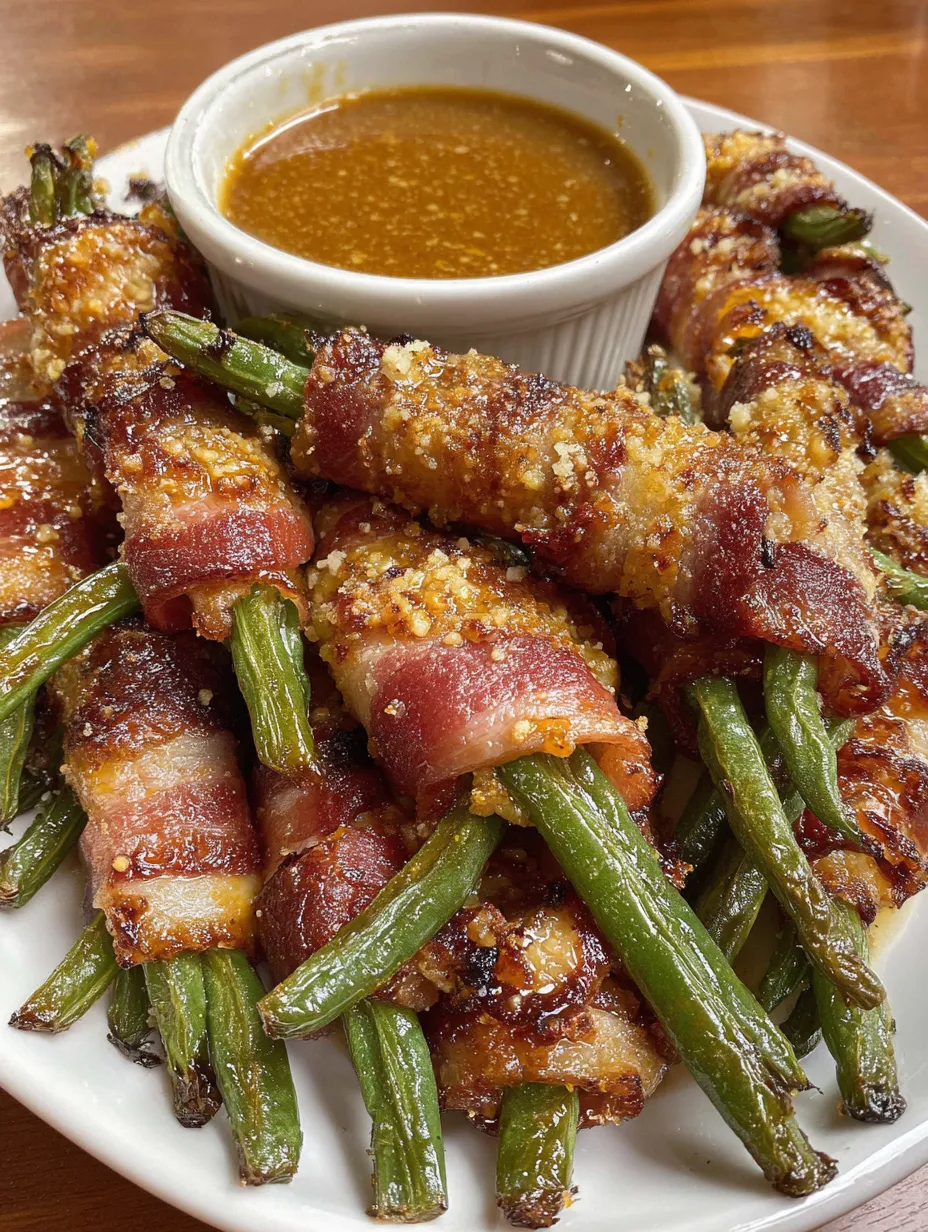
These bacon-wrapped green bean bundles feature crisp-tender beans wrapped in bacon and glazed with a sweet and savory brown sugar sauce.

Green Bean Bundles
Green Bean Bundles

These green bean bundles happened when I was trying to figure out how to make vegetables that my family would actually eat without complaining for once. My kids have always been suspicious of green beans, but they love bacon, so wrapping the beans in bacon seemed like the perfect sneaky parent trick. The brown sugar glaze was inspired by those fancy restaurant sides that make everything taste amazing. After some experimenting with cooking times and getting the bacon crispy enough, we created these incredible little packages that disappear faster than any vegetable dish I’ve ever made. Now my kids actually request green beans, which feels like a parenting miracle.

Why These Are Amazing

  • Bacon makes everything better – Even picky eaters can’t resist vegetables wrapped in crispy bacon
  • Sweet and salty perfection – Brown sugar glaze balances the smoky bacon and fresh green beans
  • Looks restaurant fancy – Individual bundles make dinner feel special without complicated techniques
  • Make-ahead friendly – Can be assembled hours ahead and just popped in the oven when guests arrive

My friend Sarah made these for Thanksgiving dinner and said they were the only vegetable dish that got completely finished. Her mother-in-law, who usually criticizes everything, actually asked for the recipe and said they were “restaurant quality.” Now Sarah’s become the designated vegetable person for every family gathering, which she finds hilarious since she used to burn frozen corn.

Getting Your Ingredients Right

  • French green beans work best: Thinner than regular green beans and cook more evenly in bundles
  • Good bacon matters: Don’t use turkey bacon or anything weird, real bacon is what makes these special
  • Dan-O’s Cheesoning: This seasoning blend is perfect, but garlic powder and parmesan work as substitutes
  • Quality soy sauce: Adds umami depth that regular salt can’t match
  • Real butter: Margarine doesn’t create the same rich flavor in the glaze
  • Brown sugar consistency: Light or dark brown sugar both work fine for the sweet glaze
Green Bean Bundles
Green Bean Bundles

Making Them Step by Step

Preparing the green beans:

Bring a large pot of salted water to boil and add the green beans for five to six minutes until they’re bright green and tender-crisp. Immediately transfer them to a bowl of ice water to stop the cooking process and keep them vibrant.

Creating the glaze:

In a small mixing bowl, combine melted butter, brown sugar, soy sauce, and Dan-O’s Cheesoning. Mix until it forms a thick, paste-like consistency that will stick to the bundles during baking.

Assembly technique:

Cut each bacon slice in half to make twelve pieces total. Gather five to seven green beans and wrap them with one piece of bacon, securing the ends underneath. Place each bundle on a baking sheet or in a skillet.

Final seasoning:

Sprinkle a little more Dan-O’s Cheesoning over each bundle for extra flavor. This adds another layer of seasoning that really makes them taste professional.

Glazing the bundles:

Top each bundle with a spoonful of the brown sugar mixture, spreading it slightly to cover the bacon. This glaze is what creates that amazing sweet and savory combination.

Baking to perfection:

Bake at 400 degrees for thirty to thirty-five minutes until the bacon is crispy and golden brown. The glaze should be bubbly and caramelized, and the green beans should be tender.

Making Sure They Work

  • Don’t skip the ice water bath – This keeps the green beans bright green and stops them from overcooking
  • Secure the bacon ends – Tuck them underneath so they don’t unravel during baking
  • Watch the final cooking time – Bacon can go from perfect to burnt pretty quickly

I learned the hard way that you really need to blanch the green beans first. My initial attempt used raw beans that stayed crunchy and weird while the bacon cooked. I also didn’t secure the bacon properly, so half of them unraveled and looked messy instead of neat little bundles.

Perfect Serving Ideas

These bundles work great as a side dish for any main course, from grilled chicken to holiday roasts. They’re fancy enough for special occasions but easy enough for weeknight dinners. The sweet and savory flavors complement both casual and elegant meals perfectly.

Making Them Different

You can add different seasonings to the glaze like garlic powder, onion powder, or even a little hot sauce for heat. Sometimes I wrap asparagus instead of green beans for variety. Different types of bacon like thick-cut or maple bacon create completely different flavor profiles.

Storage and Reheating

These are definitely best eaten immediately while the bacon is crispy and the glaze is hot. They don’t store well since the bacon gets soggy, but you can assemble them hours ahead and bake when ready to serve.

Green Bean Bundles
Green Bean Bundles

Tips That Actually Help

  • Use tongs for easy assembly – Makes handling the wet green beans much easier
  • Line the pan with foil – Cleanup becomes effortless and prevents sticking
  • Make extra – These disappear fast and people always want more than you expect

These green bean bundles have become my secret weapon for getting my family to eat vegetables without the usual dinner table negotiations. The combination of crispy bacon, sweet glaze, and perfectly cooked green beans creates this amazing side dish that makes everyone happy. My kids request these specifically now when they want “good vegetables,” which tells me I’ve successfully tricked them into eating healthy food that actually tastes incredible.

Frequently Asked Questions

→ Can I use frozen green beans? Fresh green beans work best for this recipe. Frozen beans tend to get mushy and won’t have the nice crisp-tender texture you want.

→ What if I don’t have the specific seasoning brand? Any garlic seasoning blend works great! You could also use garlic powder, onion powder, and a pinch of salt.

→ How do I keep the bacon from falling off? Make sure to wrap the bacon snugly around the bundle and tuck the ends underneath. The bacon will shrink and tighten as it cooks.

→ Can I make these ahead of time? You can blanch the green beans and make the glaze a day ahead, but it’s best to wrap and bake them fresh for the crispiest bacon.

→ What if my bacon isn’t crispy enough? Turn on the broiler for the last 2-3 minutes, watching carefully to prevent burning. This will crisp up the bacon nicely.

→ Can I double this recipe? Absolutely! Just use two baking sheets and rotate them halfway through cooking for even browning.

Green Bean Bundles

Serves: 6 Prep Time: 20 minutes Cooking Time: 35 minutes 35 minutes
Nutrition facts: 200 calories 20 grams fat
Rating: 5.0/5
( 1 voted )
Pin
Print

Ingredients

 1 pound fresh French green beans, trimmed
 4 tablespoons butter, melted
 2 tablespoons brown sugar
 1 teaspoon garlic seasoning blend
 1 tablespoon soy sauce
 6 slices bacon, cut in half

Instructions

Preheat oven to 400°F. Bring a large pot of salted water to boil. Add trimmed green beans and cook for 5-6 minutes until crisp-tender. Immediately transfer to a bowl of ice water to stop cooking and preserve the bright green color. Drain well.

In a small bowl, whisk together melted butter, brown sugar, garlic seasoning, and soy sauce until it forms a thick, paste-like consistency. Set aside.

Gather 5-7 green beans into small bundles. Wrap each bundle with a half slice of bacon, securing the beans together. The bacon should wrap around snugly but not too tight.

Place the bacon-wrapped bundles on a rimmed baking sheet or in an oven-safe skillet. Sprinkle each bundle with a little extra garlic seasoning for added flavor.

Brush or spoon the brown sugar glaze over each bundle, making sure to coat them well. Bake for 30-35 minutes until the bacon is crispy and golden brown.

Let the bundles rest for 2-3 minutes before serving. The glaze will thicken slightly as it cools. Serve hot as an elegant side dish.

Notes

  1. Blanching the green beans first ensures they cook evenly and stay tender-crisp
  2. Ice water stops the cooking process and keeps the beans bright green
  3. Any garlic seasoning blend works if you don't have the specific brand
  4. Use thin bacon slices for the best wrapping and crispiness
  5. These make an elegant side dish for holidays or special dinners

Tools You'll Need

  • Large pot for blanching
  • Bowl for ice water
  • Small mixing bowl
  • Rimmed baking sheet
  • Pastry brush (optional)
0 comments
0 FacebookTwitterPinterestLinkedin
CasserolesFeatured SidesSide Dishes

Cheesy Scalloped Potatoes

by myphillyconnection May 23, 2026
written by myphillyconnection

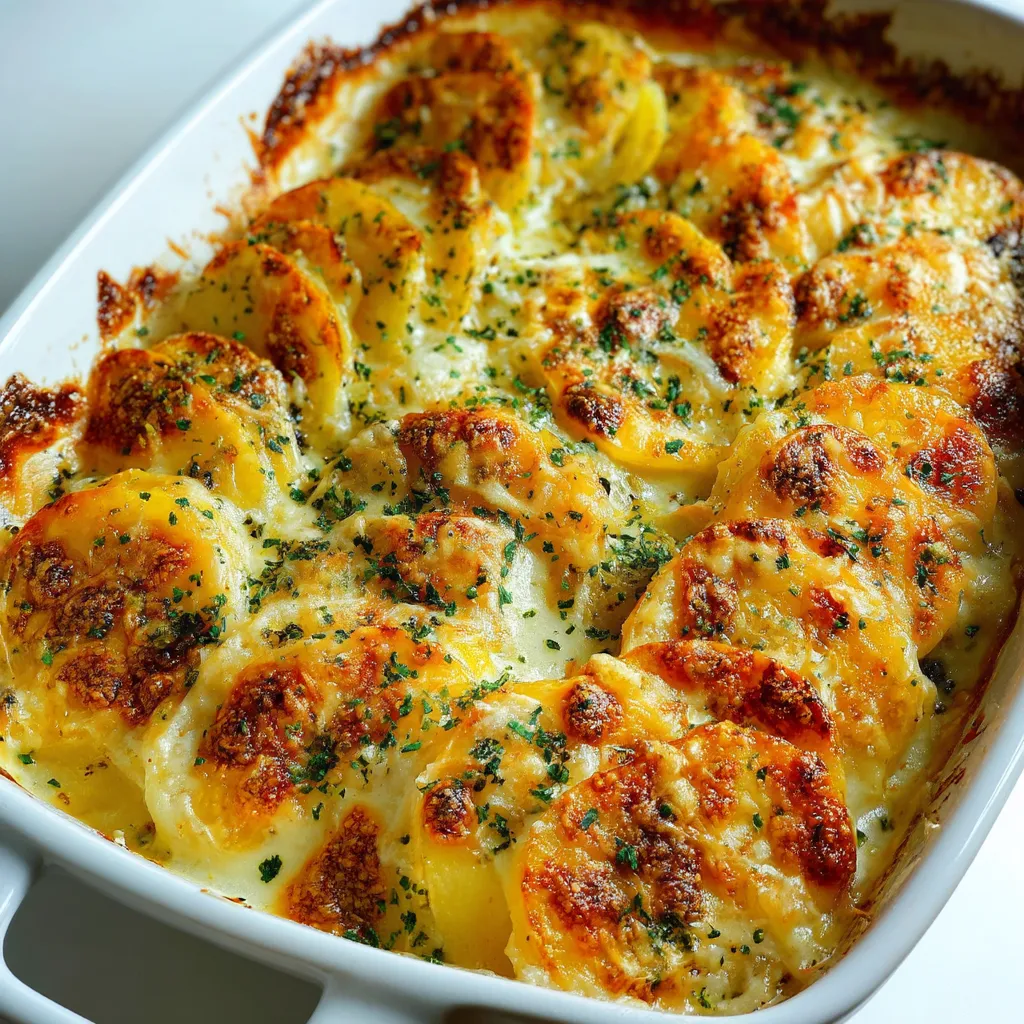
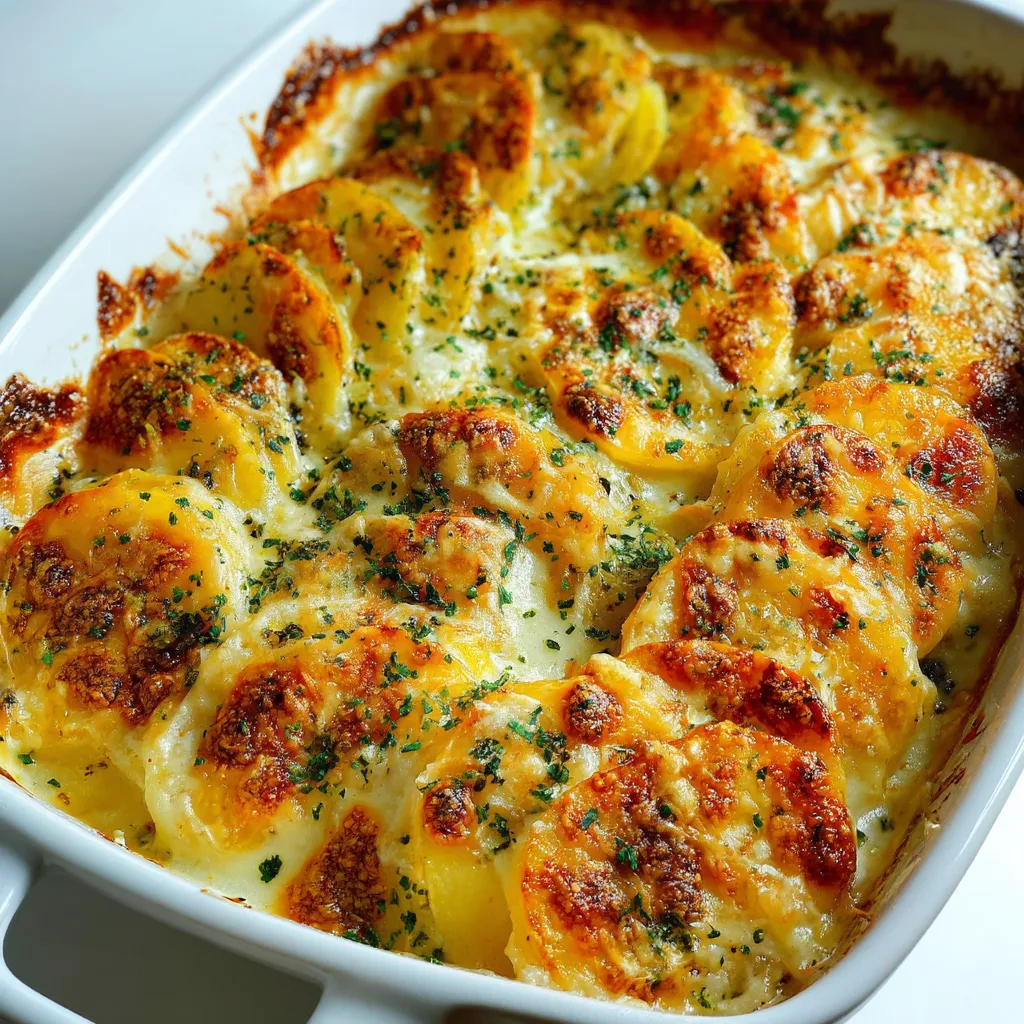
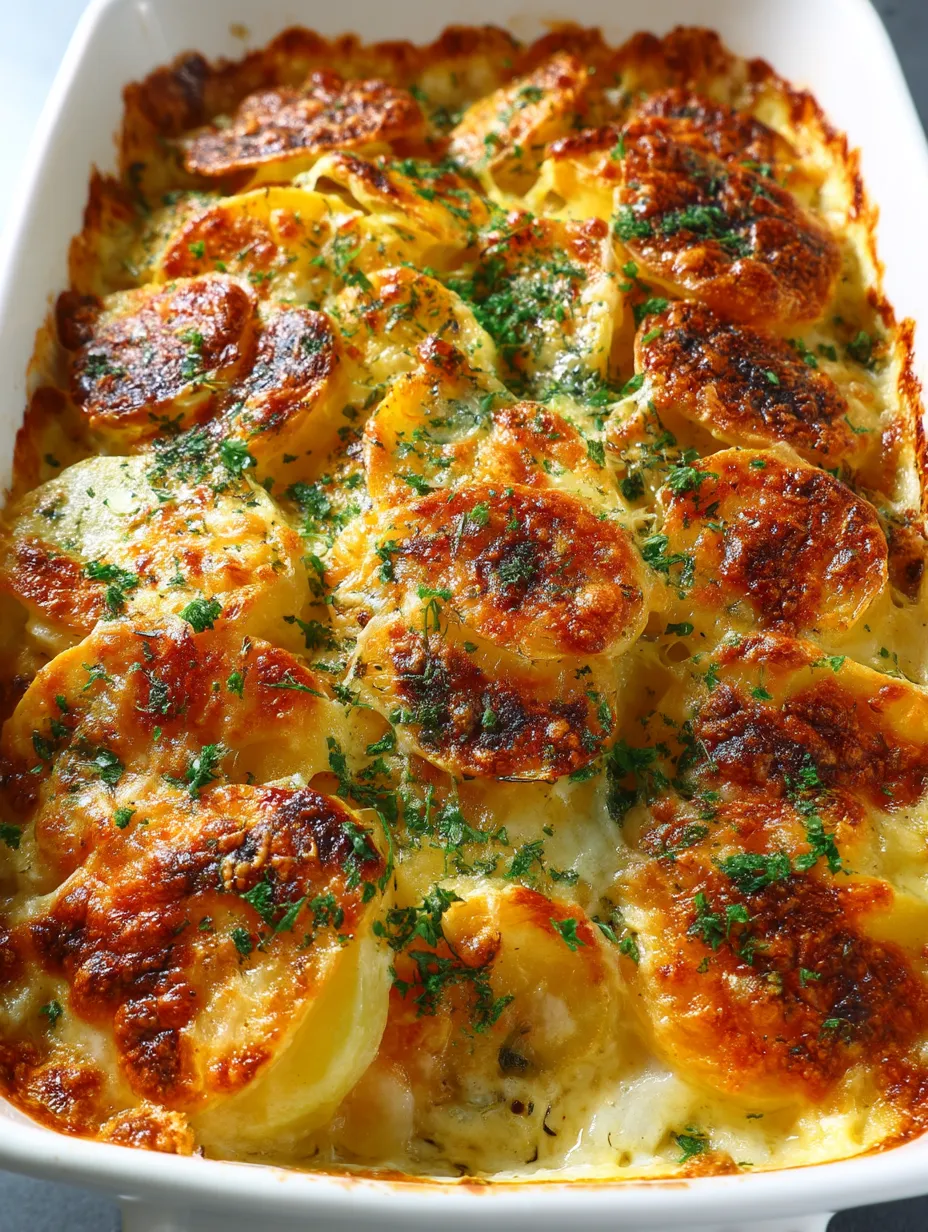
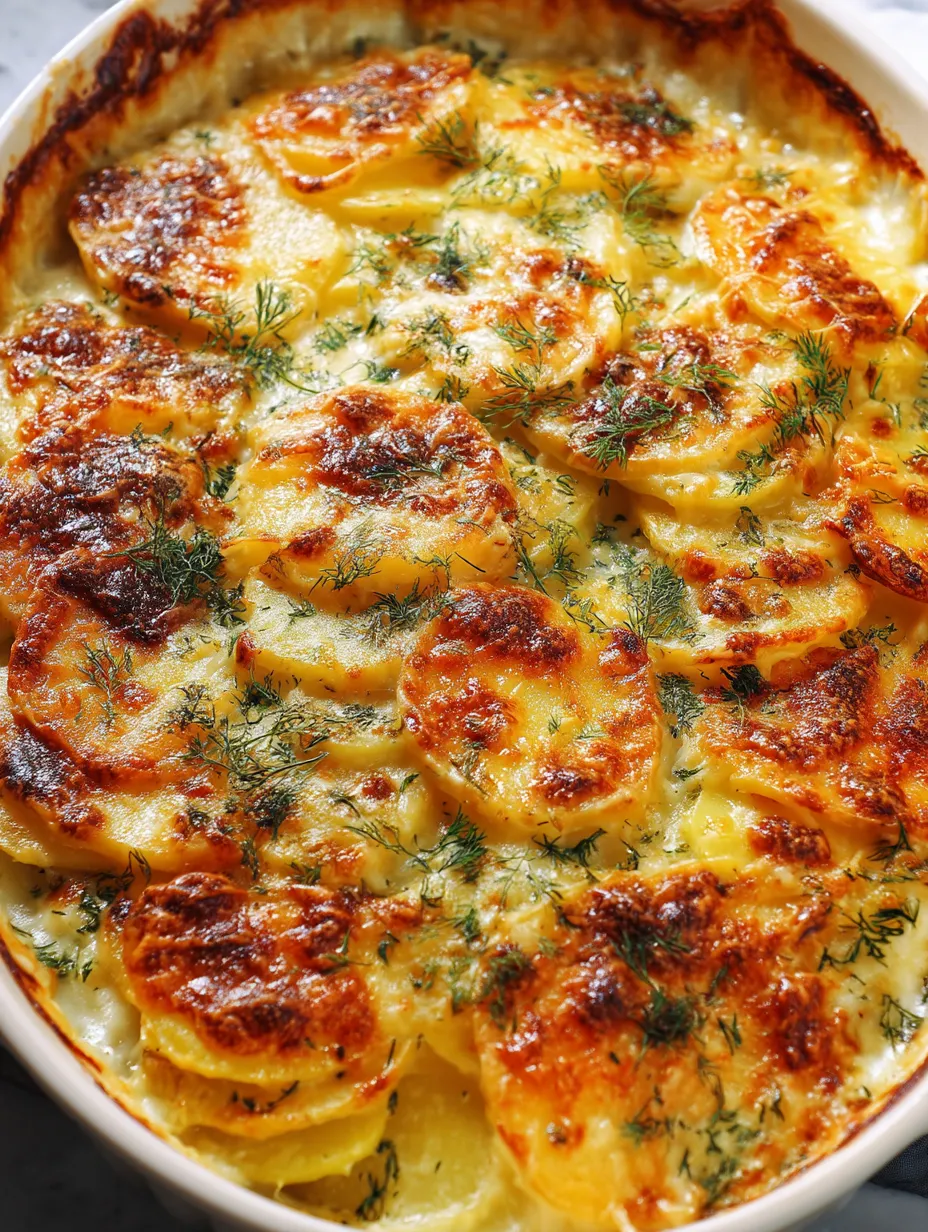
These Cheesy Scalloped Potatoes are the ultimate side dish for any occasion. Thinly sliced potatoes are layered with a rich and creamy cheese sauce made from a combination of melted mozzarella, cheddar, cream, and milk, seasoned with garlic and onion powder for an irresistible flavor. Baked to golden perfection, this crispy-on-the-top yet tender-on-the-inside dish pairs wonderfully with chicken, red meat, or fish. Garnished with fresh parsley or dill for a pop of freshness, it’s a stunning addition to your dinner table.

Cheesy Scalloped Potatoes

This cheesy scalloped potatoes recipe transforms humble potatoes into an elegant side dish that steals the spotlight at holiday gatherings. With layers of thinly sliced potatoes bathed in a rich cheese sauce, this comforting classic delivers a perfect balance of crispy edges and creamy centers that will have everyone reaching for seconds.

Why You’ll Love This Recipe

  • Perfect for special occasions yet simple enough for Sunday dinner
  • Uses basic ingredients you likely already have in your pantry
  • Makes an impressive presentation with minimal effort
  • Creates the ultimate comfort food experience with its creamy, cheesy goodness
  • Pairs beautifully with nearly any main course from roast chicken to prime rib

I first made this recipe for a Christmas dinner when I needed something special but manageable alongside my ham. The look on my guests’ faces when I brought it to the table told me everything I needed to know this would become my signature holiday side dish.

Miley Cyrus Honored with Hollywood Walk of Fame Star in Stunning Versace, Celebrates Fans with Heartfelt Gratitude

Ingredients

  • Potatoes about 1 kg: choose starchy varieties like Russets or Yukon Golds for their ability to absorb the creamy sauce while maintaining structure
  • Mozzarella 1 cup: provides that perfect melty stretch that creates those irresistible cheese pulls
  • Cheddar 3/4 cup: adds the rich, sharp flavor that gives this dish its distinctive taste
  • Heavy cream 1 cup: creates the luxuriously rich base for the cheese sauce
  • Milk 1.5 cups: works with the cream to create the perfect sauce consistency
  • Butter 2 tablespoons melted: adds richness and helps create the roux for thickening
  • Flour 2 tablespoons: essential for thickening the sauce to the perfect coating consistency
  • Onion powder 1 teaspoon: infuses sweet onion flavor throughout without texture interruptions
  • Garlic powder 1 teaspoon: adds depth and savory notes to complement the cheese
  • Salt and black pepper: enhances all flavors and balances the richness
  • Parsley or dill for garnish: adds a fresh pop of color and flavor contrast

Step-by-Step Instructions

Prepare Your Baking Dish:

Preheat your oven to 375°F/190°C/gas mark 5. Thoroughly butter a baking dish, making sure to coat the sides as well as the bottom. This prevents sticking and adds flavor to the edges of your potatoes. I use a 9×13 dish for even cooking.

Prepare the Potatoes:

Peel your potatoes completely and slice them into very thin, uniform slices about 1/8 inch thick. Consistency in thickness ensures they cook evenly. If you have a mandolin, this is the perfect time to use it. Otherwise, use a sharp knife and work slowly for precision. Arrange the slices in your baking dish in your preferred pattern. Standing them upright creates a beautiful presentation that allows the sauce to flow between each slice.

Create the Cheese Sauce:

In a medium saucepan over medium heat, melt your butter completely. Once melted, add the flour and whisk continuously for about 2 minutes until the mixture turns slightly golden and smells nutty. This roux is the foundation of your sauce. Gradually pour in the milk and cream, whisking constantly to prevent lumps from forming. Add the onion powder, garlic powder, salt, and pepper. Bring the mixture to a gentle boil, then reduce to a simmer and cook for about 5 minutes, stirring occasionally, until the sauce thickens enough to coat the back of a spoon.

Add the Cheese:

Remove the sauce from heat and add both the mozzarella and cheddar cheese. Stir until completely melted and the sauce is smooth and velvety. Taste and adjust seasonings if needed. The sauce should be rich, flavorful, and thick enough to coat the potatoes without being too runny.

First Bake:

Pour half of the cheese sauce evenly over the arranged potatoes, making sure it seeps down between the slices. Cover the dish tightly with aluminum foil, which traps steam and helps cook the potatoes through. Bake for 30 minutes with the foil on. This initial covered baking allows the potatoes to start softening without browning too quickly.

Final Bake:

After 30 minutes, carefully remove the foil from the hot dish. Pour the remaining cheese sauce over the partially cooked potatoes, making sure to distribute it evenly. Return the uncovered dish to the oven and continue baking for another hour. This extended uncovered baking allows the top to become beautifully golden and slightly crispy while ensuring the potatoes become completely tender throughout.

Finish and Serve:

Check for doneness by inserting a knife into the potatoes. It should slide in easily with no resistance. Once done, remove from the oven and let rest for 5 minutes. Sprinkle freshly chopped parsley or dill over the top for a bright contrast to the rich dish. Serve while still hot or warm for the best texture and flavor experience.

Cheesy Scalloped Potatoes

You Must Know

  • The quality of your cheese significantly impacts the final dish. Use freshly grated cheese instead of pre-shredded for better melting.
  • Don’t rush the baking process. The slow baking allows the flavors to develop and ensures the potatoes cook through properly.
  • This dish reheats beautifully, making it perfect for holiday meal prep.
  • The sauce might look too thin initially, but it will thicken as it bakes with the potatoes.

My favorite part of this recipe is watching the transformation of the cheese sauce as it bubbles and browns in the oven. I remember making this for my first Christmas hosting duty, nervous about whether it would turn out. The moment my father-in-law asked for the recipe, I knew I had a winner that would become part of our family tradition.

Make Ahead Options

These scalloped potatoes can be prepared up to 24 hours in advance. Complete all steps up to the first 30-minute bake, then cover and refrigerate. When ready to finish, remove from the refrigerator 30 minutes before baking to take the chill off, then proceed with the final hour of baking. You may need to add an extra 10-15 minutes of baking time if starting from cold.

Perfect Pairings

This versatile side dish complements many main courses. For holiday meals, serve alongside roast turkey, glazed ham, or prime rib. For everyday dinners, pair with grilled chicken, meatloaf, or roasted fish. The richness of the dish pairs wonderfully with bright, acidic sides like a simple green salad with vinaigrette or roasted vegetables with lemon.

Troubleshooting Tips

If your potatoes aren’t cooking evenly, your slices may be too thick or unevenly cut. Using a mandolin ensures consistent thickness. If the top is browning too quickly before potatoes are tender, loosely cover with foil for part of the final baking. For a sauce that’s too thin, extend the initial simmering time. Too thick? Add a splash more milk before pouring over the potatoes.

Pro Tips

  • Salting the potato slices lightly before arranging them enhances their flavor from within, not just from the sauce.
  • For extra flavor depth, infuse your warming milk and cream with a bay leaf, a crushed garlic clove, and a sprig of thyme. Remove these aromatics before making the sauce.
  • Let the dish rest for 10 minutes before serving. This allows the sauce to set slightly, making it easier to serve neat portions.
Cheesy Scalloped Potatoes

Frequently Asked Questions

→ What type of potatoes work best for scalloped dishes?

Starchy potatoes like Russet or Yukon Gold work best as they break down slightly during cooking, creating a creamy texture.→ Can I prepare this dish in advance?

Yes, you can assemble the dish ahead of time, refrigerate it, and bake it just before serving. Add additional baking time if chilled.→ What cheeses can I substitute for mozzarella and cheddar?

Gruyere, Parmesan, or Fontina are great alternatives. You can mix different cheeses for a richer, more complex flavor.→ How do I ensure my sauce is lump-free?

Use medium heat and whisk continuously while gradually adding milk and cream to the flour and butter mixture.→ What can I serve with scalloped potatoes?

This dish complements roasted chicken, red meat, fish, or even a fresh green salad for a balanced meal.

0 comments
0 FacebookTwitterPinterestLinkedin
Featured SidesSide Dishes

Garlic Parmesan Roasted Potatoes

by myphillyconnection May 23, 2026
written by myphillyconnection

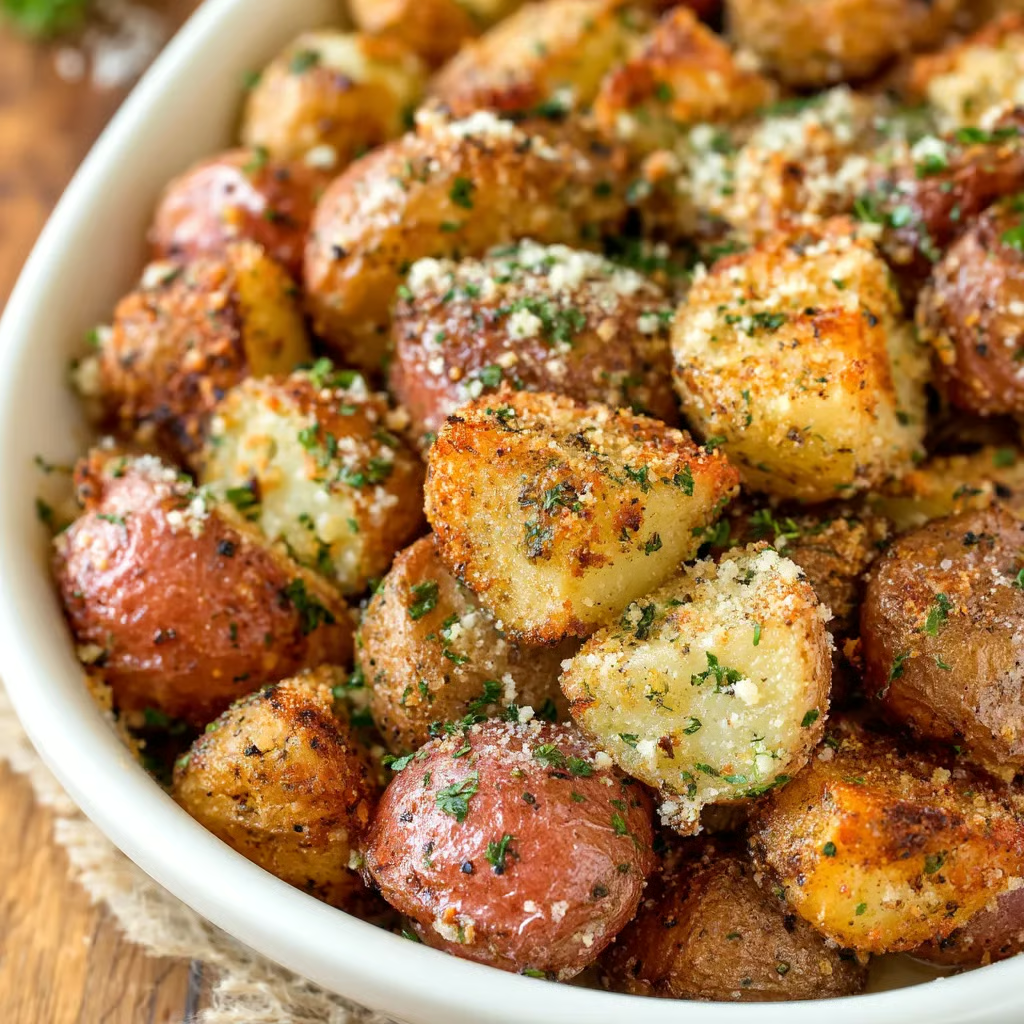
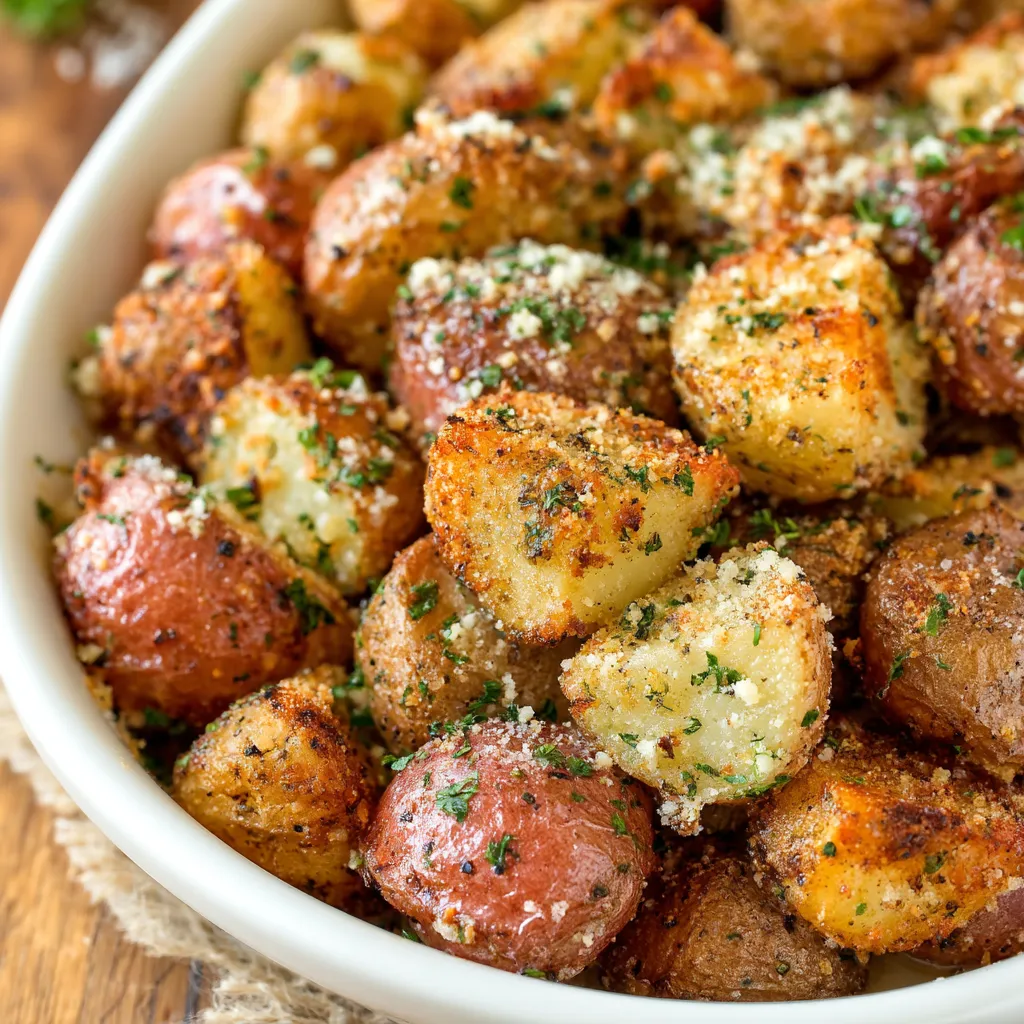
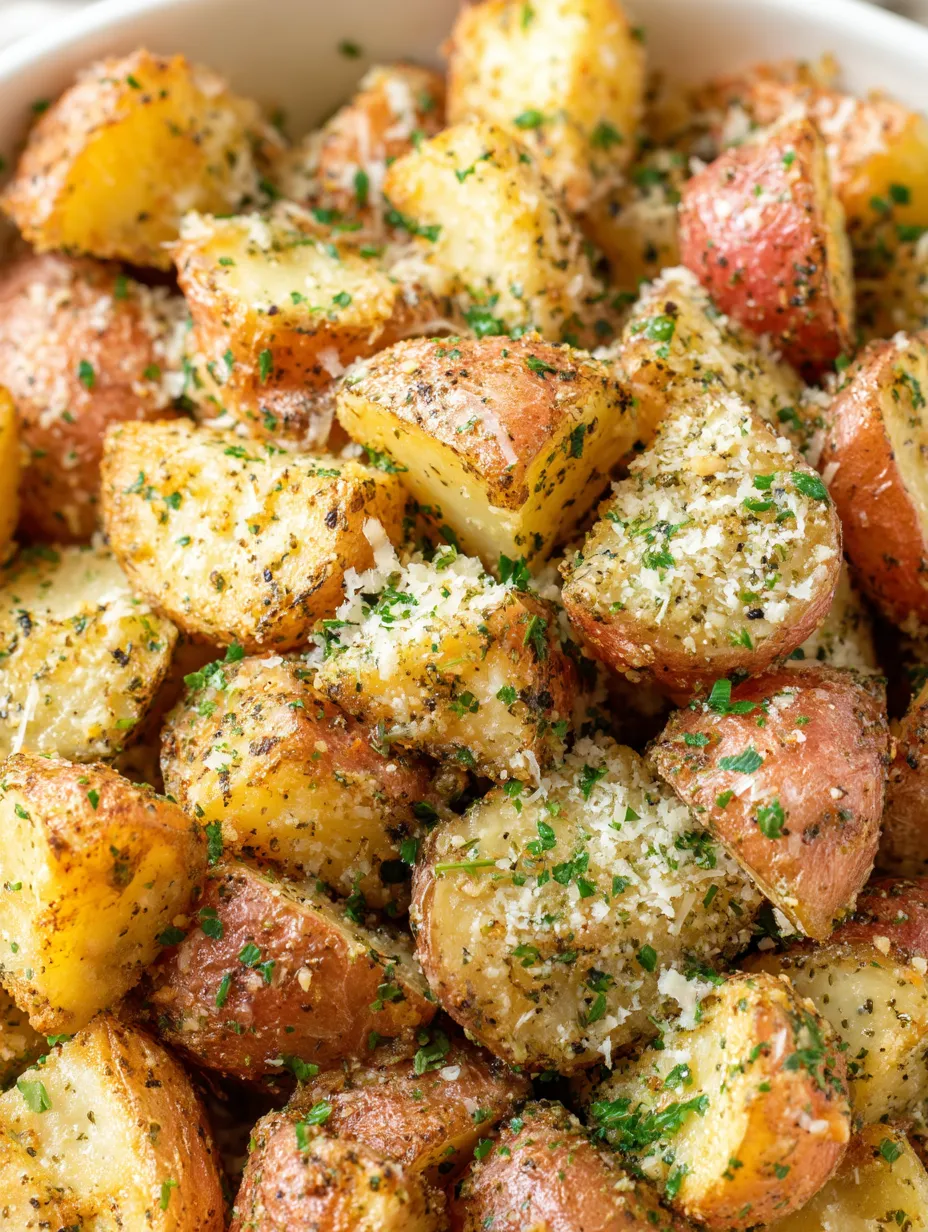
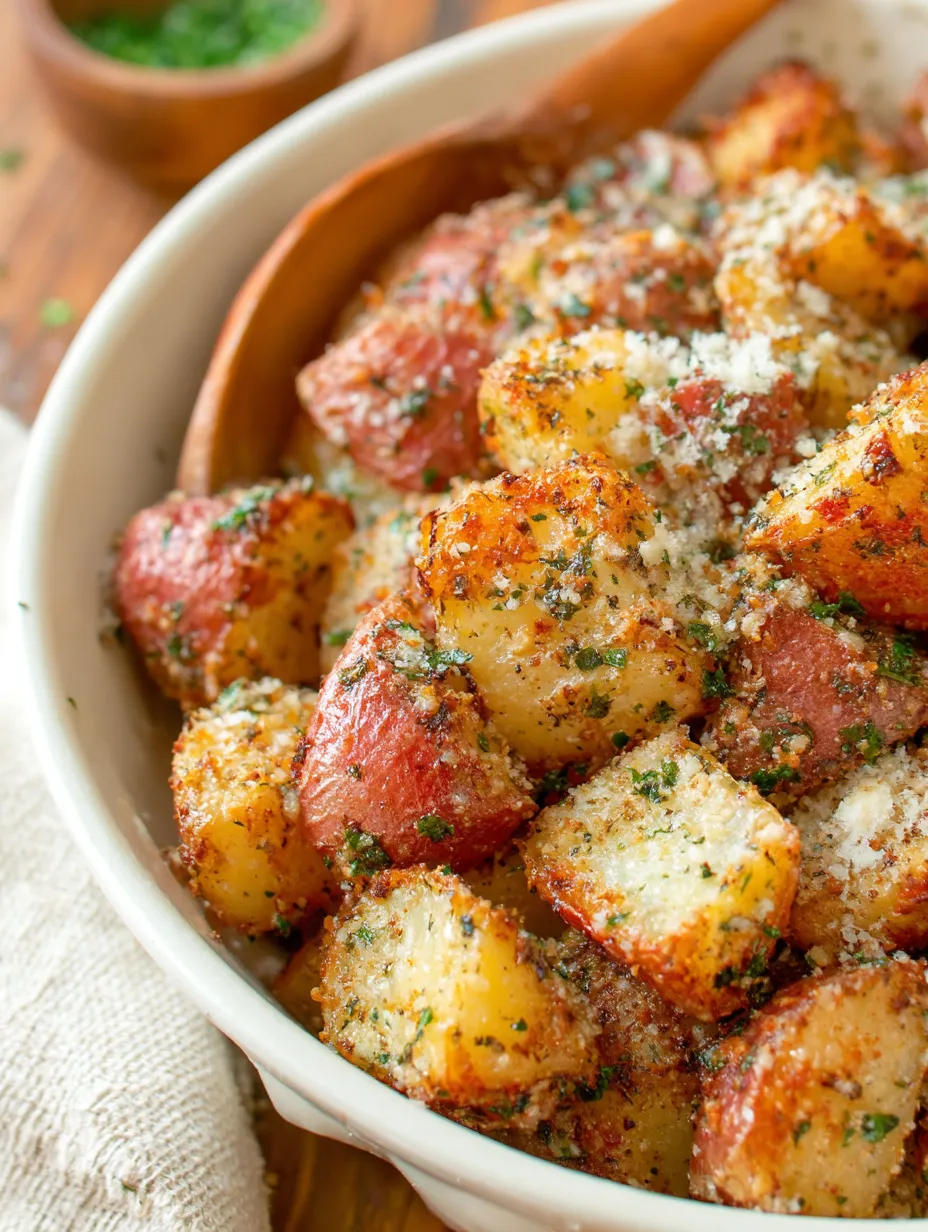
These buttery garlic parmesan potatoes are an irresistible side dish. Quartered red potatoes are tossed with olive oil, minced garlic, oregano, salt, and pepper before being roasted with freshly grated parmesan cheese. The roasting process creates crispy edges on the outside and tender, flavorful insides, all topped with a sprinkle of chopped parsley for a fresh, vibrant finish. This versatile dish is great for any occasion, complementing everything from roasted meats to light salads. Easy to prepare, it’s a perfect addition to your menu.

Garlic Parmesan Roasted Potatoes

This garlic parmesan roasted potato recipe transforms humble red potatoes into a show-stopping side dish that pairs with absolutely everything. The combination of garlic, herbs, and parmesan creates that irresistible savory crust while the insides stay perfectly tender. I discovered this method years ago when looking for a way to elevate basic potatoes, and it’s become my go-to impressive side that requires minimal effort.

Why You’ll Love This Recipe

  • Ready in just 45 minutes from start to finish
  • Made with simple ingredients you likely have on hand
  • Perfect balance of crispy exterior and fluffy interior
  • Versatile enough for weeknight dinners or holiday feasts
  • Easily scaled up or down depending on your gathering size

I first made these potatoes for a Sunday family dinner and everyone requested the recipe before dessert was even served. My nephew who typically avoids vegetables had three helpings and now asks for my special potatoes whenever he visits.

Ingredients

  • Red potatoes: quartered for the perfect size that allows crispy edges while maintaining a creamy center
  • Olive oil: creates that beautiful golden exterior when roasted at high heat
  • Minced garlic: fresh cloves provide more vibrant flavor than pre-minced varieties
  • Dried oregano: adds an herbaceous note that complements the garlic perfectly
  • Salt and pepper: the basics that enhance all the other flavors
  • Parmesan cheese: use freshly grated for best melting and flavor integration
  • Fresh parsley for garnish: adds bright color and a fresh flavor contrast

Step-by-Step Instructions

Prep the oven:

Set your oven to 400°F to ensure that perfect roasting temperature. While waiting for it to preheat, prepare your baking dish by giving it a light coating of cooking spray to prevent sticking.

Combine ingredients:

In a large mixing bowl, add your quartered red potatoes, olive oil, minced garlic, dried oregano, salt, and black pepper. Toss everything thoroughly until each potato piece is evenly coated with the oil and seasonings. Make sure to get into all the nooks and crannies of the potatoes.

Add first layer of parmesan:

Sprinkle half of your parmesan cheese over the seasoned potatoes and give everything another gentle toss. The cheese will begin to stick to the oil-coated potatoes, creating the foundation for that delicious crust.

Prepare for baking:Transfer the potato mixture to your casserole dish, arranging them in a single layer if possible. Some overlap is fine but try to avoid piling too many potatoes on top of each other as this can prevent even cooking and crisping.

Initial covered bake:

Cover the dish tightly with tinfoil. This step is crucial as it allows the potatoes to steam a bit first, ensuring they become tender throughout before we focus on crisping the exterior.

Add remaining cheese:

After 20 minutes, carefully remove the tinfoil from the hot dish. The potatoes should be starting to become tender. Sprinkle the remaining parmesan cheese evenly across the top of the potatoes.

Final uncovered bake:

Return the uncovered dish to the oven for another 20 minutes. This uncovered baking time allows moisture to escape, resulting in that perfect crispy exterior while the parmesan forms a golden crust.

Garnish and serve:

Remove the finished potatoes from the oven and sprinkle with freshly chopped parsley. Serve immediately while hot and crispy for the best texture and flavor experience.

Garlic Parmesan Roasted Potatoes

You Must Know

  • These potatoes can be prepped ahead and refrigerated until ready to bake
  • The two-stage baking process ensures perfectly tender centers with crispy exteriors
  • Adding parmesan in two stages creates layers of cheesy flavor throughout
  • Red potatoes hold their shape better than russet potatoes in this recipe

My favorite part of this recipe is the moment you pull back the foil for the second half of baking. The aroma of garlic and oregano fills the kitchen, and everyone starts wandering in to ask when dinner will be ready. It reminds me of Sunday dinners at my grandmother’s house where the smell of roasting potatoes always signaled a special meal.

Best Potato Varieties

While this recipe calls for red potatoes, several other varieties work beautifully. Yukon golds offer a naturally buttery flavor that complements the parmesan wonderfully. Fingerling potatoes create an elegant presentation perfect for dinner parties. Whatever variety you choose, look for firm potatoes without green spots or sprouts, and try to select ones of similar size for even cooking.

Make Ahead Options

These roasted potatoes can be partially prepared ahead of time to make meal prep easier. You can clean and quarter the potatoes up to 24 hours in advance, storing them submerged in cold water in the refrigerator to prevent browning. The seasoning mixture can also be prepared ahead and stored separately. When ready to cook, drain and thoroughly dry the potatoes before continuing with the recipe as written.

Serving Suggestions

These garlic parmesan potatoes shine alongside nearly any protein. Pair them with a simple roasted chicken for a classic comfort meal, or serve alongside a grilled steak for an elevated dinner. They also work beautifully with fish, particularly salmon or cod. For a vegetarian option, serve them with a hearty salad and some roasted vegetables for a satisfying meatless meal that doesn’t sacrifice flavor.

Flavor Variations

The basic recipe serves as an excellent template for countless variations. Try adding rosemary and thyme in place of oregano for a different herb profile. For a spicy kick, incorporate red pepper flakes or a pinch of cayenne. Smoked paprika adds depth and a subtle smokiness. You can also experiment with different cheeses alongside or in place of parmesan. Pecorino Romano offers a sharper flavor, while a sprinkle of mozzarella in the final baking stage creates delicious cheese pulls.

Pro Tips

  • Quarter potatoes into similar sized pieces to ensure even cooking throughout
  • Pat potatoes completely dry after washing to achieve maximum crispiness
  • Allow the casserole dish to heat in the oven while it preheats for extra crispy bottoms
  • For an ultra golden top, broil for the final 2 minutes but watch carefully to prevent burning
Garlic Parmesan Roasted Potatoes

Frequently Asked Questions

→ What type of potatoes work best?

Red potatoes work best for their natural sweetness and firm texture, which roasts to a perfect crisp and tender balance.

→ How do I ensure the potatoes are crispy?

Be sure to toss the potatoes thoroughly in olive oil and roast them on high heat, uncovered, for the right amount of time. Adding parmesan at different stages helps enhance the texture.

→ Can I use fresh garlic instead of minced garlic?

Yes, freshly minced garlic works great. It will enhance the flavor and aroma even more.

→ Can I prepare this dish ahead of time?

While it’s best served fresh, you can prep the potatoes and seasoning ahead of time, then roast them just before serving for the best texture.→ What substitutions can I make for parsley?

You can use fresh herbs like chives, thyme, or rosemary as a garnish for similar freshness and flavor.

→ What pairs well with these roasted potatoes?

These potatoes are excellent with roasted chicken, grilled steak, salmon, or even a fresh green salad for a lighter pairing.

Garlic Parmesan Roasted Potatoes

Serves: 10 Prep Time: 5 minutes Cooking Time: 29 minutes 29 minutes
Nutrition facts: 200 calories 20 grams fat
Rating: 5.0/5
( 1 voted )
Pin
Print

Ingredients

 48 ounces red potatoes, quartered
 1/4 cup olive oil
 3 teaspoons minced garlic (about 3 cloves)
 1 teaspoon dried oregano
 1 teaspoon salt
 1 teaspoon black pepper
 1/2 cup grated Parmesan cheese
 Chopped parsley (for garnish)

Instructions

Preheat the oven to 400°F.

In a large bowl, combine the quartered red potatoes, olive oil, minced garlic, dried oregano, salt, and black pepper. Toss well to coat evenly.

Add half of the grated Parmesan cheese and briefly toss the mixture again before transferring to a casserole dish.

Cover the casserole dish with tin foil and bake in the preheated oven for 20 minutes.

Remove the tin foil, sprinkle the remaining Parmesan cheese over the potatoes, and return the dish to the oven, uncovered, for an additional 20 minutes.

Remove the potatoes from the oven and serve with freshly chopped parsley for garnish.

Notes

  • 3-quart casserole dish or 9x13 casserole dish
  • Tin foil
  • Mixing bowl

Please check ingredients for potential allergens and consult a health professional if in doubt.

It is important to consider this information as approximate and not to use it as definitive health advice.

0 comments
0 FacebookTwitterPinterestLinkedin
Featured SidesSide Dishes

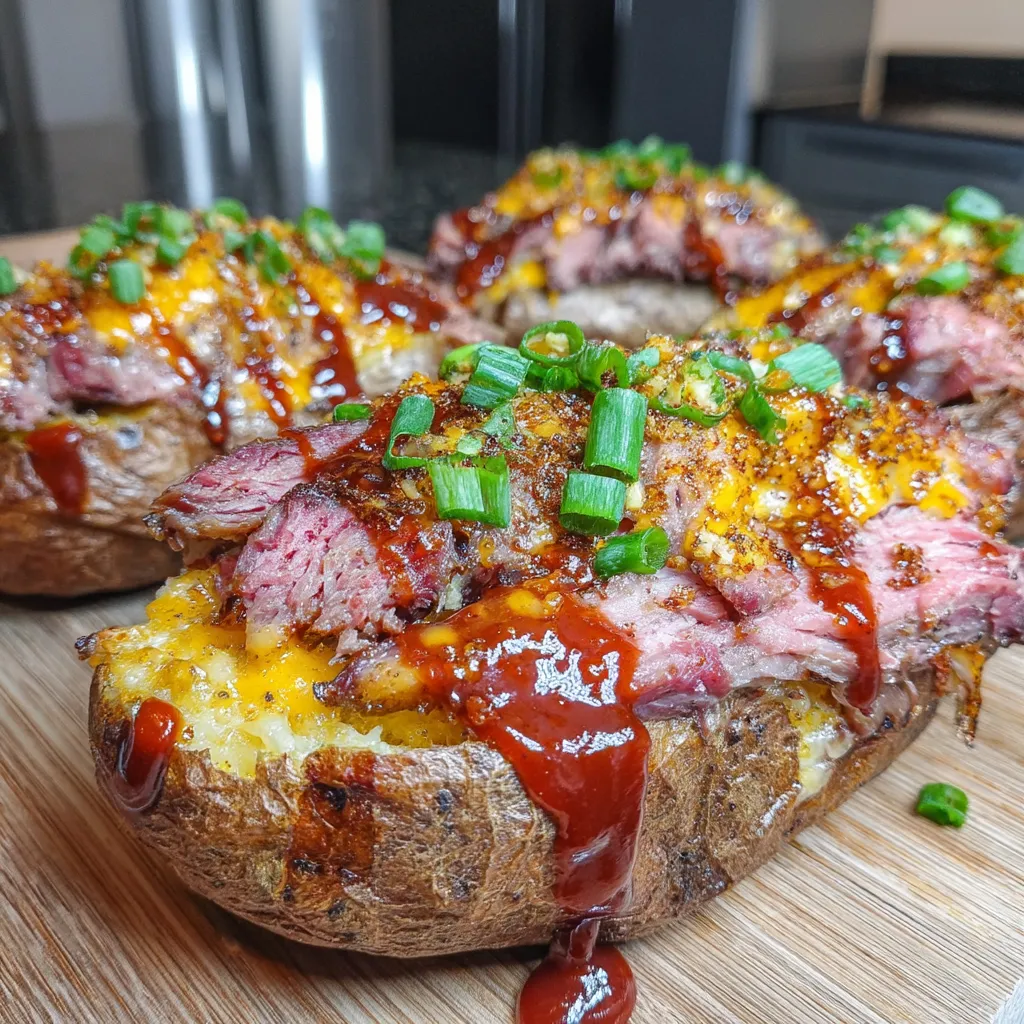
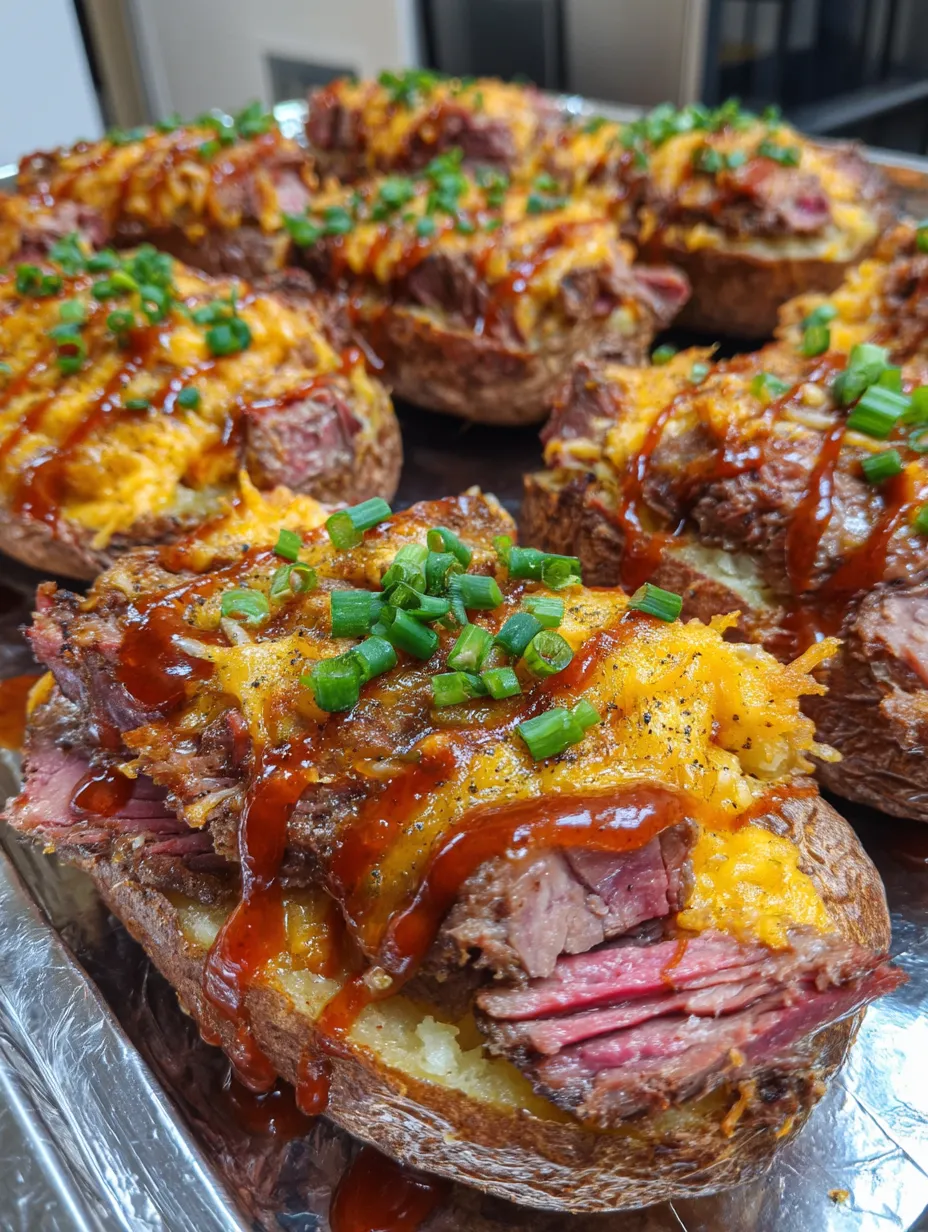
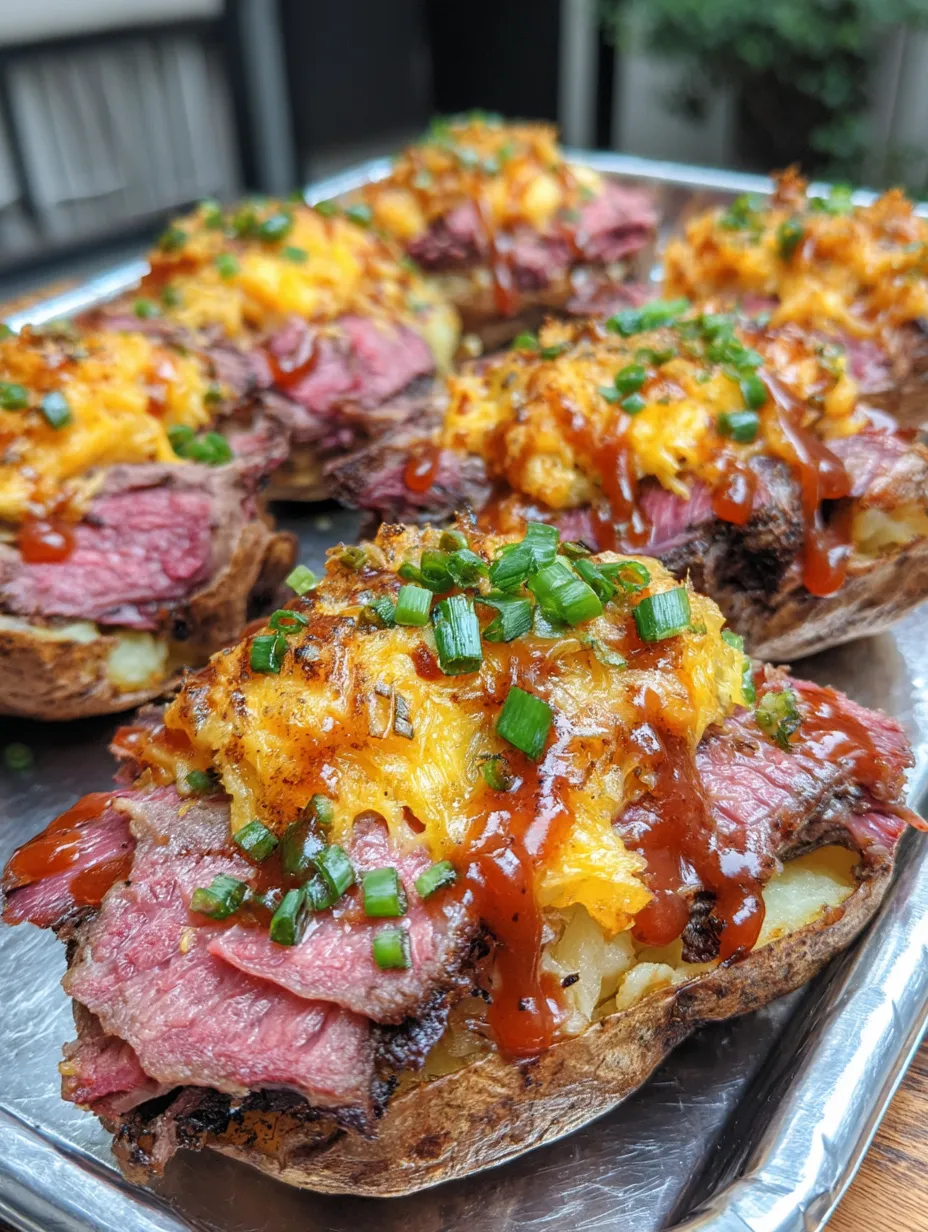
Brisket Loaded Twice Baked Potatoes

by myphillyconnection May 23, 2026
written by myphillyconnection

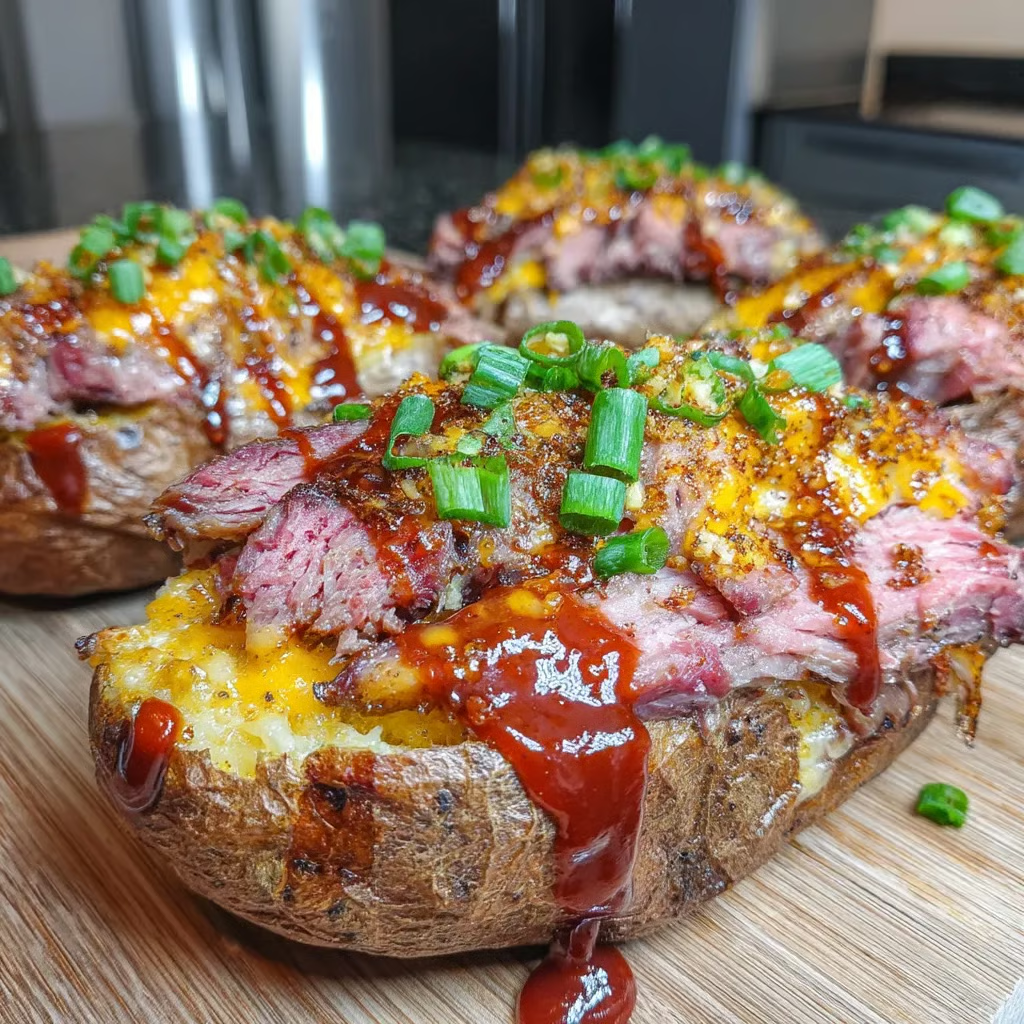
Smoke a brisket overnight. Bake potatoes, scoop out centers and mix with butter, sour cream, cheese and seasonings. Refill and bake again. Top with chopped brisket, BBQ sauce, crispy onions and jalapeños.

Brisket Loaded Twice Baked Potatoes

Got a Sunday family dinner that needs to blow everyone away? These loaded potatoes crammed with choky brisket bits practically scream “I spent all day making this just for you.” Truth is, they take some time but most of it’s hands off while that brisket does its thing in the smoker. I started making these four years ago after my brother in law brought over half a smoked brisket and we couldn’t possibly eat it all. Now the family actually gets more excited about these potatoes than the brisket itself.

Why You’ll Love This Recipe

  • Gets you maximum credit for your smoking efforts with that perfect crispy outside, fluffy inside potato texture
  • Tastes even better the next day when flavors meld together if any actually survive the first round
  • Creates that “I could sell this at a restaurant” moment when you bring them to the table
  • Makes people think you slaved all day when really the smoker did most of the work

Last summer I made these for my neighbor who swore he didn’t like twice baked potatoes. Caught him in my kitchen at midnight raiding the fridge for the last one. His wife texted me the next morning with just an eye roll emoji. Now I make an extra batch whenever I know they’re coming over.

‘Stranger Things’ Star Charlie Heaton Takes on Role as Tommy Shelby’s Son in ‘Peaky Blinders’ Sequel

Magic Ingredients

  • Brisket Point: The fattier end of the brisket gives you those melt in your mouth bits that burst with flavor—don’t even think about using the leaner flat section for this
  • Russets: Their starchy insides whip up fluffy and their sturdy skins hold everything together—those thin skinned varieties just collapse under all this goodness
  • Full Fat Sour Cream: Brings that tangy richness that balances the smoke—no light versions here or you’ll miss that velvety mouthfeel
  • Real Butter: None of that “spread” nonsense—we need the real deal to bring everything together
  • Fresh Jalapeños: The fresh pop of heat cuts through all that richness—sometimes I leave some seeds in when cooking for adults only

My dad taught me about brisket smoking when I was ten, standing beside his ancient offset smoker that leaked smoke from every seam. He’d wake up every hour overnight to check the temperature, something I thought was crazy until I tasted the results. These potatoes are my way of honoring that tradition while making it my own.

Brisket Loaded Twice Baked Potatoes

Step-by-Step Instructions

Overnight Brisket

Slather that whole brisket with yellow mustard—don’t worry, you won’t taste it later, it just helps the seasoning stick. Cover every inch with Thundering Longhorn seasoning, working it into all the crevices. Get your smoker steady at 215°F with a water pan for moisture. Throw the meat on and go to bed. The overnight cooking isn’t just convenience—it’s when all that magical collagen breakdown happens.

Morning Wrap

Checking on the brisket is my favorite morning ritual. When it hits 165°F inside, it’s wrapping time. Lay out butcher paper not foil, spread some beef tallow, add the brisket, then more tallow on top. Wrap it tight but not strangling and back on the smoker it goes at 250°F. The paper lets it breathe while the tallow bastes everything.

Potato Prep

Stab those russets all over with a fork—not just a couple pokes, really go at them. Trust me, exploded potato all over your smoker is a cleaning nightmare I’ve experienced firsthand. Coat them with beef tallow regular oil works but isn’t nearly as good and kosher salt, then wrap in foil. The salted skin gets just crispy enough to hold everything while staying edible.

The Mix

The secret’s in how you mix the filling. Scoop out the potato guts leaving just enough shell for structure. Add butter while it’s still hot so it melts completely. The sour cream goes in next, then cheese, then everything else. Mix it just until combined—overdo it and you’ll get wallpaper paste instead of fluffy potatoes. I learned this the hard way at my first dinner party.

Finishing Touches

That second bake caramelizes the top and makes those crispy bits everyone fights over. Then comes the layering—crispy onions on the bottom they get soggy if you put them on top, chopped brisket next so it nestles into the potato, BBQ sauce drizzled over, then fresh jalapeños. Each layer plays its part in the perfect bite.

You Must Know

  • The brisket needs proper resting time—rushing this step means dry meat
  • Different sized potatoes cook at different rates—match them up for even cooking
  • The filling tastes even better when you make it a day ahead and let the flavors meld

My first attempt at these was a disaster—overcooked potatoes that collapsed when I tried to stuff them and brisket that wasn’t chopped small enough to distribute evenly. We ate it anyway, laughing at the ugly mess on our plates. Four years and countless iterations later, they’ve become the most requested item at family gatherings. My uncle even faked a birthday to get me to make them again.

Perfect Company

These potatoes need little else, but a simple side of tangy coleslaw provides the perfect contrast to cut through the richness. Skip the mayo heavy versions and go with something vinegar based that brings acidity to the party. A cold beer—something dark and malty—completes the picture perfectly. For dessert, keep it simple with fresh seasonal berries topped with just a touch of whipped cream.

Tasty Twists

When brisket isn’t an option, pulled pork makes an incredible substitute—the tangier sauce pairs beautifully with the creamy potatoes. For a quicker version when you’re craving these midweek, rotisserie chicken tossed with a little liquid smoke and BBQ sauce creates a surprising approximation. Vegetarians at your table might enjoy smoked mushrooms instead—portobellos develop an amazing meaty quality when properly smoked.

Keeping Fresh

These potatoes actually reheat beautifully if you do it right. Store them without the toppings, covered in the fridge for up to three days. Reheat in a 350°F oven until hot through the middle—microwaving makes them gummy. Add the toppings fresh after reheating. For meal prep, you can freeze the filled but unbaked potatoes wrapped individually, though the texture isn’t quite as perfect as fresh.

Brisket Loaded Twice Baked Potatoes

Smoke Secrets

  • Wood Choice: Oak gives reliable, medium smoke flavor, but adding a chunk of hickory creates deeper complexity
  • Temperature Truth: Never trust the thermometer built into your smoker—use a separate digital one for accuracy
  • Rest Importance: A proper rest in a cooler isn’t optional—it’s what separates amateur brisket from the stuff people dream about

I’ve made these potatoes for cookouts, football Sundays, and once for a neighborhood potluck where they disappeared faster than anything else on the table. What began as a way to use leftover brisket has become the reason I smoke brisket in the first place. My kids have started requesting them for birthday dinners, bypassing restaurant options for dad’s smoky, loaded potatoes. Sometimes the best family traditions start by accident—a random kitchen experiment that becomes the dish everyone talks about years later.

Frequently Asked Questions

→ Can I use leftover brisket instead of smoking a new one?Absolutely! This recipe is perfect for using leftover brisket. Just warm it slightly before chopping and adding to the potatoes. If you don’t have brisket, other smoked or braised meats like pulled pork or chuck roast work great too.

→ What can I substitute for Thundering Longhorn seasoning?Any good beef rub with salt, pepper, garlic, and some heat will work. Common substitutes include SPG (salt, pepper, garlic), Texas-style rub, or even a simple mix of 2 parts kosher salt, 1 part black pepper, and 1 part garlic powder.

→ Can I make these potatoes ahead of time?Yes! You can prepare the twice-baked potatoes up to the second baking stage, then refrigerate them covered for 1-2 days. When ready to serve, bake them until hot (about 25-30 minutes at 375°F), then add the toppings.

→ Can I cook the potatoes in the oven instead of a smoker? Definitely. Bake the potatoes in a 400°F oven for about 1 hour until tender. For the twice-baking step, use the same temperature. You’ll miss a bit of smoke flavor, but they’ll still be delicious.

→ What’s the best type of potato to use? are ideal for twice-baked potatoes because of their fluffy texture and sturdy skins. Select potatoes of similar size for even cooking, and look for ones without green spots or sprouts.

Brisket Loaded Twice Baked Potatoes

Serves: 6 Prep Time: 15 minutes Cooking Time: 45M 45M
Nutrition facts: 200 calories 20 grams fat
Rating: 5.0/5
( 1 voted )
Pin
Print

Ingredients

→ For the Brisket

 1 whole brisket (12-15 pounds), trimmed
 Yellow mustard (as needed for binder)
 Thundering Longhorn seasoning (or your favorite beef rub)
 Beef tallow for wrapping and potato coating

→ For the Twice Baked Potatoes

 6 large russet potatoes, washed and dried
 2/3 stick (about 5 tablespoons) unsalted butter, softened
 1 cup sour cream
 3 tablespoons hot sauce (like Franks or Tabasco)
 1 cup fresh scallions, chopped
 1 jalapeño, seeded and finely diced
 1 1/2 packages (about 6 cups) shredded cheddar cheese
 Potato Slayer seasoning or your favorite potato seasoning
 Kosher salt for potato skins

→ For the Toppings

 Crispy fried onion chips (store-bought)
 Chopped brisket (from the point section)
 Fresh jalapeños, diced for garnish

→ For the BBQ Sauce (Option 1)

 1 cup ketchup
 1/2 cup brown sugar
 1/2 cup pineapple preserves
 1/4 cup apple cider vinegar
 2 tablespoons Worcestershire sauce
 1 tablespoon molasses
 1 tablespoon honey
 2 teaspoons garlic powder
 2 teaspoons onion powder
 2 teaspoons kosher salt
 1 teaspoon black pepper
 2 teaspoons cayenne pepper (adjust to taste)

→ For the BBQ Sauce (Option 2)

 1 cup ketchup
 1/4 cup apple cider vinegar
 1/4 cup honey
 1/4 cup brown sugar
 2 tablespoons Worcestershire sauce
 2 teaspoons kosher salt
 2 teaspoons onion powder
 2 teaspoons garlic powder
 2 teaspoons smoked paprika
 2 teaspoons red pepper flakes
 1 teaspoon black pepper

Instructions

Start by trimming your brisket if needed. Apply a thin coating of yellow mustard all over as a binder - this helps the seasoning stick and won't leave any mustard flavor. Generously sprinkle Thundering Longhorn seasoning (or your favorite beef rub) over the entire surface, patting it gently to adhere.

Fire up your smoker to 215°F. Place a water pan inside for moisture, then position the brisket on a wire rack or grates above it. Close the lid and let it smoke overnight - this is where the magic happens! The slow cooking process allows the fat to render and the meat to become tender.

In the morning, check your brisket. Once it reaches an internal temperature of 165°F (this usually takes 8-10 hours, depending on size), it's time to wrap. Lay out a large piece of butcher paper and spread some beef tallow on it. Place the brisket on the paper, add more tallow on top, then wrap it tightly. Return it to the smoker and increase the temperature to 250°F. Continue smoking for several more hours until the brisket is probe tender in the thickest part (the point) - it should feel like pushing a knife through warm butter. This usually happens around 200-205°F internal temperature. Once tender, remove it from the smoker, keeping it wrapped. Place it in an aluminum pan, then into a cooler (with no ice). Seal the cooler and let the brisket rest for 2-3 hours - this critical step allows the juices to redistribute.

After the brisket has been resting for an hour, prep your potatoes. Use a fork to poke several holes in each one (this prevents them from exploding). Rub each potato generously with beef tallow, then sprinkle with kosher salt. Wrap each potato in foil and place them in your smoker or oven at 375°F.

Bake the potatoes until they're tender when pierced with a fork or probe thermometer, about 45-60 minutes depending on size. Remove them from the smoker or oven and let them rest for 20 minutes - they'll be too hot to handle immediately. Once potatoes are cool enough to handle, cut them open lengthwise and carefully scoop out the insides, leaving about 1/4 inch of potato attached to the skin to maintain structure. Place the scooped potato flesh in a large bowl. Add the softened butter, sour cream, 3/4 of the shredded cheese, chopped scallions, hot sauce, and Potato Slayer seasoning (or your favorite potato seasoning). Mix until well combined but still fluffy - don't overmix or they'll become gluey.

Spoon the filling back into the potato skins, mounding it slightly. Top each potato with the remaining shredded cheese. Return them to the smoker or oven at 375°F for 15-20 minutes, until the cheese is melted and the tops are slightly golden.

While the potatoes are baking, make your BBQ sauce. Choose one of the sauce recipes and combine all ingredients in a saucepan. Whisk over medium heat for 6-8 minutes until the sauce thickens slightly and all ingredients are well incorporated. Remove from heat and let cool slightly.

Unwrap your rested brisket. Slice the flat portion for other uses and finely chop the point section into small, bite-sized pieces for topping the potatoes. The point has more intramuscular fat, making it juicier and perfect for this application.

Remove the twice-baked potatoes from the smoker. Top each with a generous layer of crispy fried onion chips, then a hearty handful of the chopped brisket point. Drizzle your homemade BBQ sauce over everything, then garnish with fresh diced jalapeños for color and a kick of heat. Serve immediately while everything is hot and delicious.

Notes

  1. This recipe is perfect for using up leftover brisket - if you already have smoked brisket on hand, you can skip straight to the potato preparation steps.
  2. The beef tallow adds incredible flavor to both the brisket and potatoes. If you don't have tallow, you can substitute butter for the potatoes, but the flavor won't be quite the same.
  3. For an extra layer of flavor, try mixing some of the chopped brisket directly into the potato filling before the second bake.
  4. The wrapped brisket can be held in a cooler for up to 6 hours while still maintaining food-safe temperature, which gives you flexibility on timing the potatoes.


0 comments
0 FacebookTwitterPinterestLinkedin
CasserolesFeatured SidesSide Dishes

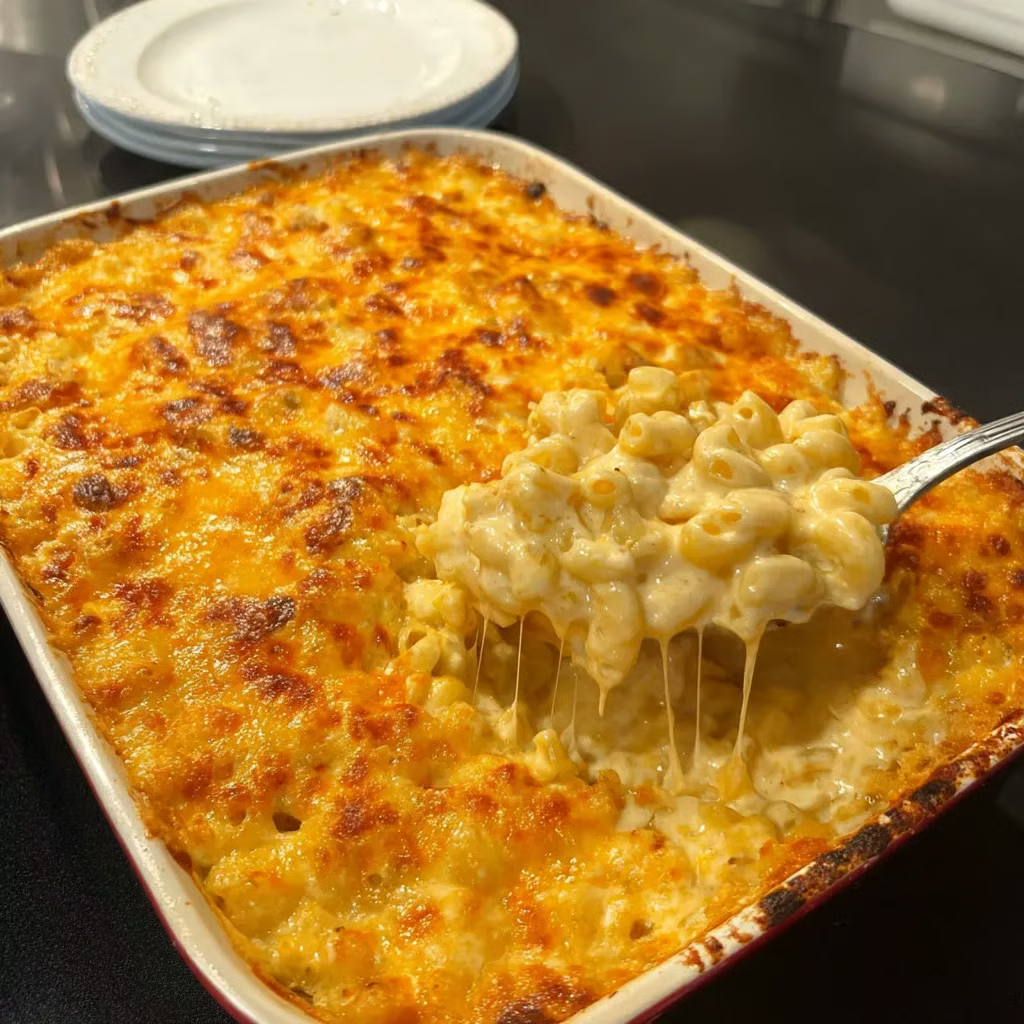
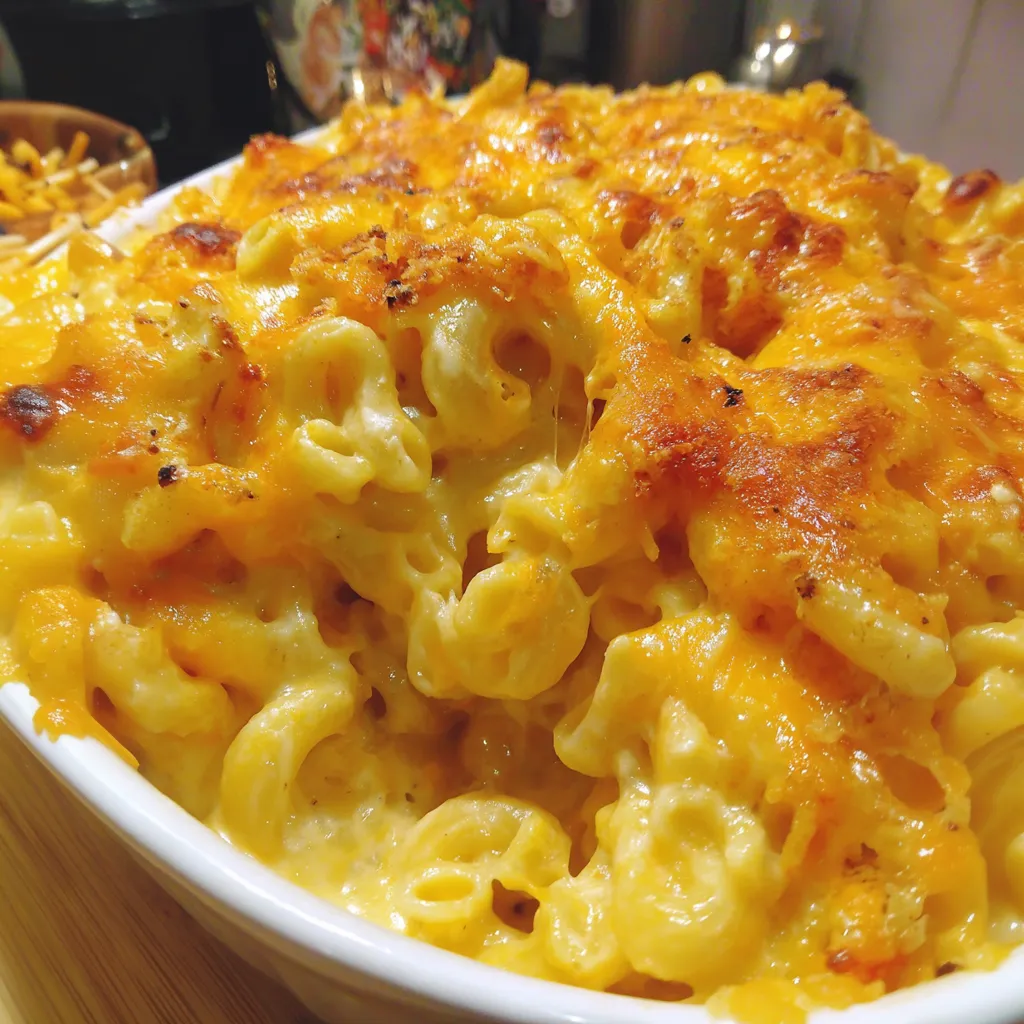
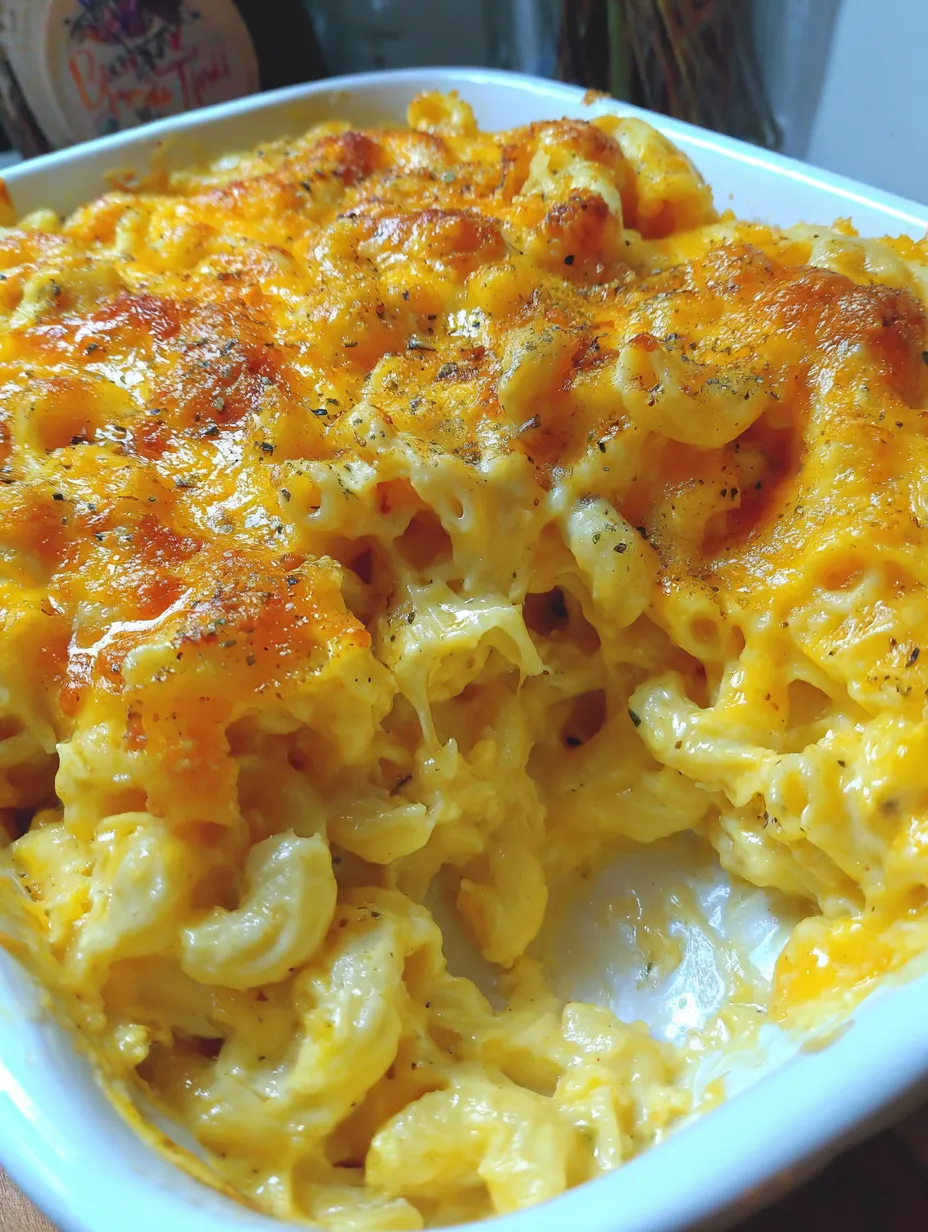
Southern Baked Mac and Cheese

by myphillyconnection May 23, 2026
written by myphillyconnection
Mind-Blowing Southern Baked Macaroni and Cheese

This Southern baked macaroni and cheese completely changed my understanding of what mac and cheese could be. We’re talking about a creamy, extra-saucy base loaded with five different cheeses, topped with a crispy, golden layer that’s basically cheese heaven. After years of making regular stovetop mac and cheese, I tried this recipe for a family reunion and watched grown adults literally fight over the last scoop. Now it’s become my signature dish that people specifically request whenever there’s a potluck or special occasion.

Why You’ll Love This

  • Five different cheeses – Each one brings something special to create the ultimate flavor combination
  • Extra saucy base – Way more cheese sauce than pasta, which is exactly how it should be
  • Crispy cheese topping – That golden, bubbly top layer is pure magic
  • Feeds a crowd – One pan serves 12 people, perfect for gatherings

My husband’s grandmother, who’s been making mac and cheese for seventy years, took one bite of this and declared it better than hers. Coming from a woman who’s never admitted anyone else’s cooking was superior, that was basically a miracle. Now she asks me to bring this to every family dinner instead of making her own.

‘Stranger Things’ Star Charlie Heaton Takes on Role as Tommy Shelby’s Son in ‘Peaky Blinders’ Sequel

What Makes It Special

  • Medium cheddar: Provides that classic mac and cheese flavor everyone expects
  • Colby Jack and mozzarella: Add creaminess and that perfect stretchy texture
  • Sharp and white cheddar: Bring complexity and depth to the cheese blend
  • Cream cheese: Makes everything incredibly smooth and rich
  • Heavy cream and half-and-half: Create that luxurious, restaurant-quality sauce
  • Secret seasonings: Mustard powder, paprika, and onion powder elevate the whole thing
Mind-Blowing Southern Baked Macaroni and Cheese

Making It Happen

Getting your setup ready

Before you start anything else, shred all your cheeses and set aside 1 cup each of medium cheddar, Colby Jack, and mozzarella for the top layer. Preheat your oven to 425°F and get a 9×13 casserole dish ready. Cook your pasta just slightly less than al dente, it’ll finish cooking in the oven, so you don’t want it mushy.

Creating the sauce base

In a large skillet, melt 5 tablespoons of butter over medium-high heat and sauté the minced garlic for about a minute until it smells amazing. Whisk in the flour and keep stirring until it turns golden, this creates the roux that’ll thicken your sauce. Slowly add the reserved pasta water, heavy cream, and half-and-half while whisking constantly to prevent lumps.

The cheese magic

Turn the heat down to low and start adding your cheeses one handful at a time, whisking constantly until each addition is completely melted before adding more. This takes patience, but it’s what creates that incredibly smooth sauce. Finish by whisking in the cream cheese and all your seasonings until everything’s perfectly combined.

Assembly and baking

Toss your cooked pasta with 2 tablespoons of butter in your casserole dish, then pour that incredible cheese sauce over everything and mix well. Top with your reserved cheeses and bake for 10 minutes. Switch to broil for the last 5 minutes to get that perfect crispy, golden top layer.

You Must Know

  • Shred your own cheese – Pre-shredded cheese has anti-caking agents that prevent smooth melting
  • Add cheese gradually – Rushing this step creates a grainy, broken sauce
  • Don’t overcook the pasta – It continues cooking in the oven, so slightly underdone is perfect
  • Watch the broiling carefully – That crispy top can go from perfect to burnt in seconds

I learned the hard way that using pre-shredded cheese just doesn’t work for this recipe. My first attempt resulted in a grainy, weird texture that was nothing like the smooth, creamy sauce this recipe is supposed to create. Now I always shred fresh cheese and get perfect results every time.

Perfect Serving Ideas

This mac and cheese is rich enough to be a main dish, but it’s incredible alongside barbecue, fried chicken, or any Southern-style meal. A simple green salad or some steamed vegetables help balance out all that richness. For beverages, sweet tea is traditional, but honestly, cold beer or even wine works great too.

Making It Different

You can customize this by adding cooked bacon, ham, or lobster to make it even more special. Sometimes I throw in some jalapeños for heat, or use different cheese combinations based on what I have available. The base recipe is so good that almost any addition works well.

Make-Ahead Tips

This is perfect for entertaining because you can assemble everything up to the point of baking and refrigerate overnight. Just add an extra 10-15 minutes to the baking time if you’re starting from cold. The flavors actually get better after sitting, so it’s ideal for meal planning.

Mind-Blowing Southern Baked Macaroni and Cheese

Success Secrets

  • Room temperature ingredients melt better – Take your cheeses and cream cheese out ahead of time
  • Use a good-sized skillet – You need room to whisk without making a mess
  • Let it rest before serving – A few minutes of cooling helps it set up for cleaner slices

This Southern baked macaroni and cheese has become more than just a recipe in our house – it’s become a tradition. Every time I make it, I’m reminded why some dishes become legendary in families. The combination of multiple cheeses, that perfect creamy-to-crispy ratio, and those special seasonings creates something that’s way more than the sum of its parts. It’s the kind of comfort food that makes people feel loved and taken care of, which is really what good cooking is all about.

Frequently Asked Questions

→ Why do you use five different types of cheese? Each cheese brings something unique – sharp cheddar for tang, mozzarella for stretch, Colby Jack for creaminess. The blend creates incredible depth of flavor.

→ Can I make this ahead of time? You can assemble it and refrigerate for up to 24 hours before baking. Add 10-15 extra minutes to the baking time if starting from cold.

→ What if I don’t have all five types of cheese? You can substitute with similar cheeses, but try to use at least 3-4 different types for the best flavor complexity. Avoid pre-shredded if possible.

→ How do I prevent the cheese sauce from breaking? Keep heat low when adding cheese, add it gradually one handful at a time, and whisk constantly. Room temperature cheese melts more smoothly.

→ Can I freeze leftovers? Yes, but the texture may change slightly. Freeze for up to 3 months and reheat in the oven with a splash of milk to restore creaminess.

Southern Baked Mac and Cheese

Serves: 12 Prep Time: 25 minutes Cooking Time: 15M 15M
Nutrition facts: 200 calories 20 grams fat
Rating: 5.0/5
( 1 voted )
Pin
Print

Ingredients

→ Main ingredients

 1 pound pasta noodles (elbow or rotini preferred)
 7 tablespoons room temperature butter, divided
 4 garlic cloves, minced
 3 tablespoons all-purpose flour
 ½ cup reserved pasta water
 ½ cup heavy cream
 3½ cups half and half
 ¼ cup whipped cream cheese

→ Cheese blend

 12 oz medium cheddar cheese, shredded (reserve 1 cup for topping)
 8 oz Colby Jack cheese, shredded (reserve 1 cup for topping)
 8 oz mozzarella cheese, shredded (reserve 1 cup for topping)
 4 oz sharp cheddar cheese, shredded
 4 oz white cheddar cheese, shredded

→ Seasonings

 ½ teaspoon onion powder
 ½ teaspoon paprika
 ½ teaspoon mustard powder
 Salt to taste
 Black pepper to taste

Instructions

Preheat oven to 425°F. Shred all cheeses and set aside 1 cup each of medium cheddar, Colby Jack, and mozzarella for the crispy topping. Mince garlic and divide butter into portions.

Boil pasta until slightly less than al dente. Reserve ½ cup pasta water before draining. Pour drained pasta into a greased 9x13 casserole dish and toss with 2 tablespoons of butter.

In a large skillet over medium-high heat, melt the remaining 5 tablespoons of butter. Add minced garlic and sauté for 1 minute until fragrant.

Whisk in flour and continue stirring until golden, about 2 minutes. Gradually pour in reserved pasta water, heavy cream, and half and half, whisking constantly until thickened, about 4 minutes.

Reduce heat to low. Add the non-reserved cheeses one handful at a time, whisking until each addition is fully melted before adding more. Whisk in cream cheese, onion powder, paprika, and mustard powder until smooth.

Pour the cheese sauce over the buttered pasta and mix thoroughly. Top evenly with the reserved shredded cheeses for the crispy crust.

Bake for 10 minutes, then switch oven to broil and cook for an additional 5 minutes until the top is golden and crispy.

Remove from oven and let cool for 3-5 minutes before serving. This allows the sauce to set up slightly for easier serving.

Notes

  1. This recipe is perfect for using up leftover brisket - if you already have smoked brisket on hand, you can skip straight to the potato preparation steps.
  2. The beef tallow adds incredible flavor to both the brisket and potatoes. If you don't have tallow, you can substitute butter for the potatoes, but the flavor won't be quite the same.
  3. For an extra layer of flavor, try mixing some of the chopped brisket directly into the potato filling before the second bake.
  4. The wrapped brisket can be held in a cooler for up to 6 hours while still maintaining food-safe temperature, which gives you flexibility on timing the potatoes.

    0 comments
    0 FacebookTwitterPinterestLinkedin
    Featured SidesSide Dishes

    Sweet Potato Casserole with Marshmallows

    by myphillyconnection May 22, 2026
    written by myphillyconnection

    Roast sweet potatoes until tender, mash with butter, maple syrup, and cinnamon, spread in a baking dish, cover with mini marshmallows, and bake until golden.

    Sweet Potato Casserole with Marshmallows
    Sweet Potato Casserole with Marshmallows | recipesbyclare.com

    Sweet potato casserole with marshmallows is one of those holiday dishes that sparks intense debates about whether it’s a side dish or dessert. You roast sweet potatoes until they’re soft, mash them with butter, maple syrup, and cinnamon, spread everything in a baking dish, cover the top with mini marshmallows, and bake until those marshmallows get golden and toasted. The whole thing is ridiculously sweet and probably has no business being called a vegetable side, but it shows up on every Thanksgiving table anyway because tradition demands it.

    Why This Casserole Works

    • **Roasting** the sweet potatoes instead of boiling them concentrates their natural sweetness and prevents them from getting waterlogged.
    • **Maple syrup** adds subtle complexity beyond just plain sugar, making the flavor more sophisticated.
    • **Mini marshmallows** toast more evenly than large ones, ensuring a uniform golden topping.
    • The simple ingredient list means you can throw this together using mostly pantry staples.

    My uncle Jim claims he doesn’t like sweet foods and refuses dessert, but every single Thanksgiving, I watch him go back for seconds of this sweet potato casserole, piling it on his plate next to the turkey like it’s a normal savory side dish. Now it’s become this running joke where we all wait to see how much he’ll eat before someone mentions the sugar content and he pretends to be offended.

    Master Your Ingredients

    • Sweet potatoes: Five to six large ones (Russet variety, do not use yams) for a 9×13 inch baking dish.
    • Maple syrup: A third of a cup adds sweetness and distinctive maple flavor.
    • Butter: One full stick, melted into the mashed sweet potatoes for richness and creamy texture.
    • Ground cinnamon: One tablespoon brings warmth and spice.
    • Mini marshmallows: One 10-ounce bag for the classic toasted topping.
    • Salt: Just a pinch to balance all the sweetness and enhance the potato flavor.
    Sweet Potato Casserole with Marshmallows
    Sweet Potato Casserole with Marshmallows

    Making This Casserole (Holiday Prep)

    Roasting the potatoes: Preheat oven to 400 degrees Fahrenheit. Scrub potatoes, pat dry, and place on a parchment-lined baking sheet (do not peel yet). **Roast for 50 to 75 minutes** until easily pierced with a fork.

    Mashing the filling: Let potatoes cool slightly (10-15 minutes). Peel off the skins and place the flesh in a large mixing bowl. Add maple syrup, melted butter, cinnamon, and salt. Mash to your preferred consistency (smooth or slightly chunky).

    Assembling in dish: Spray a 9×13 inch dish well. Spread the mashed sweet potato mixture into an even, level layer. Scatter mini marshmallows uniformly across the top, covering everything edge to edge. **Gently press down** so they sink slightly into the filling.

    Baking and toasting: Bake at 400 degrees Fahrenheit. **Set a timer for 10 minutes** and begin watching closely. Continue baking for an additional 2 to 10 minutes until the marshmallows are gorgeously golden brown. Remove immediately to prevent burning.

    Resting:Let the casserole rest for about **5 minutes** before serving so it sets up slightly and isn’t molten hot.

    You Must Know

    • Roasting sweet potatoes prevents the filling from becoming watery and runny.
    • **Watching the marshmallows closely** (especially after the 10-minute mark) is crucial; they go from golden to burnt incredibly fast.
    • Letting the casserole **rest** prevents the filling from being soupy when scooped.
    • The **pinch of salt** balances the sweetness and enhances the potato flavor.
    • Mini marshmallows toast more uniformly than large marshmallows.

    I learned about the marshmallow burning situation when I got distracted helping someone in another room during that final baking step. The marshmallows had gone from golden to charcoal in literally no time, and the smell of burnt sugar took hours to leave the house. Now I stand in front of the oven watching those marshmallows like a hawk.

    Different Ways to Make It

    • Add a **pecan streusel topping** instead of or in addition to marshmallows for crunch and nutty flavor.
    • Use **brown sugar** instead of maple syrup for a more traditional molasses sweetness.
    • Mix in some **vanilla extract** for extra warmth and depth.
    • Add **orange zest** to the filling for bright citrus notes.
    • Use **coconut milk** instead of butter for a dairy-free version.

    Keeping and Reheating

    • The casserole keeps in the refrigerator for up to 5 days. The marshmallows will deflate and get sticky.
    • Reheat the whole dish covered with foil in a **350-degree oven** for about 20 minutes.
    • The sweet potato filling can be **made ahead** and stored in the fridge for up to 2 days before assembling and baking.
    • **Do not add the marshmallows until right before baking** or they will dissolve into the filling.
    Sweet Potato Casserole with Marshmallows
    Sweet Potato Casserole with Marshmallows

    Kitchen Secrets

    • **Pierce the sweet potatoes** before roasting to prevent them from exploding in the oven.
    • Don’t skip the butter, as it creates the essential creamy texture.
    • If your marshmallows are browning too fast, cover the dish loosely with foil and continue baking until the casserole is heated through.

    The simplicity is what makes it work—no fancy ingredients or complicated techniques, just sweet potatoes mashed with butter and syrup then topped with marshmallows like people have been doing for generations. The nostalgic factor makes this special beyond just the taste, connecting everyone at the table to holiday memories and family traditions.

    Frequently Asked Questions

    → Can I use canned sweet potatoes instead? You can, but fresh tastes way better. If you do use canned, drain them really well and skip the roasting step. You’ll need about 3-4 cans.

    → Why are my marshmallows burning? Marshmallows toast super fast. Check them every couple minutes after the 10 minute mark. Some ovens run hot and will toast them in 8 minutes.

    → Can I make this ahead of time? Yes! Make the sweet potato mixture up to 2 days ahead and keep it covered in the fridge. Add the marshmallows and bake right before serving.

    → What if I don’t like marshmallows? Try a pecan streusel topping instead. Mix chopped pecans with brown sugar, flour, and melted butter, then sprinkle it on top before baking.

    → Can I use regular sized marshmallows? Sure, but mini marshmallows cover the top more evenly. If using regular ones, cut them in half or just space them out across the top.

    → How do I know when the sweet potatoes are done roasting? They should be really soft when you poke them with a fork. The skin might look wrinkled and some syrup might leak out. That’s perfect.

    Sweet Potato Casserole with Marshmallows

    Serves: 8 Prep Time: 15 minutes Cooking Time: 70M 70M
    Nutrition facts: 200 calories 20 grams fat
    Rating: 5.0/5
    ( 1 voted )
    Pin
    Print

    Ingredients

    → For the Sweet Potato Base

     5 to 6 medium sweet potatoes
     ⅓ cup maple syrup
     1 stick butter, melted (8 tbsp)
     1 tbsp cinnamon
     Pinch of salt

    → For the Topping

     10 oz bag mini marshmallows

    Instructions

    Turn your oven to 400 degrees and let it preheat while you get the sweet potatoes ready.

    Line a baking dish with parchment paper and place your sweet potatoes on it. Slide them into the oven and roast for a full hour until they're soft all the way through.

    Let the potatoes cool down enough to handle, then peel off the skins. Put the potato flesh into a large bowl and add your maple syrup, melted butter, cinnamon, and a pinch of salt. Mash everything together until it's as smooth or chunky as you like it.

    Spray a 9 by 13 inch baking dish with cooking spray. Scoop the sweet potato mixture into the dish and spread it out evenly so the top is nice and flat.

    Pour the entire bag of mini marshmallows over the top. Press them down gently into the sweet potato mixture so they stick.

    Put the dish on the middle rack of your oven and bake for 10 to 20 minutes. Watch it closely because marshmallows can burn fast. You want them golden and toasted, not charred.

    Take it out when the marshmallows look perfect. Let the casserole cool for a few minutes before serving so nobody burns their mouth.

    Notes

    1. Every oven is different with marshmallows, so stay close during that final bake. They can go from perfect to burnt in less than a minute.
    2. You can make the sweet potato base a day ahead and keep it in the fridge. Just add the marshmallows right before baking.
    3. If you like a crunchier topping, some people add chopped pecans along with the marshmallows.
    4. This is a holiday favorite that works great for Thanksgiving dinner.

    0 comments
    0 FacebookTwitterPinterestLinkedin
    30 Minute MealsChicken Meals

    Mexican Chicken With Cheese Sauce

    by myphillyconnection March 24, 2026
    written by myphillyconnection

    A perfectly seasoned chicken breast dripping with homemade cheese sauce changed my weeknight dinner game forever. This Mexican-inspired dish brings restaurant flavor right to your kitchen table, and the best part? It takes less time than scrolling through your delivery apps. The combination of warm spices and creamy cheese sauce creates something truly magical.

    Why You’ll Love This Recipe

    • Creates restaurant-worthy chicken without leaving home
    • Takes just 25 minutes from start to finish
    • Uses spices you probably already have
    • Makes enough sauce to drizzle over everything
    • Perfect for meal prep and leftovers
    • Lets you control the heat level

    Last night, I served this to my neighbor who swears she can’t cook. By the end of dinner, she was taking pictures of my spice blend. There’s something about that cheese sauce that makes everyone reach for seconds.

    The Forgotten Medieval Dessert

    Essential Ingredients

    • Chicken breasts: Should be evenly thin-sliced
    • Fresh spices: Make all the difference
    • Real butter: Creates sauce magic
    • Sharp cheddar: Brings the best flavor
    • Whole milk: Makes the sauce silky
    • Fresh garlic powder: Adds depth
    • Paprika: Brings color and warmth
    • Cumin: Adds that Mexican soul
    Mexican Chicken With Cheese Sauce Recipe
    Mexican Chicken With Cheese Sauce Recipe

    Detailed Instructions

    Seasoning Symphony

    Start by mixing your spice blend – this is where the magic begins. Each spice plays its part in creating layers of flavor that’ll make your taste buds dance.

    Chicken Perfection

    Drizzle those chicken breasts with olive oil, then massage in your spice blend. Don’t be shy – every bite should be fully seasoned. Think of it as giving your chicken a warm, flavorful blanket.

    Sauce Magic

    While your chicken bakes, create that velvety cheese sauce. Start with a butter-flour base, slowly add milk, then watch as your cheese melts into liquid gold. Keep whisking – smooth sauce is your goal.

    Final Touch

    Let your chicken rest briefly before slicing, then drizzle generously with that gorgeous cheese sauce. A sprinkle of fresh herbs makes everything look and taste even better.

    You Must Know

    • Room temperature milk makes smoother sauce
    • Fresh-grated cheese melts better than pre-shredded
    • Don’t overcrowd your baking pan
    • Let the chicken rest before cutting

    My family requests this dish weekly now. The way the spices form a perfect crust on the chicken while the cheese sauce brings everything together – it’s pure comfort food magic.

    Perfect Pairings

    Around here, we love serving this over cilantro-lime rice – it soaks up that cheese sauce beautifully. A side of black beans and corn makes it feel like a real Mexican feast. Sometimes I throw together quick-pickled red onions for brightness, or slice up some avocado when they’re perfectly ripe. On busy nights, warmed tortillas work great for scooping up every last bit of sauce.

    Make It Your Own

    The beauty of this recipe lies in its flexibility. Sometimes I add a pinch more cayenne when I’m craving heat, or swap the cheddar for pepper jack cheese. My sister makes hers with chicken thighs instead of breasts. During summer, I love topping it with fresh pico de gallo. For a lower-carb version, serve it over cauliflower rice or roasted vegetables.

    Keep It Fresh

    This chicken stays juicy in the fridge for about three days. The cheese sauce can be tricky to store – it’s best made fresh, but if you need to save it, reheat gently with a splash of milk while whisking. I often make extra spice blend to keep in a jar – it’s great on roasted potatoes or grilled vegetables too.

    Kitchen Wisdom

    • Thin chicken breasts cook more evenly
    • Don’t walk away from your cheese sauce – it needs constant attention
    • Check chicken temperature at the thickest part
    • Keep whisking that sauce until it’s silky smooth

    The first time I made this, my kitchen smelled like my favorite Mexican restaurant. Now it’s become our Monday night tradition – something to look forward to at the start of each week.

    Spice Level Control

    You’re in charge of the heat here. Start with less cayenne and crushed red pepper if you’re unsure, then adjust next time. My kids prefer it milder, while my husband adds extra hot sauce to his portion. That’s the beauty of cooking at home – everyone gets it just how they like it.

    Easy Mexican Chicken With Cheese Sauce
    Easy Mexican Chicken With Cheese Sauce

    Chef’s Helpful Tips

    • Toast your spices in a dry pan before mixing for extra flavor
    • Use block cheese and grate it yourself – it really makes a difference
    • Let sauce cool slightly before serving – it’ll thicken a bit
    • Keep some extra warm milk nearby while making the sauce

    This recipe reminds me of the first time I tried Mexican food beyond tacos. It taught me that simple ingredients, treated with respect and paired with a great sauce, can create something truly special. Whether you’re cooking for family or entertaining friends, this dish never fails to impress.

    Frequently Asked Questions

    → Why use block cheese instead of pre-shredded? Freshly shredded block cheese melts better as it doesn’t contain anti-caking agents found in pre-shredded cheese.

    → Can I adjust the spice level? Yes, adjust the amount of cayenne and red pepper flakes to control heat.

    → What can I serve this with? Rice, quinoa, or any grain works well. Also great with tortillas or vegetables.

    → Can I make the sauce ahead? Best made fresh, but can be reheated gently with a splash of milk if needed.

    → Can I use chicken thighs? Yes, but cooking time may need to be adjusted for thicker cuts.

    Mexican Chicken With Cheese Sauce

    Serves: 6 Prep Time: 10 minutes Cooking Time: 15 minutes 15 minutes
    Nutrition facts: 200 calories 20 grams fat
    Rating: 5.0/5
    ( 1 voted )
    Pin
    Print

    Ingredients

     For Chicken

     1½ lbs. thin sliced, skinless + boneless chicken breast (about 6 breasts)
     1 teaspoon chili powder
     1 teaspoon garlic powder
     1 teaspoon onion powder
     ½ teaspoon crushed red pepper flakes
     ½ teaspoon dried oregano
     1½ teaspoons paprika
     1½ teaspoons ground cumin
     ¼ teaspoon salt
     ¼ teaspoon black pepper
     Olive oil

    → For Cheese Sauce

     2 tablespoons all purpose flour
     2 tablespoons butter
     1 cup milk
     ¼ teaspoon salt
     ⅛ teaspoon cayenne pepper
     ¼ teaspoon paprika
     1 cup extra sharp cheddar cheese, freshly shredded

    → Garnish

     Fresh chopped parsley or cilantro (optional)

    Instructions

    Preheat oven to 425°. Line a large baking pan with parchment paper or foil.

    Mix together all of your seasonings together for chicken in a small bowl. Place chicken breasts on lined baking sheet. Drizzle some olive oil over each breast, and rub around on each side. Take your mixed seasonings and sprinkle all over chicken breasts, making sure to rub on each sides.

    Bake in preheated oven for 15-18 minutes, or when chicken reaches internal temperature of 165°.

    While chicken is cooking, make your sauce by melting butter over medium heat in a small sauce pan. When butter is melted, add flour and whisk until smooth.

    Add in milk slowly, whisking constantly until nice and smooth. Add in your shredded cheese, and whisk constantly until smooth. Add in paprika and cayenne. Mix until well combined.

    Place chicken over grain of choice, drizzle with cheese sauce and garnish with fresh parsley if desired.

    Notes

    1. Use freshly shredded cheese for better melting.
    2. Can adjust spice levels to taste.
    3. Serve over any grain of choice.

    Tools You'll Need

    • Large baking pan
    • Parchment paper or foil
    • Small saucepan
    • Whisk

    0 comments
    0 FacebookTwitterPinterestLinkedin
    • 1
    • 2
    • 3
    • …
    • 11

    Search

    Follow Us

    279.6K Fans
    twitter
    instagram
    pinterest

    Recent Posts

    • Immune Boosting Vegetable Soup

      May 25, 2026
    • Creamy Crab Bisque

      May 25, 2026
    • Garlic Parmesan Pizza

      May 25, 2026
    • Green Bean Bundles

      May 24, 2026
    • Cheesy Scalloped Potatoes

      May 23, 2026
    • Garlic Parmesan Roasted Potatoes

      May 23, 2026
    • Brisket Loaded Twice Baked Potatoes

      May 23, 2026

    Categories

    • 30 Minute Meals (36)
    • Barbecue (2)
    • Beef Meals (11)
    • Breakfast & Pastries (15)
    • Casseroles (11)
    • Cheesesteak (2)
    • Chicken Meals (19)
    • Cultural Dishes (12)
    • Featured (8)
    • Featured Sides (5)
    • Fish Meals (6)
    • Fresh Baked Breads (2)
    • Main Dishes (7)
    • Other Meals (2)
    • Pasta (21)
    • Pizza (5)
    • Popular Recipes (9)
    • Pork Meals (8)
    • Seafood Meals (19)
    • Side Dishes (5)
    • Soups & Salads (14)
    • Turkey Meals (7)
    • Vegetarian (19)

    Popular Posts

    • 1

      Buddha Bowl with Tofu

      October 22, 2024
    • 2

      Creamy Tomato and Spinach Pasta

      February 15, 2026
    • 3

      Classic Spicy Barbecued Ribs

      October 20, 2021
    • 4

      Delicious Pasta Alla Norma

      October 20, 2021
    • 5

      Chicken Garlic Parmesan Pasta

      February 16, 2026

    About Me

    At MyPhillyConnection, we specialize in recipes for Philly favorites and lots of other popular dishes and cuisines.

    Phone: (215) 554-7326
    Email: info@myphillyconnection.com

    Useful Links

    • Beef Meals
    • Chicken Meals
    • Fish Meals
    • Recipes
    • Recipe Submission

    Breakfast Recipes

    • Immune Boosting Vegetable Soup

      May 25, 2026
    • Creamy Crab Bisque

      May 25, 2026

    Recent Posts

    • Immune Boosting Vegetable Soup

      May 25, 2026
    • Creamy Crab Bisque

      May 25, 2026
    • Facebook
    • Twitter
    • Instagram
    • Pinterest
    • Linkedin
    • Tiktok

    Copyright © 2026 - MyPhillyConnection / All Rights Reserved.

    Philadelphia Food Network and Recipes
    • Home
      • Main Website
    • Recipes
    • Meals
      • 30 Minute Meals
      • Beef Meals
      • Breakfast & Pastries
      • Chicken Meals
      • Fish Meals
      • Pork Meals
      • Seafood Meals
      • Turkey Meals
      • Vegan & Vegetarian Meals
      • Other Meals
    • Categories
      • Barbecue
      • Casseroles
      • Cheesesteak
      • Cultural Dishes
      • Desserts & Treats
      • Featured
      • Fresh Baked Breads
      • Grilling
      • Pasta
      • Pizza
      • Popular Recipes
      • Side Dishes
      • Soul Food
      • Soups & Salads
    • About Us
    • Contact Us
    • Submit Your Recipe
    Sign In

    Keep me signed in until I sign out

    Forgot your password?

    Do not have an account ? Register here

    Password Recovery

    A new password will be emailed to you.

    Have received a new password? Login here

    Register New Account

    I Agree to the Terms of Service and Privacy Policy

    Have an account? Login here