Philadelphia Food Network and Recipes
  • Home
    • Main Website
  • Recipes
  • Meals
    • 30 Minute Meals
    • Beef Meals
    • Breakfast & Pastries
    • Chicken Meals
    • Fish Meals
    • Pork Meals
    • Seafood Meals
    • Turkey Meals
    • Vegan & Vegetarian Meals
    • Other Meals
  • Categories
    • Barbecue
    • Casseroles
    • Cheesesteak
    • Cultural Dishes
    • Desserts & Treats
    • Featured
    • Fresh Baked Breads
    • Grilling
    • Pasta
    • Pizza
    • Popular Recipes
    • Side Dishes
    • Soul Food
    • Soups & Salads
  • About Us
  • Contact Us
  • Submit Your Recipe
Top Posts
Immune Boosting Vegetable Soup
Creamy Crab Bisque
Garlic Parmesan Pizza
Green Bean Bundles
Cheesy Scalloped Potatoes
Garlic Parmesan Roasted Potatoes
Brisket Loaded Twice Baked Potatoes
Southern Baked Mac and Cheese
Sweet Potato Casserole with Marshmallows
Mexican Chicken With Cheese Sauce
Philadelphia Food Network and Recipes
  • Home
    • Main Website
  • Recipes
  • Meals
    • 30 Minute Meals
    • Beef Meals
    • Breakfast & Pastries
    • Chicken Meals
    • Fish Meals
    • Pork Meals
    • Seafood Meals
    • Turkey Meals
    • Vegan & Vegetarian Meals
    • Other Meals
  • Categories
    • Barbecue
    • Casseroles
    • Cheesesteak
    • Cultural Dishes
    • Desserts & Treats
    • Featured
    • Fresh Baked Breads
    • Grilling
    • Pasta
    • Pizza
    • Popular Recipes
    • Side Dishes
    • Soul Food
    • Soups & Salads
  • About Us
  • Contact Us
  • Submit Your Recipe
Philadelphia Food Network and Recipes
  • Home
    • Main Website
  • Recipes
  • Meals
    • 30 Minute Meals
    • Beef Meals
    • Breakfast & Pastries
    • Chicken Meals
    • Fish Meals
    • Pork Meals
    • Seafood Meals
    • Turkey Meals
    • Vegan & Vegetarian Meals
    • Other Meals
  • Categories
    • Barbecue
    • Casseroles
    • Cheesesteak
    • Cultural Dishes
    • Desserts & Treats
    • Featured
    • Fresh Baked Breads
    • Grilling
    • Pasta
    • Pizza
    • Popular Recipes
    • Side Dishes
    • Soul Food
    • Soups & Salads
  • About Us
  • Contact Us
  • Submit Your Recipe
Copyright 2021 - All Right Reserved
Breakfast & PastriesCasserolesPork Meals

Biscuits and Gravy Casserole

by myphillyconnection February 28, 2026
written by myphillyconnection

This biscuits and gravy casserole transforms the beloved Southern breakfast classic into an impressive layered dish that feeds a crowd. It combines flaky store-bought biscuits with crumbled maple sausage, melted cheese, custard-soaked eggs, and a rich homemade gravy spiked with Cajun seasoning. The genius of the casserole format lies in how the biscuits absorb the egg mixture and gravy while puffing up into golden, savory perfection. Whether you’re hosting morning brunch or a special morning event, this 9×13 wonder delivers all the satisfaction of a diner favorite in a format that lets the host actually enjoy the morning.

Why You’ll Love This Recipe

  • The scratch-made Cajun gravy uses sausage drippings as a flavor foundation, ensuring no ‘fond’ goes to waste
  • Using refrigerated biscuits saves significant prep time while providing tender, flaky layers
  • One pan provides eight generous servings, eliminating the need to cook individual portions to order
  • Make-ahead friendly: components can be prepped the night before for easy morning assembly
  • A final drizzle of maple syrup creates a sophisticated sweet-savory profile that elevates the dish

I created this for a Christmas morning when I had twelve people to feed and didn’t want to spend the whole time at the stove while my kids opened presents. This casserole solved the problem, baking hands-off while we enjoyed coffee by the tree. My family now claims it tastes better than the traditional version because the flavors have time to meld in the oven. It has become a permanent fixture of our holiday traditions.

Master Your Ingredients

  • Maple Pork Sausage: One pound, crumbled. The maple notes provide a sweet contrast to the savory Cajun spices
  • Grands-Style Biscuits: One 16-ounce tube. These act as the structural base and absorb the egg custard
  • Cajun Seasoning: Two teaspoons. This is the ‘secret’ ingredient that adds warmth and complexity to the creamy gravy
  • Colby Jack Cheese: Two cups, shredded. Provides the gooey, melty interface between the meat and the eggs
  • Egg Custard: Six large eggs whisked with half and half for a rich, silky texture that sets the casserole
  • Whole Milk: Two cups for the gravy. Using whole milk ensures the sauce is thick enough to blanket the biscuits without pooling
Biscuits and Gravy Casserole

Building Your Breakfast Casserole

The Sausage and Gravy:

Brown the sausage in a skillet, then remove the meat but keep the drippings. Melt butter into the fat, whisk in flour to create a roux, and gradually add milk to form a thick, creamy gravy. Season heavily with Cajun spices, salt, and pepper.

The Base Layers:

Grease a 9×13 pan with butter. Separate the biscuits and press them flat into the bottom of the dish. Layer the browned sausage over the biscuits, followed by a generous layer of shredded Colby Jack.

The Custard and Bake:

Whisk the eggs and half and half, then pour evenly over the cheese. Top the entire dish with your prepared Cajun gravy. Bake at 350°F for 35–45 minutes until the center is set and the top is a deep golden brown. Let it rest for five minutes before slicing.

You Must Know

  • Do not wash the skillet after browning the sausage; those browned bits (fond) are essential for a flavorful gravy
  • Flattening the biscuits is vital; if left whole, they may remain doughy in the center
  • Pour the egg mixture slowly and ensure it reaches the edges so every bite has a consistent texture
  • The five-minute rest is mandatory—it allows the custard to finish setting so you get neat, square slices
  • Check for ‘jiggle’ in the center; if it moves like liquid, it needs another 5 minutes in the oven

While traditionalists might insist on from-scratch biscuits, the refrigerated variety is actually a structural advantage here. They are designed to expand and absorb moisture, making them the perfect sponge for the egg custard and gravy. This dish is about honoring the soul of Southern cooking while adapting to the pace of modern life.

Creative Variations

For a spicier kick, use ‘hot’ breakfast sausage and swap the Colby Jack for Pepper Jack cheese. If you prefer an earthy profile, use sage sausage and add sautéed mushrooms to the meat layer. For a ‘loaded’ version, sprinkle chopped green onions or crispy bacon bits over the gravy before serving.

Make-Ahead & Storage

You can prep the sausage, gravy, and egg mixture the night before. Store them in separate containers in the fridge. In the morning, simply assemble the layers and bake. Leftovers keep well in the refrigerator for up to three days and are best reheated in a 325°F oven to maintain the biscuit texture.

Biscuits and Gravy Casserole

Expert Kitchen Secrets

  • Use room-temperature eggs for a smoother custard that incorporates more easily with the half and half
  • If your hands are sticking to the dough while flattening the biscuits, dampen them slightly with water
  • A light drizzle of maple syrup right before eating bridges the gap between the spicy Cajun gravy and the savory sausage

This Biscuits and Gravy Casserole is more than just a meal; it’s a way to reclaim your holiday mornings. It delivers that ‘diner-style’ satisfaction with a fraction of the stress. Once you see the golden, puffed gravy emerge from the oven, you’ll understand why this has become my family’s most requested breakfast.

Frequently Asked Questions

→ Can I make this ahead of time? You can assemble it the night before (minus the gravy), cover and refrigerate. In the morning, make the gravy fresh and pour it on top before baking. Add 5-10 extra minutes to the baking time since it’s cold.

→ Why serve it with syrup? The sweet syrup with the savory sausage and gravy is amazing – it’s like having pancakes and sausage together! Trust us, it’s worth trying even if it sounds odd.

→ Can I use a different kind of sausage? Yes! Regular breakfast sausage, spicy sausage, or even turkey sausage all work. Maple-flavored just adds a nice touch that goes with the syrup.

→ What if I don’t have Cajun seasoning? Make your own by mixing paprika, garlic powder, onion powder, and a tiny bit of cayenne. Or just season the gravy well with salt, pepper, and garlic powder.

→ Can I freeze this? Yes! Bake it completely, let it cool, then wrap tightly and freeze for up to 2 months. Thaw in the fridge overnight and reheat in the oven.

→ How do I know when it’s done?The casserole should be puffed up, golden brown on top, and set in the middle – not jiggly. A knife inserted in the center should come out mostly clean.

Biscuits and Gravy Casserole

Serves: 8 Prep Time: 30 minutes Cooking Time: 40 minutes 40 minutes
Nutrition facts: 250 calories 20 grams fat
Rating: 5.0/5
( 1 voted )
Pin
Print

Ingredients

→ For the Sausage and Gravy

 1 lb ground pork sausage (maple flavor preferred)
 3 tablespoons butter (plus more for greasing)
 1/4 cup all-purpose flour
 2 cups milk
 2 teaspoons Cajun seasoning
 Salt and pepper to taste

→ For the Casserole

 8-count can flaky layers biscuits (16 oz tube, like Pillsbury Grands)
 2 cups shredded Colby Jack cheese
 6 large eggs
 1/2 cup half and half
 1/2 teaspoon cracked black pepper
 1/4 teaspoon salt
 Pancake or maple syrup for serving

Instructions

Heat your oven to 350 degrees. Lightly grease a 9x13 inch baking dish with butter.

Cook the sausage in a large pan over medium-low heat, breaking it up into crumbles as it browns. Once it's cooked through, transfer it to a plate but leave the drippings in the pan.

Melt the butter in the same pan with the drippings. Sprinkle the flour over the butter and whisk constantly for about 1 minute. Gradually add the milk, whisking as you pour, until the gravy comes together. Make sure to scrape up all those tasty brown bits from the bottom of the pan.

Add the Cajun seasoning and season liberally with salt and pepper - gravy needs plenty of seasoning to be really delicious! Taste and adjust as needed. Set aside.

Add the biscuits to the bottom of the prepared baking dish. Press them down a few times until they cover most of the bottom layer of the pan - they don't have to be perfect.

Scatter the cooked sausage over the biscuits, then top with the shredded cheese.

In a medium bowl, whisk together the eggs, half and half, salt, and pepper. Pour this mixture evenly over the biscuits and sausage, making sure to cover edge to edge.

Pour the gravy over the top of the entire casserole. Place in the oven and bake for 35 to 45 minutes. The casserole is done when it has puffed up and is golden brown on top.

Let it rest for a few minutes before slicing and serving. This is best enjoyed warm with a drizzle of pancake syrup on top!

Notes

  1. Maple-flavored sausage adds a nice sweet-savory flavor that pairs perfectly with syrup.
  2. Don't skip seasoning the gravy generously - it needs plenty of salt and pepper to taste good!
  3. If you don't have Cajun seasoning, use a mix of paprika, garlic powder, onion powder, and a pinch of cayenne.
  4. This is perfect for feeding a crowd at Christmas, Easter, or church potlucks!
  5. The syrup drizzle might sound weird, but it's amazing - don't skip it!


Tools You'll Need

  • 9x13 inch baking dish
  • Large skillet or pan
  • Whisk
  • Medium mixing bowl

Allergy Information

Please check ingredients for potential allergens and consult a health professional if in doubt.

Nutrition Facts (Per Serving)

It is important to consider this information as approximate and not to use it as definitive health advice.
  • Calories: ~
  • Total Fat: ~
  • Total Carbohydrate: ~
  • Protein: ~
0 comments
0 FacebookTwitterPinterestLinkedin
Soups & Salads

Greek Lemon Chicken Soup

by myphillyconnection February 28, 2026
written by myphillyconnection

50-minute traditional Greek soup featuring chicken, orzo, and creamy egg-lemon sauce. A comforting meal that’s both elegant and satisfying.

Avgolemono transforms simple chicken soup into a velvety, lemony masterpiece that’s both elegant and comforting. This Greek classic combines tender chicken, orzo pasta, and a silky egg-lemon sauce that creates an unforgettable golden broth, rich with Mediterranean flavors and warming to the very last spoonful.

Why You’ll Love This Recipe

  • The silky, creamy texture achieved without any cream – just the magic of tempered eggs
  • Bright citrus notes that perfectly balance the rich chicken broth
  • Simple ingredients transform into something truly extraordinary

I discovered this soup during a cooking class in Athens, and it’s become my go-to comfort food. The instructor taught me that patience while tempering the eggs creates that signature silkiness that makes this soup so special.

Essential Ingredients

  • Egg Yolks: Room temperature eggs are crucial for the smoothest sauce
  • Fresh Lemons: Only fresh-squeezed juice will give you that vibrant flavor
  • Chicken Breast: Creates a flavorful base and adds lean protein
  • Orzo Pasta: Tiny rice-shaped pasta that cooks perfectly in the broth
  • Fresh Dill: Adds a distinctive Mediterranean freshness
  • Quality Chicken Stock: Forms the foundation of your soup’s flavor
Avgolemono — Greek Lemon Chicken Soup Recipe

Detailed Cooking Instructions

Create Your Flavor Base:

  • Gently sauté diced onions, carrots, and celery until tender
  • Add minced garlic just until fragrant

This slow cooking process builds essential flavor layersDevelop the Broth:

  • Add chicken and stock, bringing to a gentle simmer
  • Cook until chicken is tender, about 15 minutes
  • Remove chicken to shred while continuing with soup

Perfect the Pasta:

  • Add orzo to simmering broth
  • Cook until just tender, stirring occasionally
  • Return shredded chicken to the pot

Master the Avgolemono Sauce:

  • Whisk egg yolks and lemon juice until smooth
  • Gradually add hot broth to temper eggs
  • Incorporate back into soup with gentle stirring

You Must Know

  • Never skip tempering the eggs – it’s crucial for silky texture
  • The soup will continue to thicken as it stands
  • Fresh lemon juice is non-negotiable – bottled won’t give the same bright flavor

My Greek grandmother always said that the secret to perfect avgolemono is patience – rushing the egg tempering will result in a completely different soup.

Chef’s Helpful Tips

  • Keep the soup at a bare simmer to prevent curdling
  • Add lemon gradually – you can always add more, but can’t take it away
  • Reserve some hot broth before adding orzo in case you need to thin the soup

This soup has become my ultimate comfort food, especially during cold winter months. The way the bright lemon cuts through the rich broth while the orzo provides just enough substance makes it a perfectly balanced meal. Every spoonful reminds me of sunny Mediterranean afternoons and the timeless wisdom of Greek cuisine.

Serving and Storage Tips

Serving:

  • Always serve hot but not boiling – the perfect temperature maintains the soup’s silky texture
  • Fresh crusty bread makes an ideal accompaniment for soaking up every last drop
  • Consider a light Greek salad on the side for a complete Mediterranean meal

Storage:

After years of making this soup, I’ve found that crusty sourdough bread works particularly well – its slight tanginess complements the lemon perfectly.

Perfect Pairings

  • A crisp Greek white wine like Assyrtiko
  • Fresh cucumber and tomato salad dressed with olive oil
  • Warm pita bread brushed with olive oil and oregano

Make-Ahead and Meal Prep

  • Prepare the basic soup without the egg-lemon mixture up to 2 days ahead
  • Store the base soup in an airtight container in the refrigerator
  • Add the tempered egg-lemon mixture only when reheating to serve
  • Never bring leftover soup to a full boil when reheating
Avgolemono — Greek Lemon Chicken Soup Homemade

Troubleshooting Tips

  • If your soup is too thick, gradually stir in hot chicken broth
  • For too thin soup, simmer gently until it reaches desired consistency
  • If the eggs start to curdle, lower the heat immediately and whisk vigorously

My neighbor Maria, who taught me this recipe, always says “The soup should be like velvet – if it’s not, you’re either rushing or your heat is too high.”

Final Notes

This soup is more than just a meal – it’s a testament to the ingenuity of Greek cuisine, transforming simple ingredients into something truly magical. While it might take a try or two to master the egg-tempering technique, the result is well worth the effort. The combination of tender chicken, perfectly cooked orzo, and that signature egg-lemon sauce creates a dish that’s both elegant enough for special occasions and comforting enough for everyday meals.

Remember, patience is your best friend when making avgolemono – take your time with each step, and you’ll be rewarded with a soup that rivals any you’d find in Athens’ finest restaurants. Whether you’re under the weather, seeking comfort on a cold day, or simply craving something special, this soup never fails to deliver both nourishment and satisfaction.

Frequently Asked Questions

→ Why temper the eggs? Tempering prevents eggs from curdling when added to hot soup. Gradually warming them is essential.

→ Can I use different pasta? Yes, rice or small pasta shapes work well instead of orzo.

→ Can I make this ahead? Best served fresh as reheating can affect texture. If needed, reheat gently to prevent curdling.

→ Can I use rotisserie chicken? Yes, add shredded rotisserie chicken near end of cooking time.

→ Is this soup supposed to be thick? The egg-lemon mixture creates a silky, slightly thickened broth but not extremely thick.

Greek Lemon Chicken Soup

Serves: 4 Prep Time: 10 minutes Cooking Time: 30 minutes 30 minutes
Nutrition facts: 200 calories 20 grams fat
Rating: 5.0/5
( 1 voted )
Pin
Print

Ingredients

→ Base

 1 tablespoon olive oil
 1 medium onion, diced
 1 medium carrot, diced
 2-3 celery stalks, diced
 2-3 cloves garlic, finely chopped
 2 bay leaves

→ Main Components

 2 chicken breasts (about 12 oz/350g total)
 6 cups (1.5 liter) chicken stock
 ¾ cup (175g) orzo

→ Egg-Lemon Mixture

 2 egg yolks
 Juice of 1 lemon

→ Finishing

 Fresh dill
 Salt and freshly ground black pepper to taste

Instructions

Heat olive oil in large pot and cook onion, carrot, and celery for 8-10 minutes until softened

Add garlic and cook 1 minute. Add bay leaves, chicken, and stock

Bring to boil, reduce heat, cover and simmer 15 minutes. Remove chicken and bay leaves

Add orzo and cook 10 minutes. Meanwhile, shred chicken and return to pot

Whisk egg yolks and lemon juice. Temper with hot soup, then add to pot. Cook 5 minutes more

Stir in dill, season to taste, and serve with extra dill if desired

Notes

  1. Traditional Greek comfort soup
  2. Temper eggs carefully to prevent curdling


Tools You'll Need

  • Large stock pot or Dutch oven
  • Mixing

Allergy Information

Please check ingredients for potential allergens and consult a health professional if in doubt.

Nutrition Facts (Per Serving)

It is important to consider this information as approximate and not to use it as definitive health advice.
  • Calories: ~
  • Total Fat: ~
  • Total Carbohydrate: ~
  • Protein: ~
0 comments
0 FacebookTwitterPinterestLinkedin
Pork MealsSoups & Salads

Meatball Soup

by myphillyconnection February 26, 2026
written by myphillyconnection

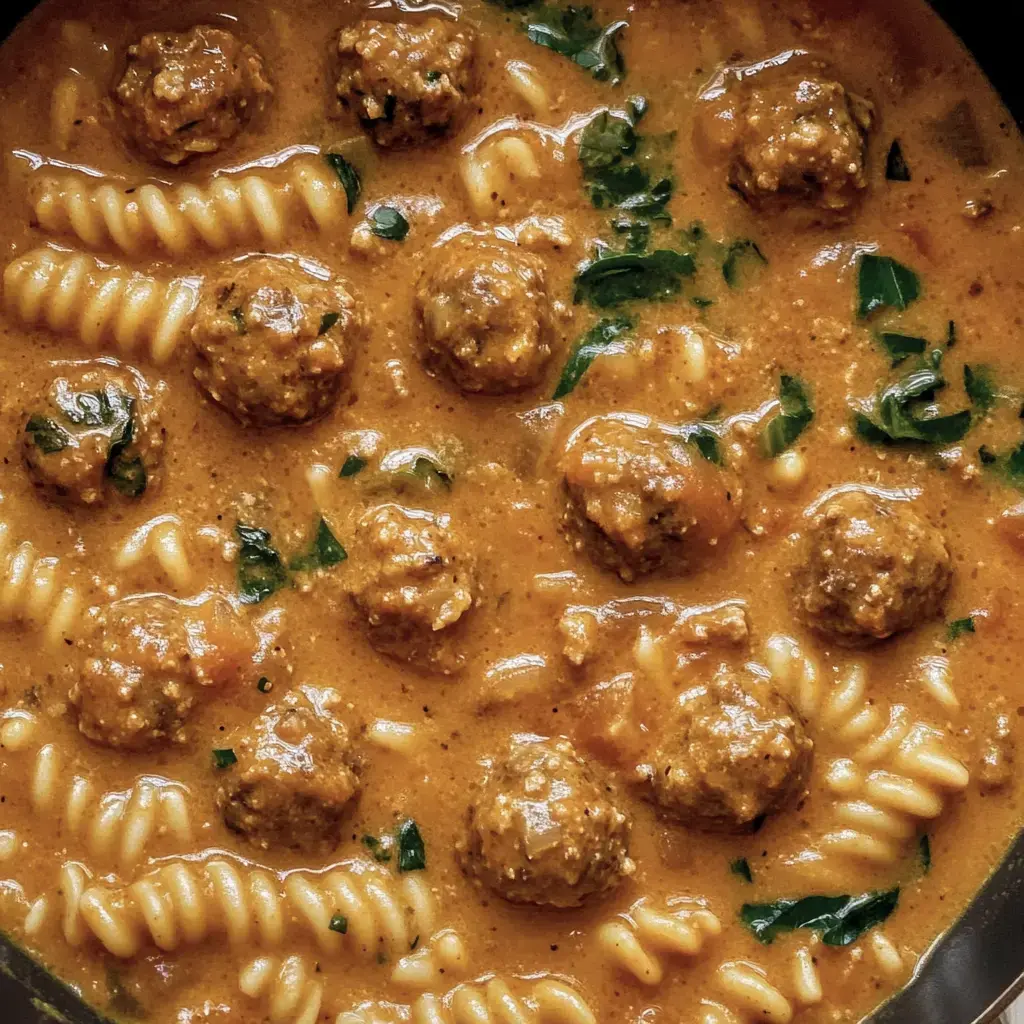
Let me tell you about my Creamy Italian Meatball Soup it’s become our ultimate comfort meal. Picture tender juicy meatballs swimming in this rich tomato cream broth with perfectly cooked pasta. Every spoonful tastes like a cozy Italian dinner transformed into the most comforting bowl of soup.

Why You’ll Fall in Love

This soup warms your soul with those classic Italian flavors we all crave. I love that it comes together in just 30 minutes using simple ingredients from my pantry. Add some crusty garlic bread on the side and you’ve got pure comfort in a bowl.

What You’ll Need

  • Meatballs: Homemade or store-bought both work beautifully.
  • Crushed Tomatoes: Big 28 oz can makes our base.
  • Chicken Broth: Six cups gives us perfect soup consistency.
  • Pasta: Two cups rotini those spirals catch all the goodness.
  • Heavy Cream: Half cup makes everything silky.
  • Baby Spinach: Three cups for color and goodness.
  • Tomato Paste: Two tablespoons deepens the flavor.
  • Italian Seasoning: One teaspoon of herby magic.
  • Garlic and Onion: Our aromatic flavor base.

Let’s Make It Together

Start With The Meatballs

Make your own or grab your favorite frozen kind both work great here.

Build The Base

Soften those onions and garlic in olive oil until your kitchen smells amazing.

Create The Broth

Add tomato paste herbs broth and crushed tomatoes let it all simmer together.

Add The Good Stuff

Drop in pasta and meatballs cook until that pasta’s just right about 12 minutes.

Make It Creamy

Stir in spinach and cream watch it become silky and perfect.

Time To Enjoy

Ladle it up top with fresh Parmesan grab some garlic bread.

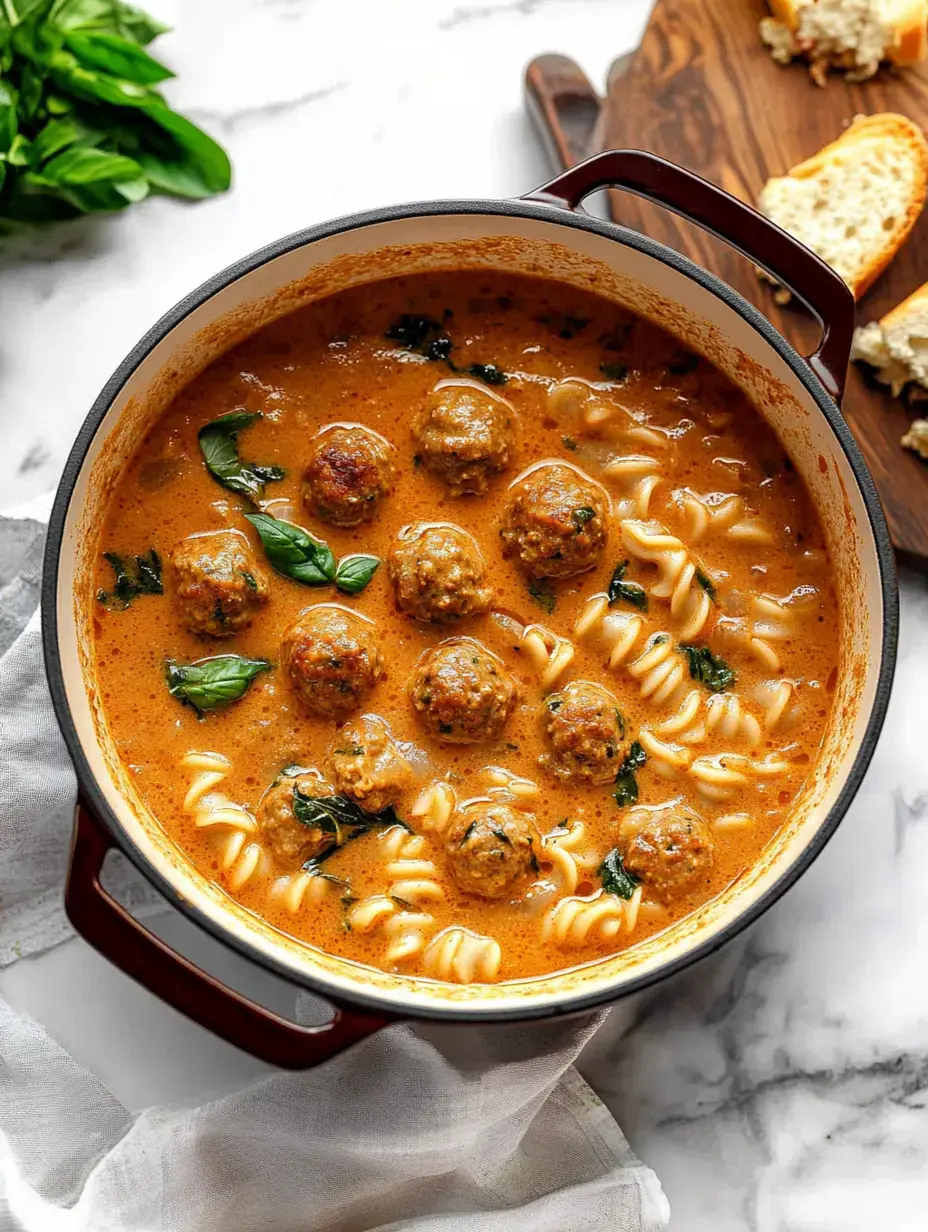
A pot of creamy pasta with meatballs and spinach sits on a marble surface, accompanied by a slice of bread on a wooden cutting board.

My Best Tips

Season as you go makes all the flavors pop. Got a Parmesan rind? Toss it in while simmering pure gold. Add more broth or cream until it’s just how you like it.

Keep It Fresh

This soup stays good in the fridge five days keeps getting better. When reheating add a splash of cream or broth keeps that silky texture. Always taste and adjust the seasoning.

Plan Ahead

Make those meatballs and broth ahead save the pasta for last. Fresh cooked pasta makes such a difference keeps everything perfect.

Freezer Friendly

Skip the pasta when freezing add it fresh later. Stays perfect up to three months in the freezer. Just thaw overnight heat up add fresh pasta good as new.

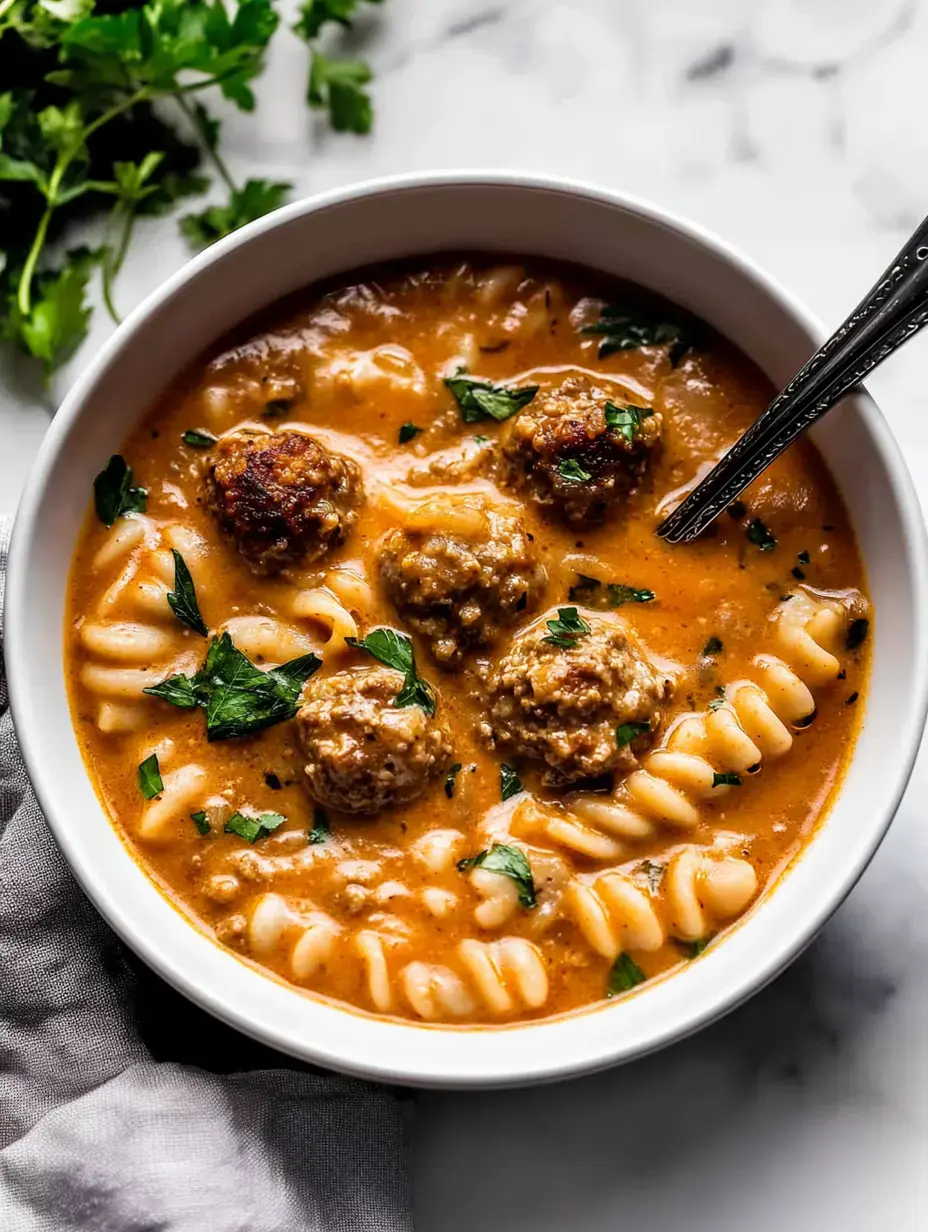
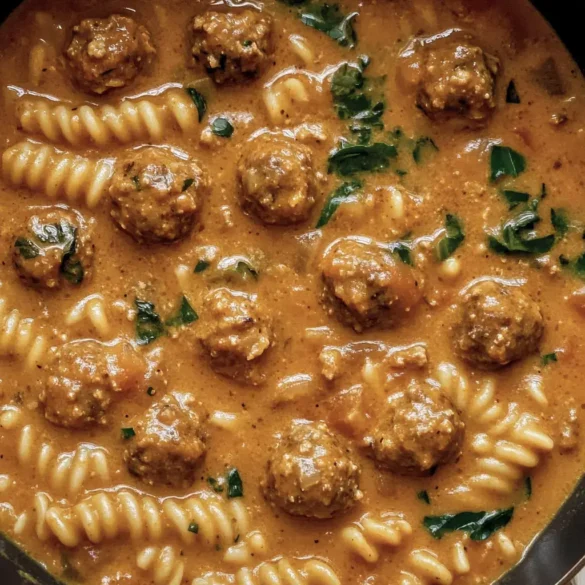
A bowl of hearty soup containing meatballs, spiral pasta, and green herbs in a rich, savory broth.

Make It Your Own

Try kale instead of spinach swap in white beans. Love heat? Add red pepper flakes or fresh jalapeños. It’s so flexible make it just how you like it.

Perfect Partners

Nothing beats dunking garlic bread in this soup. A simple Caesar salad on the side makes it complete. Sometimes I roast some veggies to go alongside pure Italian comfort.

Make It Cheesy

That hit of fresh Parmesan or Pecorino at the end makes everything better. They melt into the hot soup creating little pockets of cheesy goodness.

Going Gluten Free

Use your favorite gluten free pasta or try rice instead. Check those meatballs and broth labels if needed. Everyone can enjoy this bowl of comfort.

A close-up of a bowl filled with pasta, meatballs, and a creamy sauce garnished with green herbs.

Switch It Up

Sometimes I turn this into a casserole use less broth top with cheese. Under the broiler until bubbly makes it extra special.

More Veggies Please

Toss in carrots celery bell peppers whatever you love. Cook them with the onions and garlic builds such good flavor.

Spice It Up

Red pepper flakes cayenne pepper adjust the heat how you like. Start small you can always add more makes it your own.

Company Ready

This soup always impresses at dinner parties. Serve it in pretty bowls fresh herbs on top everyone loves it.

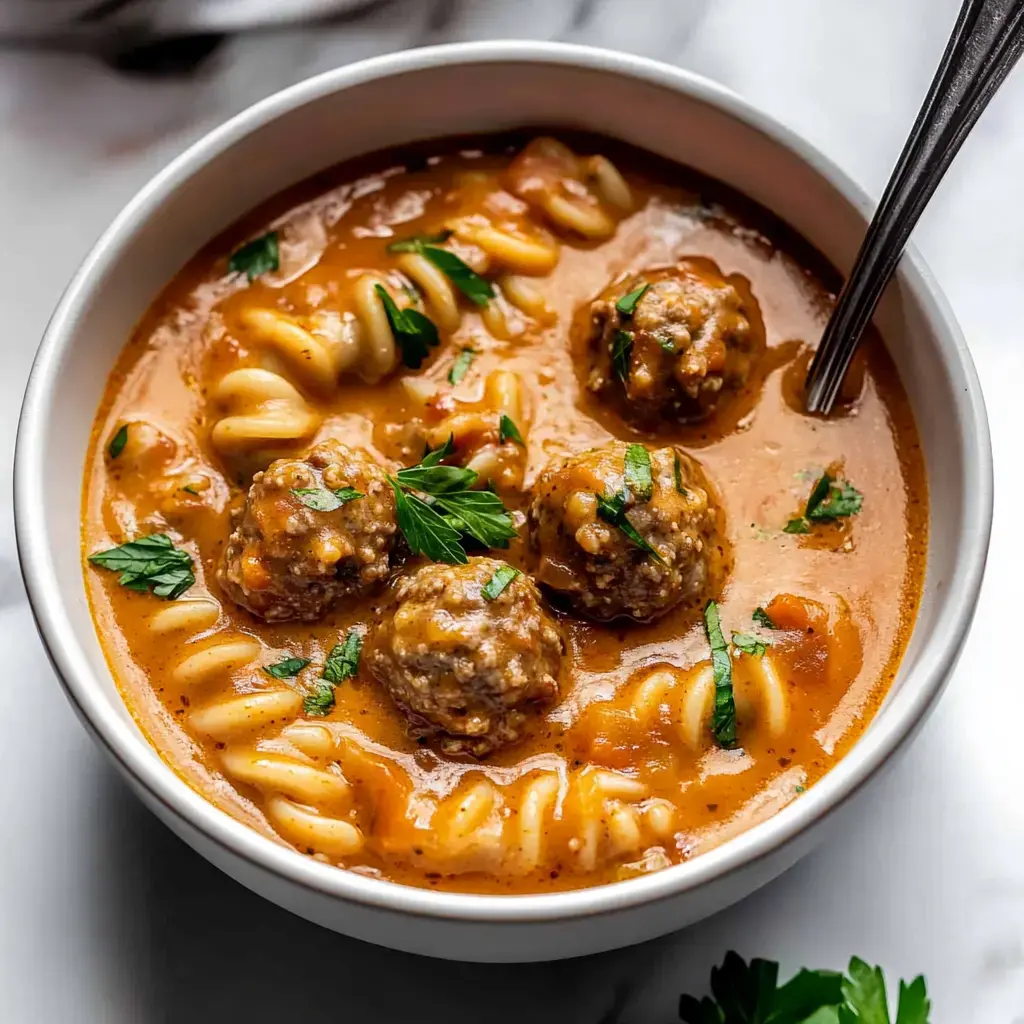
A bowl of creamy pasta soup with meatballs, garnished with parsley.
A bowl of creamy pasta soup with meatballs, garnished with parsley

Kid Friendly

Little pasta shapes make it fun for kids to eat. Blend the spinach right in if they’re picky about greens. They’ll never know it’s good for them.

Dairy Free Options

Coconut milk works beautifully instead of cream. Try nutritional yeast for that cheesy flavor keeps it dairy free but delicious.

Meal Prep Magic

I love making a big batch portioning it out for the week. Quick to reheat perfect lunch or dinner anytime.

Everyone’s Favorite

This soup just works those tender meatballs creamy broth perfect pasta. It’s the kind of recipe that becomes a family tradition everyone asks for.

A bowl of hearty meatball and pasta soup garnished with fresh parsley.

Frequently Asked Questions

→ Can I use frozen meatballs? Yes, use an 18-20 oz bag of thawed frozen meatballs instead of homemade. Just make sure they’re fully thawed or cooked according to package directions.

→ Why is my soup getting too thick? The pasta continues to absorb liquid as it sits. Add extra broth or cream to thin the soup to your desired consistency.

→ How can I add more flavor? Season with salt and pepper at each step of cooking. Adding a Parmesan rind during simmering adds great depth of flavor.

→ Can I make this ahead? Yes, but the pasta will continue to absorb liquid as it sits. You might need to add more broth when reheating.

→ What can I substitute for spinach? Kale or other leafy greens work well. Just adjust cooking time as needed for tougher greens.

Conclusion

Transform classic Italian flavors into a hearty soup featuring meatballs, pasta, and spinach in a creamy tomato broth. Ready in 35 minutes using one pot.

Meatball Soup

Serves: 8 Prep Time: 10 minutes Cooking Time: 25 minutes 25 minutes
Nutrition facts: 300 calories 20 grams fat
Rating: 5.0/5
( 1 voted )
Pin
Print

Ingredients

1 recipe homemade meatballs or 18-20 oz frozen meatballs, thawed.
 1 tablespoon olive oil.
 1 yellow onion, diced.
 6 cloves garlic, minced.
 1 tablespoon Italian seasoning.
 2 tablespoons tomato paste.
 32 ounces chicken broth.
 28 ounces crushed tomatoes.
 8 ounces (2 1/2 cups) uncooked rotini pasta.
 2 cups baby spinach.
 1/2 cup heavy cream.
 Kosher salt to taste.
 Fresh cracked pepper to taste.
 Shaved Parmesan for garnish.
 Fresh parsley, chopped, for garnish.

Instructions

Make homemade meatballs or use thawed frozen ones according to package directions.

Heat oil and cook onion with salt and pepper until lightly caramelized, 6-8 minutes. Add garlic, seasoning, and tomato paste, cook 1 minute.

Add splash of broth to scrape up bottom bits. Then add remaining broth, tomatoes, pasta, and meatballs.

Bring to simmer, reduce heat, cover and cook 12-15 minutes until pasta is al dente.

Stir in spinach and cream until spinach wilts. Season to taste and serve with Parmesan and parsley.

Notes

  1. Season at each step for best flavor.
  2. Add Parmesan rind while cooking for extra flavor.
  3. Add more liquid if soup gets too thick.


Tools You'll Need

  • Large pot.

Allergy Information

Please check ingredients for potential allergens and consult a health professional if in doubt.

Nutrition Facts (Per Serving)

It is important to consider this information as approximate and not to use it as definitive health advice.
  • Calories: ~
  • Total Fat: ~
  • Total Carbohydrate: ~
  • Protein: ~
0 comments
0 FacebookTwitterPinterestLinkedin
Soups & SaladsVegetarian

Crockpot Lentil Soup

by myphillyconnection February 26, 2026
written by myphillyconnection

I discovered this amazing Crockpot Lentil Soup recipe last winter and honestly it’s changed my weeknight dinner game forever. My kitchen fills with the most incredible aroma while the lentils simmer away with fresh veggies in a rich broth. This soup has become my go-to healthy comfort food that keeps my family coming back for seconds.

My Family’s New Favorite

Every time I make this lentil soup my husband asks for the recipe to share with his coworkers. It’s become our Sunday dinner tradition since it practically cooks itself in the crockpot while we enjoy our weekend. The best part? It’s budget friendly and fills everyone up with goodness.

Everything You Need

  • Dried Lentils: Grab 1 1/2 cups and give them a good rinse.
  • Vegetable Broth: 4 cups of low sodium works best in my experience.
  • Tomatoes: One 15 oz can brings everything together.
  • Fresh Veggies: 2 carrots and 2 celery stalks diced small.
  • Onion: One medium yellow onion finely chopped.
  • Garlic: 2 fresh cloves minced up.
  • My Secret Touch: 1 teaspoon dried thyme makes it special.
  • Basics: Salt and pepper to your taste.

Let’s Get Cooking

Throw Everything In

I just toss all my ingredients into the crockpot and give them a good stir. Super simple no fuss.

Set It and Forget It

Pop it on low for about 6 to 8 hours or high for 4 to 5 if you’re in a rush. You’ll know it’s ready when those lentils are tender.

The Finishing Touch

Before serving I sprinkle some fresh herbs on top. My garden parsley works perfectly here.

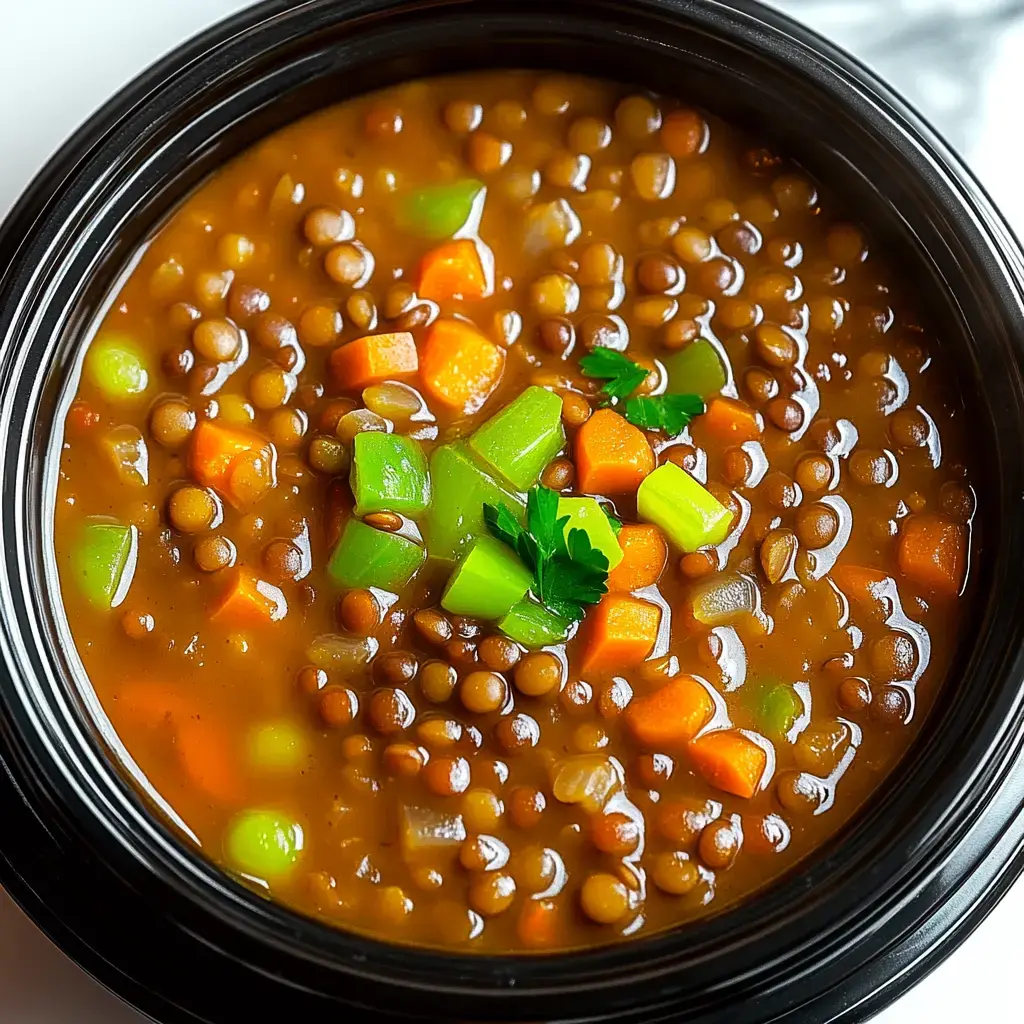
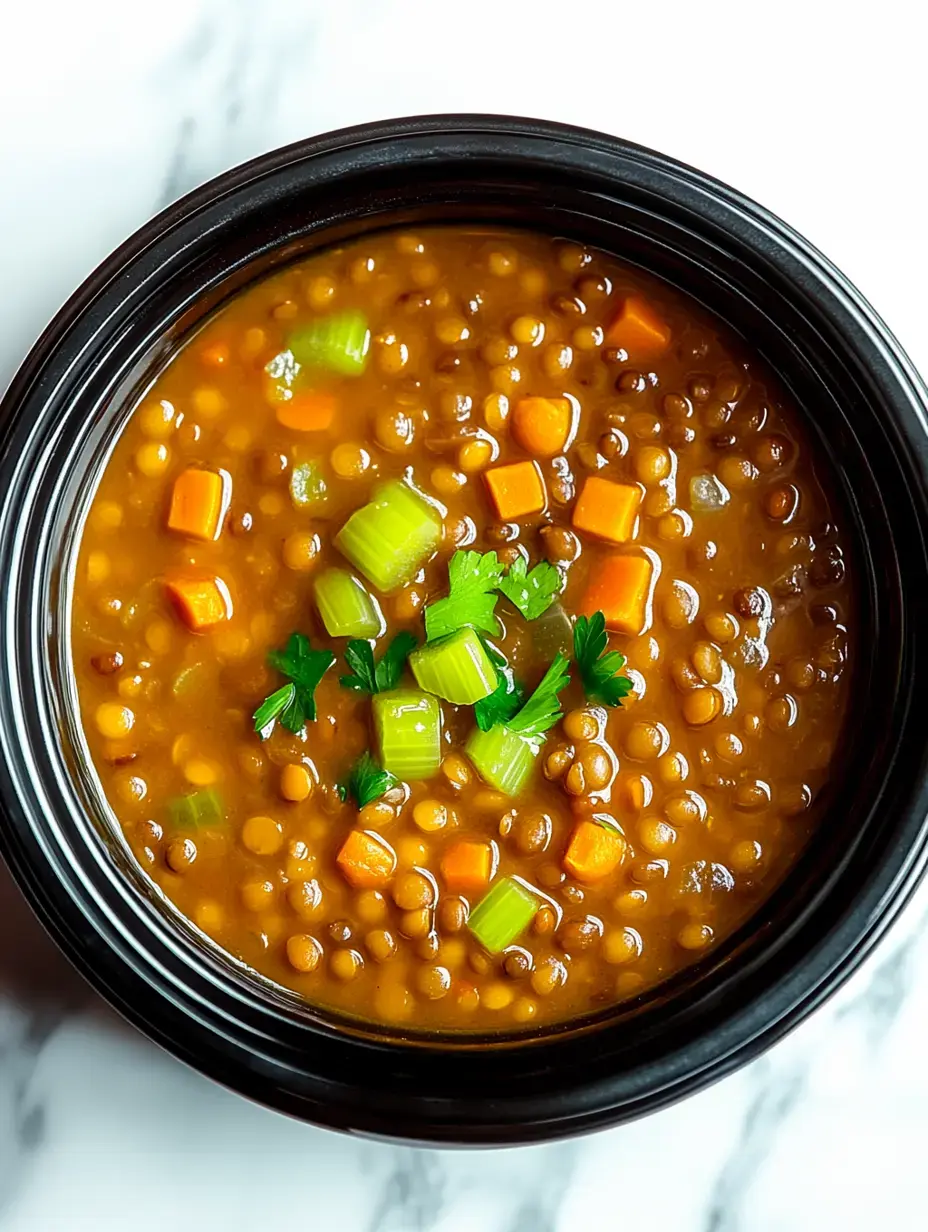
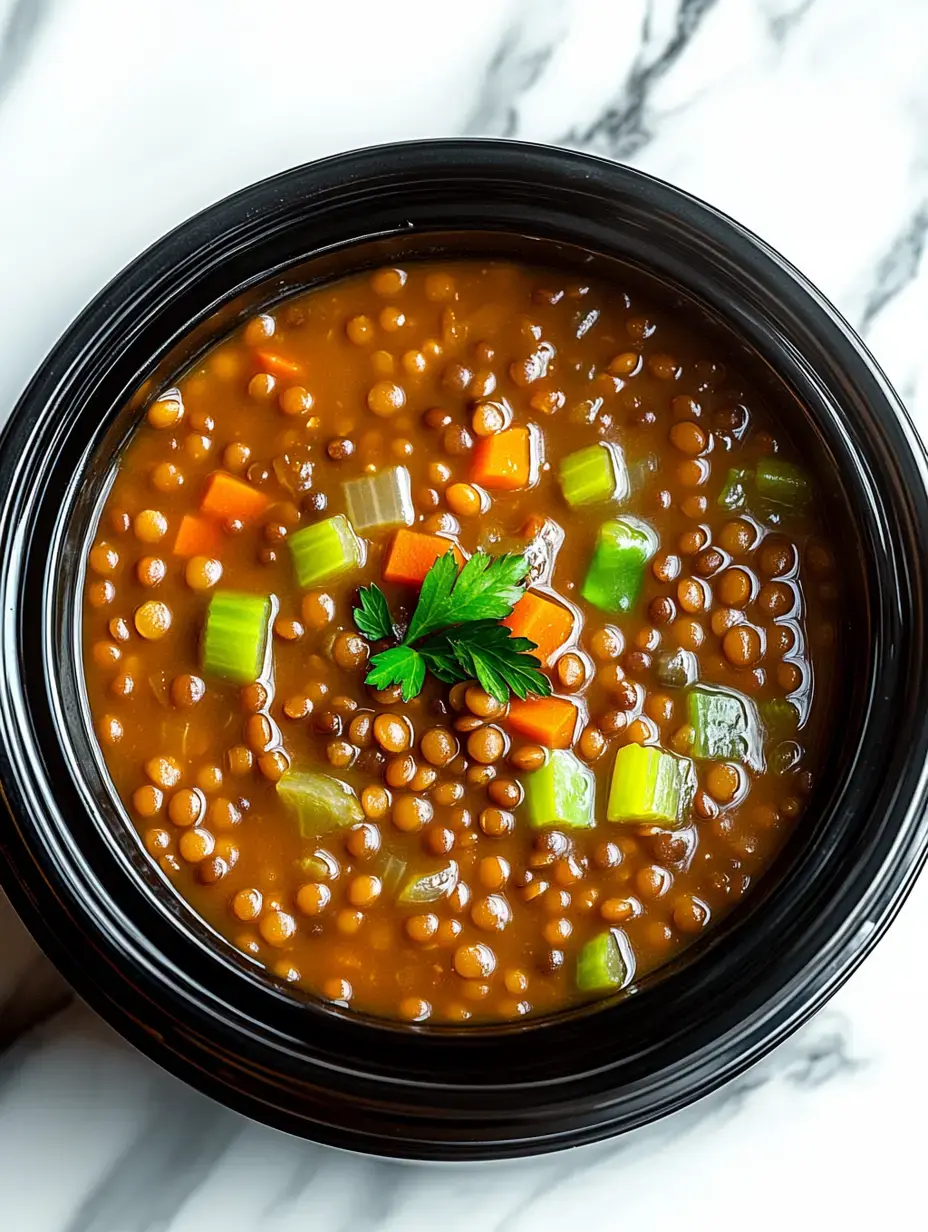
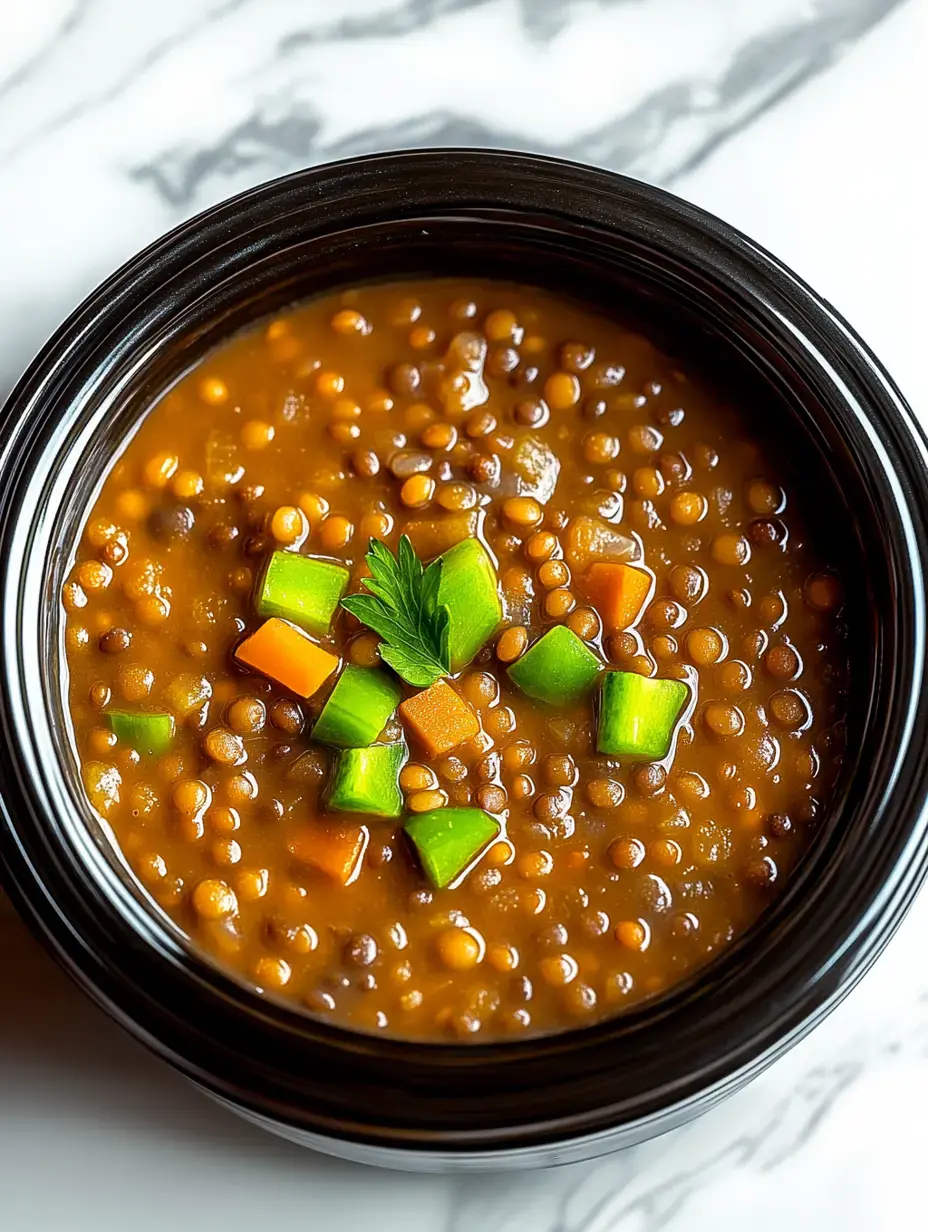
A black bowl filled with hearty lentil soup garnished with diced carrots, celery, and fresh parsley.

My Tips for Success

Listen giving those lentils a good rinse is super important. Sometimes I quickly sauté my onions and garlic first it adds such amazing flavor. Trust me on this one taste as you go and adjust your seasonings at the end. That’s how you’ll make it perfect for your family.

Making It Your Own

Sometimes I throw in a handful of spinach near the end or squeeze some lemon juice over my bowl. My daughter loves when I add sweet potatoes and my son’s favorite version includes tiny pasta shapes. Play around with it you really can’t go wrong.

Saving It For Later

This soup actually tastes even better the next day. I pack it in my favorite glass containers and it stays good in the fridge for about 4 days. For busy weeks I portion it out and freeze it then just warm it up whenever we need a quick healthy meal.

Why Lentils Are So Great

I love how these little powerhouses pack so much nutrition into our meals. My mother in law started making lentil soup years ago and now I understand why. They’re loaded with protein and fiber keeping us full and energized all afternoon.

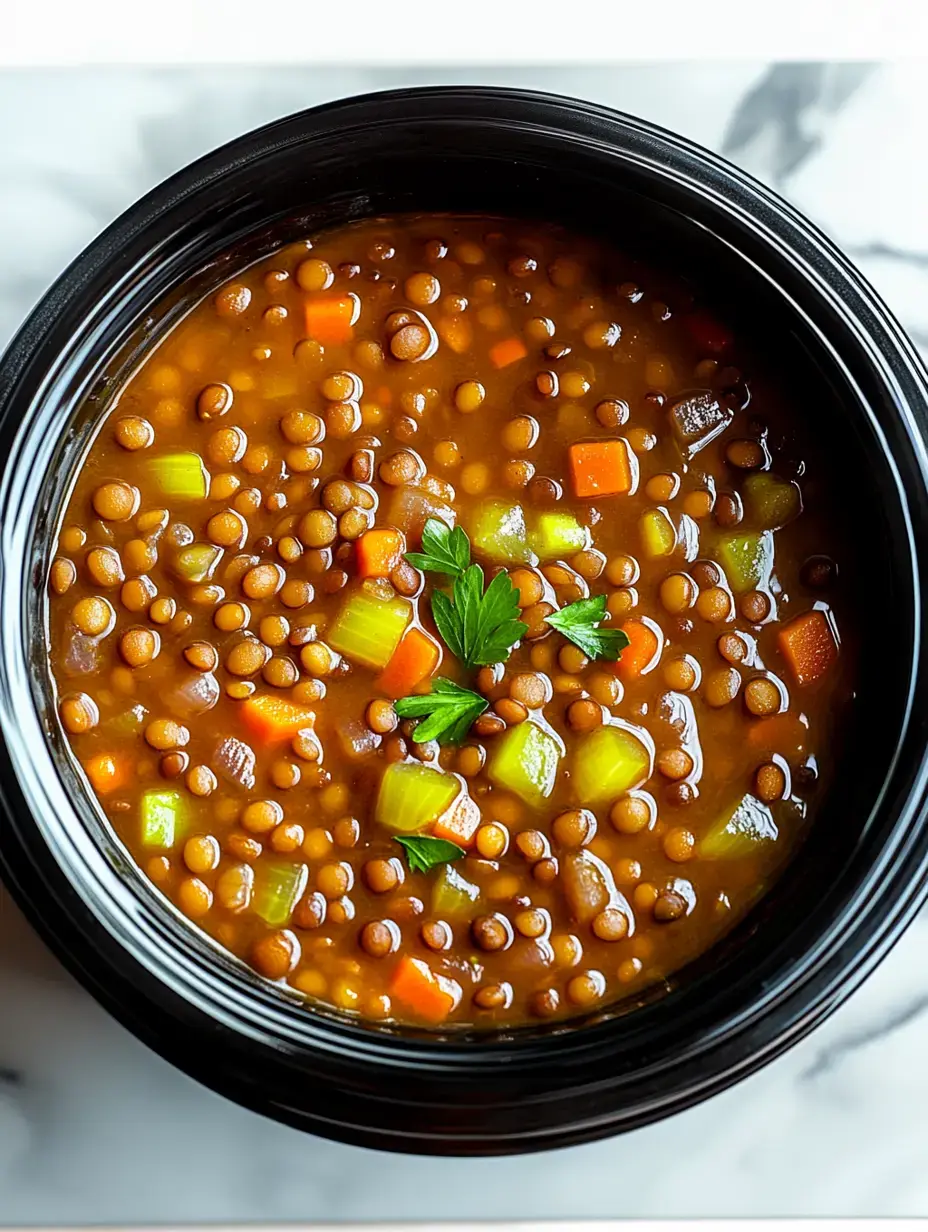
A bowl of lentil soup garnished with parsley and containing diced carrots and celery.

When to Serve This Soup

This is my go to recipe when hosting casual dinners. I’ve served it at book club gatherings and even packed it for ski trip weekends. It’s filling enough to be a main dish but light enough that everyone feels good after eating.

What Goes Well With It

We love dunking crusty sourdough bread into our bowls. Some nights I’ll toss together a quick green salad or toast up some garlic bread. My kids actually love it with grilled cheese sandwiches on the side.

Why I Love Crockpot Cooking

On busy days nothing beats walking through the door to dinner that’s already made. This soup basically cooks itself while I’m running errands or working. The slow cooking really brings out all those wonderful flavors.

Adding Extra Protein

Sometimes I’ll add some shredded chicken if my husband wants extra protein. For my vegetarian friends I toss in some quinoa or chickpeas. It’s so easy to adapt to whatever you’re craving.

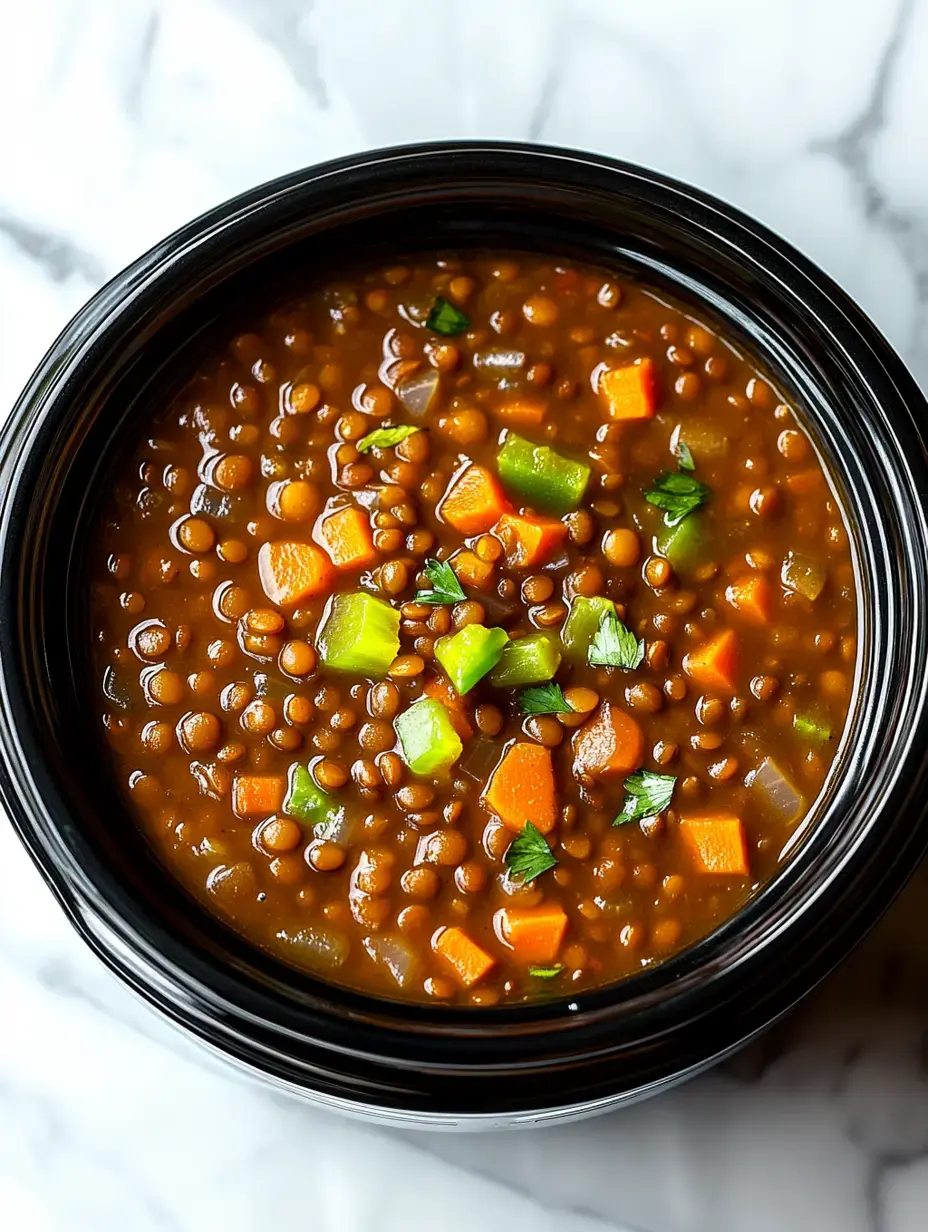
A close-up view of a bowl of lentil soup garnished with diced green bell peppers, carrots, and a sprig of parsley.

Getting Creative With Flavors

Last month I experimented with curry powder and coconut milk talk about delicious. My sister loves when I make it Mediterranean style with extra cumin and a good squeeze of lemon. The possibilities are endless.

Why I Always Keep Lentils Handy

These little gems are always in my pantry. They’re so affordable and versatile. Plus they take on whatever seasonings you add making them perfect for experimenting with different flavor combinations.

Stovetop Option

No crockpot? No problem. You can make this on the stove in about an hour. Just keep an eye on it and stir occasionally. The results are just as delicious just requires a bit more attention.

Fresh Herbs Make Everything Better

I love finishing this soup with whatever herbs are growing in my garden. Thyme goes in while cooking but fresh parsley or cilantro sprinkled on top adds such a lovely fresh pop of flavor.

A close-up view of a bowl of lentil soup garnished with fresh parsley, featuring carrots and celery.

Getting Kids to Love It

My little ones weren’t sure about lentils at first but now they ask for this soup. The trick was letting them add their own toppings. A sprinkle of cheese works wonders with picky eaters.

Perfect for Healthy Eating

This has become my favorite healthy comfort food. It’s naturally low in calories but so filling. Perfect when you want something satisfying that’s still good for you.

Make Ahead Magic

Sunday meal prep is a breeze with this recipe. I make a big batch divide it up into containers and freeze them. Such a lifesaver on those crazy weeknights when cooking isn’t happening.

Good for the Planet Too

I feel good serving my family meals with lentils. They’re so sustainable to grow and a great way to eat less meat without sacrificing protein. Small changes add up.

A close-up view of a bowl of lentil soup featuring diced carrots and green bell peppers, garnished with fresh herbs.

Frequently Asked Questions

→ Do I need to soak the lentils first?

No, dry lentils can go directly into the crockpot. Just rinse them first to remove any debris.→ Can I freeze this soup?

Yes, this soup freezes well for up to 3 months. Cool completely before freezing.→ What type of lentils work best?

Green or brown lentils hold their shape well during slow cooking. Red lentils tend to break down more.→ Can I add more vegetables?

Yes, feel free to add other vegetables like spinach, potatoes, or bell peppers.→ How can I make it more filling?

Serve over rice or with crusty bread. Can also add diced potatoes to the soup.

Conclusion

A nutritious vegetarian soup that provides a hearty and healthy meal option. Prepared easily in a slow cooker, this soup combines protein-rich lentils with fresh vegetables to create a delicious and wholesome dish perfect for meal prep.

Crockpot Lentil Soup

Serves: 6 Prep Time: 10 minutes Cooking Time: 360 minutes 360 minutes
Nutrition facts: 200 calories 20 grams fat
Rating: 5.0/5
( 1 voted )
Pin
Print

Ingredients

 1½ cups dried lentils.
 4 cups vegetable broth.
 15 ounces diced tomatoes.
 2 carrots, diced.
 2 celery stalks, diced.
 1 onion, diced.
 2 garlic cloves, minced.
 1 teaspoon dried thyme.
 Salt and pepper to taste.

Instructions

Add all ingredients to crockpot.

Cook on low 6-8 hours or high 4-5 hours until lentils tender.

Serve hot with optional fresh herbs.

Notes

  1. High in protein and fiber.
  2. Vegetarian friendly.


Tools You'll Need

  • Slow cooker.

Allergy Information

Please check ingredients for potential allergens and consult a health professional if in doubt.

Nutrition Facts (Per Serving)

It is important to consider this information as approximate and not to use it as definitive health advice.
  • Calories: ~
  • Total Fat: ~
  • Total Carbohydrate: ~
  • Protein: ~
0 comments
0 FacebookTwitterPinterestLinkedin
30 Minute MealsBreakfast & PastriesPork MealsTurkey Meals

Turkey & Ham Croissant Melts

by myphillyconnection February 26, 2026
written by myphillyconnection

Layer provolone, ham and turkey between halved croissants. Brush tops with butter. Bake at 375°F for 5-8 minutes until cheese melts and tops are golden. Simple, delicious hot sandwiches in minutes.

These turkey and ham croissant melts saved my sanity last month during that crazy week when I had deadlines stacked on deadlines but still needed to feed my family something better than cereal for dinner. I grabbed some bakery croissants and deli meat during my coffee run and threw these together in minutes. The kitchen filled with this amazing buttery, toasty smell, and my teenager actually looked up from his phone and said, “Whoa, that smells amazing.” Now they’ve become our go-to quick meal when we need something warm and satisfying without any real cooking. The flaky croissants get this perfect golden crisp outside while staying tender inside, and the cheese gets all melty and gooey around the savory layers of meat. Pure comfort food that feels fancy but takes zero effort.

Why You’ll Love These

  • They take literally 5 minutes to assemble and just a few minutes to bake
  • The combination of buttery croissant, gooey cheese, and savory meats hits all the comfort food notes
  • They feel special enough for a weekend lunch but easy enough for hectic weeknights
  • Kids and adults both devour them with zero complaints

Last winter when my sister’s family visited unexpectedly, I needed something quick I could feed everyone for lunch. I made a tray of these melts alongside some sliced apples, and my brother-in-law (who usually just picks at his food) ate two and asked how I’d “had time to make such a nice lunch.” My secret weapon is keeping good quality deli meat and cheese in the fridge and grabbing fresh croissants whenever I see them. These have saved dinner more times than I can count when plans fall apart or everyone is suddenly starving RIGHT NOW.

Simple Ingredients

  • Croissants create the perfect base – their buttery layers get extra crispy in the oven while still staying tender inside, elevating this way beyond regular sandwich bread
  • Provolone cheese melts beautifully without getting stringy or greasy – I’ve tried with cheddar and Swiss too, but provolone hits that perfect melt factor
  • Deli ham brings that classic smoky flavor that pairs perfectly with the buttery croissant – splurging on good quality makes a noticeable difference here
  • Oven-roasted turkey adds a leaner protein that balances the richness of the other ingredients – I like to fold each slice rather than laying it flat for better texture
  • That extra brush of melted butter on top might seem unnecessary given how buttery croissants already are, but trust me, it creates this amazing golden finish that makes them look and taste even more special
Turkey & Ham Croissant Melts Recipe

Step-by-Step Instructions

I’ve made these so many times now I could probably do it with my eyes closed.Start with good croissants – the ones from the bakery section of the grocery store work great, but even the ones in those tubes that pop open will do in a pinch. Just make sure they’re fresh – stale croissants will still taste okay but won’t have that amazing texture contrast.

Slicing them horizontally can be tricky.

I use a serrated knife and hold the croissant gently but firmly with my other hand. First time I made these, I squished several flat before figuring out the right technique. Now I slice them like I’m opening a book, keeping the back “spine” intact, which helps hold everything together.

Layer order matters more than you’d think.

I put cheese directly against both the top and bottom croissant layers, which creates this protective barrier that prevents the bread from getting soggy from the meat. My first attempt had the meat directly against the bread, and it wasn’t nearly as good.

That brush of butter on top looks fussy but takes two seconds and makes such a difference.

I tried skipping it once when in a hurry, and they just didn’t get that same beautiful golden finish. If you’re feeling fancy (or have forgotten to melt butter), a quick spray of olive oil works too.

Don’t overbake these babies!

They need just enough time for the cheese to get melty and the tops to get golden. First time I made them, I got distracted and left them in too long – the cheese was perfect but the croissants got too dark. About 6 minutes is usually perfect in my oven.

Must-Know Tips

  • Watch them closely in the oven – the line between perfectly golden and too brown is thin with butter-rich croissants
  • Let them rest for a minute after baking so you don’t burn your mouth on molten cheese (learned this the hard way)
  • These work great with leftover holiday turkey or ham too – just slice it thin

My first attempt at these was just a desperate move to use up some leftover deli meat, but they’ve evolved as I’ve made them repeatedly. I’ve found that slightly warming the meat in the microwave for about 10 seconds before assembling helps it heat more evenly in the oven. I’ve experimented with different meats and cheeses based on what’s in the fridge – roast beef works great too, and adding a thin layer of honey mustard or mayo adds a nice flavor boost when you’re feeling fancy.

Perfect Pairings

Serve these with a handful of kettle chips for a quick lunch with satisfying crunch. For a lighter option that still feels like a complete meal, add a simple side salad with mixed greens, cherry tomatoes, and a quick vinaigrette. When serving these for dinner, I like to add a cup of tomato soup on the side for dipping – the creamy soup with the buttery sandwich is an unbeatable combo. For a grab-and-go breakfast version, use ham and cheese only and serve with fresh fruit on the side.

Tasty Twists

Try spreading a thin layer of Dijon mustard on the bottom croissant half before layering ingredients – adds a nice tang that cuts through the richness. For a Mediterranean spin, substitute salami for the ham and add a few thin slices of roasted red pepper. My kids love when I add a few spinach leaves between the meat layers – adds color and a bit of freshness without being obviously “healthy.” During holiday season, try adding a thin spread of cranberry sauce to the turkey version for a festive twist.

Keeping Fresh

These are definitely best eaten immediately while warm and melty. If you need to make them ahead, assemble completely but don’t butter or bake until just before serving. In a pinch, you can reheat leftovers in a 300°F oven for about 5 minutes to crisp them back up – the microwave will make them soggy. For packed lunches, I sometimes make these in the morning, wrap them in foil after they’ve cooled slightly, and they’re still delicious at room temperature for lunch.

Turkey & Ham Croissant Melts Homemade

Chef Shortcuts

  • Buy pre-sliced croissants from the bakery section to save time and avoid squishing them
  • Keep good quality deli meats and sliced cheese on hand for emergency meals
  • For a party, make a big batch and keep warm in a low oven (200°F) covered loosely with foil

I’ve made these turkey and ham croissant melts for quick family lunches, impromptu dinner parties, and even cut into quarters as appetizers for game day. There’s something universally appealing about warm, melty sandwiches that feels both comforting and slightly indulgent. While they’re incredibly simple, they never fail to please everyone at the table. My neighbor asked for the “recipe” after her kids raved about them, and she laughed when I told her how easy they are. Sometimes the simplest combinations are the most satisfying, and these melts have definitely earned their place in my regular rotation of meals I can count on no matter how chaotic life gets.

Frequently Asked Questions

→ Can I prep these sandwiches ahead of time? Yes! Assemble the sandwiches up to a day ahead, wrap tightly in plastic wrap, and refrigerate. Just brush with butter right before baking.

→ What can I substitute for provolone cheese? Swiss, cheddar, or Havarti all work well in these melts. Choose a cheese that melts smoothly for best results.

→ Can I make these in a toaster oven? Absolutely! Just watch them closely as toaster ovens sometimes heat more intensely than conventional ovens.

→ How can I make this more filling? Add sliced tomatoes, avocado, or a fried egg after baking. You could also serve with a hearty soup on the side.

→ Is there a way to make this vegetarian? Yes! Replace the meats with grilled vegetables like zucchini, bell peppers, and portobello mushrooms for a delicious vegetarian version.

Turkey & Ham Croissant Melts

Serves: 4 Prep Time: 5 minutes Cooking Time: 8 minutes 8 minutes
Nutrition facts: 200 calories 20 grams fat
Rating: 5.0/5
( 1 voted )
Pin
Print

Ingredients

 4 large croissants, sliced in half horizontally
 8 slices provolone cheese
 8 slices deli ham (Bistro Favorites recommended)
 12 slices oven-roasted turkey (Bistro Favorites recommended)
 3 tbsp melted butter

Instructions

Preheat your oven to 375°F (190°C). Line a baking sheet with parchment paper for easy cleanup.

Place the bottom halves of the croissants on the baking sheet. On each one, layer 1 slice of provolone, 2 slices of ham, 3 slices of turkey and 1 more slice of provolone. Top with the croissant tops to close each sandwich.

Use a pastry brush or spoon to gently coat the tops of each croissant with melted butter. This will help them toast up beautifully in the oven.

Bake in the preheated oven for 5–8 minutes, or until the cheese is melted and the croissants are lightly golden and crisp on top.

Let the sandwiches rest for a minute or two, then serve immediately. Pair with kettle chips, a fresh fruit salad, or a simple spring mix tossed in vinaigrette.

Notes

  1. These melts are perfect for a quick lunch or easy dinner option.
  2. You can customize with different deli meats or cheeses based on preference.


Tools You'll Need

  • Baking sheet
  • Parchment paper
  • Pastry brush (optional)

Allergy Information

Please check ingredients for potential allergens and consult a health professional if in doubt.

Nutrition Facts (Per Serving)

It is important to consider this information as approximate and not to use it as definitive health advice.
  • Calories: ~
  • Total Fat: ~
  • Total Carbohydrate: ~
  • Protein: ~
0 comments
0 FacebookTwitterPinterestLinkedin
Soups & SaladsTurkey Meals

Leftover Turkey Soup

by myphillyconnection February 26, 2026
written by myphillyconnection

A creamy soup that gives leftover turkey new life, combined with mushrooms, vegetables, and wild rice. Perfect for post-holiday meals and easy to customize with other leftovers.

My creamy turkey soup transforms holiday leftovers into pure comfort. The rich broth tender turkey and fresh vegetables create something completely new and delicious. It’s my favorite way to make those holiday memories last a little longer.

Smart And Delicious

This soup gives leftover turkey new life while saving time in the kitchen. The creamy broth and hearty vegetables turn simple ingredients into something special. Plus it helps reduce food waste which always feels good.

What You Need

  • Good Broth: Four cups turkey or chicken both work.
  • Turkey: Two cups leftover meat chopped up.
  • Mushrooms: One cup sliced fresh ones.
  • Potatoes: Two cups little ones diced small.
  • Carrots: One cup sliced use fresh or roasted.
  • Celery: Half cup adds nice crunch.
  • Wild Rice: Half cup makes it hearty.
  • Fats: Two spoons each butter and oil.
  • Half and Half: One cup makes it creamy.
  • Garlic: Two cloves minced fine.
  • Seasonings: Italian blend salt and pepper.

Start Your Soup

First Flavors

Cook those onions and celery in butter and oil until soft.

Add Mushrooms

Let them get golden then add garlic just a minute.

A close-up of a bowl of creamy chicken soup with chunks of chicken, carrots, and yellow squash, garnished with parsley.

Building Layers

Make It Rich

Stir flour and herbs into your veggies.

Add Liquid

Pour broth in slowly keep stirring.

More Veggies

Add carrots potatoes rice let it all simmer covered.

Finish Strong

Last Bits

Add your turkey corn and that creamy half and half.

Final Touch

Let everything warm through about ten minutes.

Time To Eat

Serve your soup piping hot with crusty bread on the side. The creamy broth and tender bits of turkey make everyone happy. Pure comfort in every spoonful.

Make It Perfect

Keep your heat medium when cooking vegetables. Stir that broth in slowly no lumps allowed. Taste and season as you go. Take time with those first vegetables they build flavor.

A close-up of a bowl of creamy chicken soup with chunks of chicken, carrots, and yellow vegetables, garnished with parsley.

Save Some For Later

Keeps well two days in the fridge. Warm it slowly on the stove. Skip the freezer though potatoes get funny and cream can separate.

Make It Yours

Those glazed carrots from dinner work great here. Switch up the rice try pasta instead. Leftover gravy makes it even richer.

Good For You Too

You get protein from the turkey plus all those vegetable nutrients. Want it lighter? Try evaporated milk instead of cream still tastes rich.

Pure Comfort

One pot does it all keeps cleanup simple. Those tender vegetables rich broth and bits of turkey create the perfect cold day meal.

A bowl of creamy chicken soup filled with pieces of chicken, carrots, and herbs.

Perfect Partners

Add a fresh salad on the side. Some garlic bread for dipping. Fresh parsley on top makes everything look prettier.

Work Ahead

Cook everything but the rice save that for last when reheating. Keeps the texture just right no mushy rice here.

Holiday Magic

This soup makes those holiday leftovers shine in a whole new way. Simple ingredients careful cooking lots of love that’s what makes it special.

A close-up view of a bowl of creamy chicken soup containing shredded chicken, carrots, and colorful vegetables, topped with black pepper and fresh herbs.

Frequently Asked Questions

→ Can I freeze this soup?

Yes, but freeze before adding the cream. When reheating, thaw completely and add fresh cream at the end of reheating. This prevents the cream from separating.

→ What can I substitute for wild rice blend?

You can use all potatoes instead of rice, or try other grains like barley or regular rice. Just adjust cooking time according to what you use.

→ Can I use chicken instead of turkey?

Yes, cooked chicken works perfectly in this recipe. Use rotisserie chicken or leftover roasted chicken cut into bite-sized pieces.

→ How do I prevent lumpy flour in my soup?

Make sure to sprinkle flour evenly and stir constantly. When adding broth, pour gradually while stirring to prevent lumps from forming.

→ How long does this soup keep?

Store in the refrigerator for up to 3-4 days. The soup may thicken when chilled; thin with a bit of broth when reheating if needed.

Leftover Turkey Soup

Serves: 6 Prep Time: 15 minutes Cooking Time: 60 minutes 60 minutes
Nutrition facts: 200 calories 20 grams fat
Rating: 5.0/5
( 1 voted )
Pin
Print

Ingredients

1 tablespoon butter.
 1 tablespoon olive oil.
 1/2 cup onion, finely chopped.
 1/2 cup celery, chopped.
 4 ounces cremini mushrooms, sliced.
 1 garlic clove, crushed.
 1 teaspoon Italian seasoning.
 3 tablespoons flour.
 6 cups turkey or chicken broth.
 3 medium carrots, peeled and sliced.
 1/2 pound baby potatoes, halved.
 1/2 cup wild rice blend.
 1 cup half & half.
 4 cups cooked turkey, shredded.
 1/2 cup corn.
 Salt and pepper to taste.

Instructions

Heat butter and oil in large pot. Cook onion and celery until soft, 4-5 minutes.

Add mushrooms and cook 3-4 minutes until soft. Add garlic and cook 1 minute more.

Reduce heat to medium-low. Add Italian seasoning and flour, stir for 1 minute.

Gradually stir in broth to prevent lumps. Add carrots, potatoes and rice.

Bring to boil, reduce heat and simmer covered until rice is nearly done (20-35 minutes depending on rice type).

Add half and half, turkey and corn. Simmer uncovered 10 minutes. Season with salt and pepper.

Notes

  1. Can use leftover vegetables and gravy in place of fresh ingredients.
  2. Mushrooms can be omitted if preferred.


Tools You'll Need

  • Large pot.

Allergy Information

Please check ingredients for potential allergens and consult a health professional if in doubt.

Nutrition Facts (Per Serving)

It is important to consider this information as approximate and not to use it as definitive health advice.
  • Calories: ~
  • Total Fat: ~
  • Total Carbohydrate: ~
  • Protein: ~

0 comments
0 FacebookTwitterPinterestLinkedin
Turkey Meals

Maple-Butter-Glazed Turkey

by myphillyconnection February 26, 2026
written by myphillyconnection

This Maple-Butter-Glazed Turkey is a holiday showstopper, offering a blend of sweet maple syrup and savory butter for a juicy, flavorful main course. By dry brining the turkey with a savory blend of kosher salt, brown sugar, and seasonings, the meat remains moist and tender. The glaze, made from butter, maple syrup, soy sauce, and a touch of vinegar, creates a beautifully caramelized exterior as it bakes. Regular basting ensures maximum flavor absorption, while the turkey rests to preserve its juices. A perfect centerpiece for Thanksgiving or any special gathering.

Elevate your holiday table with this Maple-Butter-Glazed Turkey, a perfect combination of sweet and savory flavors. The secret to its juiciness lies in the dry brine, which locks in moisture and deeply infuses flavor into the meat.INGREDIENTS

  • Turkey: 12-14 lb, with neck and giblets removed, for a hearty main
  • Black Peppercorns: 1 Tbsp, coarsely ground for seasoning
  • Kosher Salt: ⅔ cup (or 6 Tbsp plus ½ tsp Morton salt), essential for dry brining
  • Garlic Powder: 2 Tbsp, for added flavor
  • Light Brown Sugar: 2 Tbsp, for a hint of sweetness
  • Vegetable or Olive Oil: 1 Tbsp, to coat
  • Water: 1 cup, added during roasting
  • Unsalted Butter: ½ cup (1 stick), for the glaze
  • Pure Maple Syrup: ¼ cup, for sweetness in the glaze
  • Soy Sauce or Tamari: 2 Tbsp, for a savory note
  • Unseasoned Rice Vinegar or White Wine Vinegar: 2 Tbsp, for balance
  • Worcestershire Sauce: 1 Tbsp, for depth of flavor
  • Thyme: 2 sprigs, for aromatic infusion

INSTRUCTIONS

Step 1: Prepare the turkey by removing the legs and wings, separating the breast, and optionally trimming the backbone. Pat all pieces dry.

Step 2: Mix coarsely ground black peppercorns, kosher salt, garlic powder, and brown sugar. Coat all turkey pieces with this dry brine and place on a wire rack over a baking sheet. Chill for up to 1 day.

Step 3: Prepare the glaze by combining butter, maple syrup, soy sauce, vinegar, Worcestershire sauce, and thyme in a saucepan over medium heat. Cook until thickened.

Step 4: Preheat oven to 425°F. Arrange brined turkey pieces on a wire rack over a baking sheet with 1 cup of water. Roast for 20-30 minutes.

Step 5: Reduce oven temperature to 300°F and continue roasting for 50-70 minutes, brushing the turkey with the prepared glaze every 20 minutes.

Step 6: Once roasted, allow the turkey to rest before carving and serving.Serving and Storage Tips

  • Serve hot, arranged on a platter with herbs for a festive presentation.
  • Store leftovers in the refrigerator for up to 3-4 days, or freeze for longer preservation.
  • Reheat gently to maintain juiciness.

Helpful Notes

  • Adjust the amount of glaze based on desired sweetness and richness.
  • For a deeper flavor, add a few smashed garlic cloves during roasting.

Tips from Well-Known Chefs

  • Chef Brown recommends basting frequently to ensure a deeply caramelized and flavorful crust.
  • Chef Lee suggests using tamari for a gluten-free version of the glaze without sacrificing flavor.
Maple-Butter-Glazed Turkey

Maple-Butter-Glazed Turkey

Serves: 6 Prep Time: 1440 minutes Cooking Time: 100 minutes 100 minutes
Nutrition facts: 300 calories 20 grams fat
Rating: 5.0/5
( 1 voted )
Pin
Print

Ingredients

12-14 lb Turkey (neck and giblets removed).
1 Tbsp Black peppercorns, coarsely ground.
⅔ cup Kosher salt (or 6 Tbsp plus ½ tsp Morton salt).
2 Tbsp Garlic powder.
2 Tbsp Light brown sugar.
1 Tbsp Vegetable oil or olive oil.
1 cup Water.
½ cup (1 stick) Unsalted butter.
¼ cup Pure maple syrup.
2 Tbsp Soy sauce or tamari.
2 Tbsp Unseasoned rice vinegar or white wine vinegar.
1 Tbsp Worcestershire sauce.
2 sprigs Thyme.

Instructions

Remove turkey legs and wings, separate the breast, and optionally trim the backbone. Pat turkey pieces dry.

Coarsely grind black peppercorns and mix with kosher salt, garlic powder, and brown sugar. Coat turkey pieces with this mixture and place them on a wire rack over a baking sheet. Chill for up to 1 day to dry brine.

In a saucepan, cook unsalted butter, pure maple syrup, soy sauce, vinegar, Worcestershire sauce, and thyme over medium heat until thickened, creating a glaze.

Preheat the oven to 425°F. Arrange brined turkey pieces on a wire rack over a baking sheet with 1 cup water. Roast for 20-30 minutes.

Reduce oven heat to 300°F and continue roasting for another 50-70 minutes, brushing the turkey with the prepared glaze every 20 minutes.

Once done, allow the turkey to rest before carving and serving.

Notes

  1. This maple-butter-glazed turkey offers a blend of sweet and savory flavors perfect for holiday gatherings.
  2. Dry brining the turkey enhances flavor and ensures a moist texture.
  3. Regular glazing during roasting creates a beautifully caramelized and flavorful exterior.

Allergy Information

Please check ingredients for potential allergens and consult a health professional if in doubt.

Nutrition Facts (Per Serving)

It is important to consider this information as approximate and not to use it as definitive health advice.
  • Calories: ~
  • Total Fat: ~
  • Total Carbohydrate: ~
  • Protein: ~

0 comments
0 FacebookTwitterPinterestLinkedin
Turkey Meals

Crockpot Turkey Breast

by myphillyconnection February 26, 2026
written by myphillyconnection

Making a whole turkey for just a few people always seemed wasteful to me, but I still wanted that classic holiday turkey flavor without heating up my oven for hours or dealing with a massive bird. This slow cooker turkey breast changed everything. You season a bone-in turkey breast with fresh herbs, throw some oranges and herb sprigs in the bottom of your crockpot for aromatics, pour in some broth, and let it cook low and slow for about five hours. What comes out is this incredibly juicy, tender turkey that practically falls off the bone and tastes like you spent all day fussing over it. I made this for Thanksgiving a few years back when we were doing a small family dinner, and my dad kept saying it was the moistest turkey he’d ever had. Now I make it way more often than just holidays because it’s so easy and gives you amazing turkey sandwiches for days afterward.

Why This Recipe Wins

  • The slow cooker keeps everything moist and prevents that dry, overcooked turkey problem that happens so often with roasting, giving you tender meat that stays juicy all the way through
  • You only spend about ten minutes on actual prep work and then the crockpot does everything else while you do other things, which is perfect for busy holidays or when you just don’t want to babysit dinner
  • Using a turkey breast instead of a whole bird means you get way more meat per pound without dealing with dark meat that cooks at different rates or trying to carve around a complicated carcass
  • The oranges and fresh herbs create this aromatic steam that infuses the meat with incredible flavor from the inside out while it cooks, making every bite taste special

My sister is not a confident cook. She usually brings store-bought desserts to family gatherings because she’s convinced she’ll mess up anything homemade. But after eating this turkey at my house, she asked if I thought she could make it for Christmas dinner at her place. I told her if she could throw things in a crockpot and turn it on, she could definitely make this. She did it and sent me a photo of her finished turkey looking gorgeous, with a text that just said “I CAN’T BELIEVE I MADE THIS.” Her husband told me later it was the first time she’d ever successfully cooked a main dish for a holiday meal, and now she makes it all the time.

What Goes Into It

  • Bone-in turkey breast: Get one that weighs between 6 and 7 pounds with the skin still on. The bone keeps the meat juicy while it cooks, and the skin protects the meat from drying out even though it won’t get crispy in the slow cooker.
  • Oranges: Two of them quartered up to throw in the bottom of the crockpot. As they heat, they release their juices and oils, which steam up and flavor the turkey from below. You can also use one orange and one lemon if you want more tartness.
  • Fresh thyme sprigs: Whole sprigs with the leaves still on the stems go in the bottom for aromatics. The slow, gentle heat releases their earthy, slightly minty flavor throughout the cooking process.
  • Fresh rosemary sprigs: More whole sprigs for the bottom layer. Rosemary has this piney, robust flavor that pairs perfectly with poultry and gets stronger as it cooks in all that moisture.
  • Olive oil: Just enough to help the herbs and seasonings stick to the turkey skin and create a base for browning later if you want to crisp it up under the broiler.
  • Chopped fresh thyme: This time you chop the leaves finely to rub directly on the turkey skin. Fresh herbs taste way better than dried in this recipe because their oils are more vibrant and aromatic.
  • Chopped fresh rosemary: Also chopped fine for rubbing into the skin. Make sure to chop rosemary really well because the leaves can be kind of tough and woody if left in big pieces.
  • Sea salt: Fine sea salt distributes more evenly over the skin than coarse salt. You’ll use between one and two teaspoons depending on how salty you like things.
  • Black pepper: Freshly ground gives you the best flavor. Pre-ground pepper from a jar that’s been sitting in your cabinet for a year won’t have the same punch.
  • Chicken broth: Low-sodium is important because you’re adding salt separately and you can always add more salt at the end but you can’t take it away. This creates the cooking liquid that keeps everything moist. You could also use apple cider for a slightly sweeter, more fall-flavored version.
Crockpot Turkey Breast

Cooking the Turkey

Preparing the meat:

Take your turkey breast out of whatever packaging it came in and remove any little plastic pop-up thermometers or tags that might be stuck in it. Grab some paper towels and pat the entire turkey dry, getting the skin as moisture-free as possible. This helps the seasonings stick better and will matter later if you decide to brown the skin. Set your dried turkey aside on a clean plate or cutting board while you prep your slow cooker.

Building the base layer:

Get out your largest slow cooker—you need one big enough to fit a 6 to 7 pound turkey breast comfortably. Take your two oranges and cut each one into quarters, then drop all those quarters into the bottom of the slow cooker insert. They don’t need to be arranged in any particular pattern, just scattered across the bottom. Add your four sprigs of fresh thyme and four sprigs of fresh rosemary right on top of the oranges. These aromatics will sit under the turkey and release their flavors as they heat up, creating this fragrant steam that works its way up through the meat.

Seasoning the turkey:

Drizzle your tablespoon of olive oil all over the turkey breast, using your hands to rub it into the skin so the entire surface gets coated with a thin layer of oil. In a small bowl, mix together your chopped thyme, chopped rosemary, salt, and pepper. Sprinkle this herb mixture all over the oiled turkey skin, then use your hands again to rub it in really well, pressing it into the skin so it adheres. Make sure you get herbs on all sides of the turkey breast, not just the top. The more evenly you distribute the seasonings, the more flavorful every part of the turkey will be.

Setting up the slow cooker:

Carefully place your seasoned turkey breast into the slow cooker, setting it right on top of the oranges and herbs you put in the bottom. The turkey will probably be sitting kind of tilted because of the oranges underneath, and that’s completely fine. Pour your cup of chicken broth around the turkey, letting it pool in the bottom of the slow cooker. Don’t pour it directly over the top of the turkey or you’ll wash off all those herbs you just rubbed in. The broth will create moisture in the cooking environment and mix with the juices from the oranges and turkey as everything cooks.

Slow cooking process:

Put the lid on your slow cooker and make sure it’s sealed properly all the way around. Turn the heat to low and set a timer for five hours. Resist the urge to lift the lid and check on it during cooking because every time you open the slow cooker, you release heat and moisture and add to your total cooking time. After five hours, use an instant-read thermometer to check the internal temperature by sticking it into the thickest part of the breast without touching the bone. You’re looking for 165 degrees, which is the safe temperature for poultry. If it hasn’t reached that yet, put the lid back on and keep cooking, checking every thirty minutes until it hits 165. Depending on your slow cooker and the exact size of your turkey breast, total cooking time could be anywhere from five to seven hours.

Resting the meat:

Once your turkey reaches 165 degrees, very carefully lift it out of the slow cooker using sturdy tongs or two large spatulas. Be gentle because the meat will be so tender it might want to fall apart. Set the turkey on a cutting board or serving platter and immediately cover it loosely with aluminum foil. Let it rest under that foil tent for a full 20 minutes without cutting into it. This resting time lets the juices redistribute throughout the meat so they don’t all run out onto your cutting board when you start slicing. I know it’s tempting to cut right in, but waiting those 20 minutes makes a noticeable difference in how juicy each slice turns out.

Optional browning step:

The skin on slow cooker turkey won’t be crispy since it’s been steaming in moisture for hours. If you want that golden-brown, slightly crispy skin for presentation, use a sharp knife to carefully remove both turkey breast halves from the bone while keeping them in large pieces. Turn your oven to broil and line a baking sheet with foil. Place the turkey breast pieces skin side up on the prepared sheet and slide it under the broiler. Watch it constantly because broilers are aggressive and things go from golden to burnt really fast. After about 3 to 5 minutes, when the skin looks golden brown and slightly crispy, pull it out immediately. Tent it with foil again and let it rest another few minutes if needed, then slice and serve. Browning is totally optional—the turkey tastes amazing either way, but it does look more impressive and traditional with that golden skin.

Important Things to Know

  • Bone-in: The bone-in breast stays significantly juicier than boneless because the bone conducts heat more slowly and protects the meat from overcooking while adding flavor throughout the cooking process
  • Low Heat: Cooking on low rather than high gives you much better texture and moisture retention, even though it takes longer, because the gentle heat doesn’t force the meat fibers to contract and squeeze out their juices
  • Timing: Every slow cooker runs a little differently in terms of temperature, so your cooking time might vary by an hour or more from someone else making this exact recipe with a different brand or model
  • Resting: Letting the turkey rest after cooking is just as important as the cooking itself because cutting into it immediately causes all the juice to flood out instead of staying in the meat where you want it

The first time I made turkey in a slow cooker, I used a boneless breast thinking it would be easier to deal with. That turkey came out drier and way less flavorful than when I finally tried it with a bone-in breast. The bone really does make that much difference, both in keeping things moist and in adding that deeper turkey flavor you expect. Now I always buy bone-in even though it costs a bit more per pound, because the results are so much better.

I learned about resting the hard way. Early on, I’d pull the turkey out of the slow cooker and immediately start carving it because I was excited and hungry. All this juice would pour out onto my cutting board, and then when people actually ate the turkey, it seemed kind of dry. Once I started forcing myself to wait that full 20 minutes before cutting, the difference was obvious. The meat stayed juicier and every slice was tender instead of just the middle pieces being good while the ends were dry.

My slow cooker runs a little hot compared to some others I’ve used at friends’ houses. The first few times I made this, I’d check at five hours and the turkey was already at like 175 degrees, which is technically overcooked even though it still tasted fine because of the moist environment. Now I start checking around four and a half hours just to be safe. Getting an instant-read thermometer was one of the best kitchen purchases I ever made because it takes all the guessing out of when things are actually done.

The fresh herbs are really worth it for this recipe. I tried making it with dried herbs once when I didn’t feel like going to the store, using the usual conversion of one-third the amount. It was okay but nowhere near as fragrant and flavorful as when I use fresh. Fresh herbs release their oils slowly over those long cooking hours, perfuming the whole house and infusing the turkey in a way dried herbs just can’t match.

Using low-sodium broth matters more than I initially thought. I used regular broth the first time and the turkey came out tasting too salty, especially near the bottom where it was sitting in the cooking liquid. Low-sodium lets you control the salt level with what you rub on the skin, and you can always add more salt to individual slices when serving if someone wants it.

Serving This Turkey

Slice your rested turkey breast across the grain into pieces about half an inch thick and arrange them on a warmed platter for a nice presentation. This turkey works beautifully as your main protein for Thanksgiving, Christmas, or any holiday meal where you want something special without the hassle of a whole bird. Serve it with classic sides like mashed potatoes, stuffing, cranberry sauce, and roasted vegetables for a traditional spread. The leftovers make incredible sandwiches with cranberry sauce and mayo on soft bread, which honestly might be better than the actual meal. For a lighter dinner, serve sliced turkey over a big green salad with nuts and dried cranberries. The cooking liquid left in your slow cooker can be strained and used as a base for gravy if you want to go that route, just skim off any fat and thicken it with a flour or cornstarch slurry.

Different Ways to Try It

Season the turkey with a dry rub made from brown sugar, smoked paprika, and cumin instead of the herbs for a completely different flavor profile with more sweetness and smoke. Use maple syrup mixed with Dijon mustard as a glaze rubbed on before cooking for a sweet and tangy variation. Throw some chopped apples and onions in the bottom instead of oranges for a more savory, fall-inspired version. Add a few cloves of garlic to the bottom aromatics for deeper, richer flavor throughout. Try using grapefruit instead of oranges for a more tart, slightly bitter citrus note. Rub the turkey with butter mixed with dried cranberries and sage for a classic New England style. Add a splash of white wine to the chicken broth for a more sophisticated cooking liquid. Mix some honey with the olive oil before rubbing on the herbs for subtle sweetness that caramelizes slightly during cooking.

Keeping and Reheating Leftovers

  • Leftover turkey stays good in the fridge for up to 4 days stored in an airtight container or wrapped tightly in foil. Slice it before storing if you haven’t already, which makes it easier to grab exactly what you need for sandwiches or quick meals.
  • Reheat slices gently in the microwave with a damp paper towel over them to keep them from drying out, or warm them in a covered dish with a splash of broth in a 325-degree oven for about 15 minutes.
  • You can freeze cooked turkey for up to 3 months wrapped really well in plastic wrap and then foil or in freezer bags with all the air pressed out. Thaw frozen turkey in the fridge overnight before reheating.
  • The cooking liquid from the slow cooker can be strained, cooled, and frozen separately to use later for soups or gravy.
  • Leftover turkey works great in casseroles, salads, soups, pot pies, quesadillas, or basically anywhere you’d use cooked chicken.
Crockpot Turkey Breast

Best Kitchen Tips

  • Check the internal temperature in multiple spots on the turkey breast since slow cookers can have hot spots that cook some areas faster than others, and you want to make sure the entire breast has reached a safe temperature
  • Save that strained cooking liquid in the fridge or freezer because it’s incredibly flavorful and makes an amazing base for turkey soup or gravy later when you want to use up leftovers
  • If your turkey breast doesn’t fit comfortably in your slow cooker, you can remove the backbone with kitchen shears to flatten it slightly, or just buy a smaller breast that fits your equipment better

I’ve made this slow cooker turkey breast for so many different occasions now. Regular weeknight dinners when I’m craving turkey but don’t want to heat up the whole oven. Small holiday gatherings when cooking a whole turkey seems ridiculous. Meal prep Sundays when I want protein for the week ahead. Every single time, it comes out tender and juicy and full of flavor. There’s something really satisfying about putting ingredients in a pot in the morning and coming home to dinner basically done. The house smells incredible when you walk in, and you feel like a genius for making something this good with such little active work. People always assume slow cooker food is going to be kind of mushy or overcooked, but this turkey proves that’s not true when you do it right. The meat has texture and structure, it slices beautifully, and the flavor is way better than what most people get from hours of roasting. I honestly prefer this method now even when I have time to use the oven, just because the results are so consistently good. No more worrying about dry breast meat or constantly basting or any of that traditional turkey drama. Just season it, walk away, and come back to perfect turkey. That’s pretty much the dream for any cook, and this recipe delivers on that promise every single time!

Frequently Asked Questions

→ Can I use a boneless turkey breast? Yes, but it will cook faster – probably 4 to 5 hours on low. The bone helps keep the meat juicy and adds flavor, but boneless works in a pinch.

→ Do I need to brown the turkey first? No! That’s the beauty of this recipe – just season it and toss it in the slow cooker. You can brown the skin at the end under the broiler if you want it crispy.

→ What size slow cooker do I need? A 6 to 7 quart slow cooker works best for a turkey breast this size. Make sure the lid closes completely.

→ Can I cook this on high instead of low? You can, but it will take about 3 to 4 hours and won’t be quite as tender. Low and slow is best for turkey.

→ What can I do with the drippings? Strain them and use them to make gravy! Just thicken with a flour or cornstarch slurry and season to taste.

→ Can I add vegetables to the slow cooker? Sure! Carrots, celery, and onions would be great additions. Just put them on the bottom with the oranges and herbs.

0 comments
0 FacebookTwitterPinterestLinkedin
Turkey Meals

Easy Creamy Ground Turkey Pasta Recipe

by myphillyconnection February 26, 2026
written by myphillyconnection

This ground turkey pasta combines lean meat, creamy tomato sauce, and melted cheese for a family-friendly meal. It’s quick to make, uses simple ingredients, and creates a comforting dinner that everyone will love.

This creamy turkey pasta has saved my weeknight dinner routine countless times. It’s my go to recipe when I need something quick yet satisfying that my whole family will enjoy. The combination of tender ground turkey and pasta in a rich tomato sauce creates pure comfort in a bowl.

Why This Recipe Never Fails

I love how this dish brings together lean protein with a sauce that’s absolutely irresistible. The best part is how flexible it is. Sometimes I toss in whatever veggies are sitting in my fridge or switch up the pasta shapes based on what I have in my pantry. It always turns out delicious no matter what.

What You’ll Need in Your Kitchen

  • 12 oz penne pasta (any short pasta works great)
  • 1 tablespoon olive oil (for cooking)
  • 1 medium onion (chopped up small)
  • 1 lb lean ground turkey
  • 3 garlic cloves (finely minced)
  • 1/2 teaspoon salt (adjust to taste)
  • 1/4 teaspoon black pepper
  • 2 tablespoons flour (gluten free works too)
  • 1 cup chicken broth (I prefer low sodium)
  • 1 can tomato sauce (15 oz)
  • 1/2 cup half and half (cream makes it extra luxurious)
  • 1 cup shredded cheese (I mix cheddar and mozzarella)
  • 1 cup of your favorite veggies
A skillet filled with baked penne pasta topped with melted cheese, ground meat, tomato sauce, and garnished with fresh parsley.
baked penne pasta topped with melted cheese, ground meat, tomato sauce, and garnished with fresh parsley

Let’s Cook Together

Start with the PastaGet your pasta cooking in well salted water. Save a cup of the cooking water before draining it really helps with the sauce.Cook the TurkeyWhile the pasta cooks, soften your onions in olive oil then add the turkey. Break it up as it browns to get nice even pieces.Make it SaucyOnce your turkey is cooked, add garlic and seasonings. Sprinkle in the flour, then pour in your broth and tomato sauce. Let it bubble away.Bring it All TogetherMix in your cooked pasta and half and half. Add cheese in two stages some for mixing and some on top. Let it get all melty and delicious.

Make it Your Own

Some nights I use gluten free pasta or swap in ground chicken. My kids love when I add their favorite veggies like peas or broccoli. I usually serve it with a simple salad on the side but honestly it’s perfectly satisfying on its own.

Frequently Asked Questions

→ Can I use different types of pasta?

Yes, any pasta shape works well. Penne, rotini, or fusilli are great choices as they hold the sauce well in their ridges.→ How do I store leftovers?

Store in an airtight container in the fridge for up to 3 days. Reheat gently on stovetop or microwave, adding a splash of milk if needed.→ Can I make this healthier?

Use whole wheat pasta, low-fat dairy, and add extra vegetables like spinach or zucchini. The taste stays great while adding more nutrients.→ Can I freeze this dish?

Yes, it freezes well for up to 3 months. Thaw overnight in the fridge and reheat slowly, stirring often to keep the creamy texture.→ What can I serve with this pasta?

A simple green salad or roasted vegetables make perfect sides. Garlic bread is great for soaking up the extra sauce.

Easy Creamy Ground Turkey Pasta Recipe

Serves: 6 Prep Time: 10 minutes Cooking Time: 30 minutes 30 minutes
Nutrition facts: 400 calories 20 grams fat
Rating: 5.0/5
( 1 voted )
Pin
Print

Ingredients

 12 ounces penne pasta.
 2 tablespoons olive oil.
 1 large yellow onion, diced.
 1 pound ground turkey.
 2 teaspoons salt, divided.
 ½ teaspoon black pepper.
 1 teaspoon Italian seasoning.
 5 cloves garlic, minced.
 2 tablespoons all-purpose flour.
 2 cups low-sodium chicken broth.
 1 (15-ounce) can tomato sauce.
 1 cup half and half.
 1 cup mozzarella cheese, shredded.
 1 cup cheddar cheese, shredded.
 Fresh parsley for garnish.
 Red chili flakes for garnish (optional).

Instructions

Boil pasta in salted water until just under done.

Save 1 cup pasta water before draining.

Heat oil in large pan over medium heat.

Cook onions until soft (5 minutes).

Add turkey, cook until browned.

Season with salt, pepper, Italian seasoning.

Add garlic, cook 1 minute.

Sprinkle flour over meat, stir well.

Pour in broth and tomato sauce, simmer.

Add cooked pasta and half-and-half.

Mix in half the cheeses.

Top with remaining cheese.

Cover until cheese melts.

Garnish with parsley and chili flakes.

Notes

  1. Can use ground beef instead.
  2. Use heavy cream for richer sauce.
  3. Can add vegetables.
  4. Great for meal prep.
  5. Easy to customize.


Tools You'll Need

  • Large pot.
  • Large pan or Dutch oven.
  • Colander.

Allergy Information

Please check ingredients for potential allergens and consult a health professional if in doubt.

Nutrition Facts (Per Serving)

It is important to consider this information as approximate and not to use it as definitive health advice.
  • Calories: ~
  • Total Fat: ~
  • Total Carbohydrate: ~
  • Protein: ~

0 comments
0 FacebookTwitterPinterestLinkedin
30 Minute MealsSoups & Salads

Cucumber Ranch Crack Salad

by myphillyconnection February 26, 2026
written by myphillyconnection

Slice cucumbers, mix with ranch dressing, cheddar cheese, bacon, and green onions. Add seasonings, toss well, chill briefly, and serve cold.

This cucumber ranch crack salad earned its name because I literally couldn’t stop eating it once I started, and apparently neither could anyone else who tried it. It started as my desperate attempt to use up a massive bag of cucumbers from my neighbor’s garden that was threatening to turn into expensive compost if I didn’t do something with them fast. I threw together what I thought would be a basic cucumber salad, but the combination of cool, crisp cucumbers with creamy ranch, sharp cheddar, and smoky bacon created this addictive side dish that had my family coming back to the fridge every ten minutes for “just one more bite.” Now I can’t make it without people asking for the recipe, and I’ve learned to always double the batch because it disappears faster than anything else I put on the table.

Why People Get Obsessed

  • Addictive flavor combination – The cool crunch of cucumbers with creamy ranch and salty bacon hits every craving at once
  • Takes five minutes to make – No cooking required, just chop, mix, and eat, which is perfect for hot summer days
  • Uses simple pantry ingredients – Everything you need is probably already in your kitchen or easy to grab at any store
  • Perfect for crowds – Doubles or triples easily and actually gets better as it sits and the flavors meld together
  • Healthy but doesn’t taste like it – You’re basically eating a vegetable salad, but it tastes like indulgent comfort food

My sister brought this to a family barbecue last summer after I’d made it for her once, and my uncle literally stood next to the bowl eating it with a spoon while talking to people. By the end of the night, three different cousins had asked her for the recipe, and my aunt wanted to know why she’d never made anything that good before. Sometimes the simplest combinations create the biggest impact, especially when you’re not trying to impress anyone.

Ingredients

  • Fresh cucumbers: Use the regular slicing kind, not the tiny pickling ones, and slice them thick enough to hold their crunch but thin enough to coat with dressing
  • Good ranch dressing: This is not the time to skimp on quality – use the good stuff from the refrigerated section or make your own if you’re feeling ambitious
  • Sharp cheddar cheese: Mild cheddar gets lost in all the other flavors, so go for something with real bite that can stand up to the ranch and bacon
  • Real bacon pieces: Cook your own and crumble it, or use the pre-cooked bacon bits from a bag, but avoid the fake bacon-flavored bits that taste like cardboard
  • Fresh green onions: These add a subtle onion flavor and bright color that makes the whole salad look more appetizing
Cucumber Ranch Crack Salad

Step-by-Step Instructions

Prep your cucumbers right

Wash and slice your cucumbers into rounds that are about a quarter-inch thick – thick enough to have some substance when you bite them, but thin enough that they’ll absorb the dressing flavors. You don’t need to peel them unless you want to, but I like leaving the skin on for extra color and nutrients. If your cucumbers are really large and seedy, you might want to scoop out some of the seeds so they don’t make the salad watery.

Get everything ready

Chop your green onions into small pieces, including some of the green parts for color. If you’re cooking bacon fresh, let it cool completely before crumbling it into bite-sized pieces. Shred your cheddar cheese if you bought it in a block, or just measure out the pre-shredded stuff if that’s what you have on hand.

Combine the base ingredients

Dump the sliced cucumbers, shredded cheese, crumbled bacon, and chopped green onions into your largest mixing bowl. Give everything a gentle toss with your hands or a big spoon just to distribute the ingredients evenly before you add the wet stuff.

Add the flavor magic

Pour the ranch dressing over everything, then sprinkle in the garlic powder, dried dill, salt, and pepper. Start with less seasoning than you think you need because you can always add more, but you can’t take it back once it’s mixed in. The ranch dressing will carry all these flavors throughout the salad.

Mix until everything’s coated

Use a large spoon or your clean hands to gently toss everything together until every piece of cucumber is coated with the creamy dressing and all the bacon and cheese is distributed evenly. Be gentle so you don’t break up the cucumbers, but make sure everything gets well combined.

Let it chill and meld

If you have time, stick the bowl in the refrigerator for 10-15 minutes before serving. This gives the flavors time to meld together and the cucumbers time to absorb some of that ranch goodness. It’s good right away, but it’s even better after it’s had a chance to sit for a bit.

Making cucumber ranch crack salad has become my go-to contribution for potlucks and family gatherings because it’s practically foolproof and people always react like I’ve done something amazing when really I just threw some ingredients in a bowl. The first time I made it, I was worried it would be too simple or bland, but sometimes the most basic combinations create the most craveable results.

What I love about this recipe is how forgiving it is with measurements and substitutions. You can add more or less of any ingredient based on your preferences, throw in some cherry tomatoes for color, or use different types of cheese if that’s what you have on hand. The base concept of cucumbers with creamy dressing and crunchy add-ins works with so many variations.

The texture contrast is what makes this salad so addictive. You get the cool crunch of fresh cucumbers, the creamy richness of ranch dressing, the sharp bite of cheddar cheese, and the smoky saltiness of bacon all in one bite. It’s like eating all your favorite flavors at once, which explains why people can’t stop going back for more.

One thing I learned is that this salad is actually better when it’s been sitting for a while. The cucumbers release a little bit of their water, which mixes with the ranch to create this perfectly seasoned dressing that coats everything beautifully. Don’t worry if it looks a little liquidy after sitting – that’s exactly what you want.

The dill is optional but really recommended because it adds this fresh, bright flavor that complements the cucumbers perfectly. If you have fresh dill, that’s even better, but dried works fine and is what most people have in their spice cabinet anyway.

Serving This Crowd-Pleaser

Serve your cucumber ranch crack salad chilled in a large bowl with a serving spoon, and maybe put out some extra napkins because people will want to eat it with their hands. This pairs perfectly with grilled meats, fried chicken, or anything barbecued because the cool, creamy texture balances out hot, smoky flavors beautifully. It’s also great alongside other picnic favorites like potato salad and coleslaw. For parties, I like to garnish the top with a few extra bacon crumbles and green onion pieces to make it look more intentional.

Creative Twists

This cucumber ranch crack salad is incredibly versatile and works with so many different additions and substitutions. Try adding cherry tomatoes, corn kernels, or diced bell peppers for extra color and nutrition. You can switch up the cheese to pepper jack for heat or use crumbled blue cheese for a more sophisticated flavor. Sometimes I’ll add sunflower seeds or chopped pecans for extra crunch, or throw in some fresh herbs like chives or parsley. For a lighter version, use Greek yogurt ranch or make your own with Greek yogurt and ranch seasoning mix.

Storage Tips

Cucumber ranch crack salad keeps well in the refrigerator for up to three days, though it’s definitely best within the first day or two when the cucumbers are still at their crispest. Store it in a covered container and give it a good stir before serving since the ingredients tend to settle. The cucumbers will release more water as it sits, which actually makes the dressing more flavorful, but if it gets too watery, you can drain off some of the excess liquid before serving. Don’t freeze this salad because cucumbers don’t handle freezing well and will turn mushy when thawed.

Cucumber Ranch Crack Salad

Simple Success Tips

  • Don’t overdress it initially – You can always add more ranch, but you can’t take it back once it’s mixed in
  • Let it sit before serving – Even ten minutes makes a difference in how the flavors come together
  • Keep it cold – This salad is all about that refreshing, crisp texture that gets lost if it sits at room temperature too long

This cucumber ranch crack salad has become my secret weapon for summer entertaining because it’s one of those recipes that makes people think you’re a better cook than you actually are when really you just know how to combine flavors that work perfectly together. It’s proof that sometimes the best dishes are the simplest ones, and that you don’t need complicated techniques or exotic ingredients to create something that people will remember and ask for again and again.

Frequently Asked Questions

→ Why is it called crack salad?It gets this nickname because it’s so addictive – once you start eating it, you can’t stop! The combination of flavors is irresistible.

→ How long does this salad keep?Best eaten fresh, but it will keep in the fridge for up to 2 days. The cucumbers may release some water over time.

→ Can I make this ahead of time?You can prep the ingredients ahead, but mix everything together just before serving for the best texture and flavor.

→ What type of cucumbers work best?Regular cucumbers work great, but English cucumbers are even better since they have fewer seeds and stay crunchier longer.

→ Can I substitute the ranch dressing?Sure! Try it with Caesar dressing, blue cheese dressing, or even a simple vinaigrette for a lighter version.

Cucumber Ranch Crack Salad

Serves: 4 Prep Time: 10 minutes
Nutrition facts: 200 calories 20 grams fat
Rating: 5.0/5
( 1 voted )
Pin
Print

Ingredients

→ Main Ingredients

 2-3 cups fresh cucumbers, sliced thin
 ½ cup creamy ranch dressing
 ½ cup sharp cheddar cheese, shredded
 ⅓ cup crispy bacon, crumbled
 2 tbsp fresh green onions, chopped

→ Seasonings

 ½ tsp garlic powder
 ½ tsp dried dill weed
 Salt and fresh black pepper to taste

Instructions

Wash and slice the cucumbers into thin rounds - about ¼ inch thick works perfectly. Chop the green onions into small pieces. If your bacon isn't already cooked, fry it up until crispy and crumble into bite-sized pieces.

In a large mixing bowl, toss together the sliced cucumbers, shredded cheddar cheese, crumbled bacon, and chopped green onions. Give everything a gentle mix so it's evenly distributed.

Pour the ranch dressing over the cucumber mixture. Sprinkle in the garlic powder, dried dill, and a pinch of salt and pepper. Don't go too heavy on the salt since the bacon and cheese already add plenty of flavor.

Gently toss everything until the cucumbers are nicely coated with the ranch dressing and all the flavors are mixed throughout. Make sure every piece gets some of that creamy goodness.

For the best flavor, pop it in the fridge for 10-15 minutes to let everything meld together. Serve chilled and garnish with extra bacon bits or green onions if you're feeling fancy.

Notes

  1. This addictive salad is called 'crack salad' because once you start eating it, you can't stop!
  2. Best enjoyed fresh, but will keep in the fridge for up to 2 days - though the cucumbers may release some water.
  3. Perfect for potlucks, barbecues, or as a refreshing side dish on hot summer days.
  4. No cooking required - just chop, mix, and enjoy this cool and crunchy treat.


Tools You'll Need

  • Large mixing bowl
  • Sharp knife
  • Cutting board

Allergy Information

Please check ingredients for potential allergens and consult a health professional if in doubt.

Nutrition Facts (Per Serving)

It is important to consider this information as approximate and not to use it as definitive health advice.
  • Calories: ~

  • Total Fat: ~

  • Total Carbohydrate: ~

  • Protein: ~
0 comments
0 FacebookTwitterPinterestLinkedin
  • 1
  • 2
  • 3
  • 4
  • 5
  • …
  • 11

Search

Follow Us

279.6K Fans
twitter
instagram
pinterest

Recent Posts

  • Immune Boosting Vegetable Soup

    May 25, 2026
  • Creamy Crab Bisque

    May 25, 2026
  • Garlic Parmesan Pizza

    May 25, 2026
  • Green Bean Bundles

    May 24, 2026
  • Cheesy Scalloped Potatoes

    May 23, 2026
  • Garlic Parmesan Roasted Potatoes

    May 23, 2026
  • Brisket Loaded Twice Baked Potatoes

    May 23, 2026

Categories

  • 30 Minute Meals (36)
  • Barbecue (2)
  • Beef Meals (11)
  • Breakfast & Pastries (15)
  • Casseroles (11)
  • Cheesesteak (2)
  • Chicken Meals (19)
  • Cultural Dishes (12)
  • Featured (8)
  • Featured Sides (5)
  • Fish Meals (6)
  • Fresh Baked Breads (2)
  • Main Dishes (7)
  • Other Meals (2)
  • Pasta (21)
  • Pizza (5)
  • Popular Recipes (9)
  • Pork Meals (8)
  • Seafood Meals (19)
  • Side Dishes (5)
  • Soups & Salads (14)
  • Turkey Meals (7)
  • Vegetarian (19)

Popular Posts

  • 1

    Buddha Bowl with Tofu

    October 22, 2024
  • 2

    Creamy Tomato and Spinach Pasta

    February 15, 2026
  • 3

    Classic Spicy Barbecued Ribs

    October 20, 2021
  • 4

    Chicken Garlic Parmesan Pasta

    February 16, 2026
  • 5

    Delicious Pasta Alla Norma

    October 20, 2021

About Me

At MyPhillyConnection, we specialize in recipes for Philly favorites and lots of other popular dishes and cuisines.

Phone: (215) 554-7326
Email: info@myphillyconnection.com

Useful Links

  • Beef Meals
  • Chicken Meals
  • Fish Meals
  • Recipes
  • Recipe Submission

Breakfast Recipes

  • Immune Boosting Vegetable Soup

    May 25, 2026
  • Creamy Crab Bisque

    May 25, 2026

Recent Posts

  • Immune Boosting Vegetable Soup

    May 25, 2026
  • Creamy Crab Bisque

    May 25, 2026
  • Facebook
  • Twitter
  • Instagram
  • Pinterest
  • Linkedin
  • Tiktok

Copyright © 2026 - MyPhillyConnection / All Rights Reserved.

Philadelphia Food Network and Recipes
  • Home
    • Main Website
  • Recipes
  • Meals
    • 30 Minute Meals
    • Beef Meals
    • Breakfast & Pastries
    • Chicken Meals
    • Fish Meals
    • Pork Meals
    • Seafood Meals
    • Turkey Meals
    • Vegan & Vegetarian Meals
    • Other Meals
  • Categories
    • Barbecue
    • Casseroles
    • Cheesesteak
    • Cultural Dishes
    • Desserts & Treats
    • Featured
    • Fresh Baked Breads
    • Grilling
    • Pasta
    • Pizza
    • Popular Recipes
    • Side Dishes
    • Soul Food
    • Soups & Salads
  • About Us
  • Contact Us
  • Submit Your Recipe
Sign In

Keep me signed in until I sign out

Forgot your password?

Do not have an account ? Register here

Password Recovery

A new password will be emailed to you.

Have received a new password? Login here

Register New Account

I Agree to the Terms of Service and Privacy Policy

Have an account? Login here