Philadelphia Food Network and Recipes
  • Home
    • Main Website
  • Recipes
  • Meals
    • 30 Minute Meals
    • Beef Meals
    • Breakfast & Pastries
    • Chicken Meals
    • Fish Meals
    • Pork Meals
    • Seafood Meals
    • Turkey Meals
    • Vegan & Vegetarian Meals
    • Other Meals
  • Categories
    • Barbecue
    • Casseroles
    • Cheesesteak
    • Cultural Dishes
    • Desserts & Treats
    • Featured
    • Fresh Baked Breads
    • Grilling
    • Pasta
    • Pizza
    • Popular Recipes
    • Side Dishes
    • Soul Food
    • Soups & Salads
  • About Us
  • Contact Us
  • Submit Your Recipe
Top Posts
Asparagus & Cheese Stuffed Chicken
Asian Cabbage Stir Fry
High Protein Broccoli Cheddar Soup
Homemade Popeyes Cajun Fries
Immune Boosting Vegetable Soup
Creamy Crab Bisque
Garlic Parmesan Pizza
Green Bean Bundles
Cheesy Scalloped Potatoes
Garlic Parmesan Roasted Potatoes
Philadelphia Food Network and Recipes
  • Home
    • Main Website
  • Recipes
  • Meals
    • 30 Minute Meals
    • Beef Meals
    • Breakfast & Pastries
    • Chicken Meals
    • Fish Meals
    • Pork Meals
    • Seafood Meals
    • Turkey Meals
    • Vegan & Vegetarian Meals
    • Other Meals
  • Categories
    • Barbecue
    • Casseroles
    • Cheesesteak
    • Cultural Dishes
    • Desserts & Treats
    • Featured
    • Fresh Baked Breads
    • Grilling
    • Pasta
    • Pizza
    • Popular Recipes
    • Side Dishes
    • Soul Food
    • Soups & Salads
  • About Us
  • Contact Us
  • Submit Your Recipe
Copyright 2021 - All Right Reserved
PastaSeafood Meals

Shrimp Scampi Pasta Bake

by myphillyconnection February 24, 2026
written by myphillyconnection

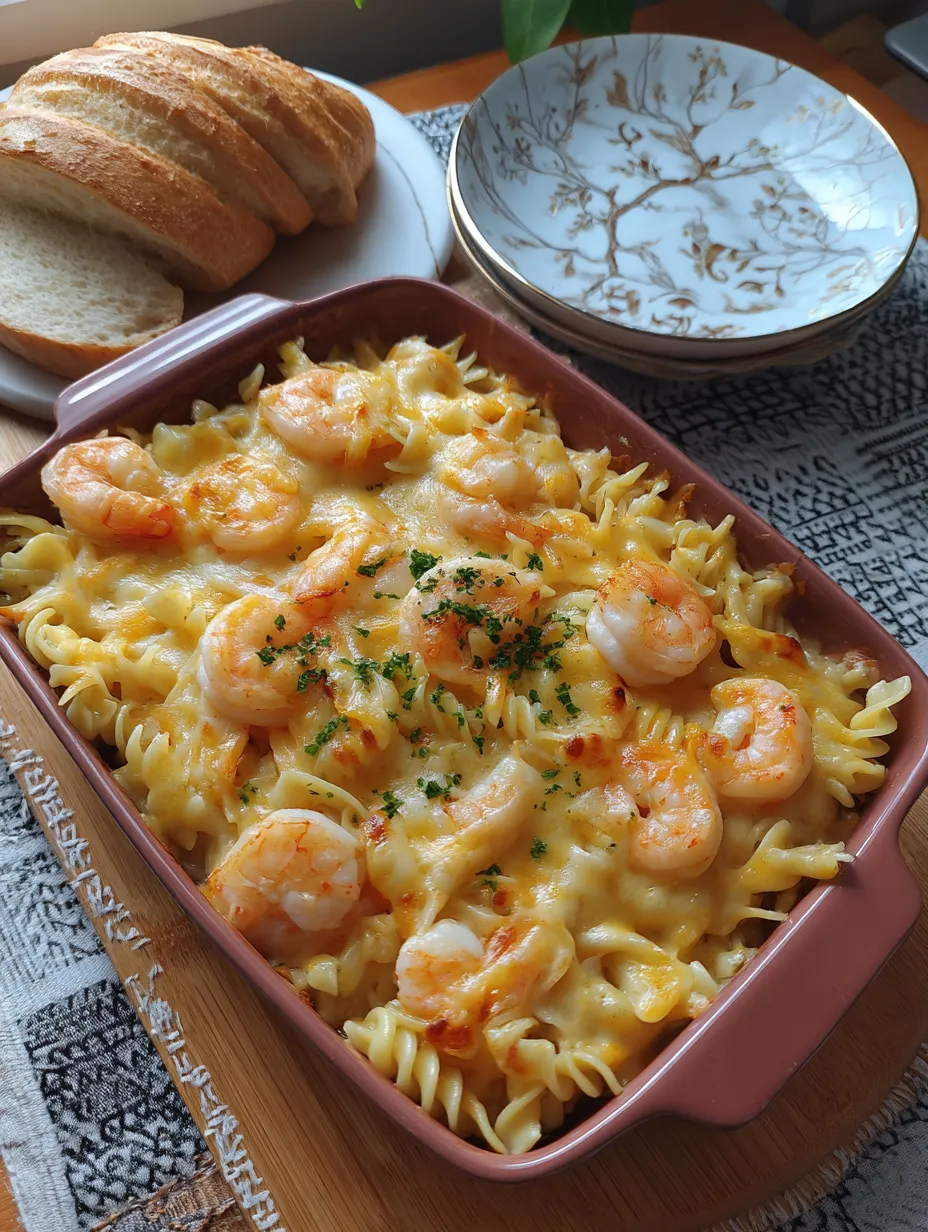
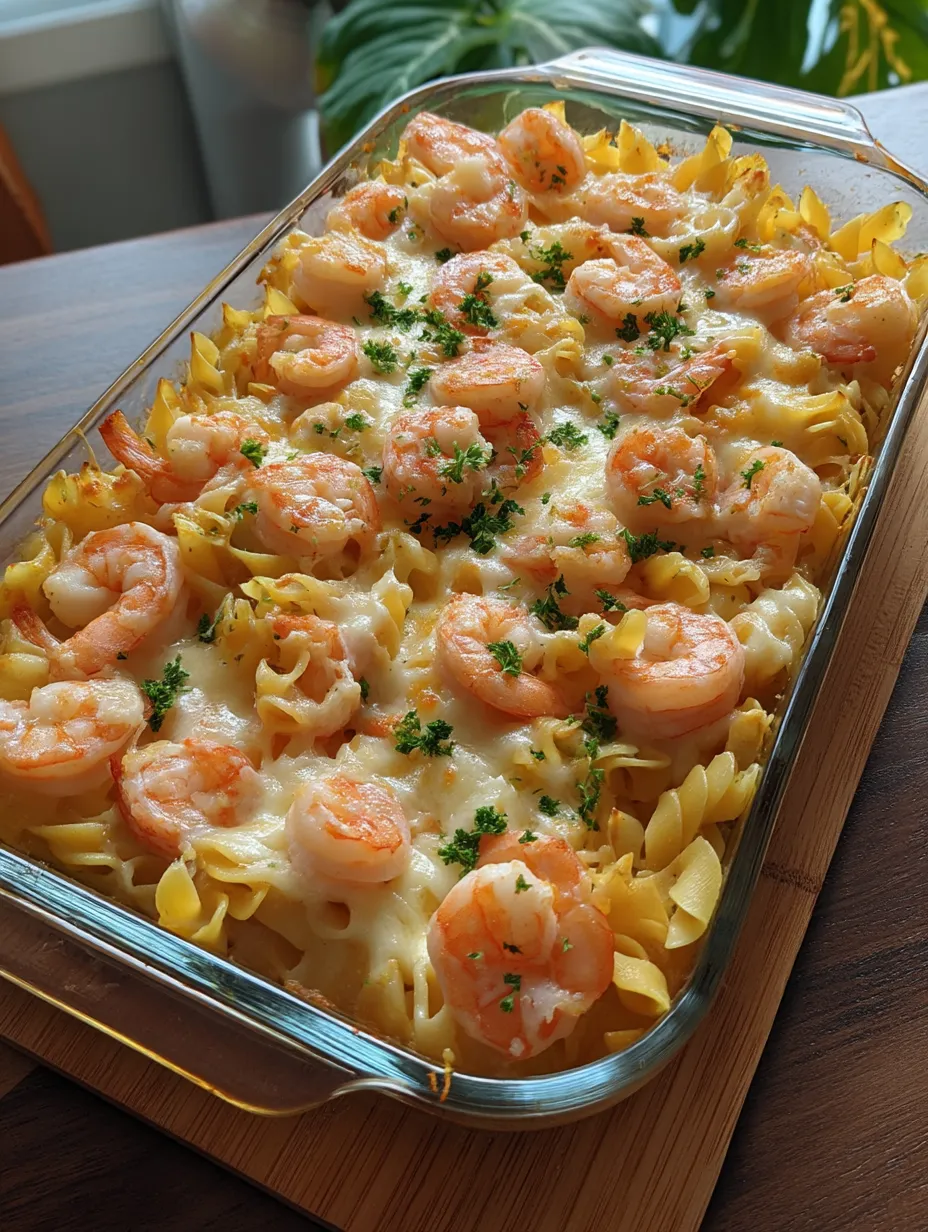
Cook pasta al dente. Make a sauce with butter, olive oil, garlic and lemon. Add shrimp just until pink. Combine with pasta and half the cheese, top with remaining cheese and bake until bubbly.

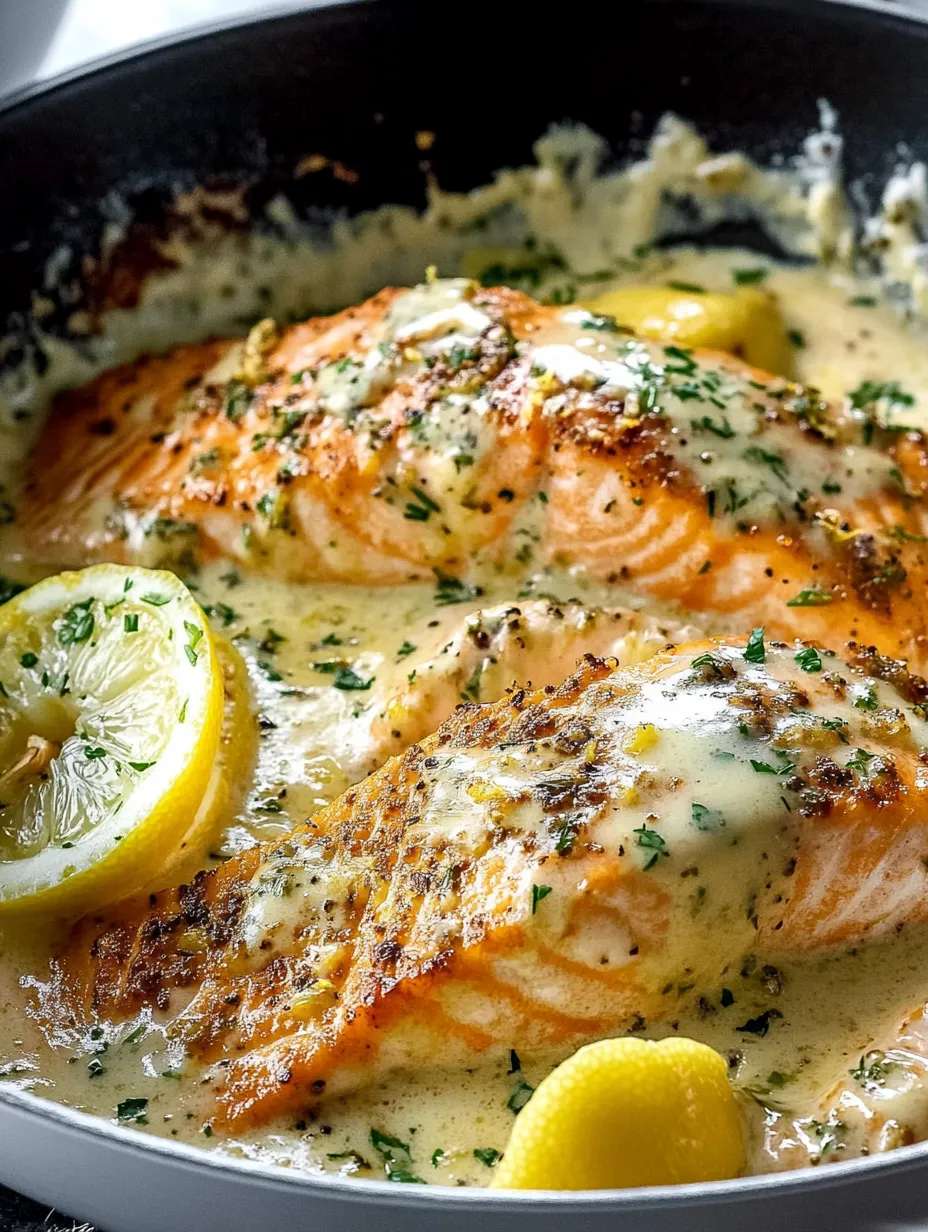
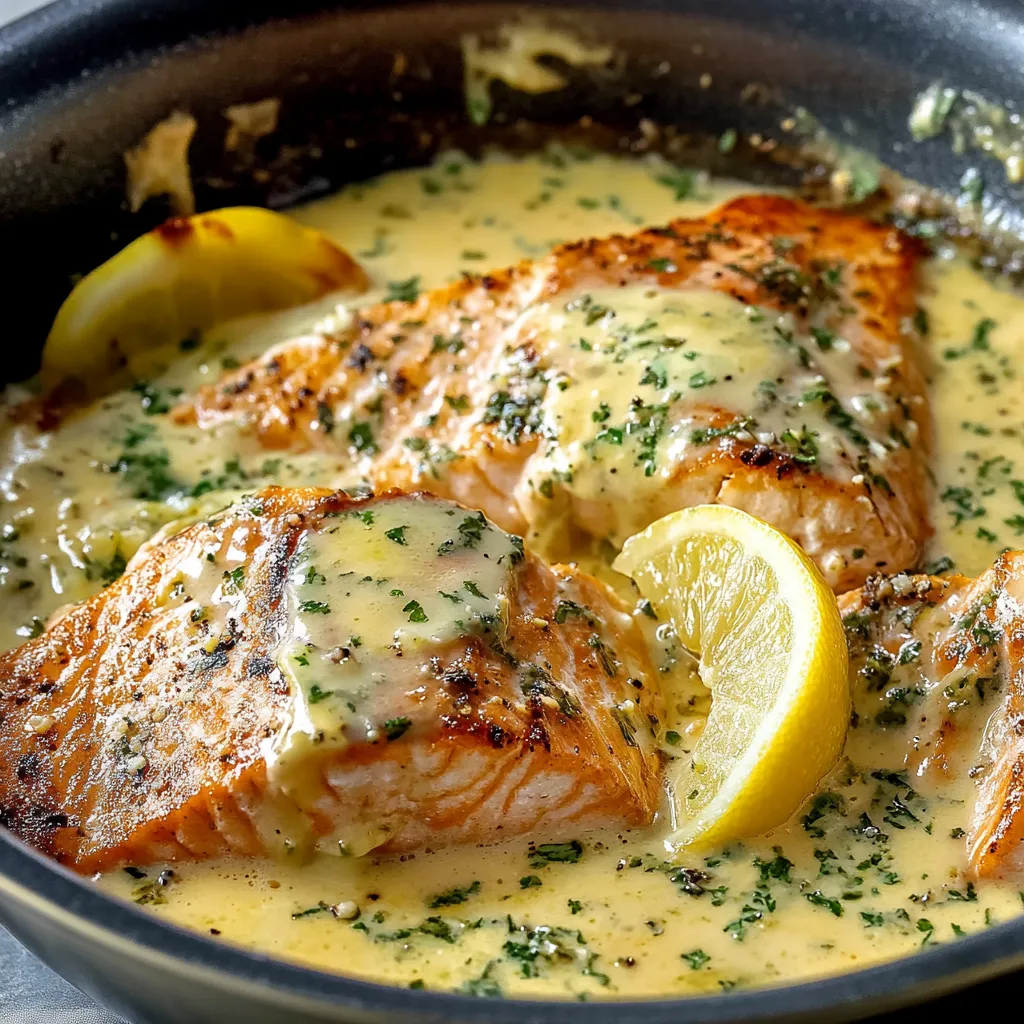
Nothing beats the comfort of pasta, especially when it’s loaded with succulent shrimp and wrapped in a garlicky, lemony butter sauce. This shrimp scampi pasta bake takes the classic stovetop dish and transforms it into something even more magical in the oven. The cheese gets all melty and golden, the flavors meld together, and you end up with something that feels fancy but doesn’t require a culinary degree.

Why You’ll Love This Recipe

  • Combines all the flavors of classic shrimp scampi with the comfort of a cheesy pasta bake
  • Uses ingredients that are easy to find in any grocery store
  • Creates that perfect balance of rich and bright flavors
  • Makes enough to feed a crowd (or give you awesome leftovers)

I started making this dish after a dinner party disaster where I was trying to cook individual shrimp scampi servings for eight people and ended up with some overcooked and some undercooked shrimp. This baked version lets you prep everything at once, and the oven does all the work while you actually get to hang out with your guests.

Star Ingredients

  • Pasta That Grabs: Forget traditional linguine for this bake – go for shapes with nooks and crannies that trap all that amazing sauce. Cavatappi or cellentani are my go-tos because those spirals hold sauce like they were designed for it.
  • Shrimp: Large ones work best, and don’t worry about splurging on fresh – good quality frozen shrimp that you thaw yourself often taste just as good. Just make sure they’re peeled and deveined to save yourself the hassle.
  • Butter and Olive Oil: This dynamic duo creates the base of that signature scampi sauce. Don’t skimp here – this isn’t diet food, it’s comfort food.
  • Garlic: The recipe says 6-8 cloves, but honestly, measure with your heart. Garlic lovers know that “too much garlic” is not a real concept.
  • Lemon: Both the juice AND the zest are crucial – that zest contains all the aromatic oils that give this dish its bright character.

I discovered the power of pasta water by accident one night when I was low on broth. That starchy liquid is like liquid gold – it helps the sauce cling to the pasta and gives everything a silky texture. Now I always save some even when the recipe doesn’t call for it.

Shrimp Scampi Pasta Bake

Step-by-Step Instructions

Pasta Perfection

Cook that pasta just shy of al dente – it’ll finish cooking in the oven. That starchy pasta water isn’t just an emergency backup; it’s a secret weapon for creating a silky sauce that clings to every bite. Don’t rinse your pasta after draining – that starch on the outside helps the sauce stick.

Sauce Building

The butter and olive oil create the rich base, while the garlic infuses it with flavor. The key is cooking the garlic just until fragrant – about a minute or two is all it takes. Burnt garlic will ruin the whole dish, so keep an eye on it and lower the heat if needed.

Shrimp Timing

Shrimp cook incredibly quickly – just 2-4 minutes until they turn pink and start to curl. The biggest mistake people make is overcooking them at this stage. Remember, they’ll continue cooking in the oven, so it’s better to undercook them slightly in the skillet.

Cheese Choices

The Parmesan brings salty depth, while the mozzarella creates that irresistible cheesy stretch. Adding some cheese directly to the pasta mixture and saving some for the top gives you flavor throughout with a beautiful golden crust.

Baking Magic

The time in the oven isn’t just about melting cheese – it allows all those flavors to meld together. The edges get slightly crispy, the sauce bubbles up around the sides, and everything becomes greater than the sum of its parts.

Resting Period

Those 5-10 minutes of resting time after it comes out of the oven aren’t just to prevent burned tongues (though that’s important too). This pause allows the sauce to thicken slightly and the flavors to settle.

You Must Know

  • Don’t overcook the shrimp in the skillet – they’ll finish cooking in the oven
  • Al dente pasta is key – it’ll absorb some sauce while baking
  • The dish will thicken as it rests, so don’t worry if it seems a bit loose at first

My first attempt at this dish was too dry because I drained the pasta and didn’t save any of that starchy water. Now I always keep at least a cup of it aside, just in case. It’s like an insurance policy for perfect pasta sauce.

Serving Ideas

This hearty main dish pairs perfectly with simple sides that complement without competing. A crisp green salad with a light vinaigrette cuts through the richness beautifully. Garlic bread is practically mandatory for sopping up every last drop of that incredible sauce. For a complete meal, add some roasted asparagus or broccoli on the side – the slight char from roasting plays nicely with the lemon and garlic flavors.

Creative Twists

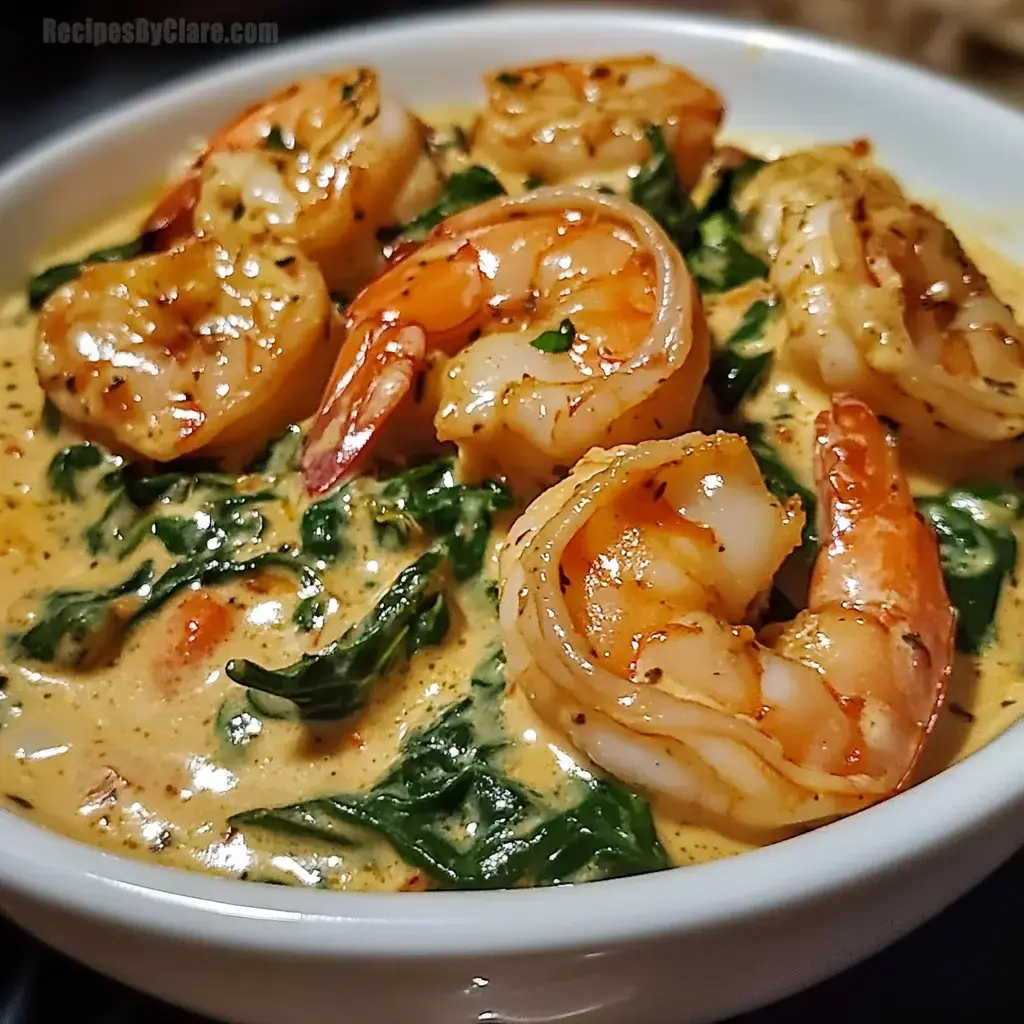
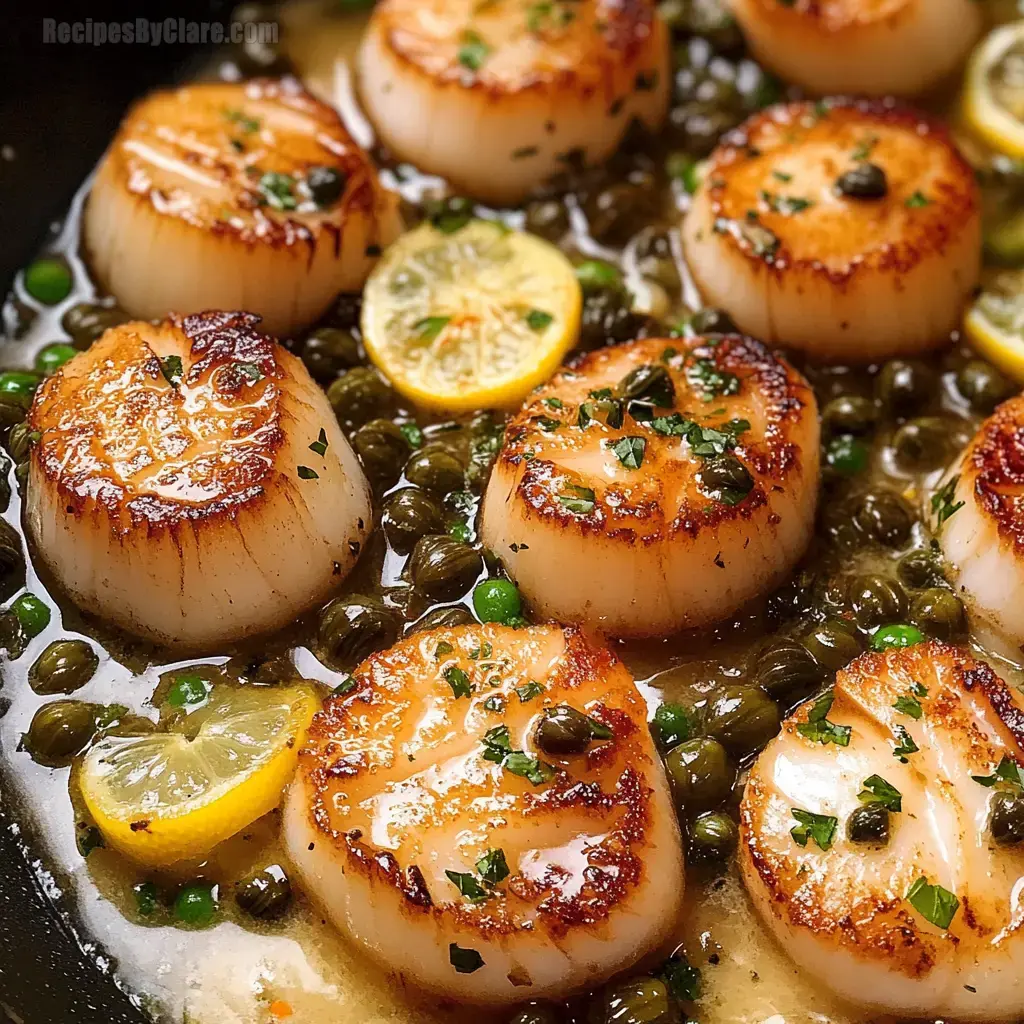
Transform this basic recipe with simple additions that create entirely new experiences. Add a few handfuls of fresh spinach when mixing the pasta and sauce – it’ll wilt down perfectly in the oven. For a flavor boost, stir in sun-dried tomatoes or artichoke hearts. Seafood fans might appreciate adding scallops or chunks of firm white fish alongside the shrimp. For extra decadence, mix in a couple ounces of cream cheese with the sauce for an even richer result.

Make It Ahead

While this dish is best assembled and baked right before serving, you can prep many components ahead of time. Chop the garlic, zest and juice the lemon, and grate the cheese up to a day in advance. You can even make the sauce base (stopping before adding the shrimp) and refrigerate it. If you absolutely need to assemble the entire dish ahead, add 10-15 minutes to the baking time if it’s coming straight from the refrigerator.

Leftover Love

If you’re lucky enough to have leftovers, they’ll keep in the refrigerator for 3-4 days. Reheat gently to prevent the shrimp from becoming rubbery – a covered dish in a 325°F oven works best. Add a splash of water or broth if it seems dry. This dish doesn’t freeze well because of the seafood and dairy, so plan to enjoy it within a few days.

Shrimp Scampi Pasta Bake

Pasta Bake Wisdom

  • Temperature Tip: If your shrimp are particularly large, quarter them so they cook at the same rate as the pasta during baking
  • Texture Secret: For an amazing crunchy topping, mix panko breadcrumbs with a bit of melted butter and sprinkle over the cheese before baking
  • Flavor Boost: A sprinkle of fresh herbs (like basil or chives) along with the parsley adds color and freshness to the finished dish

I’ve been making versions of this shrimp scampi pasta bake for years, gradually refining the proportions and techniques. What started as a solution to serving seafood to a crowd has become one of my signature dishes that friends and family specifically request. There’s something deeply satisfying about watching people go silent as they take their first bite, then immediately reach for seconds. Those quiet moments of food appreciation are what make cooking for others so rewarding.

Frequently Asked Questions

→ Can I use pre-cooked shrimp for this recipe? While fresh is best, you can use pre-cooked shrimp in a pinch. Just add them at the very end of the sauce preparation and don’t cook them further in the skillet – they’ll warm up during baking. This prevents them from becoming tough and rubbery.

→ What’s the best pasta shape to use? Pasta shapes with nooks and crannies work best for this bake – try cavatappi, cellentani, penne, or rotini. These shapes hold onto the sauce better than long pasta like linguine, though traditional scampi often uses linguine.

→ How can I make this recipe lighter? Use whole wheat pasta, reduce the butter and use more olive oil, add extra veggies like spinach or broccoli, and consider using less cheese or skipping the mozzarella altogether. You could also serve smaller portions with a large side salad.

→ Can I make this ahead of time? You can prep ingredients in advance (chop garlic, zest lemon, grate cheese), but for best texture, assemble and bake just before eating. If needed, you can assemble completely, refrigerate, and bake later, adding 10-15 minutes to the baking time.

→ How do I store and reheat leftovers? Cool completely, then cover tightly and refrigerate for up to 3-4 days. Reheat gently in the oven (covered, at moderate heat) to prevent the shrimp from becoming rubbery. Microwave works too – cover and use short bursts with a tiny splash of water.

→ What can I add to make this dish more filling? Add vegetables like spinach, steamed broccoli, asparagus, or peas. For extra protein, toss in some diced cooked chicken. You could also mix in some cream cheese for added richness, or top with buttered panko breadcrumbs for extra texture.

Shrimp Scampi Pasta Bake

Serves: 6 Prep Time: 30 minutes Cooking Time: 35 minutes 35 minutes
Nutrition facts: 325 calories 20 grams fat
Rating: 5.0/5
( 1 voted )
Pin
Print

Ingredients

→ Pasta and Shrimp

 1 pound (450g) pasta (like cavatappi, cellentani, penne, or rotini)
 1½ pounds (680g) large shrimp, peeled and deveined

→ Sauce Base

 ½ cup (113g) unsalted butter
 ¼ cup (60ml) extra virgin olive oil
 6-8 cloves garlic, minced
 1 large lemon, zested and juiced (about ¼ cup juice)
 ½ cup (120ml) vegetable or chicken broth
 ½ cup fresh parsley, chopped, plus extra for garnish
 Salt and freshly ground black pepper, to taste
 ¼-½ teaspoon red pepper flakes (optional)

→ Cheesy Topping

 1 cup (100g) Parmesan cheese, freshly grated
 1 cup (113g) low-moisture mozzarella cheese, shredded

Instructions

Bring a large pot of generously salted water to a boil. Cook the pasta until it's al dente, about 1 minute less than package directions suggest (it will continue cooking in the oven). Reserve about 1 cup of pasta water before draining. Don't rinse the pasta - the starch helps the sauce cling better.

While the pasta cooks, melt the butter and olive oil together in a large oven-safe skillet over medium heat. Add the minced garlic and red pepper flakes (if using). Cook for 1-2 minutes until fragrant, stirring constantly to prevent burning. Reduce heat if necessary.

Pour in the broth and fresh lemon juice, allowing the mixture to simmer for about 2 minutes. Stir in the lemon zest and half of the chopped parsley. Season with salt and pepper to taste, adjusting as needed.

Add the shrimp to the skillet and cook just until they begin to turn pink and curl slightly, about 2-4 minutes depending on size. Be careful not to overcook as they'll continue cooking in the oven. Remove from heat as soon as they're pink.

Add the drained pasta to the skillet with the shrimp and sauce, gently tossing until everything is well coated. Stir in half of the Parmesan and half of the mozzarella. If the mixture seems dry, add a splash of reserved pasta water to loosen it up - you want it saucy but not soupy.

Preheat your oven to 375°F (190°C). If you're not using an oven-safe skillet, transfer the mixture to a 9×13 inch baking dish. Sprinkle the remaining Parmesan and mozzarella evenly over the top.

Bake for 20-25 minutes until the edges are bubbling and the cheese on top is melted and golden. For extra browning, you can broil for the final 1-2 minutes, watching carefully to prevent burning.

Let the pasta bake rest for 5-10 minutes before serving. This allows the sauce to thicken slightly. Sprinkle with the remaining fresh parsley just before serving for a burst of color and fresh flavor.

Notes

  1. Pasta shapes with nooks and crannies like cavatappi or rotini work best for this dish as they capture more of the delicious sauce.
  2. For extra crunch, mix some panko breadcrumbs with a little melted butter and sprinkle over the cheese before baking.
  3. This dish is perfect paired with garlic bread and a simple green salad with lemon dressing.
  4. Leftovers can be stored in the refrigerator for 3-4 days. Reheat gently to prevent the shrimp from becoming rubbery.


Tools You'll Need

  • Large pot for cooking pasta
  • Large oven-safe skillet (or regular skillet plus 9×13 baking dish)
  • Cheese grater
  • Zester or microplane
  • Measuring cups and spoons

Allergy Information

Please check ingredients for potential allergens and consult a health professional if in doubt.

Nutrition Facts (Per Serving)

It is important to consider this information as approximate and not to use it as definitive health advice.
  • Calories: ~
  • Total Fat: ~
  • Total Carbohydrate: ~
  • Protein: ~
0 comments
0 FacebookTwitterPinterestLinkedin
Cultural DishesPopular RecipesSeafood Meals

Cheddar Bay Crab Cakes with Lemon Butter Drizzle

by myphillyconnection February 24, 2026
written by myphillyconnection

These crab cakes infuse traditional seafood flavors with cheddar cheese and Old Bay seasoning, then get topped with a simple lemon-garlic butter for a restaurant-quality dish you can make at home.

I discovered this crab cake recipe last summer when looking for something special to serve at a small dinner party. These aren’t your typical Maryland-style crab cakes – the addition of cheddar cheese and that lemon butter drizzle takes them in a completely different direction. The cheese melts slightly during baking, creating these little pockets of gooey goodness throughout, while the outside gets perfectly golden and crisp.

Why You’ll Love This Recipe

  • The cheddar cheese adds an unexpected richness that works surprisingly well with crab
  • Baking instead of frying means less mess and more consistent results
  • They hold together beautifully without tons of filler
  • The lemon butter drizzle elevates them from good to restaurant-quality
  • They’re impressive enough for company but simple enough for a weeknight treat

Made these for my seafood-skeptical brother-in-law last month. He’s usually the “where’s the beef?” guy at family gatherings. After his second crab cake, he asked if I’d write down the recipe for him. My neighbor smelled them baking through the open window and texted asking what I was cooking that smelled so amazing.

Essential Elements

  • Lump crab meat: Splurge on the good stuff here if you can. Less expensive claw meat works too, but the texture isn’t quite as nice.
  • Cheddar cheese: Sharp cheddar gives the best flavor contrast with the sweet crab. Pre-shredded works, but freshly grated melts more smoothly.
  • Breadcrumbs: Panko creates the crispiest exterior, but regular breadcrumbs work fine too. The Cheddar Bay biscuit mix substitution is a game-changer if you have it on hand.
  • Mayonnaise: This is your binding agent. Real mayo provides better flavor than the light stuff.
  • Old Bay seasoning: The classic seafood seasoning that brings everything together. Don’t skimp here.
  • Fresh herbs: The green onions and parsley add brightness and color that dried herbs just can’t match.
  • Lemon: Both in the cakes and the butter drizzle, it cuts through the richness perfectly.
Cheddar Bay Crab Cakes with Lemon Butter Drizzle Recipe
Cheddar Bay Crab Cakes with Lemon Butter Drizzle

Crab Cake Creation

Gentle Mixing:

Start by combining all your ingredients in a large bowl. Use a light touch when mixing – you want to preserve those beautiful lumps of crab meat rather than breaking them down.

Perfect Patties:

Shape the mixture into even-sized patties, about 3 inches across and about 3/4 inch thick. If the mixture feels too wet, add a bit more breadcrumbs. Too dry? A touch more mayo does the trick.

Chilling Time:

This step isn’t in the original recipe, but I’ve found refrigerating the shaped patties for about 30 minutes helps them hold together much better during baking. Worth the extra time if you can spare it.

Baking Setup:

Line your baking sheet with parchment paper – this prevents sticking and makes cleanup a breeze. Leave some space between each cake for even browning.

Oven Magic:

Bake at 375°F for about 25-30 minutes. You’re looking for that perfect golden-brown color and a slightly crisp exterior. They should feel firm to the touch when done.

Buttery Finish:

While the crab cakes are in their final minutes of baking, prepare the lemon butter. Keep it warm but not hot – you want it melted but not separated. That drizzle over the hot cakes is what makes them truly special.

You Must Know

  • Over-mixing will break down the crab meat and give you a paste-like texture
  • The mixture will be somewhat loose before chilling – that’s normal
  • Crab cakes are done when they reach an internal temperature of 165°F
  • The butter drizzle is best added just before serving, not ahead of time
  • These freeze beautifully before baking – make a double batch for future dinners
  • A small ice cream scoop helps create uniform-sized cakes

My first attempt at these was actually a bit of a mess – I didn’t chill the patties and tried to flip them halfway through baking, which resulted in crab cake crumbles. Delicious crumbles, but not what I was going for! Now I know to let the oven do all the work. I’ve also experimented with the cheese – a smoked cheddar adds interesting depth, and a pepper jack gives a nice kick if you like heat.

Creative Switches

While the classic version is hard to beat, there are some fun variations worth trying. Add a diced jalapeño for some heat. Substitute gruyère or fontina for the cheddar for a more sophisticated flavor profile. Mix in some chopped artichoke hearts for an interesting texture contrast. For a smoky twist, add a half teaspoon of smoked paprika to the mixture. And for true indulgence, fold in some lump crabmeat to the lemon butter to make a crab butter drizzle.

Storage Smarts

These crab cakes keep well in the refrigerator for about 2 days. Reheat them in a 350°F oven for about 10 minutes to maintain their crispy exterior. For longer storage, freeze the uncooked patties separated by parchment paper in an airtight container. They can go straight from freezer to oven – just add about 5-7 minutes to the baking time. The lemon butter can be made ahead and refrigerated, then gently reheated.

Cheddar Bay Crab Cakes with Lemon Butter Drizzle Homemade
Cheddar Bay Crab Cakes with Lemon Butter Drizzle

Cook’s Wisdom

  • For the most even cooking, try to make all your crab cakes the same size and thickness
  • A gentle press in the center of each patty before baking helps prevent them from doming
  • Let the crab cakes rest for about 5 minutes after baking before serving – they’ll be easier to move
  • If you’re using canned crab, drain it very well and pick through for any shell fragments
  • For an extra-golden top, give them a quick blast under the broiler for the last minute of cooking

I’ve made these cheddar bay crab cakes for everything from casual family dinners to fancier celebrations. There’s something about the combination of sweet crab, savory cheese, and bright lemon that just works magic together. My dad, who grew up on the Chesapeake and considers himself a crab cake purist, was skeptical about the addition of cheese – until he tried them. Now he requests them whenever he visits. These have become one of my signature dishes, the kind friends and family specifically ask for. Sometimes the most memorable recipes are the ones that break a few rules.

Frequently Asked Questions

→ Can I use imitation crab meat for this recipe? While real lump crab meat provides the best flavor and texture, you can use imitation crab in a pinch. Chop it finely and expect a different texture in the final crab cakes.

→ How do I keep my crab cakes from falling apart? The key is chilling the formed patties for at least 30 minutes before cooking. This helps the binders (eggs and mayo) set up properly so the cakes hold together during baking.

→ Can I pan-fry these crab cakes instead of baking them? Absolutely! Heat 2-3 tablespoons of oil in a skillet over medium heat and cook the crab cakes for about 4-5 minutes per side until golden and cooked through.

→ What sides pair well with these crab cakes? These crab cakes go wonderfully with a fresh green salad, roasted asparagus, corn on the cob, or a light coleslaw. For a heartier meal, serve with roasted potatoes or rice pilaf.

→ Can I make these crab cakes ahead of time? Yes, you can form the patties up to a day ahead and refrigerate them covered. You can also fully cook them, refrigerate, and reheat in a 325°F oven for 10-15 minutes until warmed through.

Cheddar Bay Crab Cakes with Lemon Butter Drizzle

Serves: 6 Prep Time: 15 minutes Cooking Time: 30 minutes 30 minutes
Nutrition facts: 250 calories 20 grams fat
Rating: 5.0/5
( 1 voted )
Pin
Print

Ingredients

1 pound lump crab meat, picked over for shells
 1 cup cheddar cheese, shredded
 2 large eggs
 1 cup breadcrumbs (or Cheddar Bay biscuit mix for extra flavor)
 1/4 cup green onions, finely chopped
 1 tablespoon fresh parsley, chopped
 1/2 cup mayonnaise
 1 teaspoon garlic, minced
 Juice of 1 lemon
 1 teaspoon Old Bay seasoning
 Salt and pepper to taste

→ Lemon Butter Drizzle

 1/4 cup butter
 1 tablespoon lemon juice
 1/2 teaspoon garlic powder

Instructions

Preheat your oven to 375°F (190°C). Line a baking sheet with parchment paper to prevent sticking and make cleanup easier.

In a large bowl, gently combine the lump crab meat, shredded cheddar cheese, eggs, breadcrumbs, chopped green onions, parsley, mayonnaise, minced garlic, lemon juice, Old Bay seasoning, salt, and pepper. Fold the ingredients together carefully to avoid breaking up the crab meat too much.

Using your hands or an ice cream scoop, form the mixture into even-sized patties about 3 inches wide and 1 inch thick. Place them on the prepared baking sheet. For best results, refrigerate the formed patties for 30 minutes to help them firm up.

Bake in the preheated oven for 25-30 minutes, or until the crab cakes are golden brown and heated through. They should reach an internal temperature of 165°F.

While the crab cakes are baking, make the lemon butter drizzle. In a small saucepan over low heat, melt the butter. Once melted, remove from heat and stir in the lemon juice and garlic powder until well combined. Keep warm until ready to serve.

Transfer the hot crab cakes to serving plates. Drizzle each cake with the warm lemon butter sauce just before serving. Garnish with additional chopped parsley or lemon wedges if desired.

Notes

  1. For extra flavor and texture, you can substitute Cheddar Bay biscuit mix for the breadcrumbs.
  2. Refrigerating the formed crab cakes for at least 30 minutes before cooking helps them hold together better.
  3. These crab cakes can be made up to a day ahead and refrigerated before baking.


Tools You'll Need

  • Baking sheet
  • Parchment paper
  • Large mixing bowl
  • Small saucepan
  • Measuring cups and spoons

Allergy Information

Please check ingredients for potential allergens and consult a health professional if in doubt.

Nutrition Facts (Per Serving)

It is important to consider this information as approximate and not to use it as definitive health advice.
  • Calories: ~
  • Total Fat: ~
  • Total Carbohydrate: ~
  • Protein: ~
0 comments
0 FacebookTwitterPinterestLinkedin
Fish Meals

Lemon Garlic Butter Baked Cod

by myphillyconnection February 24, 2026
written by myphillyconnection

Season cod with oil, salt and pepper. Make a quick lemon garlic butter sauce, pour over fish, and bake for 15 minutes until flaky. Fast, healthy, and delicious.

This lemon garlic butter baked cod is my secret weapon for those nights when I need something that feels fancy but takes almost zero effort. The cod turns out perfectly tender and flaky, while the lemon brightens everything up and the garlic butter creates this amazing sauce that you’ll want to soak up with every bite. I’ve served this to dinner guests who thought I’d spent hours in the kitchen, when really it took me about 5 minutes of prep time.

Why You’ll Love This Recipe

  • It’s practically foolproof, even if you’re nervous about cooking fish
  • The ingredients are simple pantry staples, nothing fancy required
  • It looks and tastes impressive while being ridiculously easy

I made this for my mom last time she visited, and she immediately asked for the recipe – which is saying something because she’s the one who taught me to cook in the first place. My husband, who usually reaches for the tartar sauce with fish, eats this straight up and always goes back for seconds.

Key Ingredients

  • Fresh cod fillets: Look for thick, white fillets that feel firm to the touch. Fresh is best, but thawed frozen works fine too – just pat them really dry before cooking.
  • Unsalted butter: Using unsalted lets you control the salt level. The butter creates that luxurious sauce that makes this dish special.
  • Fresh garlic: Don’t even think about substituting garlic powder here. The fresh stuff gives you those little caramelized bits that are absolutely worth the minute it takes to mince.
  • Lemon: Both the zest and juice are essential. The zest has all those fragrant oils that give depth, while the juice adds brightness that cuts through the richness of the butter.
  • Fresh parsley: Adds color and a fresh, herbal note. If you don’t have parsley, chives or dill work beautifully too.
Lemon Garlic Butter Baked Cod Homemade

Cooking Magic

Prep your fish right:

Pat those fillets completely dry with paper towels before they hit the baking sheet. Extra moisture is the enemy of a good sear. Season them well with salt and pepper – fish needs proper seasoning to shine.

Create flavor magic:

When you’re cooking the garlic in butter, watch it carefully. You want it fragrant but not browned – about 90 seconds does the trick. That moment when the garlic hits the hot butter fills your kitchen with the most amazing smell.

Get the most from your lemon:

Zest the lemon before you juice it (much easier that way). And when you add the juice to the hot butter mixture, stand back a bit – it will sizzle and sputter in the most satisfying way.

Don’t overcook:

The biggest mistake with cod is leaving it in too long. It cooks quickly – start checking at 10 minutes. You want it just barely flaking with a fork, still moist and tender. It will continue cooking slightly after you take it out of the oven.

Sauce it up:

Don’t waste a drop of that amazing butter sauce left in the pan. Spoon it generously over the fillets when serving, or even better, serve the fish right from the baking dish so everyone can dip into that liquid gold.

Rest briefly:

Let the fish rest for just a minute before serving. This allows the juices to redistribute and the fish to finish cooking gently from residual heat.

You Must Know

  • Different thickness of fillets will cook at different rates – adjust your timing accordingly
  • The butter sauce will continue to cook the fish slightly even after it’s out of the oven
  • A white wine splash added to the butter sauce takes this to another level

I discovered this recipe during a beach vacation when we caught fresh cod on a charter fishing trip. We had limited ingredients in our rental kitchen, but I found butter, garlic, and a lemon. The result was so good that it’s become our tradition to make this on the first night of every beach trip since. Last year, our rental had an herb garden, and adding fresh herbs elevated it even further.

Serving Ideas

This cod pairs beautifully with simple roasted asparagus or a handful of cherry tomatoes roasted alongside the fish for the last 5 minutes. For a heartier meal, serve it over buttered orzo pasta that can soak up all that wonderful sauce. A chilled glass of Sauvignon Blanc or Pinot Grigio makes this feel like a restaurant experience at home.

Tasty Twists

Add a tablespoon of capers to the butter sauce for a Mediterranean twist. Sprinkle some Parmesan cheese on top during the last 2 minutes of baking for a crispy, savory crust. For a bit of heat, add a pinch of red pepper flakes to the garlic butter or serve with sliced fresh chilis on the side.

Quick Tips

This fish is best served fresh from the oven, but if you do have leftovers, they’ll keep in the refrigerator for up to 2 days. Reheat gently in a 275°F oven just until warmed through to avoid drying out the fish. You can prep the garlic butter mixture in advance and keep it refrigerated, just warm it slightly before using so it spreads easily over the fish.

Lemon Garlic Butter Baked Cod Recipe
Lemon Garlic Butter Baked Cod

Chef’s Secrets

  • For an extra-special presentation, add thin lemon slices on top of the fish before baking
  • A splash of white wine or chicken broth added to the butter sauce creates more delicious liquid for serving
  • Line your baking sheet with parchment for the easiest cleanup ever

I’ve been making this lemon garlic butter cod for years, and it never fails to impress. There’s something about the combination of flaky fish, rich butter, and bright lemon that just works so perfectly together. It’s simple enough for a weeknight but special enough for company, which in my book makes it the ideal recipe to have in your back pocket. The fact that it comes together in about 20 minutes total is just a bonus.

Frequently Asked Questions

→ Can I use frozen cod fillets? Yes, but thaw them completely and pat dry with paper towels first to remove excess moisture.

→ What other fish can I substitute for cod? Haddock, pollock, tilapia, or any mild white fish works well with this recipe.

→ How do I know when the fish is done? Cod is done when it flakes easily with a fork and is opaque throughout. For thicker fillets, you may need 2-3 extra minutes.

→ Can I make this dish ahead of time? Fish is best served fresh, but you can prepare the garlic lemon butter ahead of time and reheat it gently before using.

→ What sides pair well with this cod? Try roasted asparagus, steamed broccoli, a fresh green salad, or rice pilaf for a complete meal.

Lemon Garlic Butter Baked Cod

Serves: 4 Prep Time: 10 minutes Cooking Time: 15 minutes 15 minutes
Nutrition facts: 125 calories 20 grams fat
Rating: 5.0/5
( 1 voted )
Pin
Print

Ingredients

 4 cod fillets, about 6 ounces each
 2 tablespoons olive oil
 Salt and pepper to taste

→ For the Lemon Garlic Butter

 4 tablespoons unsalted butter
 4 garlic cloves, minced
 Zest and juice of 1 lemon
 2 tablespoons fresh parsley, chopped

Instructions

Heat your oven to 400°F (200°C). Line a baking sheet with parchment paper or lightly grease it.

Place cod fillets on the prepared baking sheet. Drizzle with olive oil and season generously with salt and pepper.

In a small saucepan, melt butter over medium heat. Add minced garlic and cook 1-2 minutes until fragrant but not browned. Remove from heat and stir in lemon zest and juice.

Spoon the garlic butter mixture evenly over each cod fillet. Sprinkle with the chopped fresh parsley.

Bake in the preheated oven for 12-15 minutes, or until fish flakes easily with a fork and is opaque throughout.

Serve immediately, spooning any remaining buttery sauce from the pan over the fillets. Pairs well with roasted vegetables or a fresh salad.

Notes

  1. This dish is best served fresh from the oven while the butter sauce is still warm


Tools You'll Need

  • Baking sheet
  • Parchment paper
  • Small saucepan

Allergy Information

Please check ingredients for potential allergens and consult a health professional if in doubt.

Nutrition Facts (Per Serving)

It is important to consider this information as approximate and not to use it as definitive health advice.
  • Calories: ~
  • Total Fat: ~
  • Total Carbohydrate: ~
  • Protein: ~
0 comments
0 FacebookTwitterPinterestLinkedin
Fish Meals

Baked Salmon with Lemon Butter Cream Sauce

by myphillyconnection February 23, 2026
written by myphillyconnection

Quick-baked salmon with rich lemon butter cream sauce. One skillet, 20 minutes total. Perfect with mashed potatoes or pasta.

Nothing transforms a weeknight quite like perfectly baked salmon draped in silky lemon butter sauce. I’ve spent years perfecting this recipe, finding that sweet spot where the fish is just cooked through and the sauce is rich but not heavy. The best part? It takes just 20 minutes from start to finish.

Why You’ll Love This Recipe

  • Creates a restaurant-quality dish with minimal effort
  • The sauce is pure gold – you’ll want to drink it with a spoon
  • Everything comes together in one pan for easy cleanup

Last month, I served this at a casual dinner party and my friend’s picky five-year-old asked for seconds. That’s when I knew this recipe was truly special.

Essential Ingredients

  • Fresh salmon fillets: Look for even thickness
  • Real butter: Don’t skimp here, it makes the sauce sing
  • Fresh lemons: Their brightness cuts through the richness
  • Heavy cream: Creates that silky-smooth finish
  • Quality Dijon: Adds depth to the sauce
Baked Salmon with Lemon Butter Cream Sauce Recipe

Detailed Instructions

Perfect PreparationPat those fillets dry and season them well – this creates a beautiful crust.Temperature TalkGet your oven nice and hot – 425°F is the sweet spot for moist, flaky salmon.Sauce SymphonyStart with butter and garlic, then slowly add your cream and lemon.Timing TricksTen minutes is usually perfect for inch-thick fillets, but trust your eyes and fork.Final FlourishLet the sauce reduce until it coats the back of a spoon beautifully.

You Must Know

  • The salmon keeps cooking after you take it out of the oven
  • Fresh garlic makes a huge difference in the sauce
  • Never let the cream sauce boil – gentle simmer is key

I learned through trial and error that letting the salmon come to room temperature before cooking makes it more evenly done. The day I started doing this, my husband said it was better than our favorite seafood restaurant.

Perfect Pairings

Serve this beauty over fluffy mashed potatoes that soak up every drop of sauce. Roasted asparagus on the side adds color and crunch. Sometimes I’ll make extra sauce just for drizzling over steamed broccoli – even vegetable haters can’t resist.

Make It Your Own

Try adding capers to the sauce for a briny pop. Sometimes I throw in some fresh dill at the end – it’s classic with salmon for a reason. For a lighter version, you can use half-and-half, though the sauce won’t be quite as rich.

Simple Storage

Keep any leftover salmon separate from the sauce. Gently reheat the fish in a low oven to prevent drying out. The sauce can be warmed slowly on the stovetop – add a splash of cream if needed to bring it back to life.

Quick Fix Tips

Keep the ingredients for the sauce on hand – you can use it on chicken or pasta too. If your sauce gets too thick, thin it with a little pasta water or chicken broth.

Baked Salmon with Lemon Butter Cream Sauce Homemade
Baked Salmon with Lemon Butter Cream Sauce

Chef’s Wisdom

  • Don’t move the salmon around while it’s cooking
  • Let it rest for 5 minutes after baking
  • Season each layer – fish and sauce both need love

After countless salmon dinners, I’ve found that this recipe hits that perfect balance between elegant and easy. There’s something magical about how the lemony sauce complements the rich salmon. Whether it’s a quiet family dinner or a special occasion, this dish makes any night feel a little more special. Plus, watching people mop up every last drop of sauce with their bread tells you everything you need to know about how good it is.

Frequently Asked Questions

→ Can I use salmon with skin? Yes, just place the salmon skin-side down in the skillet. The skin can easily be removed after cooking if desired.

→ What can I substitute for heavy cream? Half and half works well as a lighter alternative, though the sauce won’t be quite as rich.

→ What sides go well with this? Mashed potatoes, steamed broccoli, roasted asparagus, or homemade pasta all pair beautifully.

→ Can I make this ahead? Best served fresh, but you can prepare the sauce ahead and reheat gently before serving.

→ Is the additional lemon juice necessary? The extra lemon juice in the sauce is optional – taste and adjust based on your preference for tartness.

0 comments
0 FacebookTwitterPinterestLinkedin
Beef MealsPopular RecipesSeafood Meals

Filet Mignon with Shrimp and Lobster Cream Sauce

by myphillyconnection February 23, 2026
written by myphillyconnection

This Filet Mignon with Shrimp and Lobster Cream Sauce is the epitome of elegance and luxury on a plate. Perfectly cooked filet mignon steaks are topped with a rich and creamy sauce made with shrimp and lobster, creating a dish that’s perfect for special occasions or when you want to indulge in something truly special. The sauce is made by sautéing shallots in butter, then adding white wine and lemon juice for a hint of acidity, before being enriched with heavy cream. The lobster and shrimp add a delightful seafood flavor that pairs beautifully with the tender steak. Garnish with fresh parsley for a final touch of color and freshness, and serve this luxurious dish to impress your guests or treat yourself to a restaurant-quality meal at home.

Filet Mignon with Shrimp and Lobster Cream Sauce is a dish that exudes luxury and sophistication. This elegant recipe pairs the tender, juicy filet mignon with a rich and creamy sauce made from shrimp and lobster, creating a perfect harmony of flavors and textures. Whether you’re celebrating a special occasion or simply indulging in a fine dining experience at home, this dish is sure to impress with its depth of flavor and beautiful presentation.INGREDIENTS

  • Filet Mignon Steaks: 4 steaks (6-8 oz each), the star of the dish, known for its tenderness and rich flavor.
  • Salt and Black Pepper: To taste, essential seasonings for the steaks.
  • Olive Oil: 2 tbsp, used to sear the steaks and create a delicious crust.
  • Unsalted Butter: 1 tbsp, adds richness to the sauce.
  • Shallots: 1/2 cup, finely chopped, provides a mild, sweet onion flavor.
  • Heavy Cream: 1 cup, forms the rich base of the sauce.
  • Lobster Meat: 1/2 cup, chopped, adds a luxurious seafood flavor to the sauce.
  • Shrimp: 1/2 cup, peeled and deveined, provides a tender and sweet addition to the sauce.
  • White Wine: 1/4 cup, adds acidity and depth of flavor to the sauce.
  • Lemon Juice: 1 tbsp, brightens the sauce and balances the richness.
  • Garlic Powder: 1 tsp, adds a subtle garlic flavor to the sauce.
  • Salt and Black Pepper: To taste, enhances the overall flavor of the sauce.
  • Fresh Parsley: For garnish, adds color and a fresh note to the finished dish.

INSTRUCTIONS

Step 1: Season filet mignon steaks with salt and pepper on both sides.

Step 2: Heat olive oil in a skillet over medium-high heat. Cook steaks for 4-5 minutes per side for medium-rare, or adjust time to desired doneness. Remove from skillet and let rest.

Step 3: In the same skillet, melt butter over medium heat. Add shallots and cook until softened, about 2 minutes.

Step 4: Pour in white wine and lemon juice. Cook for 1-2 minutes until reduced slightly.

Step 5: Stir in heavy cream, garlic powder, and season with salt and pepper. Bring to a simmer.

Step 6: Add lobster meat and shrimp to the sauce. Cook until shrimp are pink and lobster is heated through, about 3-4 minutes.

Step 7: Spoon the shrimp and lobster cream sauce over the rested filet mignon steaks. Garnish with fresh parsley.

Serving and Storage Tips

  • Serve immediately for the best flavor and texture, with the sauce spooned generously over the steaks.
  • Pair this dish with sides like roasted vegetables, mashed potatoes, or a fresh green salad for a complete meal.
  • If you have leftovers, store the steak and sauce separately in airtight containers in the refrigerator for up to 2 days. Reheat gently in a skillet over low heat.
  • For a more intense flavor, let the steaks marinate in olive oil, garlic, and herbs for a few hours before cooking.

Helpful Notes

  • Make sure to let the filet mignon rest after cooking to allow the juices to redistribute, ensuring a tender and juicy steak.
  • The key to a smooth, creamy sauce is to add the cream slowly and stir continuously to avoid curdling.
  • You can substitute the lobster and shrimp with other seafood like scallops or crab meat, depending on availability.
  • For a richer sauce, consider adding a splash of brandy or cognac during the deglazing process.

Tips from Well-Known Chefs

  • Chef Thomas recommends using fresh, high-quality seafood for the best flavor and texture in the sauce.
  • Chef Julia advises searing the steaks in a cast-iron skillet to achieve a perfect crust on the outside while keeping the inside tender.
  • Chef Eric suggests adding a pinch of cayenne pepper to the sauce for a subtle kick of heat that complements the richness of the cream.

Filet Mignon with Shrimp and Lobster Cream Sauce: A Luxurious Dinner

This Filet Mignon with Shrimp and Lobster Cream Sauce is a dish that will make any dinner feel special. The combination of tender, juicy filet mignon and the rich, creamy seafood sauce creates a truly indulgent meal that’s perfect for a romantic dinner, a holiday celebration, or any occasion where you want to impress. The flavors are deep and satisfying, with the shrimp and lobster adding a luxurious touch to the dish. Serve it with your favorite sides and a glass of white wine for a dining experience that rivals the finest restaurants.Why This Filet Mignon Recipe Is Perfect for Special Occasions

This recipe is ideal for special occasions because it combines two luxurious ingredients—filet mignon and seafood—into one stunning dish. The rich cream sauce, enhanced with white wine and lemon juice, pairs perfectly with the tender steak, creating a meal that’s both decadent and satisfying. Despite its elegant appearance, the dish is straightforward to prepare, allowing you to enjoy a gourmet meal without spending all day in the kitchen. Whether you’re celebrating a milestone or simply want to treat yourself, this Filet Mignon with Shrimp and Lobster Cream Sauce is a perfect choice.FAQs

Can I use a different cut of steak?

Yes, you can use other tender cuts like ribeye or strip steak, though the cooking time may vary.

Can I make the sauce ahead of time?

Yes, the sauce can be made a few hours ahead and reheated gently before serving. Be careful not to overheat to avoid separating the cream.

What can I serve with this dish?

Roasted vegetables, mashed potatoes, or a fresh salad are great side options that complement the richness of the steak and sauce.

Can I use frozen shrimp and lobster?

Yes, but make sure to thaw them completely and pat them dry before adding them to the sauce to avoid excess water.

How do I know when the steak is done?

Use a meat thermometer to check the internal temperature. For medium-rare, aim for 130-135°F.

Filet Mignon with Shrimp and Lobster Cream Sauce

Conclusion

This Filet Mignon with Shrimp and Lobster Cream Sauce is an elegant and indulgent dish that’s perfect for special occasions. The tender, juicy filet mignon is beautifully complemented by the rich and creamy seafood sauce, made with succulent shrimp and lobster. The sauce is flavored with shallots, white wine, and a hint of lemon, creating a deliciously balanced accompaniment to the steak. Easy to prepare but impressive to serve, this dish is a fantastic choice for a luxurious dinner that will impress your guests or provide a memorable meal at home.

Filet Mignon with Shrimp and Lobster Cream Sauce

Serves: 4 Prep Time: 15 minutes Cooking Time: 25 minutes 25 minutes
Nutrition facts: 450 calories 20 grams fat
Rating: 5.0/5
( 1 voted )
Pin
Print

Ingredients

4 filet mignon steaks (6-8 oz each).
 Salt and black pepper, to taste.
 2 tbsp olive oil.
 1 tbsp unsalted butter.
 1/2 cup finely chopped shallots.
 1 cup heavy cream.
 1/2 cup lobster meat, chopped.
 1/2 cup shrimp, peeled and deveined.
 1/4 cup white wine.
 1 tbsp lemon juice.
 1 tsp garlic powder.
 Salt and black pepper, to taste.
 Fresh parsley, for garnish.

Instructions

Season filet mignon steaks with salt and pepper on both sides.

Heat olive oil in a skillet over medium-high heat. Cook steaks for 4-5 minutes per side for medium-rare, or adjust time to desired doneness. Remove from skillet and let rest.

In the same skillet, melt butter over medium heat. Add shallots and cook until softened, about 2 minutes.

Pour in white wine and lemon juice. Cook for 1-2 minutes until reduced slightly.

Stir in heavy cream, garlic powder, and season with salt and pepper. Bring to a simmer.

Add lobster meat and shrimp to the sauce. Cook until shrimp are pink and lobster is heated through, about 3-4 minutes.

Spoon the shrimp and lobster cream sauce over the rested filet mignon steaks. Garnish with fresh parsley.

Notes

  1. This Filet Mignon with Shrimp and Lobster Cream Sauce is a luxurious and elegant dish, perfect for special occasions. The tender filet mignon pairs beautifully with the rich and creamy seafood sauce, creating a memorable dining experience.


Allergy Information

Please check ingredients for potential allergens and consult a health professional if in doubt.

Nutrition Facts (Per Serving)

It is important to consider this information as approximate and not to use it as definitive health advice.
  • Calories: ~
  • Total Fat: ~
  • Total Carbohydrate: ~
  • Protein: ~
0 comments
0 FacebookTwitterPinterestLinkedin
30 Minute MealsSeafood Meals

Creamy Garlic Butter Lobster Tails

by myphillyconnection February 23, 2026
written by myphillyconnection

Creamy Garlic Butter Lobster Tails are a decadent and indulgent seafood dish, perfect for special occasions or when you want to treat yourself. The tender lobster tails are baked until perfectly cooked, then drizzled with a rich, creamy garlic butter sauce made with heavy cream, Parmesan, and a hint of lemon juice. The result is an irresistible combination of buttery richness and fresh flavors. Serve these lobster tails with a side salad or roasted vegetables for a complete, delicious meal that will impress your guests!

Creamy Garlic Butter Lobster Tails are a show-stopping seafood dish that combines the delicate flavors of lobster with a rich, flavorful sauce. The lobster tails are baked until tender and served with a creamy garlic butter sauce made with heavy cream, Parmesan cheese, and a hint of lemon juice. This dish is perfect for a romantic dinner or any special occasion where you want to impress with a luxurious meal.

INGREDIENTS

  • Lobster tails: 4 large, for a tender and rich seafood dish
  • Butter: 4 tbsp divided, for cooking the lobster and making the garlic butter sauce
  • Garlic cloves: 4 minced, adds flavor to the sauce
  • Heavy cream: 1½ cups, creates the rich and creamy sauce
  • Parmesan cheese: ½ cup grated, adds savory flavor to the sauce
  • Lemon juice: 1 tbsp, brightens the flavors of the sauce
  • Fresh parsley: 1 tbsp chopped, for garnish and freshness
  • Salt and pepper: to taste, seasons the lobster and sauce

INSTRUCTIONS

Step 1: Preheat your oven to 425°F (220°C). Using kitchen shears, carefully cut along the top of each lobster shell lengthwise. Gently pull the meat out of the shell and place it on top, keeping it attached at the base.

Step 2: Season the lobster tails with salt, pepper, and a little melted butter to enhance the flavor.

Step 3: Place the lobster tails on a baking sheet and bake for 8-10 minutes, or until the meat is firm, opaque, and cooked through.

Step 4: In a skillet over medium heat, melt the remaining butter. Add the minced garlic and sauté for about 1 minute until fragrant.

Step 5: Stir in the heavy cream and grated Parmesan cheese. Simmer the mixture for 3-4 minutes, allowing it to thicken slightly. Add lemon juice and season with salt and pepper to taste.

Step 6: Drizzle the creamy garlic butter sauce generously over the baked lobster tails. Garnish with fresh parsley and serve hot.Serving and Storage Tips

  • Serve this dish with a light green salad or roasted vegetables for a balanced meal. You can also pair it with garlic bread to soak up the rich sauce.
  • Leftover lobster tails can be stored in an airtight container in the refrigerator for up to 2 days. Reheat gently in a skillet with extra sauce to avoid overcooking the lobster meat.

Helpful Notes

  • For an extra touch, broil the lobster tails for the last 1-2 minutes to achieve a golden, slightly crispy top.
  • To add more richness, you can substitute half of the Parmesan with Gruyère cheese.

Tips from Well-Known Chefs

  • Chef Gordon Ramsay recommends using clarified butter for basting the lobster tails to prevent browning and give them a smoother, richer flavor.
Creamy Garlic Butter Lobster Tails

Creamy Garlic Butter Lobster Tails

Serves: 4 Prep Time: 10 minutes Cooking Time: 10 minutes 10 minutes
Nutrition facts: 350 calories 20 grams fat
Rating: 5.0/5
( 1 voted )
Pin
Print

Ingredients

 4 lobster tails.
 4 tbsp butter (divided).
 4 garlic cloves, minced.
 1½ cup heavy cream.
 ½ cup Parmesan cheese, grated.
 1 tbsp lemon juice.
 1 tbsp fresh parsley, chopped.
 Salt and pepper (to taste).

Instructions

Preheat your oven to 425°F (220°C). Using kitchen shears, carefully cut along the top of each lobster shell lengthwise. Gently pull the meat out of the shell and place it on top, keeping it attached at the base.

Season the lobster tails with salt, pepper, and a little melted butter to enhance the flavor.

Place the lobster tails on a baking sheet and bake for 8-10 minutes, or until the meat is firm, opaque, and cooked through.

In a skillet over medium heat, melt the remaining butter. Add the minced garlic and sauté for about 1 minute until fragrant.

Stir in the heavy cream and grated Parmesan cheese. Simmer the mixture for 3-4 minutes, allowing it to thicken slightly. Add lemon juice and season with salt and pepper to taste.

Drizzle the creamy garlic butter sauce generously over the baked lobster tails. Garnish with fresh parsley and serve hot.

Notes

  1. This luxurious Creamy Garlic Butter Lobster Tail dish combines the richness of lobster with a flavorful garlic butter sauce made with heavy cream, Parmesan, and lemon.
  2. Perfect for a special dinner or any indulgent occasion!.

Allergy Information

Please check ingredients for potential allergens and consult a health professional if in doubt.

Nutrition Facts (Per Serving)

It is important to consider this information as approximate and not to use it as definitive health advice.
  • Calories: ~
  • Total Fat: ~
  • Total Carbohydrate: ~
  • Protein: ~
0 comments
0 FacebookTwitterPinterestLinkedin
30 Minute MealsSeafood Meals

Creamy Shrimp and Crab Spinach

by myphillyconnection February 23, 2026
written by myphillyconnection

This Creamy Shrimp and Crab Spinach is the ultimate seafood lover’s dish, featuring tender shrimp and crab in a rich, creamy Parmesan sauce with fresh spinach. The natural sweetness of the seafood pairs beautifully with the earthy spinach, while the cream sauce provides a luxurious texture that ties it all together. It’s quick to prepare, making it a fantastic option for an elegant meal at home.

INGREDIENTS

  • Shrimp: ½ pound, peeled and deveined, sautéed until pink and tender
  • Crab meat: ½ pound, added to the creamy sauce for sweetness
  • Butter: 2 tbsp, used to sauté the garlic and onion
  • Garlic: 2 cloves, minced, to add flavor to the sauce
  • Onion: 1 small, finely diced, for sweetness and texture
  • Fresh spinach: 2 cups, wilted in the sauce
  • Heavy cream: 1 cup, to create a rich, creamy sauce
  • Parmesan cheese: ¼ cup, grated, to thicken the sauce and add flavor
  • Nutmeg (optional): ¼ tsp, to enhance the flavor
  • Salt and pepper: To taste, for seasoning the dish
  • Olive oil: 1 tbsp, to sauté the shrimp
  • Fresh parsley: For garnish, to add freshness and color

INSTRUCTIONS

Step 1: Heat olive oil in a pan, season shrimp with salt and pepper, and sauté for 2-3 minutes on each side until pink. Remove and set aside.

Step 2: In the same pan, melt butter and add garlic and onion. Cook until soft and fragrant, about 2-3 minutes.

Step 3: Add spinach to the pan and cook until wilted, about 2 minutes.

Step 4: Pour in heavy cream and add Parmesan cheese, simmer for 3-4 minutes until the sauce thickens.

Step 5: Gently fold in the crab meat and cooked shrimp, stirring until well combined.

Step 6: Season with nutmeg (optional), salt, and pepper to taste.

Step 7: Garnish with fresh parsley and serve over rice, pasta, or on its own as a side dish.

Serving and Storage Tips

  • Serve the dish immediately for the best flavor and texture.
  • Leftovers can be stored in an airtight container in the refrigerator for up to 2 days.

Helpful Notes

  • You can substitute half-and-half for heavy cream if you prefer a lighter sauce.
  • Feel free to use pre-cooked crab meat to save time.

Tips from Well-Known Chefs

  • Be careful not to overcook the shrimp; they should be tender, not rubbery.

Perfect for a Luxurious Weeknight Dinner

This Creamy Shrimp and Crab Spinach is quick and easy to make, but the rich flavors and textures make it feel like a special meal. The combination of fresh seafood and creamy Parmesan sauce creates a satisfying dish that pairs perfectly with pasta, rice, or even as a side dish for a larger meal.FAQs

Can I use frozen shrimp?

Yes, just make sure they are fully thawed and patted dry before cooking.

Can I substitute a different type of cheese?

Yes, Romano or Asiago cheese can be used instead of Parmesan for a different flavor profile.

Can I make this dish ahead of time?

It’s best served fresh, but you can prepare the sauce ahead and reheat it just before serving.

What sides go well with this dish?

This dish pairs well with rice, pasta, or a fresh green salad.

Creamy Shrimp and Crab Spinach

Conclusion

Creamy Shrimp and Crab Spinach is a delectable dish that blends the natural sweetness of shrimp and crab with the vibrant flavor of spinach, all wrapped in a luscious Parmesan sauce. This recipe is easy to prepare, making it perfect for weeknight dinners or elegant enough for special occasions. The shrimp is quickly sautéed to perfection, and the spinach is gently wilted in the same pan, absorbing the flavors of garlic and onion. Heavy cream and Parmesan cheese combine to create a rich and creamy sauce that ties everything together. Whether served over pasta, rice, or on its own, this dish is sure to impress!

Creamy Shrimp and Crab Spinach

Serves: 4 Prep Time: 10 minutes Cooking Time: 15 minutes 15 minutes
Nutrition facts: 200 calories 20 grams fat
Rating: 5.0/5
( 1 voted )
Pin
Print

Ingredients

½ pound shrimp, peeled and deveined.
 ½ pound crab meat.
 2 tbsp butter.
 2 garlic cloves, minced.
 1 small onion, finely diced.
 2 cups fresh spinach.
 1 cup heavy cream.
 ¼ cup Parmesan cheese, grated.
 ¼ tsp nutmeg (optional).
 Salt and pepper to taste.
 1 tbsp olive oil.
 Fresh parsley for garnish.

Instructions

Heat olive oil in a pan, season shrimp with salt and pepper, and sauté for 2-3 minutes on each side until they turn pink. Remove and set aside.

In the same pan, melt butter and add garlic and onion. Cook until soft and aromatic, about 2-3 minutes.

Add spinach and cook until wilted, about 2 minutes.

Pour in heavy cream and add Parmesan cheese. Simmer for 3-4 minutes until the sauce thickens.

Gently fold in crab meat and cooked shrimp, stirring until well combined.

Season with nutmeg (optional), salt, and pepper to taste.

Garnish with fresh parsley and serve immediately over rice, pasta, or on its own as a side dish.

Notes

  1. A rich and creamy dish featuring shrimp, crab, and spinach in a Parmesan-infused sauce, perfect for serving with rice, pasta, or as a side.

Allergy Information

Please check ingredients for potential allergens and consult a health professional if in doubt.

Nutrition Facts (Per Serving)

It is important to consider this information as approximate and not to use it as definitive health advice.
  • Calories: ~
  • Total Fat: ~
  • Total Carbohydrate: ~
  • Protein: ~
0 comments
0 FacebookTwitterPinterestLinkedin
Beef MealsSeafood Meals

Shrimp, Sausage & Dirty Rice

by myphillyconnection February 23, 2026
written by myphillyconnection

This shrimp sausage dirty rice became my secret weapon when I want to make something that feels like a special occasion but doesn’t require me to spend all day in the kitchen. The combination of Cajun spices, three different proteins, and perfectly seasoned rice creates this incredible one-pot meal that transports you straight to Louisiana with every bite. I discovered this recipe after falling in love with dirty rice at a Creole restaurant, and after lots of experimenting, I finally nailed that perfect balance of heat, flavor, and comfort that makes this dish so addictive.

Why You’ll Love This

  • Bold, authentic Cajun flavors – Every spoonful delivers that perfect mix of heat and seasoning
  • Three proteins in one dish – Shrimp, beef, and sausage make this incredibly satisfying
  • One-pot convenience – Everything comes together in one skillet for easy cleanup
  • Perfect for feeding crowds – Makes plenty and always gets rave reviews at gatherings

My brother-in-law, who grew up in New Orleans, took one bite of this and said it reminded him of his grandmother’s cooking. Coming from someone who’s pretty particular about authentic Cajun food, that was basically the best compliment I could have gotten. Now he specifically requests this whenever he visits.

What You Need

  • Ground beef and sausage: The traditional base that gives dirty rice its name and hearty texture
  • Fresh shrimp: Adds that special seafood element that makes this feel elevated
  • Cooked rice: Day-old rice works perfectly and won’t get mushy when mixed in
  • Holy trinity vegetables: Onions and bell peppers are essential for authentic Cajun flavor
  • Cajun spice blend: All those individual spices create that complex, layered heat
  • Chicken broth: Helps bring everything together and adds depth to the final dish
Shrimp Sausage Dirty Rice Recipe

Making It Happen

Prepping the shrimp

Start by seasoning your peeled and deveined shrimp with seafood seasoning. Heat 2 tablespoons of oil in a large skillet and cook the shrimp for about 2-3 minutes per side until they’re pink and cooked through. Remove them from the skillet and set aside, you’ll add them back at the very end so they don’t overcook.

Building the meat base

Add the remaining tablespoon of oil to the same skillet and brown your ground beef and sausage together, breaking them up as they cook. Once the meat is nicely browned, add your chopped onions, bell peppers, and minced garlic to the pan. Cook everything together for about 5 minutes until the vegetables start getting soft and fragrant.

Adding the spice magic

Stir in all your seasonings – oregano, thyme, garlic powder, onion powder, chili powder, black pepper, and a pinch of cayenne if you like heat. Sprinkle the flour over everything and stir well to combine. This flour helps thicken the mixture and prevents any lumps from forming when you add the liquid.

Bringing it together

Pour in the chicken broth and let everything simmer for 5-7 minutes, stirring occasionally, until the mixture thickens slightly. Add your cooked rice and simmer for another 5 minutes, stirring well to make sure all the rice gets coated with those incredible flavors and the liquid is mostly absorbed.

The final touch

Gently fold in your cooked shrimp during the last minute or two of cooking, just long enough to heat them through. You don’t want to overcook the shrimp or they’ll get tough and rubbery.

You Must Know

  • Use day-old rice – Fresh rice gets mushy, while day-old rice holds its texture perfectly
  • Don’t overcook the shrimp – Add them at the very end just to heat through
  • Let the vegetables soften properly – This builds the flavor foundation for the whole dish
  • Adjust spice levels to taste – Start with less cayenne and add more if needed

I learned through experience that adding the shrimp too early just results in tough, overcooked seafood. Now I always cook them separately first and fold them in at the end, which keeps them perfectly tender and flavorful.

Perfect Serving Ideas

This dirty rice is substantial enough to be a complete meal on its own, but it’s fantastic with some crusty French bread for soaking up any extra sauce. A simple green salad with a light vinaigrette cuts through the richness nicely. For drinks, cold beer or sweet tea complement those Cajun spices perfectly.

Making It Your Own

You can easily customize the heat level by adjusting the amount of cayenne and chili powder. Sometimes I add diced tomatoes or corn for extra vegetables, or use different types of sausage like andouille for more authentic flavor. The recipe also works great with chicken instead of beef if you prefer.

Storage and Reheating

This keeps really well in the refrigerator for about four days and actually tastes even better the next day when all those spices have had time to meld together. Reheat gently in the microwave or on the stovetop with a splash of broth if it seems dry.

Shrimp Sausage Dirty Rice Recipe

Cajun Cooking Tips

  • Brown the meat properly – Good color development adds tons of flavor to the final dish
  • Don’t rush the vegetable cooking – Soft vegetables are key to authentic dirty rice
  • Taste and adjust seasoning – Cajun cooking is all about building layers of flavor

This shrimp sausage dirty rice has become one of those special recipes that makes any dinner feel like a celebration. The combination of bold spices, multiple proteins, and that perfect rice texture creates something that’s both comforting and exciting at the same time. It’s the kind of dish that makes people think you’re a much more adventurous cook than you actually are, which is always a nice bonus when you’re trying to impress family or friends.

Frequently Asked Questions

→ What makes this ‘dirty’ rice? The term ‘dirty’ comes from the appearance – the rice gets a brownish color from the meat, spices, and seasonings mixed throughout.

→ Can I use pre-cooked rice? Yes! Day-old rice actually works best as it’s less likely to get mushy. Fresh rice works too, just make sure it’s cooled before adding.

→ How spicy is this dish? It has a moderate heat level from the Cajun spices. The cayenne is optional, so you can control the spice level to your preference.

→ Can I substitute the proteins? Absolutely! Try using andouille sausage, chicken, or even crawfish for different variations. The key is having multiple proteins for complexity.

→ How do I store leftovers? Store in the fridge for up to 3 days. Reheat gently on the stovetop with a splash of broth, as the flavors actually improve overnight!

Shrimp, Sausage & Dirty Rice

Serves: 6 Prep Time: 20 minutes Cooking Time: 25 minutes 25 minutes
Nutrition facts: 200 calories 20 grams fat
Rating: 5.0/5
( 1 voted )
Pin
Print

Ingredients

 1 pound ground beef
 1 pound ground sausage
 10-12 large shrimp, peeled and deveined

→ Rice and vegetables

 4 cups cooked rice
 2 cups chicken broth
 1½ cups onions and bell peppers, chopped
 3 teaspoons minced garlic
 3 tablespoons vegetable oil, divided

→ Seasonings and spices

 1 teaspoon seafood seasoning
 ¼ cup all-purpose flour
 1 tablespoon dried oregano
 1 teaspoon dried thyme
 1 tablespoon garlic powder
 1 teaspoon onion powder
 1 teaspoon chili powder
 ½ teaspoon black pepper
 Salt to taste
 Pinch of cayenne pepper (optional)

Instructions

Season shrimp with seafood seasoning. Heat 2 tablespoons of oil in a large skillet over medium-high heat. Cook shrimp for 2-3 minutes per side until pink and cooked through. Remove and set aside.

Add the remaining 1 tablespoon of oil to the same skillet. Add ground beef and ground sausage, cooking until browned and crumbled, about 6-8 minutes.

Add chopped onions, bell peppers, and minced garlic to the meat. Cook for 5 minutes until vegetables start to soften.

Stir in oregano, thyme, garlic powder, onion powder, chili powder, black pepper, salt, and cayenne if using. Sprinkle flour over everything and stir well to coat.

Pour in chicken broth and stir to combine. Let simmer for 5-7 minutes until the mixture thickens slightly.

Add the cooked rice and stir well to combine with all the flavors. Simmer for 5 minutes, stirring occasionally.

Gently fold in the cooked shrimp and heat through for 1-2 minutes. Taste and adjust seasonings as needed. Serve hot.

Notes

  1. This is authentic Louisiana-style dirty rice with a seafood twist - bold, spicy, and incredibly satisfying.
  2. Use day-old rice if possible, as it holds up better and doesn't get mushy when mixed with the other ingredients.
  3. Adjust the cayenne pepper to your heat preference - a little goes a long way!
  4. This dish tastes even better the next day as the flavors meld together beautifully.


Tools You'll Need

  • Large skillet or Dutch oven
  • Wooden spoon for stirring

Allergy Information

Please check ingredients for potential allergens and consult a health professional if in doubt.

Nutrition Facts (Per Serving)

It is important to consider this information as approximate and not to use it as definitive health advice.
  • Calories: ~
  • Total Fat: ~
  • Total Carbohydrate: ~
  • Protein: ~
0 comments
0 FacebookTwitterPinterestLinkedin
30 Minute MealsSeafood Meals

Pan-Seared Scallops with Lemon Caper Sauce

by myphillyconnection February 23, 2026
written by myphillyconnection

Pan-Seared Scallops with Lemon Caper Sauce is an elegant, simple seafood dish that’s perfect for special occasions or cozy dinners. The scallops are seared to golden perfection and topped with a tangy, buttery lemon caper sauce that adds a burst of fresh flavors. This dish is easy to prepare and pairs beautifully with pasta, rice, or a light salad. With ingredients like white wine, garlic, capers, and fresh parsley, it brings Mediterranean-inspired flavors to your table.

Pan-Seared Scallops with Lemon Caper Sauce is an elegant, flavorful seafood dish that combines the rich taste of seared scallops with a tangy, buttery sauce. This Mediterranean-inspired recipe is perfect for a special dinner or cozy night at home.

INGREDIENTS

  • Unsalted butter: 1/4 cup, creates a rich base for the sauce
  • Garlic: 4 cloves, minced for depth of flavor
  • Salt: 1/4 tsp, seasons the sauce
  • Black pepper: 1/4 tsp, adds mild spice
  • Red pepper flakes: 1/4 tsp, adds subtle heat
  • Lemon zest: 1 tsp, brings bright citrus notes
  • White wine: 1/3 cup, adds acidity and enhances flavor
  • Sugar: 1 tsp, balances the tangy flavors
  • Capers: 1 1/2 tbsp, rinsed, for briny contrast
  • Lemon juice: 2 tbsp, adds fresh acidity
  • Fresh parsley: 1 tbsp, chopped for garnish
  • Sea scallops: 1 lb, patted dry to ensure a good sear
  • Unsalted butter: 1/2 tbsp, for searing scallops
  • Olive oil: 1 tbsp, helps prevent butter from burning
  • Salt and pepper: to taste, for seasoning scallops

INSTRUCTIONS

Step 1:Melt butter in a skillet over medium-high heat until golden brown. Add garlic, salt, black pepper, red pepper flakes, and lemon zest, cooking until fragrant, about 1 minute.

Step 2:Add white wine and sugar, reduce heat, and simmer for 5 minutes. Stir in capers and cook for another 2 minutes. Remove from heat and mix in lemon juice and parsley.

Step 3:Heat 1/2 tbsp butter and olive oil in a separate pan over high heat. Season scallops with salt and pepper and sear for 1.5 minutes per side until golden.Serving and Storage Tips

  • Serve hot with pasta, rice, or a fresh green salad.
  • Leftover sauce can be refrigerated for up to 2 days and reheated gently.

Helpful Notes

  • Ensure scallops are dry before searing to achieve a golden crust.
  • Deglaze the pan with white wine to enhance the sauce’s flavor.

Tips from Well-Known Chefs

  • Chef Emma recommends using a nonstick pan and high heat for a perfect sear on the scallops.

Bringing Mediterranean Flavors to Your Plate

This dish is inspired by the fresh, bold flavors of the Mediterranean, combining garlic, lemon, and capers with seared scallops for a unique dining experience.An Elegant Dish for Special Occasions

Whether for a date night or a dinner party, these Pan-Seared Scallops with Lemon Caper Sauce make an impressive, flavorful main course.FAQs

What’s the best way to sear scallops?

Use high heat and make sure scallops are completely dry before searing for the best golden crust.

Can I substitute the white wine in the sauce?

Yes, chicken broth can be used as a substitute for white wine in the sauce.

How should I store leftovers?

Leftover sauce can be stored in the refrigerator for up to 2 days.

Can I use bay scallops instead?

Yes, bay scallops can be used, but adjust the cooking time as they are smaller and cook faster.

Pan-Seared Scallops with Lemon Caper Sauce

Conclusion

Pan-Seared Scallops with Lemon Caper Sauce is an elegant, flavorful dish that’s surprisingly simple to make. Fresh sea scallops are seared to golden perfection in a mixture of butter and olive oil, creating a tender, flavorful base. The lemon caper sauce adds a bright, tangy contrast to the rich scallops, made with ingredients like garlic, white wine, lemon zest, and capers. The sauce is finished with fresh parsley and a touch of lemon juice for a refreshing burst of flavor. Ideal for date nights or dinner parties, this dish is perfect served with pasta, rice, or a light, crisp salad. Enjoy a taste of the Mediterranean with this delightful recipe that balances rich and tangy flavors beautifully.

Pan-Seared Scallops with Lemon Caper Sauce

Serves: 4 Prep Time: 10 minutes Cooking Time: 15 minutes 15 minutes
Nutrition facts: 200 calories 20 grams fat
Rating: 5.0/5
( 1 voted )
Pin
Print

Ingredients

 Unsalted butter: 1/4 cup, for a rich, tangy sauce base.
 Garlic: 4 cloves, minced for flavor.
 Salt: 1/4 tsp, to season the sauce.
 Black pepper: 1/4 tsp, adds depth.
 Red pepper flakes: 1/4 tsp, for a hint of heat.
 Lemon zest: 1 tsp, provides bright citrus flavor.
 White wine: 1/3 cup, adds acidity and richness.
 Sugar: 1 tsp, balances the flavors.
 Capers: 1 1/2 tbsp, rinsed, adds briny tang.
 Lemon juice: 2 tbsp, for a refreshing tang.
 Fresh parsley: 1 tbsp, chopped for garnish.
 Sea scallops: 1 lb, patted dry for even searing.
 Unsalted butter: 1/2 tbsp, for searing scallops.
 Olive oil: 1 tbsp, prevents butter from burning.
 Salt and pepper: to taste, for seasoning scallops.

Instructions

In a skillet over medium-high heat, melt 1/4 cup of butter until golden brown. Add minced garlic, salt, black pepper, red pepper flakes, and lemon zest, cooking for 1 minute until fragrant.

Pour in the white wine and sugar, reduce the heat, and simmer for 5 minutes. Add capers and cook for an additional 2 minutes. Remove from heat and stir in lemon juice and parsley. Set the sauce aside.

In a separate pan, heat 1/2 tbsp of butter and 1 tbsp of olive oil over high heat. Season the sea scallops with salt and pepper. Sear scallops for about 1.5 minutes per side until golden brown.

Top the seared scallops with the prepared lemon caper sauce. Serve immediately with pasta, rice, or a crisp salad.

Notes

  1. These Pan-Seared Scallops with Lemon Caper Sauce are a delightful, elegant dish that’s simple to make yet full of rich flavors, perfect for a cozy night in or any special occasion.

Allergy Information

Please check ingredients for potential allergens and consult a health professional if in doubt.

Nutrition Facts (Per Serving)

It is important to consider this information as approximate and not to use it as definitive health advice.
  • Calories: ~
  • Total Fat: ~
  • Total Carbohydrate: ~
  • Protein: ~
0 comments
0 FacebookTwitterPinterestLinkedin
Seafood Meals

Loaded Seafood Baked Potato

by myphillyconnection February 23, 2026
written by myphillyconnection

Perfectly baked russet potatoes get stuffed with seasoned shrimp and cheese, then topped with a creamy crawfish sauce made with white wine and fresh herbs. Serves 2 as a hearty main course.

These loaded seafood baked potatoes happened by accident when I was trying to figure out what to do with some leftover crawfish and shrimp from a weekend boil. My husband suggested just putting it on baked potatoes, and I thought why not make it fancy with a proper cream sauce? What started as a way to use up leftovers turned into one of our most requested dinner ideas because it feels like something you’d get at an upscale restaurant but you’re making it at home in your pajamas.

Why You’ll Love This Recipe

  • Feels incredibly fancy, The creamy seafood sauce makes regular baked potatoes seem boring by comparison
  • Perfect for date night at home, Impressive enough to feel special but cozy enough for a weeknight
  • Uses simple techniques, Nothing complicated here, just good ingredients treated well

My neighbor came over while I was making these last month and the smell from the kitchen had her practically drooling. She ended up staying for dinner and spent the whole meal asking detailed questions about every step. Now she texts me whenever she finds crawfish at the store asking if it’s “seafood potato time” again.

What You’ll Need

  • Large russet potatoes: Get the biggest ones you can find since these are the main event
  • Good shrimp: I use medium-large size and keep some tails on for presentation
  • Crawfish tails: Frozen ones work fine if you can’t get fresh
  • Old Bay seasoning: This is what gives the shrimp that classic seafood flavor
  • Heavy cream: Don’t try to substitute with milk, you need the richness
  • White wine: Use something you’d actually drink, nothing fancy but nothing terrible either
  • Mixed cheeses: Colby jack and three-pepper cheese make everything creamy and melty
  • Fresh garlic and shallots: These build the flavor base for your cream sauce
Loaded Seafood Baked Potato

How to Make Them

Get those potatoes started: Scrub them really well, rub with olive oil and salt, then prick with a fork. Wrap in foil and bake at 400 for about an hour until they’re crispy outside and fluffy inside.

Season the shrimp: While potatoes bake, toss your shrimp with olive oil and all those seasonings. Let them sit and absorb all that flavor.

Cook the shrimp perfectly: Sear them in a hot skillet with butter and oil for about 3 minutes per side. Don’t move them around too much or they won’t get that nice golden color. Chop half of them up and leave the rest whole.

Build the cream sauce: In the same pan, cook your shallots until fragrant, add garlic, then deglaze with wine. Pour in that heavy cream and let it reduce slightly.

Add the seafood: Season your sauce with all those spices, then add the crawfish and let everything simmer together for a few minutes. Finish with cheese until it’s all melted and smooth.

Prepare the potato filling: Scoop out the cooked potato flesh and mash it with sour cream, milk, and butter. Fold in the chopped shrimp and both cheeses.

Put it all together: Stuff the potato mixture back into the skins, top with more cheese if you want, then ladle that amazing seafood cream sauce over everything. Sprinkle with green onions for color.

You Must Know

  • Don’t overcook the shrimp, They keep cooking in the hot cream sauce
  • Save some pasta water mentality, Keep some of that starchy potato water if you need to thin the filling
  • Taste and adjust, Every seafood seasoning blend is different, so season to your preference

I definitely overcooked the shrimp the first time I made these because I was worried about food safety. They turned out rubbery and disappointing. Now I know that shrimp cook incredibly fast, and the residual heat from the sauce finishes them perfectly. It’s all about timing and not being afraid to pull them off the heat when they’re just done.

Perfect Serving Ideas

These are pretty substantial on their own, but a simple green salad with lemon vinaigrette goes perfectly alongside. Some crusty bread for soaking up any extra cream sauce never hurts either. I sometimes roast some asparagus or green beans while the potatoes are in the oven for a complete meal.

Ways to Change It Up

Try different seafood combinations, scallops work great in place of crawfish, or use all shrimp if that’s easier to find. You could add some crab meat for extra luxury, or even use lobster if you’re feeling really fancy. Different cheese combinations work too, gruyere and parmesan create a more sophisticated flavor profile.

Storage Tips

These are definitely best served immediately while everything is hot and the cheese is melty. If you have leftovers, store the components separately and reheat gently. The cream sauce can be reheated on the stove with a splash of cream to bring back the consistency.

Loaded Seafood Baked Potato

Things That Really Matter

  • High heat for the shrimp, You want a good sear for the best flavor and texture
  • Don’t skip the wine, It adds acidity that balances all that cream and cheese
  • Fresh herbs make a difference, Green onions add color and a mild onion flavor that ties everything together

This recipe has become my go-to when I want to make something that feels like a special occasion without spending all day in the kitchen. There’s something really satisfying about how all these simple ingredients come together into something that looks and tastes like restaurant food. Every time I serve these, people get excited and start taking pictures before they even taste them, which always makes me feel like I’ve accomplished something special in the kitchen.

Frequently Asked Questions

→ Can I use frozen crawfish tails? Yes, thaw them completely and pat dry before adding to the sauce. Fresh crawfish will have better texture, but frozen works fine.

→ What can I substitute for crawfish? Crab meat, lobster, or even more shrimp work well. Adjust cooking time since some seafood cooks faster than crawfish.

→ How do I know when the potatoes are done? They should feel soft when gently squeezed and the skin should be crispy. A fork should pierce through easily with no resistance.

→ Can I make this ahead of time? You can bake the potatoes and make the sauce ahead. Assemble and reheat in the oven at 350°F until warmed through.

→ What vegetables pair well with this dish? Simple steamed asparagus, roasted Brussels sprouts, or a crisp garden salad complement the rich seafood flavors perfectly.

Loaded Seafood Baked Potato

Serves: 2 Prep Time: 25 minutes Cooking Time: 45 minutes 45 minutes
Nutrition facts: 200 calories 20 grams fat
Rating: 5.0/5
( 1 voted )
Pin
Print

Ingredients

→ Baked Potatoes

 2 large russet potatoes
 2 tablespoons olive oil
 Salt and freshly ground black pepper
 1/3 cup Colby Jack cheese, shredded
 1/4 cup 3-pepper cheese blend, shredded
 1/4 cup sour cream
 2-4 tablespoons milk or heavy cream
 Fresh green onions, chopped for garnish

→ Seasoned Shrimp

 1/2 pound large shrimp, peeled and deveined (keep tails on half)
 1/2 teaspoon Old Bay seasoning
 1/2 teaspoon onion powder
 1/4 teaspoon all-purpose seasoning
 1/4 teaspoon black pepper
 1 tablespoon olive oil

→ Crawfish Cream Sauce

 1 cup crawfish tails (about half a bag)
 3 tablespoons unsalted butter, divided
 3 tablespoons chopped seasoning blend
 1/2 shallot, finely diced
 3 garlic cloves, minced
 1/4 cup dry white wine
 1/3 cup heavy whipping cream
 1/3 cup Italian cheese blend, shredded
 1/2 teaspoon onion powder
 1/2 teaspoon garlic powder
 1/4 teaspoon black pepper
 1/4 teaspoon crab boil seasoning
 1/4 teaspoon paprika
 Salt to taste
 Fresh lemon juice

Instructions

Heat oven to 400°F. Scrub the potatoes clean and pat completely dry. Rub olive oil all over the skin, then sprinkle with salt. Pierce each potato 8 times with a fork, wrap in foil, and place on a baking sheet.

Bake for 1 hour or until the skin feels crispy and the inside is tender when squeezed gently. The potatoes should give slightly when pressed.

Toss the cleaned shrimp with olive oil, Old Bay, onion powder, all-purpose seasoning, and black pepper. Heat 1 tablespoon each of butter and olive oil in a skillet over medium heat until bubbling.

Add seasoned shrimp to the hot skillet and sear for 3 minutes without moving them. Flip and cook 1-2 minutes more until pink and cooked through. Remove from pan and chop half the shrimp, leaving the rest whole.

In the same skillet, melt another tablespoon of butter. Add diced shallots and chopped seasoning, cooking until fragrant, about 2 minutes. Add minced garlic and cook 2 minutes more.

Pour in the white wine to deglaze the pan, scraping up any browned bits. Once the wine reduces, stir in the heavy cream and bring to a gentle simmer.

Season with onion powder, garlic powder, paprika, crab boil seasoning, salt, and pepper. Add crawfish tails and simmer 3-4 minutes. Stir in cheese until melted and add a squeeze of fresh lemon juice.

Cut baked potatoes lengthwise and gently push ends together to open. Carefully scoop out the flesh, leaving the skins intact. Mash the potato flesh with sour cream, milk, butter, and chopped shrimp.

Fold both cheeses into the potato mixture and season with garlic powder and salt. Spoon the filling back into the potato skins, top with more cheese if desired, then ladle the crawfish cream sauce over the top.

Sprinkle with fresh chopped green onions and serve immediately while hot. Pair with your favorite vegetables for a complete meal.

Notes

  1. This recipe transforms a simple baked potato into an elegant seafood feast perfect for special occasions.
  2. Keeping tails on half the shrimp adds visual appeal and makes the dish feel more restaurant-quality.
  3. The crawfish cream sauce can be made ahead and reheated gently when ready to serve.
  4. Make sure to pat the potatoes completely dry before oiling to ensure crispy skins.

Tools You'll Need

  • Large baking sheet
  • Aluminum foil
  • Large skillet
  • Fork for piercing potatoes
  • Spoon for scooping potato flesh
  • Mixing bowl

Allergy Information

Please check ingredients for potential allergens and consult a health professional if in doubt.

Nutrition Facts (Per Serving)

It is important to consider this information as approximate and not to use it as definitive health advice.
  • Calories: ~
  • Total Fat: ~
  • Total Carbohydrate: ~
  • Protein: ~
0 comments
0 FacebookTwitterPinterestLinkedin
  • 1
  • …
  • 3
  • 4
  • 5
  • 6
  • 7
  • …
  • 11

Search

Follow Us

facebook
twitter
instagram
pinterest

Recent Posts

  • Asparagus & Cheese Stuffed Chicken

    May 29, 2026
  • Asian Cabbage Stir Fry

    May 29, 2026
  • High Protein Broccoli Cheddar Soup

    May 29, 2026
  • Homemade Popeyes Cajun Fries

    May 28, 2026
  • Immune Boosting Vegetable Soup

    May 25, 2026
  • Creamy Crab Bisque

    May 25, 2026
  • Garlic Parmesan Pizza

    May 25, 2026

Categories

  • 30 Minute Meals (38)
  • Barbecue (2)
  • Beef Meals (11)
  • Breakfast & Pastries (15)
  • Casseroles (11)
  • Cheesesteak (2)
  • Chicken Meals (20)
  • Cultural Dishes (13)
  • Featured (8)
  • Featured Sides (5)
  • Fish Meals (6)
  • Fresh Baked Breads (2)
  • Main Dishes (7)
  • Other Meals (2)
  • Pasta (21)
  • Pizza (5)
  • Popular Recipes (9)
  • Pork Meals (8)
  • Seafood Meals (19)
  • Side Dishes (6)
  • Soups & Salads (15)
  • Turkey Meals (7)
  • Vegetarian (22)

Popular Posts

  • 1

    Creamy Tomato and Spinach Pasta

    February 15, 2026
  • 2

    Buddha Bowl with Tofu

    October 22, 2024
  • 3

    Chicken Garlic Parmesan Pasta

    February 16, 2026
  • 4

    Classic Spicy Barbecued Ribs

    October 20, 2021
  • 5

    Easy Creamy Garlic Shrimp

    February 15, 2026

About Me

At MyPhillyConnection, we specialize in recipes for Philly favorites and lots of other popular dishes and cuisines.

Phone: (215) 554-7326
Email: info@myphillyconnection.com

Useful Links

  • Beef Meals
  • Chicken Meals
  • Fish Meals
  • Recipes
  • Recipe Submission

Breakfast Recipes

  • Asparagus & Cheese Stuffed Chicken

    May 29, 2026
  • Asian Cabbage Stir Fry

    May 29, 2026

Recent Posts

  • Asparagus & Cheese Stuffed Chicken

    May 29, 2026
  • Asian Cabbage Stir Fry

    May 29, 2026
  • Facebook
  • Twitter
  • Instagram
  • Pinterest
  • Linkedin
  • Tiktok

Copyright © 2026 - MyPhillyConnection / All Rights Reserved.

Philadelphia Food Network and Recipes
  • Home
    • Main Website
  • Recipes
  • Meals
    • 30 Minute Meals
    • Beef Meals
    • Breakfast & Pastries
    • Chicken Meals
    • Fish Meals
    • Pork Meals
    • Seafood Meals
    • Turkey Meals
    • Vegan & Vegetarian Meals
    • Other Meals
  • Categories
    • Barbecue
    • Casseroles
    • Cheesesteak
    • Cultural Dishes
    • Desserts & Treats
    • Featured
    • Fresh Baked Breads
    • Grilling
    • Pasta
    • Pizza
    • Popular Recipes
    • Side Dishes
    • Soul Food
    • Soups & Salads
  • About Us
  • Contact Us
  • Submit Your Recipe
Sign In
or
Login with HostGator

Keep me signed in until I sign out

Forgot your password?

Do not have an account ? Register here

Password Recovery

A new password will be emailed to you.

Have received a new password? Login here

Register New Account

I Agree to the Terms of Service and Privacy Policy

Have an account? Login here