Philadelphia Food Network and Recipes
  • Home
    • Main Website
  • Recipes
  • Meals
    • 30 Minute Meals
    • Beef Meals
    • Breakfast & Pastries
    • Chicken Meals
    • Fish Meals
    • Pork Meals
    • Seafood Meals
    • Turkey Meals
    • Vegan & Vegetarian Meals
    • Other Meals
  • Categories
    • Barbecue
    • Casseroles
    • Cheesesteak
    • Cultural Dishes
    • Desserts & Treats
    • Featured
    • Fresh Baked Breads
    • Grilling
    • Pasta
    • Pizza
    • Popular Recipes
    • Side Dishes
    • Soul Food
    • Soups & Salads
  • About Us
  • Contact Us
  • Submit Your Recipe
Top Posts
Asparagus & Cheese Stuffed Chicken
Asian Cabbage Stir Fry
High Protein Broccoli Cheddar Soup
Homemade Popeyes Cajun Fries
Immune Boosting Vegetable Soup
Creamy Crab Bisque
Garlic Parmesan Pizza
Green Bean Bundles
Cheesy Scalloped Potatoes
Garlic Parmesan Roasted Potatoes
Philadelphia Food Network and Recipes
  • Home
    • Main Website
  • Recipes
  • Meals
    • 30 Minute Meals
    • Beef Meals
    • Breakfast & Pastries
    • Chicken Meals
    • Fish Meals
    • Pork Meals
    • Seafood Meals
    • Turkey Meals
    • Vegan & Vegetarian Meals
    • Other Meals
  • Categories
    • Barbecue
    • Casseroles
    • Cheesesteak
    • Cultural Dishes
    • Desserts & Treats
    • Featured
    • Fresh Baked Breads
    • Grilling
    • Pasta
    • Pizza
    • Popular Recipes
    • Side Dishes
    • Soul Food
    • Soups & Salads
  • About Us
  • Contact Us
  • Submit Your Recipe
Copyright 2021 - All Right Reserved
30 Minute MealsSeafood Meals

Cheesy Shrimp and Crab Bake Dip

by myphillyconnection February 23, 2026
written by myphillyconnection

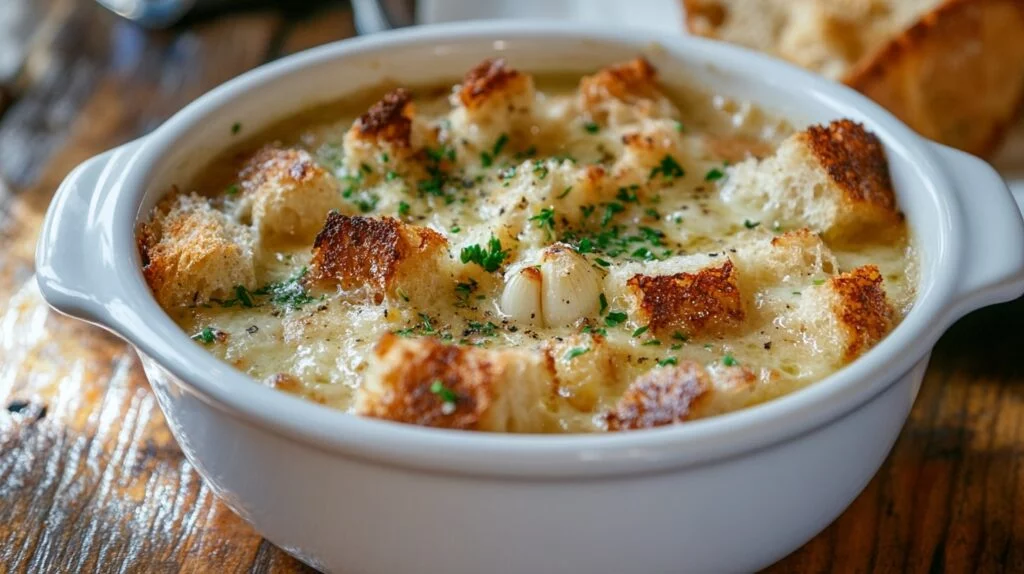
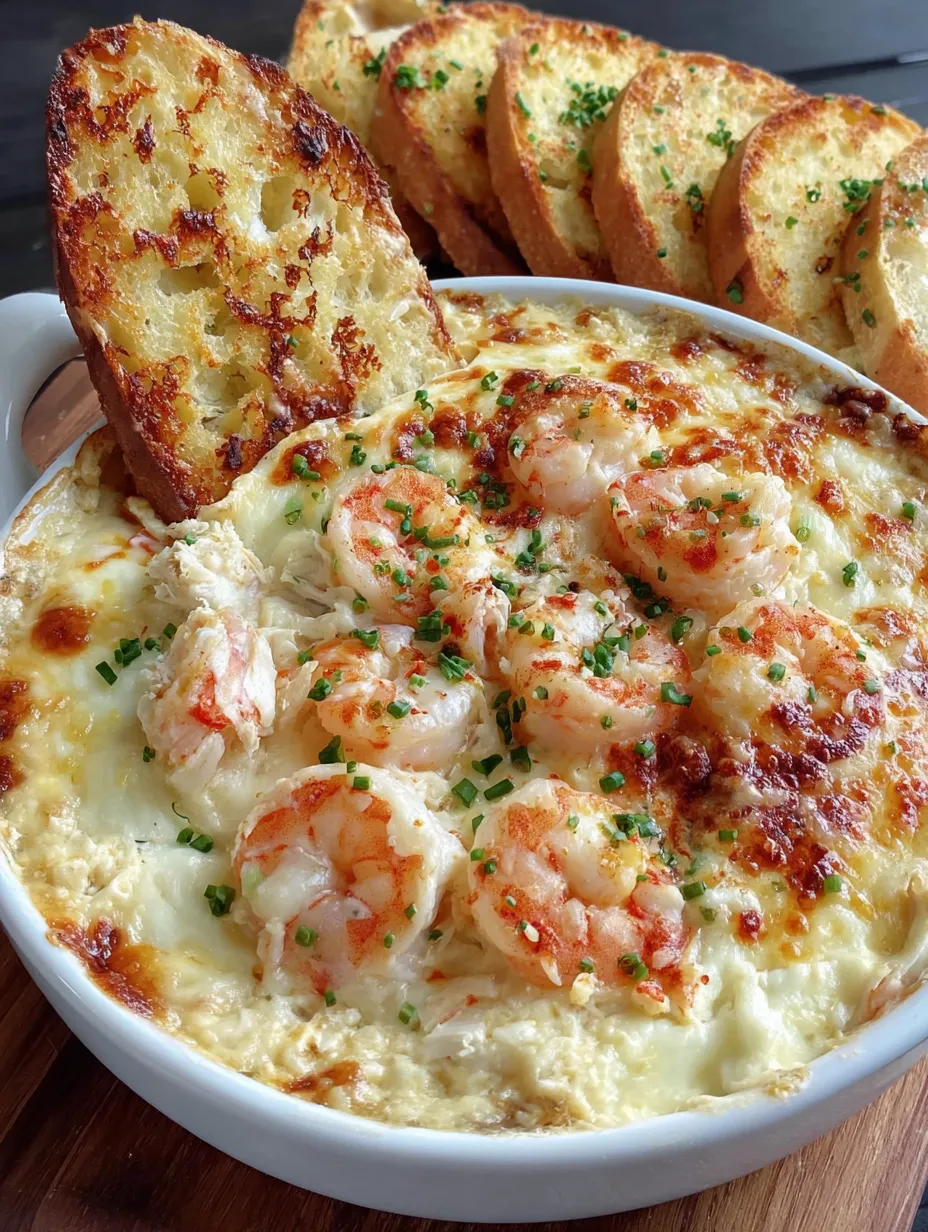
Cream cheese mixed with shrimp, crab, mozzarella, and Parmesan, then baked until hot and bubbly. Serve with toasted bread or crackers for dipping.

This cheesy seafood dip has saved me at so many last-minute gatherings I’ve lost count. You mix cream cheese with shrimp, crab, and a bunch of melty cheese, throw it in the oven, and 25 minutes later you’ve got this bubbly, golden dip that people swarm around. I first made this for a Super Bowl party maybe three years ago when I realized an hour before kickoff that I’d forgotten to plan any appetizers. Had some shrimp and crab in the freezer, cream cheese in the fridge, and just kind of threw it together based on other hot dips I’d made. Everyone kept asking where I ordered it from because it tasted like something from a restaurant. Now it’s my secret weapon whenever I need to bring something impressive without actually spending hours in the kitchen.

Why This Works

  • Mixing cream cheese and sour cream creates this rich, tangy base that doesn’t get watery when it bakes like other dips sometimes do
  • The combination of mozzarella and Parmesan gives you both that melty stretch and sharp, salty flavor that makes people keep coming back for more
  • Old Bay seasoning is perfect with seafood and adds that classic coastal flavor without needing a bunch of different spices
  • Everything bakes in one dish and comes out hot and bubbly with golden cheese on top that looks way fancier than the effort required

My neighbor Lisa is one of those people who brings fancy store-bought appetizers to everything. She showed up at my place for a barbecue last summer and tried this dip, then asked which gourmet shop I got it from. When I told her I made it, she actually looked offended, like I was lying to her. I had to pull up the cream cheese package from the recycling to prove it. She made me text her the recipe right there, and now she makes it for her own parties and somehow everyone thinks she’s this amazing cook. I think it’s hilarious.

What Goes Into It

  • Cooked shrimp: About a cup of already cooked shrimp that you chop into smaller pieces. I usually buy the pre-cooked frozen kind and just thaw it, which saves time and keeps this recipe quick.
  • Lump crab meat: Get the canned stuff from the seafood section and make sure to drain it really well. The lump variety has bigger pieces that stay intact in the dip instead of disappearing.
  • Cream cheese: Needs to be softened to room temperature or it won’t mix smoothly with everything else. I leave mine on the counter for an hour before I start cooking.
  • Sour cream: Adds tanginess and makes the dip a little lighter than just straight cream cheese, which can be kind of heavy on its own.
  • Mozzarella cheese: Shredded mozzarella gives you that melty, stretchy quality that makes this dip so addictive. Don’t buy the pre-shredded if you can avoid it—block cheese you shred yourself melts better.
  • Parmesan cheese: The grated kind in the container works fine here. It adds this salty, nutty flavor that plays really well with the seafood.
  • Fresh garlic: Minced up small so it distributes through the dip. Don’t use the jarred stuff—fresh garlic makes a noticeable difference in flavor.
  • Green onions or chives: Chopped for a little freshness and color. Either one works, though I usually go with green onions because I’m more likely to have them around.
  • Old Bay seasoning: This classic seafood spice blend has celery salt, paprika, and other spices that are perfect with shrimp and crab. Cajun seasoning works too if that’s what you have.
  • Hot sauce: Optional but I always add it. Just half a teaspoon gives the dip a little kick without making it spicy.
  • Bread or crackers: Toasted baguette slices are my favorite because they’re sturdy enough to scoop up the chunky dip without breaking.
Cheesy Shrimp & Crab Bake Dip

Making the Dip

Creating the base:Pull out a medium mixing bowl and dump in your softened cream cheese and sour cream. Add your minced garlic, Old Bay seasoning, a good pinch of salt, some black pepper, and that hot sauce if you’re using it. Take a sturdy spoon or a hand mixer and beat everything together until it’s completely smooth with no lumps of cream cheese remaining. This takes a couple minutes by hand or about 30 seconds with a mixer. You want this base really creamy and well-blended because it’s what holds everything else together and carries all the flavor throughout the dip.Folding in seafood:Add your chopped shrimp, drained crab meat, about half of your shredded mozzarella, all the Parmesan, and half of your chopped green onions to the bowl with your cream cheese mixture. Use a spatula to fold everything together gently instead of stirring aggressively. You want to keep those nice chunks of crab intact rather than breaking them into tiny shreds. Make sure the seafood and cheese get distributed evenly throughout the cream cheese base so every scoop of dip has all the good stuff in it. The mixture will be thick and chunky, which is exactly what you want.Preparing to bake:Turn your oven to 375 degrees and let it heat up while you finish getting the dip ready. Take an oven-safe baking dish—I usually use an 8×8 square or a shallow round dish about that size—and spray it lightly with cooking spray or rub a little butter around the inside. Scrape your dip mixture into the prepared dish and use your spatula to spread it out into an even layer that reaches all the edges. Sprinkle the rest of your shredded mozzarella evenly over the top, covering the entire surface. This top layer of cheese will melt and get golden and bubbly, creating that irresistible crust everyone fights over.Baking until bubbly:Slide your baking dish into the preheated oven and set a timer for 20 minutes. The dip needs to heat all the way through and get bubbling around the edges, with the cheese on top melting into a gooey layer. After 20 minutes, check if the edges are bubbling and the cheese is melted. If the top cheese looks melted but nothing’s bubbling yet, give it another 5 minutes. You want to see those bubbles coming up through the cheese and around the sides of the dish, which tells you the whole thing is hot enough.Getting that golden top:Once your dip is hot and bubbly, you have a choice. You can take it out and serve it as is, which is perfectly fine. Or you can turn your oven to broil and stick the dish back in for 1 to 2 minutes to get that golden-brown crust on top that looks really impressive. If you broil it, watch it like a hawk because it goes from golden to burnt really fast. The second you see those cheese patches turning deep golden brown, pull it out. This broiling step isn’t required but it makes the dip look a lot more professional and adds some texture to the top.Finishing and serving:Take your hot dip out of the oven and sprinkle the remaining chopped green onions or chives over the top for color and a hit of fresh flavor. Let it sit for just a minute or two so it’s not molten lava hot, then get it to the table with your toasted bread slices, crackers, or whatever you’re serving it with. Put out some small plates and spreading knives if you’re feeling fancy, though honestly most people just grab a piece of bread and scoop directly from the dish.

Important Things to Know

  • Cream cheese: Softening the cream cheese completely before mixing prevents lumps in your dip that won’t smooth out no matter how much you stir
  • Crab meat: Draining the crab meat really well is crucial because excess liquid will make your dip watery instead of thick and creamy
  • Serving: The dip will be extremely hot right out of the oven, so letting it cool for a few minutes prevents people from burning their mouths on the first bite

I forgot to drain the crab meat properly the first time I made this. Just dumped the whole can in without squeezing out the liquid. The dip came out of the oven looking fine, but when people started scooping into it, there was this pool of watery liquid at the bottom that made everything soupy and gross. Now I always drain it in a strainer and actually press on it with a spoon to get as much moisture out as possible. Makes a huge difference in the final texture.

The cream cheese temperature thing took me a while to figure out. I used to just take it straight from the fridge and try to mix it, which left chunks of hard cream cheese throughout the dip. Even after baking, those chunks never fully melted and the texture was weird. Now I take it out when I start prepping everything else, and by the time I’m ready to mix, it’s soft enough to blend smoothly. Sometimes I’ll microwave it for like 10 seconds if I’m in a rush, but you have to be careful not to melt it.

The broiling step scared me at first because I’d heard horror stories about people burning things under the broiler. But once I tried it and stayed right there watching it, I realized it only takes a minute or two and the difference in appearance is worth it. That golden-brown cheese on top just looks so much better than pale melted cheese. Just don’t walk away from the oven when the broiler is on.

I’ve made this with imitation crab when I couldn’t find the real stuff, and honestly it still tastes really good. Real crab has better texture and flavor, but in a dip with all this cheese and seasoning, the imitation kind works fine and costs way less. Nobody at a party is going to complain.

The type of baking dish matters a little. I used a deep casserole dish once and the dip took forever to heat through and the top started getting too brown before the middle was hot. A shallow dish, maybe 2 inches deep at most, works way better because the heat reaches everything evenly and you get that perfect ratio of golden top to creamy middle.

Serving This Dip

Set this out on a trivet or hot pad right on your coffee table or wherever people are gathering, and arrange your dippers around it. Toasted baguette slices are my go-to because they’re sturdy and taste good, but thick crackers like Wheat Thins or Triscuits work great too. Some people like tortilla chips with this, which gives it more of a Tex-Mex vibe. For a party spread, put this dip out with some raw veggies and other appetizers so people have options. It stays hot for a good 20 minutes after coming out of the oven, and even when it cools down it still tastes good—just different. This works for game day parties, holiday gatherings, or any time you need a crowd-pleasing appetizer that feels a little fancy. I’ve also served it as part of a seafood-themed dinner alongside other dishes.

Different Ways to Make It

Add some chopped artichoke hearts to the mixture for extra texture and a slightly tangy flavor that works really well with seafood. Throw in some diced jalapeños if your crowd likes spice, or use pepper jack cheese instead of plain mozzarella. Mix in some cooked chopped bacon for a smokier, meatier version. Use all crab or all shrimp instead of both if you have a strong preference or one is way cheaper. Add some cream cheese with chives and onion flavor for extra punch without needing to chop anything extra. Swap Old Bay for Cajun seasoning and add some diced bell peppers for more of a Louisiana-style dip. Top with panko breadcrumbs mixed with melted butter before baking for a crunchy top layer instead of just cheese.

Storage and Reheating

Leftovers keep in the fridge for up to 3 days in an airtight container, though honestly this dip rarely lasts that long because people keep sneaking back to eat more. Reheat it in a baking dish at 350 degrees for about 15 minutes until it’s hot and bubbly again. You can microwave individual portions if you’re just heating up a small amount, stirring halfway through so it heats evenly. The texture changes a little after refrigeration—it gets thicker and less creamy—but it still tastes good. Don’t leave this sitting out at room temperature for more than 2 hours since it’s got seafood and dairy in it. I’ve never tried freezing it because it seems like the texture would get weird, so I’d stick to making only what you’ll eat within a few days.

Cheesy Shrimp & Crab Bake Dip

Pro Kitchen Tips

  • Taste the dip mixture before baking and adjust the seasoning if needed—once it’s baked, you can’t fix it if it’s too bland
  • Use a shallow baking dish rather than a deep one so the dip heats evenly and you get a good ratio of crispy top to creamy middle
  • If the top is browning too fast but the dip isn’t hot yet, cover it loosely with foil and keep baking until everything is heated through

I’ve made this cheesy seafood dip so many times now that I can basically do it without thinking. It’s become my default appetizer when I need something reliable that I know will disappear fast. There’s something really satisfying about watching people crowd around a dish you made and seeing it empty within like 20 minutes. The combination of sweet seafood, tangy cream cheese, and melty cheese just works in a way that makes people happy. I love that it looks and tastes impressive but comes together so quickly with stuff I usually have in my fridge or freezer. No complicated techniques, no exotic ingredients, just good flavors mixed together and baked until bubbly. Every time I bring this somewhere, at least two people ask for the recipe, which never gets old. It’s the kind of dish that makes you look like a better cook than you actually are, which is honestly the best kind of recipe to have in your back pocket!

Frequently Asked Questions

→ Can I use imitation crab instead of real crab? Real lump crab meat tastes much better and has a better texture, but you can use imitation crab if that’s what you have. The dip just won’t be quite as flavorful.

→ Can I make this ahead of time? Yes! Mix everything together and keep it covered in the fridge for up to a day before baking. Just add a few extra minutes to the baking time since it’ll be cold.

→ What can I serve this dip with? Toasted baguette slices are classic, but crackers, pita chips, tortilla chips, or even veggies all work great for scooping.

→ How do I keep the dip warm during a party? You can transfer it to a small slow cooker on the warm setting, or just reheat it in the oven for a few minutes when it starts to cool down.

→ Can I freeze this dip? Cream cheese dips don’t freeze very well – the texture can get grainy when thawed. It’s best made fresh or stored in the fridge for a couple days.

→ What if I don’t have Old Bay seasoning? Cajun seasoning works great, or you can use a mix of paprika, garlic powder, and a pinch of celery salt to get a similar flavor.

Cheesy Shrimp and Crab Bake Dip

Serves: 6 Prep Time: 10 minutes Cooking Time: 20M 20M
Nutrition facts: 200 calories 20 grams fat
Rating: 5.0/5
( 1 voted )
Pin
Print

Ingredients

→ For the Dip

 8 oz cream cheese, softened
 1/2 cup sour cream
 2 garlic cloves, minced
 1 teaspoon Old Bay seasoning or Cajun seasoning
 Salt and black pepper to taste
 1/2 teaspoon hot sauce (optional)
 1 cup cooked shrimp, chopped
 1 cup lump crab meat, drained
 1 cup shredded mozzarella cheese, divided
 1/2 cup grated Parmesan cheese
 2 green onions or chives, chopped, divided

→ For Serving

 Toasted baguette slices, crackers, or tortilla chips

Instructions

In a large bowl, combine the softened cream cheese, sour cream, minced garlic, Old Bay seasoning, salt, pepper, and hot sauce if you're using it. Mix everything together until smooth and well combined.

Gently fold in the chopped shrimp, crab meat, half of the mozzarella cheese, all of the Parmesan cheese, and half of the chopped green onions or chives. Be careful not to break up the crab too much - you want to keep some nice chunks in there.

Spread the mixture into an oven-safe baking dish. Sprinkle the remaining mozzarella cheese evenly over the top.

Bake at 375 degrees for 20 to 25 minutes until the dip is hot all the way through, bubbly around the edges, and the cheese on top is melted and starting to turn golden.

If you want a really golden, crispy top, turn on the broiler and broil for 1 to 2 minutes. Watch it closely so it doesn't burn.

Take the dip out of the oven and sprinkle the remaining green onions or chives on top. Serve hot with toasted baguette slices, crackers, or tortilla chips for dipping.

Notes

  1. This dip is best served warm right out of the oven.
  2. You can prep the dip ahead of time and refrigerate it before baking. Just add a few extra minutes to the baking time if it's cold from the fridge.
  3. Leftover dip can be stored in the fridge for up to 2 days and reheated in the oven or microwave.
  4. Make sure to use lump crab meat for the best texture - don't use imitation crab.

Tools You'll Need

  • Large mixing bowl
  • Oven-safe baking dish
  • Spoon or spatula for mixing

Allergy Information

Please check ingredients for potential allergens and consult a health professional if in doubt.

Nutrition Facts (Per Serving)

It is important to consider this information as approximate and not to use it as definitive health advice.
  • Calories: ~
  • Total Fat: ~
  • Total Carbohydrate: ~
  • Protein: ~
0 comments
0 FacebookTwitterPinterestLinkedin
30 Minute MealsSeafood MealsSoups & Salads

Seafood Salad

by myphillyconnection February 23, 2026
written by myphillyconnection

Mix cooked shrimp and crab with chopped vegetables. Whisk mayo, sour cream, Dijon, lemon juice and seasonings. Combine everything, chill for 30 minutes, then garnish with herbs.

Nothing says easy elegance quite like a seafood salad. This refreshing combination of tender shrimp, sweet crab, and crisp vegetables brings together the best flavors of the ocean in a dish that’s equally at home at a backyard gathering or an upscale brunch. I started making this years ago for summer get togethers when I wanted something impressive that wouldn’t keep me stuck in a hot kitchen.

Why You’ll Love This Recipe

  • Creates an impressive dish with just 15 minutes of actual work
  • Uses readily available ingredients that shine with minimal fuss
  • Offers the perfect balance of creamy dressing and fresh seafood
  • Makes a complete meal that’s satisfying yet light enough for warm days

The first time I served this at a dinner party, one guest who claimed she “doesn’t do seafood” took a small courtesy spoonful, then promptly went back for seconds. There’s something about the combination of tender seafood with that tangy, creamy dressing that wins over even the skeptics.

Fresh Ingredients

  • Salad Shrimp: These small, sweet shrimp distribute throughout each bite—pre cooked saves time but you can cook your own for extra flavor
  • Crab Meat: Brings delicate sweetness and that characteristic seafood flavor—splurge on lump crab if budget allows, but imitation works well too
  • Crisp Vegetables: Create refreshing texture contrast against the tender seafood—the trio of celery, red onion, and bell pepper offers perfect crunch
  • Creamy Dressing Base: The combination of mayo and sour cream creates ideal richness without heaviness—the ratio gives tanginess without being too rich
  • Fresh Herbs: That final sprinkle of dill or parsley isn’t just garnish—it adds brightness that makes all the other flavors pop

I discovered the magic of adding sour cream to the dressing after years of using only mayonnaise. That touch of tanginess complements the seafood perfectly and lightens the overall texture of the salad. Sometimes small tweaks make all the difference in elevating a good recipe to a great one.

Seafood Salad
Seafood Salad

Step-by-Step Instructions

Vegetable PreparationFinely chopping the vegetables ensures they distribute evenly throughout the salad without overwhelming the delicate seafood. The uniform size creates consistent texture in every bite. That careful chop also allows the vegetables to absorb more dressing flavor while maintaining their essential crunch.Seafood CareEnsuring the seafood is well drained before adding prevents the dressing from becoming watery. Gentle handling preserves the integrity of the crab chunks and keeps the shrimp intact. If using frozen seafood, thawing completely and patting dry is crucial for the best texture.Dressing DevelopmentWhisking the dressing ingredients separately before adding to the seafood allows for perfect integration of flavors. The Old Bay seasoning brings classic seafood flavor, while the Dijon mustard adds complexity without dominating. That touch of fresh lemon juice brightens everything and enhances the natural sweetness of the seafood.Delicate MixingGently tossing rather than aggressive stirring preserves the texture of the seafood, particularly the crab meat which can break down easily. Thorough coating ensures every bite has the perfect balance of seafood, vegetables, and dressing. Using a rubber spatula rather than a spoon helps prevent crushing the delicate ingredients.Resting TimeThat 30 minute refrigeration period isn’t just convenient—it’s essential for flavor development. The chilling time allows the dressing to penetrate the ingredients while firming up the texture slightly. The vegetables retain their crunch while the seafood absorbs the seasonings for a more cohesive flavor profile.Final TouchesThe fresh herb garnish adds both visual appeal and a final layer of flavor. Those lemon wedges aren’t just decorative—a last minute squeeze brightens all the flavors just before eating. A final gentle stir redistributes any dressing that may have settled during chilling.

You Must Know

  • Don’t skip the chilling time—it makes a significant difference in flavor development
  • The salad can be made several hours ahead, making it perfect for entertaining
  • The dressing proportions can be adjusted to your preference for creaminess

My first attempt at seafood salad years ago was disappointing because I used seafood straight from the refrigerator without letting the finished salad rest. Now I understand that letting those flavors meld for at least half an hour transforms it from good to exceptional. Sometimes patience really is the secret ingredient!

Serving Suggestions

This versatile salad adapts to multiple presentation styles. For an elegant lunch, serve it nestled in butter lettuce cups or atop a halved avocado. For casual gatherings, pile it onto croissants or crusty bread for deluxe sandwiches. It also works beautifully as part of a larger spread alongside fresh fruit, crackers, and other finger foods. For a light dinner, serve over a bed of mixed greens with additional vegetables for a complete meal.

Creative Variations

Transform this basic recipe with simple swaps that create entirely new flavor experiences. Try adding diced avocado just before serving for creamy richness. For a Mediterranean twist, include chopped artichoke hearts and substitute the dill with fresh basil. Seafood lovers might appreciate adding cooked bay scallops or lobster chunks for even more luxury. For a touch of heat, incorporate minced jalapeño or a dash of hot sauce into the dressing.

Storage Smarts

This salad keeps beautifully in the refrigerator for up to two days in an airtight container, making it perfect for meal prep. The flavors often improve after the first day as they continue to meld. For best presentation when serving leftovers, add a small amount of fresh lemon juice and a sprinkle of herbs to refresh the appearance. Due to the seafood and dairy components, freezing is not recommended.

Seafood Salad
Seafood Salad

Salad Wisdom

  • Texture Tip: For perfect vegetable texture, chop them right before mixing—they’ll maintain maximum crunch
  • Seasoning Secret: Always start with less salt than you think you need, as seafood naturally contains sodium
  • Flavor Boost: A tiny pinch of sugar in the dressing enhances the natural sweetness of the crab and shrimp

I’ve been making versions of this seafood salad for nearly a decade, gradually refining proportions and techniques. What started as a simple appetizer has evolved into one of my signature dishes that friends and family specifically request. There’s something deeply satisfying about creating a dish that appears sophisticated but actually fits into a busy life—the perfect balance of special and doable that makes entertaining enjoyable rather than stressful.

Frequently Asked Questions

→ Can I use frozen seafood for this recipe? Yes! Thaw frozen shrimp or crab completely in the refrigerator overnight, then drain well and pat dry before adding to the salad to prevent excess water from diluting the dressing.

→ How long does seafood salad keep in the refrigerator? When properly refrigerated in an airtight container, this salad will keep for up to 2 days. The flavor actually improves after a few hours, but for food safety, don’t keep seafood dishes longer than 2 days.

→ What can I substitute for the mayonnaise? Greek yogurt makes a great substitute for some or all of the mayonnaise. You can also use avocado mayo or olive oil mayo for different flavor profiles while keeping the creamy texture.

→ What’s the best way to serve this seafood salad? Serve it chilled over lettuce leaves, in avocado halves, stuffed in tomatoes, on toasted bread as an open-faced sandwich, or with butter crackers as an appetizer. For a more substantial meal, serve over cooked and cooled pasta.

→ Can I add other seafood to this recipe? Absolutely! Cooked and chopped lobster meat, scallops, or even firm white fish like cod work beautifully in this salad. Just make sure any seafood you add is fully cooked before mixing into the salad.

→ What can I use instead of Old Bay seasoning? If you don’t have Old Bay, make your own by combining paprika, cayenne pepper, celery salt, and a pinch each of ground mustard, black pepper, nutmeg, cloves, allspice, ginger, and cardamom.

Seafood Salad

Serves: 4 Prep Time: 15 minutes
Nutrition facts: 200 calories 20 grams fat
Rating: 5.0/5
( 1 voted )
Pin
Print

Ingredients

→ Seafood Components

 1 pound cooked salad shrimp, peeled and deveined
 1 pound cooked crab meat (lump or imitation crab), roughly chopped if needed

→ Fresh Vegetables

 1 stalk celery, finely chopped
 1 small red onion, finely chopped
 1/2 medium red bell pepper, finely chopped

→ Creamy Dressing

 1/4 cup mayonnaise
 1/4 cup sour cream
 1 tablespoon Dijon mustard
 1 tablespoon fresh lemon juice
 1 teaspoon Old Bay seasoning (optional but recommended)
 Salt and freshly ground black pepper to taste

→ For Serving

 2 tablespoons fresh dill or parsley, chopped
 Lemon wedges for squeezing

Instructions

In a large mixing bowl, combine the finely chopped celery, red onion, and red bell pepper. Add the cooked shrimp and crab meat to the bowl with the vegetables. If using lump crab, be gentle to keep some of those beautiful chunks intact.

In a separate smaller bowl, whisk together the mayonnaise, sour cream, Dijon mustard, fresh lemon juice, and Old Bay seasoning until smooth and well combined. Season with salt and pepper to taste, keeping in mind that seafood and Old Bay already have some saltiness.

Pour the creamy dressing over the seafood and vegetable mixture. Using a large spoon or rubber spatula, gently fold everything together until all ingredients are evenly coated with the dressing. Be careful not to stir too vigorously, especially if using real lump crab meat, to maintain the texture of the seafood.

Cover the bowl with plastic wrap and refrigerate for at least 30 minutes (or up to several hours) to allow the flavors to meld together. When ready to serve, give the salad a gentle stir, then transfer to a serving dish or individual plates. Garnish with the fresh chopped dill or parsley and serve with lemon wedges on the side for an extra burst of brightness.

Notes


  1. This salad can be customized with your favorite seafood and vegetables - try adding chopped cucumber, avocado, or even a bit of diced apple for sweetness and crunch.
  2. For best flavor, make this salad at least 30 minutes before serving to allow the flavors to develop, but it can be prepared up to a day in advance.
  3. If you prefer a lighter dressing, you can replace some or all of the sour cream with Greek yogurt.

Tools You'll Need

  • Large mixing bowl
  • Small bowl for dressing
  • Whisk
  • Rubber spatula or large spoon
  • Cutting board and knife

Allergy Information

Please check ingredients for potential allergens and consult a health professional if in doubt.

Nutrition Facts (Per Serving)

It is important to consider this information as approximate and not to use it as definitive health advice.
  • Calories: ~
  • Total Fat: ~
  • Total Carbohydrate: ~
  • Protein: ~
0 comments
0 FacebookTwitterPinterestLinkedin
30 Minute MealsBreakfast & PastriesSeafood Meals

Cheesy Crab Biscuits w/ Garlic Butter

by myphillyconnection February 23, 2026
written by myphillyconnection

These cheesy crab biscuits elevate the beloved Red Lobster cheddar bay biscuit into something even more indulgent by folding in chunks of sweet lump crab meat and extra cheddar cheese, then brushing each golden biscuit with roasted garlic butter that makes them absolutely irresistible. The cream cheese worked into the biscuit dough creates an incredibly tender, fluffy interior that cradles the delicate crab pieces while pockets of melted cheddar add gooey richness throughout every bite. What makes these cheesy crab biscuits so perfect for entertaining is how they transform a convenient boxed mix into restaurant-quality appetizers that taste like you spent hours in the kitchen rather than the actual 30 minutes the recipe requires. Whether you’re hosting a dinner party that needs an impressive starter, celebrating a special occasion with luxurious seafood, or simply wanting to upgrade your favorite biscuits into something extraordinary, these crab-stuffed beauties deliver elegance and incredible flavor that makes every guest reach for seconds before they’ve finished their first.

Why You’ll Love This Recipe

  • The combination of boxed biscuit mix and premium lump crab creates impressive results that taste homemade while remaining completely achievable
  • Cream cheese worked into the dough produces exceptionally tender, fluffy biscuits with a richness plain mix alone cannot achieve
  • Roasted garlic butter brushed over the hot biscuits creates that signature restaurant flavor with aromatic depth
  • Produces 6 to 8 generous biscuits, perfect for appetizer portions at dinner parties without excessive leftovers
  • The 30-minute total time allows you to prepare impressive seafood appetizers even when entertaining feels overwhelming

I first made these for my husband’s birthday when he requested his favorite restaurant appetizer but didn’t want the hassle of going out. The challenge of recreating that ‘cheddar bay’ magic at home while elevating it with real crab meat seemed daunting until I realized the boxed mix provided a perfect foundation. Now these appear at every celebration in our home, and guests consistently declare them better than anything they’ve eaten at the actual restaurant that inspired them.

Master Your Ingredients

  • Red Lobster Cheddar Bay Biscuit Mix: The essential base that provides the signature seasoning and flour proportions. Reserve the included seasoning packet for the finishing butter
  • Lump Crab Meat: One 8-ounce container of sweet, delicate crab meat. Use lump variety for the most luxurious texture and visible chunks
  • Cream Cheese: Half a block (4 oz), fully softened. This is the secret to the ultra-tender, melt-in-your-mouth interior
  • Cheddar Cheese: One cup of shredded sharp cheddar adds visible pockets of melted, gooey richness throughout the dough
  • Roasted Garlic: One tablespoon of roasted garlic paste or minced roasted cloves. This provides a sweet, nutty depth that raw garlic lacks
  • Cajun Seasoning: A teaspoon of your favorite blend adds subtle warmth that perfectly complements the seafood
Cheesy Crab Biscuits w/ Garlic Butter

Creating Your Seafood Appetizers

Preparing the Base Dough:Mix the dry biscuit mix with softened cream cheese using a hand mixer or pastry cutter until it resembles coarse sand. Gradually add 3/4 cup of ice-cold water, two tablespoons at a time, until the dough is thick and sticky. Incorporate the shredded cheddar until evenly distributed.Folding and Shaping:Gently fold in the thoroughly drained lump crab meat and Cajun seasoning by hand to keep the crab pieces intact. With oiled hands to prevent sticking, shape the dough into golf-ball-sized rounds. Place them on a parchment-lined baking sheet, leaving 1.5 inches of space between each.Baking and Glazing:Bake at 350°F for 14 to 20 minutes until golden brown and set. While they bake, melt 4 tablespoons of butter and stir in the roasted garlic and the reserved seasoning packet. Brush this fragrant mixture generously over the hot biscuits immediately after they leave the oven.

You Must Know

  • Fully soften the cream cheese to prevent lumps in your dough
  • Handling the crab by hand preserves the large, sweet lumps for a premium experience
  • The seasoning packet belongs in the butter, not the dough, for maximum flavor impact
  • Ice-cold water is the key to creating a light, airy texture
  • Space biscuits properly to allow air circulation for even browning and to prevent them from merging

I was initially skeptical that a boxed mix could produce company-worthy results, but the cream cheese and real crab transform it entirely. The cream cheese provides a tenderness impossible to achieve with water alone, while the crab adds a layer of luxury that makes any host feel like a pro. It’s a smart shortcut that ends in a gourmet result.

Creative Variations

Add a spicy kick by folding in finely diced jalapeños or using Pepper Jack cheese instead of cheddar. For a smoky profile, add crispy bacon crumbles. If you prefer a Maryland-style flavor, swap the Cajun seasoning for Old Bay to lean into those traditional coastal notes.

Storage and Reheating

These biscuits are best fresh, but can be stored in an airtight container in the fridge for up to three days. To restore their fluffy texture and crisp exterior, reheat them in a 325°F oven for about 8 minutes. Avoid the microwave if possible, as it tends to make seafood-based breads a bit soft and rubbery.

Cheesy Crab Biscuits w/ Garlic Butter

Chef’s Wisdom

  • Oiling your hands is essential; this dough is intentionally sticky and will be difficult to handle otherwise
  • Gently press the crab between paper towels before mixing to remove excess moisture
  • Serve with fresh lemon wedges to provide a bright acidic contrast to the rich garlic butter

These cheesy crab biscuits represent everything I love about modern entertaining: balancing impressive results with practical, stress-free preparation. Every time I pull a batch from the oven and watch guests reach for seconds, I’m reminded that the best recipes are those that allow the host to enjoy the party just as much as the guests do.

Frequently Asked Questions

→ Can I use fresh crab instead of canned? Yes! Fresh lump crab meat works great. Just make sure to pick through it for any shells and drain it well before adding to the dough.

→ What if I don’t have the Red Lobster biscuit mix? You can use a regular biscuit mix like Bisquick, but you’ll need to add your own cheddar cheese seasoning – try adding garlic powder, Old Bay seasoning, and extra cheddar.

→ Why does the water need to be ice cold? Cold water helps create fluffier, flakier biscuits by keeping the butter in the mix from melting too quickly. It’s a baking trick that really makes a difference!

→ Can I make these ahead of time? You can form the biscuits and refrigerate them for a few hours before baking. Or bake them ahead and reheat in a 300-degree oven for about 5 minutes.

→ What can I substitute for roasted garlic? Use 2-3 cloves of fresh minced garlic instead, or about 1 teaspoon of garlic powder. Roasted garlic has a milder, sweeter flavor, but fresh works in a pinch.

→ How do I know when they’re done? The biscuits should be golden brown on the outside and feel set when you gently press the top. If you have a thermometer, the internal temperature should be around 200 degrees.

Cheesy Crab Biscuits w/ Garlic Butter

Serves: 6 Prep Time: 10 minutes Cooking Time: 20 minutes 20 minutes
Nutrition facts: 200 calories 20 grams fat
Rating: 5.0/5
( 1 voted )
Pin
Print

Ingredients

 1 box Red Lobster Cheddar Bay Biscuit Mix
 1/2 block cream cheese
 8 oz container lump crabmeat
 1 cup shredded cheddar cheese
 3/4 cup ice cold water
 1 teaspoon Cajun seasoning
 Olive oil or non-stick spray


→ For the Garlic Butter

 4 tablespoons butter
 1 tablespoon roasted garlic
 Seasoning packet from biscuit mix

Instructions

Add the biscuit mix and cream cheese to a mixing bowl. Mix with a hand mixer or whisk until it forms a sand-like consistency.

Keep the mixer on low and gradually add the ice cold water, about 2 tablespoons at a time. The mixture should be thick and sticky. Toss in the shredded cheddar cheese and mix until it's fully combined.

Drain the crab meat and dump it into the bowl. Sprinkle in the Cajun seasoning and gently combine everything by hand to keep the crab meat lumps intact.

Spray your hands and a baking sheet with oil or non-stick spray. Form the biscuit dough into roughly 6 to 8 round balls and place them on the baking sheet with at least 1 1/2 inches of space between each one.

Bake at 350 degrees for about 14 to 20 minutes or until the biscuits are golden on the outside and fluffy on the inside.

While the biscuits are baking, melt the butter and add in the seasoning packet from the biscuit mix and the roasted garlic. Mix well.

Drizzle the garlic butter over the warm biscuits and serve right away. These are best enjoyed hot and fresh!

Notes

  1. Make sure the water is ice cold - this helps keep the biscuits fluffy.
  2. Mix the crab meat gently by hand to keep those nice lump pieces intact.
  3. Don't skip greasing your hands - the dough is sticky and this makes it so much easier to shape.
  4. These are best served warm right out of the oven!


Tools You'll Need

  • Baking sheet
  • Hand mixer or whisk
  • Mixing bowl
  • Gloves (optional, for forming biscuits)

Nutrition Facts (Per Serving)

It is important to consider this information as approximate and not to use it as definitive health advice.
  • Calories: ~
  • Total Fat: ~
  • Total Carbohydrate: ~
  • Protein: ~

0 comments
0 FacebookTwitterPinterestLinkedin
30 Minute MealsPastaSeafood Meals

Easy Shrimp Alfredo

by myphillyconnection February 23, 2026
written by myphillyconnection

This shrimp Alfredo pasta proves that restaurant-quality Italian-American cooking can happen in your own kitchen on a busy weeknight, combining tender sautéed shrimp with fettuccine in a luxuriously creamy garlic Parmesan sauce that comes together in just 30 minutes. The secret to this sauce’s incredible richness lies in using cream cheese alongside heavy cream, creating a velvety texture that clings to every strand of pasta without the risk of breaking or becoming greasy. What makes this dish so perfect for both casual weeknights and impressing guests is how the simple technique produces results that taste like you spent hours in the kitchen, when in reality the sauce simmers while you boil the pasta. Whether you’re craving indulgent comfort or cooking a romantic dinner for two, this creamy, shrimp-laden pasta satisfies on every level.

Why You’ll Love This Recipe
The cream cheese
creates a foolproof sauce that stays emulsified rather than breaking into greasy pools
Thirty minutes from start to finish makes restaurant-quality pasta achievable on busy weeknights
The sauce comes together in one skillet while the pasta boils, meaning minimal dishes and maximum efficiency
Simple pantry ingredients and one pound of shrimp feed a family of four generously
Garlic infuses directly into the simmering sauce, creating deep, aromatic flavor throughout


I developed this recipe after years of frustration with traditional Alfredo sauces that required constant attention and still managed to separate. The addition of cream cheese was a happy accident during a night when I ran out of butter. It created the most stable, consistently creamy sauce I’d ever made. Now, I serve this to company with complete confidence, knowing it will stay perfect from stove to table without any nervous hovering.

Master Your Ingredients
Shrimp:
Use uncooked 31-40 count shrimp. They are large enough to be satisfying but cook quickly. Ensure they are peeled, deveined, and patted completely dry
Fettuccine: The classic wide, flat noodle that provides the perfect surface area for the thick Alfredo sauce to cling to


Cream Cheese: Use half a standard block (4 oz), softened. This acts as the secret stabilizer that prevents the sauce from breaking


Heavy Cream: Provides the luxurious, velvety richness that defines a true Alfredo sauce
Parmesan Cheese: Freshly grated from a block is essential. Pre-grated varieties contain anti-caking agents that can make your sauce grainy


Garlic: Two large cloves, minced, provide the pungent aromatic depth that balances the rich dairy components


Easy Shrimp Alfredo Pasta
Preparing the Pasta:
Boil your fettuccine in generously salted water until al dente. Crucially, reserve about half a cup of the starchy pasta water before draining—this is your insurance policy for adjusting the sauce consistency later.

Building the Foolproof Sauce:
In a large skillet over medium heat, combine the butter, softened cream cheese pieces, heavy cream, chicken broth, and garlic. Stir and press the cream cheese against the pan until it melts into a smooth, uniform liquid. Let it bubble gently for five minutes to reduce and thicken.

The Final Assembly:
Stir in the Parmesan until the sauce is glossy and thick. Add the shrimp directly into the sauce and simmer for 5–6 minutes until pink and opaque. Toss in the cooked fettuccine, adding a splash of the reserved pasta water if the sauce needs thinning, and serve immediately.

You Must Know
The cream cheese must be softened before adding to avoid lumps that won’t melt smoothly
Overcooking shrimp for more than six minutes will result in a rubbery, tough texture
Pasta water is starchy and seasoned; it’s better for thinning the sauce than plain tap water
Freshly grated Parmesan is the difference between a gritty sauce and a velvety one
Alfredo thickens rapidly as it cools, so have your diners ready at the table!
I’ve learned that many professional kitchens use similar ‘shortcuts’ to ensure consistency under pressure. Using cream cheese isn’t cheating—it’s smart cooking. It provides a built-in emulsifier that keeps your dinner looking perfect even if someone is a few minutes late to the table.

Creative Variations
To brighten the dish, add sun-dried tomatoes or a handful of fresh baby spinach at the end. For a kick, stir in a teaspoon of Cajun seasoning or red pepper flakes. You can also add crispy pancetta for a smoky, salty depth that pairs beautifully with the sweet shrimp.

Storage and Reheating
Store leftovers in an airtight container for up to two days. To reheat, use the stovetop over low heat with a splash of milk or cream to loosen the sauce. Avoid high heat in the microwave, as it will likely overcook the shrimp and cause the sauce to separate.


Pat shrimp dry with paper towels to prevent excess water from thinning your sauce
Warm your serving bowls in the oven to keep the sauce fluid for longer
A squeeze of fresh lemon juice just before serving enhances the natural sweetness of the shrimp
This shrimp Alfredo has earned a permanent spot in my rotation because it delivers maximum satisfaction with minimum stress. It’s the perfect example of how a small ingredient swap can transform a temperamental classic into a reliable weeknight hero. Every batch reminds me why I love sharing simple, delicious meals with the people I care about.

Frequently Asked Questions
→ Can I use frozen shrimp?
Yes! Just thaw them by running cool water over them in a colander. It only takes a few minutes and they’re ready to cook.
→ What if I don’t have cream cheese?
You can make a traditional Alfredo with just butter, heavy cream, and Parmesan, but the cream cheese makes the sauce extra thick and creamy. It’s worth having on hand!
→ Can I use a different pasta?
Absolutely! Linguine, penne, or even spaghetti would work great. Just cook according to package directions.
→ Why is my sauce too thick?
Thin it out with a bit of the hot pasta water, adding just a tablespoon or two at a time until you get the consistency you want.
→ Can I make this ahead of time?
Alfredo sauce is best fresh, but you can make it a few hours ahead and gently reheat, adding a splash of cream or pasta water to loosen it up.
→ How do I know when the shrimp are done?
Shrimp cook fast – they’re done when they turn pink and opaque, usually 5-6 minutes. Don’t overcook or they’ll get rubbery!

Easy Shrimp Alfredo

Serves: 4 Prep Time: 10 minutes Cooking Time: 20 minutes 20 minutes
Nutrition facts: 200 calories 20 grams fat
Rating: 5.0/5
( 1 voted )
Pin
Print

Ingredients

→ For the Pasta and Shrimp

 1 lb uncooked shrimp (31-40 count), thawed, peeled (tails optional)
 8 oz uncooked fettuccine

→ For the Alfredo Sauce

 2 tablespoons butter
 4 oz cream cheese, softened and cut into smaller pieces
 3/4 cup heavy whipping cream
 1/4 cup chicken broth
 2 large cloves garlic, minced
 1 cup freshly grated Parmesan cheese
 Salt and pepper to taste

Instructions

If your shrimp are frozen, put them in a colander and run cool water over them until they're thawed. Start boiling a large pot of salted water for the fettuccine. Cook the pasta al dente according to the package directions.

While the pasta is cooking, add the butter, cream cheese, heavy cream, chicken broth, and minced garlic to a large skillet over medium heat. Once the butter has melted and the pan is heated up, use a spoon to help the cream cheese melt into the sauce. This will take a couple minutes.

When the cream cheese is completely incorporated into the sauce, let it gently bubble for 5 minutes until the sauce has reduced a bit. Give it an occasional stir. This is a good time to grate the Parmesan if you haven't already.

Stir the grated Parmesan into the sauce and let it cook for about a minute until it's melted and creamy.

Add the shrimp to the pan and cook for 5 to 6 minutes, stirring occasionally, until they're pink and cooked through.

Season with salt and pepper as needed. Drain the pasta and toss it with the creamy shrimp sauce. Serve immediately while it's hot!

Notes

  1. If you forget to soften the cream cheese, microwave it for 20-30 second intervals until soft.
  2. If the sauce gets too thick, thin it out with a bit of the hot pasta water.
  3. Use freshly grated Parmesan for the best flavor and creamiest sauce.
  4. This comes together in 30 minutes, making it perfect for a quick weeknight dinner!


Tools You'll Need

  • Large pot for pasta
  • Large skillet
  • Colander
  • Grater for Parmesan

Nutrition Facts (Per Serving)

It is important to consider this information as approximate and not to use it as definitive health advice.
  • Calories: ~
  • Total Fat: ~
  • Total Carbohydrate: ~
  • Protein: ~
0 comments
0 FacebookTwitterPinterestLinkedin
Fish MealsSeafood Meals

Smoked Crab Stuffed Salmon

by myphillyconnection February 22, 2026
written by myphillyconnection

This smoked crab stuffed salmon elevates two of the ocean’s finest offerings into one spectacular dish, featuring rich, creamy lump crab stuffing nestled inside tender salmon fillets that absorb gorgeous smoky flavor during the low-and-slow cooking process. The stuffing combines premium crab meat with cream cheese, Dijon mustard, and Creole seasoning to create a luxurious filling that stays moist and flavorful throughout the smoking time while the salmon develops that beautiful pink, flaky texture everyone loves. What makes this smoked crab stuffed salmon so impressive for entertaining is how the presentation rivals fine dining restaurants while the preparation remains surprisingly approachable for anyone comfortable with basic smoker operation. Whether you’re celebrating a special anniversary, hosting a summer dinner party that calls for something memorable, or simply wanting to create a weekend meal that makes you feel like a culinary genius, this showstopping dish delivers elegance and incredible flavor that leaves guests talking about your cooking long after the last bite disappears.

Why You’ll Love This Recipe

  • The low-temperature smoking process produces incredibly moist, flaky salmon with delicate smoky undertones that complement rather than overpower the delicate seafood flavors
  • Lump crab meat stuffing transforms a simple salmon fillet into restaurant-quality presentation that impresses guests before they even take their first bite
  • The optional garlic lemon butter sauce adds a rich, citrusy finish that ties all the flavors together beautifully
  • Six servings from four generously stuffed fillets feeds a dinner party elegantly without requiring multiple cooking vessels
  • The easy difficulty level means even smoking novices can achieve impressive results that look and taste like they came from years of experience

I created this smoked crab stuffed salmon for my parents’ 40th wedding anniversary dinner when I wanted to serve something appropriately special without spending the entire celebration in the kitchen. The smoker did most of the work while I mingled, and when I brought the platter to the table, my mother actually teared up at how beautiful they looked. My father declared it the best salmon he’d ever eaten. Now this recipe appears at every major celebration in our family.

Salmon and Stuffing Components

  • Salmon: 4 skin-on fillets (6–8 oz each), boneless.
  • Crab: 1 pound lump crab meat (fresh or properly thawed frozen).
  • Binder: 1/2 cup cream cheese (softened), 1/4 cup mayonnaise, and 1/4 cup bread crumbs.
  • Seasoning & Aromatics: 2 tbsp Dijon mustard, 2 tbsp green onions (finely chopped), 1 tbsp Creole seasoning, 1 tbsp Worcestershire sauce, and juice of 1/2 lemon.
  • Freshness: Fresh parsley and garlic powder to taste.

Garlic Lemon Butter Sauce

  • Base: 1 stick (1/2 cup) melted butter and 1/3 cup heavy cream.
  • Flavor: 2 tsp garlic paste and 2 tsp lemon zest.
  • Seasoning: A pinch of Creole seasoning.
Smoked Crab Stuffed Salmon

Smoking Method Detailed

Preparing the Salmon Pockets

Using a sharp knife held horizontally, slice a deep pocket into the thickest part of each fillet. Do not cut all the way through; leave about half an inch at the ends to act as a seal for the stuffing. Brush with olive oil and season with salt and pepper.

Mixing the Crab Stuffing

Gently fold the crab meat with the cream cheese, mayo, mustard, bread crumbs, green onions, and spices. Aim for a cohesive mixture without breaking up the large crab lumps.

Stuffing and Prep

Divide the crab mixture among the four pockets, pressing gently to fill the cavity. Arrange on a tray while you prepare the smoker.

The Smoking Process

Preheat your smoker to 225°F using mild wood like applewood or alder. Place fillets skin-side down on the rack. Smoke for approximately 45 minutes until the internal temperature reaches 145°F.

Basting and Saucing

Brush with butter in the last 10 minutes for a glossy finish. Prepare the garlic lemon butter sauce by whisking the ingredients over low heat until silky.Rest and ServeLet the fish rest for 3–5 minutes before drizzling with warm sauce and serving with fresh lemon wedges.

You Must Know

  • Wood choice is critical: mild woods like applewood or alder enhance the fish, while hickory or mesquite are too aggressive for delicate seafood
  • The low-and-slow 225°F temperature is the secret to salmon that stays moist and doesn’t “seize” or become tough
  • Always use an instant-read thermometer; because fillets vary in thickness, temperature is a much safer guide than time
  • Keep the skin on during the smoke; it acts as a thermal shield and keeps the delicate meat from sticking to the grates
  • Avoid over-mixing the stuffing; those big chunks of lump crab meat are what make the dish feel premium

Smoking seafood requires a gentler approach than smoking ribs or brisket. My early experiments taught me that the goal is enhancing rather than masking the natural flavors of the beautiful seafood.

Expert Tips for Success

The Temperature Trick: Bring your salmon fillets to room temperature for 20 minutes before smoking to ensure they cook evenly. Smoke Color: Look for thin, blue smoke; if the smoke is thick and white, it can leave a bitter, ashy taste on the delicate crab. Sauce Consistency: If your sauce separates, whisk in a teaspoon of warm water to bring the emulsion back together.

Storing and Reheating

Leftovers should be stored in an airtight container for up to three days. To reheat without drying out the fish, place it in a 275°F oven covered with foil for about 15 minutes. This gentle warmth protects the cream cheese in the stuffing and the flakes of the salmon.

Smoked Crab Stuffed Salmon

Pro Tips or Helpful Tips

  • Use a small amount of mozzarella in the stuffing for an extra-gooey cheese pull
  • Old Bay is a fantastic substitute for Creole seasoning if you want a classic coastal flavor
  • Garnish with fresh dill or microgreens to elevate the restaurant-style presentation
  • If your salmon fillets are thin, you can ‘sandwich‘ the stuffing between two fillets and tie them with kitchen twine
  • Pair with a crisp Sauvignon Blanc or a light Pinot Noir to complement the smoky, rich flavors

This smoked crab stuffed salmon is a showstopper that proves fine dining is achievable right in your backyard. Whether it’s an anniversary or a fancy Saturday night, this dish is guaranteed to impress. Enjoy your culinary masterpiece!

Frequently Asked Questions

→ Can I bake this instead of smoking it? Yes! Bake at 375 degrees for 20-25 minutes until the salmon reaches 145 degrees internally. You won’t get the smoky flavor, but it’ll still be delicious.

→ What if I can’t find lump crab meat? Regular crab meat works fine, just try to get the best quality you can. You could even use imitation crab in a pinch, though the flavor won’t be quite as good.’

→ How do I know when the salmon is done? Use a meat thermometer – the internal temperature should reach 145 degrees. The salmon should also flake easily with a fork and be opaque throughout.

→ Can I prep this ahead of time? Yes! You can stuff the salmon up to a few hours ahead and keep it covered in the fridge until you’re ready to smoke it.

→ What wood chips work best? Applewood or alder are best for seafood – they give a mild, sweet smoke that doesn’t overpower the delicate fish. Avoid strong woods like hickory or mesquite.

→ Do I need the garlic lemon sauce? It’s optional but highly recommended! It adds richness and brightness that really complements the smoky salmon and creamy crab filling.

Smoked Crab Stuffed Salmon

Serves: 4 Prep Time: 15 minutes Cooking Time: 45 minutes 45 minutes
Nutrition facts: 20 calories 20 grams fat
Rating: 5.0/5
( 1 voted )
Pin
Print

Ingredients

→ For the Salmon

 4 salmon fillets, skin-on, boneless, about 6 to 8 oz each
 Olive oil for brushing
 Salt and pepper to taste
 Lemon wedges for serving

→ For the Crab Stuffing

 1 lb lump crab meat (fresh or thawed if frozen)
 1/2 cup cream cheese, softened
 1/4 cup bread crumbs
 1/4 cup mayonnaise
 1/4 cup shredded mozzarella cheese (optional)
 2 tablespoons Dijon mustard
 1 tablespoon Worcestershire sauce
 2 tablespoons finely chopped green onions
 1 tablespoon fresh parsley (or 1 teaspoon dried)
 1 teaspoon garlic powder
 1 tablespoon Tony's Creole seasoning (or preferred seafood seasoning)
 Juice of 1/2 lemon

→ For the Garlic Lemon Sauce (Optional)

 1 stick butter
 1/3 cup heavy cream
 2 teaspoons garlic paste
 2 teaspoons lemon zest
 1 to 2 teaspoons Tony's Creole seasoning

Instructions

Use a sharp knife to cut a deep pocket into each salmon fillet - cut lengthwise but don't slice all the way through. You want to create a pocket that opens like a book. Lightly brush the outside with olive oil and season with salt and pepper. Set aside.

In a bowl, mix together the crab meat, softened cream cheese, bread crumbs, mayonnaise, mozzarella (if using), Dijon mustard, Worcestershire sauce, chopped green onions, parsley, garlic powder, Tony's Creole seasoning, and lemon juice. Gently combine everything while trying to keep the crab lumps intact. Taste and adjust the seasoning if needed.

Fill each salmon pocket with a generous amount of the crab mixture - really pack it in there! Gently press the edges together to keep the stuffing in place.

Preheat your smoker to 225 degrees. Use applewood or alder wood chips for a mild, sweet smokiness that won't overpower the delicate seafood.

Place the stuffed salmon fillets skin-side down on the smoker rack. Smoke for 45 minutes to 1 hour, until the salmon reaches an internal temperature of 145 degrees. Brush with a little olive oil or melted butter during the last 10 minutes of cooking to keep it moist.

While the salmon is smoking, make the sauce. In a heat-safe dish or small saucepan, melt the butter with the heavy cream, garlic paste, lemon zest, and Tony's Creole seasoning. Stir until everything is combined and smooth.

Remove the salmon from the smoker and let it rest for a few minutes. Serve with fresh lemon wedges and drizzle with the garlic lemon sauce if you made it. This is fancy enough for company but easy enough for any night!

Notes

  1. Applewood or alder wood chips give the best mild, sweet smoke flavor for seafood.
  2. Don't cut the pocket all the way through the salmon - you want it to open like a book.
  3. Be gentle when mixing the crab stuffing to keep the lump crab meat intact.
  4. If you don't have a smoker, you can bake this at 375 degrees for about 20-25 minutes.
  5. The garlic lemon sauce is optional but really takes this dish over the top!

Tools You'll Need

  • Smoker
  • Applewood or alder wood chips
  • Sharp knife
  • Mixing bowls
  • Meat thermometer
  • Small saucepan (for sauce)
0 comments
0 FacebookTwitterPinterestLinkedin
Seafood MealsSoups & Salads

Rich Seafood Bisque Bowl

by myphillyconnection February 22, 2026
written by myphillyconnection

This restaurant-style seafood bisque combines three premium seafoods in a velvety cream broth. Seasoned with Old Bay and finished with white wine, it’s pure comfort in a bowl.

Get ready to experience the ocean’s finest treasures in my creamy seafood bisque. I’ve combined sweet lobster tender shrimp and delicate crab in a rich velvety broth that’ll warm your soul. This elegant soup is perfect for special dinners or anytime you want to treat yourself to something extraordinary.

Pure Comfort

This bisque brings pure luxury to your bowl. The blend of three premium seafoods with aromatic Old Bay seasoning creates magic in every spoonful. It’s become my go-to recipe when I want to really wow dinner guests or make a regular evening feel special.

Your Shopping List

  • Shrimp: 1/2 lb fresh pink beauties peeled and cleaned
  • Crab Meat: 1/2 lb fresh is best but canned works too
  • Lobster Meat: 1/2 lb cooked and chunked fresh or frozen
  • Butter: 3 tablespoons unsalted
  • Aromatics: 1 small onion 2 garlic cloves 1 celery stalk 1 carrot
  • Flour: 2 tablespoons for thickening
  • Seafood Broth: 2 cups for deep flavor
  • Heavy Cream: 1 cup makes it silky smooth
  • White Wine: 1/2 cup optional but lovely
  • Seasonings: Old Bay cayenne salt and pepper
  • Fresh Parsley: 1 tablespoon for garnish
  • Lemon Wedges: Adds brightness

Let’s Cook

Start with ShrimpMelt butter and cook shrimp until pink set asideBuild the BaseSauté onion garlic celery and carrot in butter until softCreate RichnessStir in flour then slowly add broth no lumpsMake it CreamyPour in cream wine and seasonings simmer until thickAdd Your TreasuresFold in all that gorgeous seafood warm throughTime to ServeGarnish with parsley serve with lemon perfect

A bowl of creamy seafood soup topped with lobster claws and shrimp, garnished with parsley.
A bowl of creamy seafood soup topped with lobster claws and shrimp

My Kitchen Secrets

Take your time letting flavors develop while simmering. Want it extra rich? Add a splash more cream. Make it ahead and refrigerate up to 2 days. Crusty bread on the side makes it even better.

Keeping it Fresh

Keeps in the fridge for 2 days. For longer storage freeze the base without seafood up to 3 months. Add fresh seafood when reheating for the best texture.

Frequently Asked Questions

→ What kind of crab meat works best?

Lump crab meat gives the best texture and flavor, but you can use any fresh crab meat. Avoid imitation crab as it won’t provide the same rich taste.

→ Can I make this ahead of time?

You can make the base up to a day ahead, but add the seafood just before serving to keep it tender. Reheat gently to avoid overcooking.

→ What can I substitute for the wine?

You can skip the wine or replace it with extra seafood stock. A splash of lemon juice adds nice acidity instead.

→ Is there a lighter version possible?

You can use half-and-half instead of heavy cream, but the bisque won’t be as rich. Avoid low-fat milk as it may curdle.

→ Can I use frozen seafood?

Yes, just thaw completely and pat dry before using. Fresh seafood gives best results, but quality frozen seafood works well too.

Rich Seafood Bisque Bowl

Serves: 4 Prep Time: 20 minutes Cooking Time: 25 minutes 25 minutes
Nutrition facts: 30 calories 15 fat
Rating: 5.0/5
( 1 voted )
Pin
Print

Ingredients

 1/2 lb shrimp, peeled and deveined.
 1/2 lb crab meat.
 1/2 lb cooked lobster meat, chopped.
 3 tablespoons butter.
 1 small onion, diced.
 2 cloves garlic, minced.
 1 celery stalk, diced.
 1 carrot, diced.
 2 tablespoons all-purpose flour.
 2 cups seafood broth or fish stock.
 1 cup heavy cream.
 1/2 cup dry white wine (optional).
 1 teaspoon Old Bay seasoning.
 1/4 teaspoon cayenne pepper (optional).
 Salt and pepper to taste.
 1 tablespoon fresh parsley, chopped.
 Lemon wedges for serving.

Instructions

Melt 2 tablespoons butter over medium heat. Cook shrimp 2-3 minutes until pink. Remove and set aside.

Add remaining butter and cook onion, garlic, celery, and carrot 4-5 minutes until soft.

Sprinkle flour over vegetables. Cook 1-2 minutes to make roux.

Slowly whisk in seafood broth until smooth.

Add cream, wine, Old Bay, cayenne, salt, and pepper. Simmer 10-15 minutes until thickened.

Fold in crab, lobster, and shrimp. Simmer 5 minutes more.

Garnish with parsley and serve with lemon wedges.

Notes

  1. Can skip wine and use extra broth.
  2. Best served immediately.
  3. Don't overcook seafood.
  4. Use fresh seafood when possible.
  5. Garnish with extra parsley if desired.

Tools You'll Need

  • Large pot.
  • Whisk.
  • Measuring cups and spoons.
0 comments
0 FacebookTwitterPinterestLinkedin
Barbecue

BBQ Chicken Grilled Cheese Sandwich

by Clare Greco February 17, 2026
written by Clare Greco

This BBQ Chicken Grilled Cheese Sandwich takes comfort food to the next level with its combination of smoky BBQ chicken, creamy Havarti cheese, and buttery garlic bread. It’s a satisfying meal option that’s perfect for any time of the day. Quick to prepare and packed with bold flavors, this sandwich pairs wonderfully with sides like chips, coleslaw, or a fresh salad.

The BBQ Chicken Grilled Cheese Sandwich combines the smoky richness of BBQ chicken with creamy Havarti cheese, all tucked between buttery garlic bread. It’s the ultimate fusion of savory and cheesy, making it an ideal choice for lunch, dinner, or even as a hearty snack. This recipe is easy to prepare and perfect for satisfying your comfort food cravings.INGREDIENTS

  • Olive oil: 2 tbsp, for sautéing the onions and garlic.
  • Red onion: 1 small, thinly sliced, for a touch of sweetness and texture.
  • Garlic: 3 cloves, minced, to enhance the BBQ chicken flavor.
  • Shredded roasted chicken: 2 ½ cups, for a smoky, savory filling.
  • Paprika: ½ tsp, for added smoky depth.
  • Worcestershire sauce: 1 tsp, to enhance the BBQ sauce.
  • BBQ sauce: 1 cup, for bold, tangy flavor.
  • Havarti cheese: 12 slices, for creamy, melt-in-your-mouth cheesiness.
  • Butter: ¼ cup, melted, to create the garlic butter spread.
  • Garlic: 2 cloves, minced, to mix into the butter for flavor.
  • Parsley: 2 tsp, minced, to add a fresh, herby note to the butter.
  • Sourdough bread: 12 slices, or any sturdy white bread for structure and flavor.

INSTRUCTIONS

Step 1: Heat olive oil in a skillet over medium heat. Sauté the red onion until softened, about 2 minutes. Add garlic and cook until fragrant, about 30 seconds.

Step 2: Stir in the shredded chicken, paprika, Worcestershire sauce, and BBQ sauce. Cook until the mixture is heated through, about 2–3 minutes. Remove from heat and set aside.

Step 3: In a small bowl, melt the butter and mix in minced garlic and parsley to create garlic butter.

Step 4: Lay out 12 slices of bread. Spread the garlic butter mixture on one side of each slice. Flip the slices over, so the non-buttered side is facing up.

Step 5: Place a slice of Havarti cheese on 6 bread slices (non-buttered side). Add a portion of the BBQ chicken mixture, top with another slice of Havarti cheese, and finish with the remaining bread slices (buttered side up).

Step 6: Heat a non-stick skillet over medium heat. Place the sandwiches in the skillet and cook until the bread is golden brown on one side, about 3–5 minutes.

Step 7: Flip the sandwiches, reduce the heat to medium-low, and cook until the cheese melts and the other side browns, about 3–5 minutes.Step 8:Serve the sandwiches warm with your favorite sides, like chips, coleslaw, or a fresh salad.Serving and Storage Tips

  • Serve the sandwiches immediately for the best texture and flavor.
  • Store leftovers in the refrigerator for up to 2 days. Reheat in a skillet or oven to maintain crispiness.

Helpful Notes

  • For a smoky twist, use smoked Havarti or smoked gouda cheese.
  • Experiment with different BBQ sauce flavors, such as honey or spicy BBQ, to customize the taste.

Tips from Well-Known Chefs

  • Press the sandwiches gently with a spatula while grilling for even browning and melted cheese.
  • For extra flavor, toast the bread lightly before assembling the sandwiches.

BBQ Chicken Grilled Cheese Sandwich

Serves: 6 Prep Time: 15 minutes Cooking Time: 10 minutes 10 minutes
Nutrition facts: 260 calories 25 fat
Rating: 5.0/5
( 1 voted )
Pin
Print

Ingredients

2 tbsp olive oil.
 1 small red onion, thinly sliced.
 3 cloves garlic, minced.
 2 ½ cups shredded roasted chicken.
 ½ tsp paprika.
 1 tsp Worcestershire sauce.
 1 cup BBQ sauce.
 12 slices Havarti cheese.
 ¼ cup butter.
 2 cloves garlic, minced (for garlic butter).
 2 tsp parsley, minced.
 12 slices sourdough bread or sturdy white bread.

Instructions

Heat olive oil in a skillet over medium heat. Sauté onions until soft, about 2 minutes. Add garlic and cook until fragrant, about 30 seconds.

Add shredded chicken, paprika, Worcestershire sauce, and BBQ sauce. Stir and cook until the mixture is heated through, about 2–3 minutes.

Melt butter in a bowl and mix with minced garlic and parsley to create garlic butter.

Lay out 12 slices of bread. Spread garlic butter on one side of each slice. Flip the slices over so the non-buttered side is facing up.

Place a slice of Havarti cheese on 6 bread slices (non-buttered side). Add a portion of the BBQ chicken mixture, another slice of Havarti cheese, and top with the remaining bread slices (buttered side up).

Heat a non-stick skillet over medium heat. Place sandwiches in the skillet and cook until golden brown on one side, about 3–5 minutes.

Flip the sandwiches, reduce the heat to medium-low, and cook until the cheese melts and the other side browns, about 3–5 minutes.

Serve the sandwiches warm with your favorite side, such as chips or coleslaw.

Notes

  1. This BBQ Chicken Grilled Cheese Sandwich combines smoky, savory BBQ chicken with creamy Havarti cheese and buttery garlic bread for an irresistible meal.
  2. Perfect for lunch, dinner, or a quick snack that’s both satisfying and flavorful.


Nutrition Facts (Per Serving)

It is important to consider this information as approximate and not to use it as definitive health advice.
  • Calories: ~
  • Total Fat: ~
  • Total Carbohydrate: ~
  • Protein: ~
0 comments
0 FacebookTwitterPinterestLinkedin
Soups & Salads

Country French Garlic Soup

by Clare Greco February 17, 2026
written by Clare Greco

A comforting French soup combining garlic-infused broth with eggs and parmesan for richness. Perfect with crusty bread.

This French Country Garlic Soup brings me back to cooking with my grandmother. The way the garlic and sage meld together creates something truly magical.

Pure Comfort

What makes this soup special is how simple ingredients transform into luxury. The garlic becomes sweet while the sage adds earthiness.

What You Need

  • Fresh Garlic: A whole head.
  • Good Stock: Homemade if possible.
  • Fresh Sage: Never dried.
  • Quality Oil: Your best olive oil.
  • Fresh Eggs: For silky mayo.

Making the Base

Let that stock simmer gently with garlic and sage. The aroma will fill your kitchen with pure comfort.

Time to Serve

Ladle into bowls and top with crusty croutons. A drizzle of olive oil makes it shine.

Keep It Fresh

Stores well for three days. Just reheat gently no boiling needed.

Perfect Pairings

A glass of white wine and crusty bread make it complete. Simple but perfect.

Mix It Up

Try adding thyme or a splash of wine. Some truffle oil on top makes it fancy.

Plant Based Option

Use veggie stock and vegan mayo. Still delicious just different.

French Classic

This soup tells the story of French countryside cooking. Simple ingredients maximum flavor.

Roasted Garlic Twist

Roast the garlic first for extra sweetness. Worth the extra time.

Good For You

Garlic and herbs pack nutrition into every bowl. Pure comfort that’s good for you.

Old World Charm

This recipe comes from generations of French home cooks. Pure tradition in every spoonful.

Kid Friendly

Blend it smooth and top with cheese croutons. Even picky eaters love it.

Season to Season

Add root veggies in winter light herbs in summer. Always perfect.

Perfect for Groups

Double the recipe for gatherings easy to serve and always impresses.

Layer Those Flavors

Each ingredient adds something special. The mayo makes it silky smooth.

Make Extra

Freezes beautifully for quick dinners later. Just warm gently when needed.

Any Occasion

Perfect for casual lunches or fancy dinners. It’s that versatile.

Chef’s Secret

Top quality olive oil makes all the difference. Splurge on the good stuff.

Rustic Elegance

Simple ingredients fancy results. That’s French cooking at its best.

Garlic Love

The garlic mellows as it cooks becoming sweet and gentle.

Pure Comfort

Nothing better on a cold day. Warms you from the inside out.

Kitchen Essentials

Good pots and an immersion blender make it easier. Worth the investment.

Extra Uses

Use leftovers as pasta sauce or risotto base. So versatile.

Health Benefits

Garlic boosts immunity makes you feel good too.

Family Love

This recipe gets passed down generations. Pure tradition.

Serve with Style

Rustic bowls fresh herbs on top. Simple but beautiful.

Budget Friendly

Simple ingredients big flavor. Doesn’t break the bank.

Always In Style

This soup never goes out of fashion. Classic for good reason.

Frequently Asked Questions

→ How do I prevent the eggs from curdling? Temper the eggs by slowly whisking hot soup into them before adding back to pot. Keep heat low and stir continuously.

→ Can I freeze this soup? Freeze before adding egg mixture only. Do not freeze after eggs are incorporated as it will affect texture.

→ What bread works best with this? Crusty French bread or baguette work best for dipping and soaking up the flavorful broth.

→ Can I make this vegetarian? Yes, simply substitute vegetable broth for chicken broth. Keep all other ingredients the same.

Conclusion

A traditional French soup that combines simple ingredients to create a rich and comforting meal. Whole garlic cloves are simmered in a flavorful broth, then enriched with eggs and parmesan cheese for a creamy, satisfying dish.

Country French Garlic Soup

Serves: 6 Prep Time: 15 Minutes Cooking Time: 45 Minutes 45 Minutes
Nutrition facts: 200 calories 20 grams fat
Rating: 5.0/5
( 1 voted )
Pin
Print

Ingredients

2 heads garlic, peeled.
 1 tablespoon olive oil.
 1 onion, chopped.
 2 tablespoons butter.
 6 cups chicken or vegetable broth.
 2 sprigs fresh thyme.
 2 bay leaves.
 4 egg yolks.
 1/2 cup grated Parmesan cheese.
 Salt and pepper to taste.
 Fresh parsley for garnish.

Instructions

Heat oil and butter, cook onion until soft, about 5 minutes. Add garlic, cook 2-3 minutes.

Add broth, thyme, bay leaves. Boil, then simmer 30 minutes. Remove herbs.

Add salt and pepper to taste.

Whisk egg yolks and Parmesan. Temper with hot soup, return to pot. Simmer 5 minutes until thickened.

Notes

  1. Temper eggs carefully to prevent curdling.
  2. Freeze before adding eggs only.
  3. Can use vegetable broth for vegetarian version.

Tools You'll Need

  • Large pot.
  • Small bowl.
  • Whisk.

Nutrition Facts (Per Serving)

It is important to consider this information as approximate and not to use it as definitive health advice.
  • Calories: ~
  • Total Fat: ~
  • Total Carbohydrate: ~
  • Protein: ~
0 comments
0 FacebookTwitterPinterestLinkedin
Breakfast & PastriesPork Meals

Breakfast Sliders

by Clare Greco February 17, 2026
written by Clare Greco

These Breakfast Sliders combine the best morning flavors in one satisfying bite! Juicy sausage patties, scrambled eggs, and melty cheese are layered inside soft Hawaiian buns, all topped with a sweet maple-butter glaze. Baked to perfection, these sliders are perfect for breakfast gatherings or brunch.

Breakfast Sliders are an irresistible combination of savory sausage, fluffy eggs, and gooey cheese, all packed into soft Hawaiian buns. These sliders are perfect for breakfast or brunch and are sure to be a hit with the whole family. The addition of a sweet maple-butter glaze on top makes them even more delicious, adding a touch of sweetness to the savory flavors.

INGREDIENTS

  • Ground Pork Sausage: 24 oz (2 breakfast sausage rolls), shaped into patties for a savory base
  • Hawaiian Buns: 12 slider-sized buns, sliced horizontally and kept connected for easy assembly
  • Large Eggs: 8, scrambled, for a soft and fluffy layer
  • Pepper Jack Cheese: 6 slices, for a hint of spice
  • American Cheese: 8 slices, for extra meltiness
  • Butter: 1/2 cup, melted, for the sweet glaze
  • Maple Syrup: 1/4 cup, mixed with butter for the glaze

INSTRUCTIONS

Step 1: Preheat the oven to 350°F (175°C).

Step 2: Shape the ground sausage into 12 round patties, slightly larger than the buns. Cook the patties in a skillet over medium heat until fully cooked.

Step 3: Slice the Hawaiian buns in half horizontally, keeping them connected. Place the bottom halves in a 7×10 or 9×13 baking dish.

Step 4: Spread the scrambled eggs over the bottom halves of the buns, then layer with slices of pepper jack cheese.

Step 5: Place the cooked sausage patties over the pepper jack cheese layer, then top with slices of American cheese.

Step 6: Place the top halves of the buns over the cheese layer.

Step 7: In a small bowl, mix the melted butter and maple syrup. Brush the mixture over the tops of the buns, letting it seep down the sides.

Step 8: Bake the sliders in the oven for 15-20 minutes, or until the cheese is melted and bubbly.

Step 9: Let the sliders cool slightly before serving. Enjoy!Serving and Storage Tips

  • Serve the sliders warm for the best flavor and texture.
  • To reheat, place sliders in the oven at 350°F for 5-7 minutes, or until warmed through.

Helpful Notes

  • Feel free to add your favorite toppings, such as sautéed onions or sliced jalapeños, for extra flavor.
  • Use a combination of cheeses, like cheddar or Swiss, for a different twist.

Tips from Well-Known Chefs

  • Chef Mark suggests adding a drizzle of hot sauce to the eggs for a spicy kick.
  • Chef Linda recommends using fresh, soft buns for the best texture and taste.

How to Make the Best Breakfast Sliders

To make the best breakfast sliders, start with high-quality sausage and cheese. Be sure to scramble the eggs until just set for the fluffiest results. Brush the buns generously with the maple-butter glaze for that signature sweet and savory flavor.Variations of Breakfast Sliders

For a healthier twist, use turkey sausage and whole wheat buns. You can also try adding sautéed spinach or sliced avocado for extra nutrients.FAQs

Can I make these sliders ahead of time?

Yes, you can assemble the sliders and refrigerate them overnight. Brush with the glaze and bake just before serving.

Can I use other types of cheese?

Yes, feel free to use your favorite cheese varieties, like cheddar, Swiss, or mozzarella.

How can I make the sliders less sweet?

Reduce the amount of maple syrup in the glaze or use unsweetened butter instead.

Can I freeze these sliders?

Yes, you can freeze the sliders after baking. Wrap tightly and reheat in the oven when ready to serve.

Conclusion

Breakfast Sliders are a delicious way to start the day! Made with savory sausage patties, fluffy scrambled eggs, and two kinds of cheese—pepper jack for a bit of spice and American cheese for extra meltiness—these sliders are sandwiched between soft Hawaiian buns. The sweet and savory maple-butter glaze brushed over the top brings everything together. They’re baked until the cheese is perfectly melted and the buns are golden brown. This easy, crowd-pleasing recipe is ideal for breakfast, brunch, or even a breakfast-for-dinner option. Serve warm, and watch these sliders disappear fast!

Breakfast Sliders

Serves: 12 Prep Time: 20 Minutes Cooking Time: 20 Minutes 20 Minutes
Nutrition facts: 200 calories 20 grams fat
Rating: 5.0/5
( 1 voted )
Pin
Print

Ingredients

 24 oz ground pork sausage (2 breakfast sausage rolls).
 12 Hawaiian buns (or other slider buns).
 8 large eggs, scrambled.
 6 slices pepper jack cheese.
 8 slices American cheese.
 1/2 cup butter, melted.
 1/4 cup maple syrup.

Instructions

Preheat the oven to 350°F (175°C).

Shape the ground sausage into 12 round patties, slightly larger than the buns. Cook in a skillet over medium heat until fully cooked.

Slice the Hawaiian buns in half horizontally, keeping them connected. Place the bottom halves in a 7×10 or 9×13 baking dish.

Spread scrambled eggs over the bottom halves, then layer with the slices of pepper jack cheese.

Place cooked sausage patties over the pepper jack cheese layer, then top with slices of American cheese.

Place the top halves of the buns over the cheese layer.

In a small bowl, mix the melted butter and maple syrup. Brush over the tops of the buns, letting it seep down the sides.

Bake in the oven for 15-20 minutes, or until the cheese is melted and bubbly.

Let cool slightly before serving. Enjoy!.

Notes

  1. These sliders are perfect for breakfast or brunch gatherings.
  2. You can use any type of cheese or buns you prefer for a customized version.


Nutrition Facts (Per Serving)

It is important to consider this information as approximate and not to use it as definitive health advice.
  • Calories: ~
  • Total Fat: ~
  • Total Carbohydrate: ~
  • Protein: ~
0 comments
0 FacebookTwitterPinterestLinkedin
30 Minute MealsPastaVegetarian

Spaghetti with Spinach & Sun-Dried Tomato Cream Sauce

by Clare Greco February 17, 2026
written by Clare Greco

This Spaghetti with Spinach & Sun-Dried Tomato Cream Sauce is a comforting Italian-inspired dish that’s both creamy and packed with fresh flavors. The recipe starts by boiling whole-wheat spaghetti, which is then drained over fresh spinach to wilt it. The sauce is made by sautéing red onion and sun-dried tomatoes in reserved oil, followed by garlic and crushed red pepper flakes for a bit of heat. The addition of vegetable or chicken broth helps to create a rich base, which is finished with sour cream, Parmesan cheese, and butter for ultimate creaminess. Serve hot with extra cheese and optional lemon juice or herbs for added flavor!

Spaghetti with Spinach & Sun-Dried Tomato Cream Sauce is a perfect blend of creamy, tangy, and fresh flavors that make for an irresistible dinner. This Italian-inspired pasta dish is a favorite among vegetarians and pasta lovers alike, offering a satisfying meal that’s quick to prepare. It starts with boiling whole-wheat spaghetti, which is drained over fresh spinach to wilt it effortlessly. The sauce is built by sautéing red onion and sun-dried tomatoes, adding layers of flavor before being enriched with garlic, red pepper flakes, and a creamy combination of sour cream and Parmesan cheese.

INGREDIENTS

  • Fresh spinach leaves: 4 cups, wilted by draining hot pasta over them
  • Whole-wheat spaghetti: 8 oz, cooked to al dente
  • Sun-dried tomatoes: 1/2 cup, chopped, for a tangy flavor
  • Red onion: 1 small, finely chopped, to add sweetness
  • Garlic: 2 cloves, minced, for an aromatic touch
  • Crushed red pepper flakes: 1/2 tsp, for a hint of spice
  • Salt and pepper: to taste, for seasoning
  • Low-sodium vegetable or chicken broth: 1 cup, to create the sauce base
  • Sour cream: 1/2 cup, for creaminess
  • Grated Parmesan cheese: 1/2 cup, to add cheesy richness
  • Butter: 2 tbsp, to enrich the sauce

INSTRUCTIONS

Step 1: Place 4 cups of spinach in a colander.

Step 2: Boil 8 oz of whole-wheat spaghetti until al dente (8-10 minutes). Drain over the spinach to wilt it.

Step 3: Heat 1 tbsp reserved oil from the sun-dried tomatoes in a skillet. Add finely chopped red onion and chopped sun-dried tomatoes; sauté for 3 minutes.

Step 4: Stir in minced garlic, crushed red pepper flakes, salt, and pepper. Cook for 1 more minute.

Step 5: Add broth to the skillet and simmer until reduced by half.

Step 6: Stir in sour cream, grated Parmesan, and butter until the sauce is creamy.

Step 7: Add the cooked spaghetti and wilted spinach to the skillet, tossing to coat evenly with the sauce.

Step 8: Serve hot, garnished with extra Parmesan and optional lemon juice or herbs.Serving and Storage Tips

  • Serve with a side of garlic bread or a simple green salad for a complete meal.
  • Store leftovers in an airtight container in the refrigerator for up to 3 days. Reheat gently on the stove with a splash of broth or water to prevent drying.

Helpful Notes

  • For a vegan version, use dairy-free sour cream and vegan Parmesan cheese.
  • Feel free to add grilled chicken or shrimp for added protein.

Tips from Well-Known Chefs

  • Chef Mario suggests adding a squeeze of fresh lemon juice just before serving for a bright, zesty finish.

How to Make Creamy Spaghetti with Spinach & Sun-Dried Tomatoes

This easy pasta dish is creamy, tangy, and full of flavor, thanks to the combination of sun-dried tomatoes, Parmesan, and fresh spinach. The addition of whole-wheat spaghetti adds a nutty depth, while the tangy cream sauce brings everything together for a satisfying meal.Why This Pasta Recipe Is Perfect for Busy Weeknights

This spaghetti recipe comes together in under 30 minutes, making it an ideal choice for busy evenings. Its simple ingredient list and quick preparation mean you can have a delicious meal on the table without much effort.FAQs

Can I use regular spaghetti instead of whole-wheat?

Yes, regular spaghetti can be used if preferred.

Is there a way to make this recipe gluten-free?

Yes, use gluten-free pasta and ensure the broth and Parmesan are also gluten-free.

Can I use Greek yogurt instead of sour cream?

Yes, Greek yogurt can be used as a substitute for sour cream, though it will add a slightly tangier flavor.

How can I make this dish spicier?

Increase the amount of crushed red pepper flakes or add a dash of hot sauce to the sauce.

Conclusion

Spaghetti with Spinach & Sun-Dried Tomato Cream Sauce is a delicious vegetarian pasta recipe that’s perfect for weeknight dinners. This Italian-inspired dish combines the freshness of spinach with the tangy flavor of sun-dried tomatoes, all coated in a creamy Parmesan sauce. The spaghetti is cooked to al dente and tossed with the sauce for a comforting meal that’s quick and easy to prepare. The dish is finished with extra grated Parmesan and optional garnishes like lemon juice or fresh herbs for an added burst of flavor.

Spaghetti with Spinach & Sun-Dried Tomato Cream Sauce

Serves: 4 Prep Time: 10 Minutes Cooking Time: 20 Minutes 20 Minutes
Nutrition facts: 200 calories 20 grams fat
Rating: 5.0/5
( 1 voted )
Pin
Print

Ingredients

4 cups fresh spinach leaves.
 8 oz whole-wheat spaghetti.
 1/2 cup sun-dried tomatoes, chopped.
 1 small red onion, finely chopped.
 2 cloves garlic, minced.
 1/2 tsp crushed red pepper flakes.
 Salt and pepper to taste.
 1 cup low-sodium vegetable or chicken broth.
 1/2 cup sour cream.
 1/2 cup grated Parmesan cheese.
 2 tbsp butter.

Instructions

Place 4 cups of spinach in a colander.

Boil 8 oz of whole-wheat spaghetti until al dente (8-10 minutes). Drain over spinach to wilt.

Heat 1 tbsp reserved oil from the sun-dried tomatoes in a skillet. Add onion and chopped sun-dried tomatoes; sauté for 3 minutes.

Stir in minced garlic, crushed red pepper flakes, salt, and pepper. Cook for 1 more minute.

Add broth to the skillet and simmer until reduced by half.

Stir in sour cream, grated Parmesan, and butter until the sauce is creamy.

Add the cooked spaghetti and wilted spinach to the skillet, tossing to coat evenly with the sauce.

Serve hot, garnished with extra Parmesan and optional lemon juice or herbs.

Notes

  1. This creamy spaghetti with spinach and sun-dried tomato cream sauce is a vegetarian delight, perfect for weeknight dinners.


Nutrition Facts (Per Serving)

It is important to consider this information as approximate and not to use it as definitive health advice.
  • Calories: ~
  • Total Fat: ~
  • Total Carbohydrate: ~
  • Protein: ~
0 comments
0 FacebookTwitterPinterestLinkedin
  • 1
  • …
  • 4
  • 5
  • 6
  • 7
  • 8
  • …
  • 11

Search

Follow Us

facebook
twitter
instagram
pinterest

Recent Posts

  • Asparagus & Cheese Stuffed Chicken

    May 29, 2026
  • Asian Cabbage Stir Fry

    May 29, 2026
  • High Protein Broccoli Cheddar Soup

    May 29, 2026
  • Homemade Popeyes Cajun Fries

    May 28, 2026
  • Immune Boosting Vegetable Soup

    May 25, 2026
  • Creamy Crab Bisque

    May 25, 2026
  • Garlic Parmesan Pizza

    May 25, 2026

Categories

  • 30 Minute Meals (38)
  • Barbecue (2)
  • Beef Meals (11)
  • Breakfast & Pastries (15)
  • Casseroles (11)
  • Cheesesteak (2)
  • Chicken Meals (20)
  • Cultural Dishes (13)
  • Featured (8)
  • Featured Sides (5)
  • Fish Meals (6)
  • Fresh Baked Breads (2)
  • Main Dishes (7)
  • Other Meals (2)
  • Pasta (21)
  • Pizza (5)
  • Popular Recipes (9)
  • Pork Meals (8)
  • Seafood Meals (19)
  • Side Dishes (6)
  • Soups & Salads (15)
  • Turkey Meals (7)
  • Vegetarian (22)

Popular Posts

  • 1

    Creamy Tomato and Spinach Pasta

    February 15, 2026
  • 2

    Buddha Bowl with Tofu

    October 22, 2024
  • 3

    Chicken Garlic Parmesan Pasta

    February 16, 2026
  • 4

    Classic Spicy Barbecued Ribs

    October 20, 2021
  • 5

    Easy Creamy Garlic Shrimp

    February 15, 2026

About Me

At MyPhillyConnection, we specialize in recipes for Philly favorites and lots of other popular dishes and cuisines.

Phone: (215) 554-7326
Email: info@myphillyconnection.com

Useful Links

  • Beef Meals
  • Chicken Meals
  • Fish Meals
  • Recipes
  • Recipe Submission

Breakfast Recipes

  • Asparagus & Cheese Stuffed Chicken

    May 29, 2026
  • Asian Cabbage Stir Fry

    May 29, 2026

Recent Posts

  • Asparagus & Cheese Stuffed Chicken

    May 29, 2026
  • Asian Cabbage Stir Fry

    May 29, 2026
  • Facebook
  • Twitter
  • Instagram
  • Pinterest
  • Linkedin
  • Tiktok

Copyright © 2026 - MyPhillyConnection / All Rights Reserved.

Philadelphia Food Network and Recipes
  • Home
    • Main Website
  • Recipes
  • Meals
    • 30 Minute Meals
    • Beef Meals
    • Breakfast & Pastries
    • Chicken Meals
    • Fish Meals
    • Pork Meals
    • Seafood Meals
    • Turkey Meals
    • Vegan & Vegetarian Meals
    • Other Meals
  • Categories
    • Barbecue
    • Casseroles
    • Cheesesteak
    • Cultural Dishes
    • Desserts & Treats
    • Featured
    • Fresh Baked Breads
    • Grilling
    • Pasta
    • Pizza
    • Popular Recipes
    • Side Dishes
    • Soul Food
    • Soups & Salads
  • About Us
  • Contact Us
  • Submit Your Recipe
Sign In
or
Login with HostGator

Keep me signed in until I sign out

Forgot your password?

Do not have an account ? Register here

Password Recovery

A new password will be emailed to you.

Have received a new password? Login here

Register New Account

I Agree to the Terms of Service and Privacy Policy

Have an account? Login here