Philadelphia Food Network and Recipes
  • Home
    • Main Website
  • Recipes
  • Meals
    • 30 Minute Meals
    • Beef Meals
    • Breakfast & Pastries
    • Chicken Meals
    • Fish Meals
    • Pork Meals
    • Seafood Meals
    • Turkey Meals
    • Vegan & Vegetarian Meals
    • Other Meals
  • Categories
    • Barbecue
    • Casseroles
    • Cheesesteak
    • Cultural Dishes
    • Desserts & Treats
    • Featured
    • Fresh Baked Breads
    • Grilling
    • Pasta
    • Pizza
    • Popular Recipes
    • Side Dishes
    • Soul Food
    • Soups & Salads
  • About Us
  • Contact Us
  • Submit Your Recipe
Top Posts
Mexican Chicken With Cheese Sauce
Chocolate Bread
Bojangles Biscuits
Braided Cherry Danish
Strawberry Pop Tarts
Creamy Cajun Chicken Pasta
Sausage & Egg Burritos
Strawberry Cream Cheese Muffins
Blueberry Sausage Pancake Bake
School Breakfast Pizza
Philadelphia Food Network and Recipes
  • Home
    • Main Website
  • Recipes
  • Meals
    • 30 Minute Meals
    • Beef Meals
    • Breakfast & Pastries
    • Chicken Meals
    • Fish Meals
    • Pork Meals
    • Seafood Meals
    • Turkey Meals
    • Vegan & Vegetarian Meals
    • Other Meals
  • Categories
    • Barbecue
    • Casseroles
    • Cheesesteak
    • Cultural Dishes
    • Desserts & Treats
    • Featured
    • Fresh Baked Breads
    • Grilling
    • Pasta
    • Pizza
    • Popular Recipes
    • Side Dishes
    • Soul Food
    • Soups & Salads
  • About Us
  • Contact Us
  • Submit Your Recipe
Copyright 2021 - All Right Reserved
Chicken Meals

Creamy Smoked Sausage Pasta

by Clare Greco February 15, 2026
written by Clare Greco
Creamy Smoked Sausage Pasta

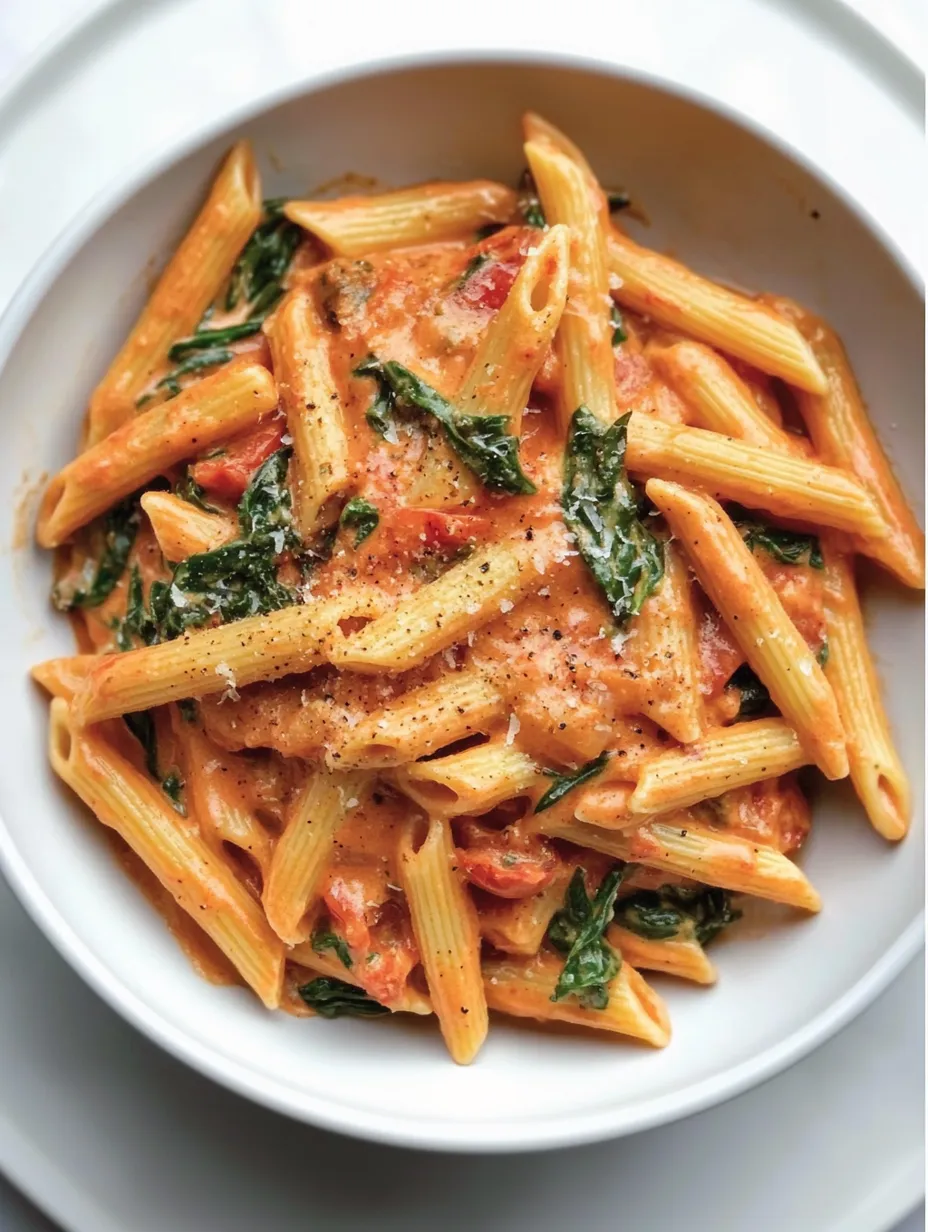
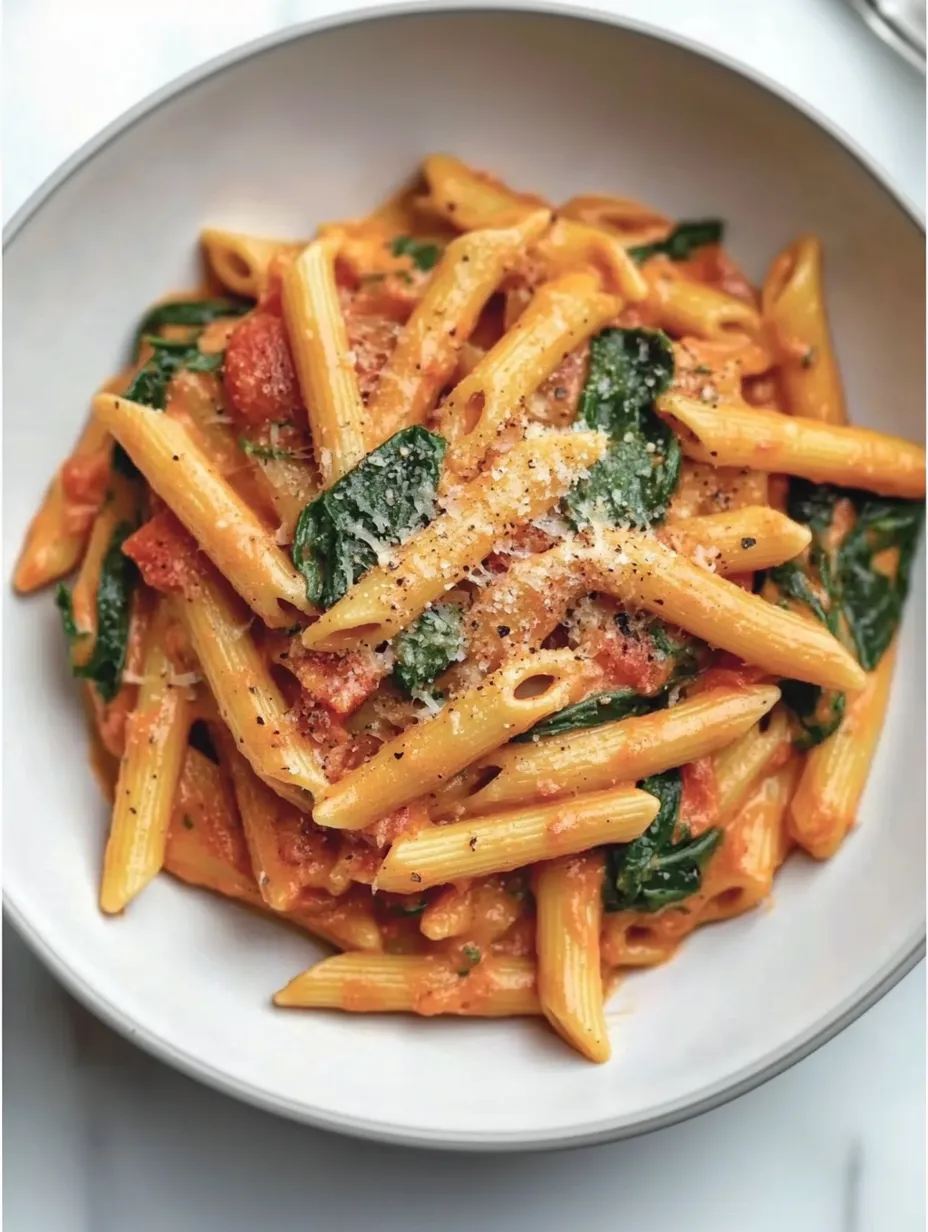
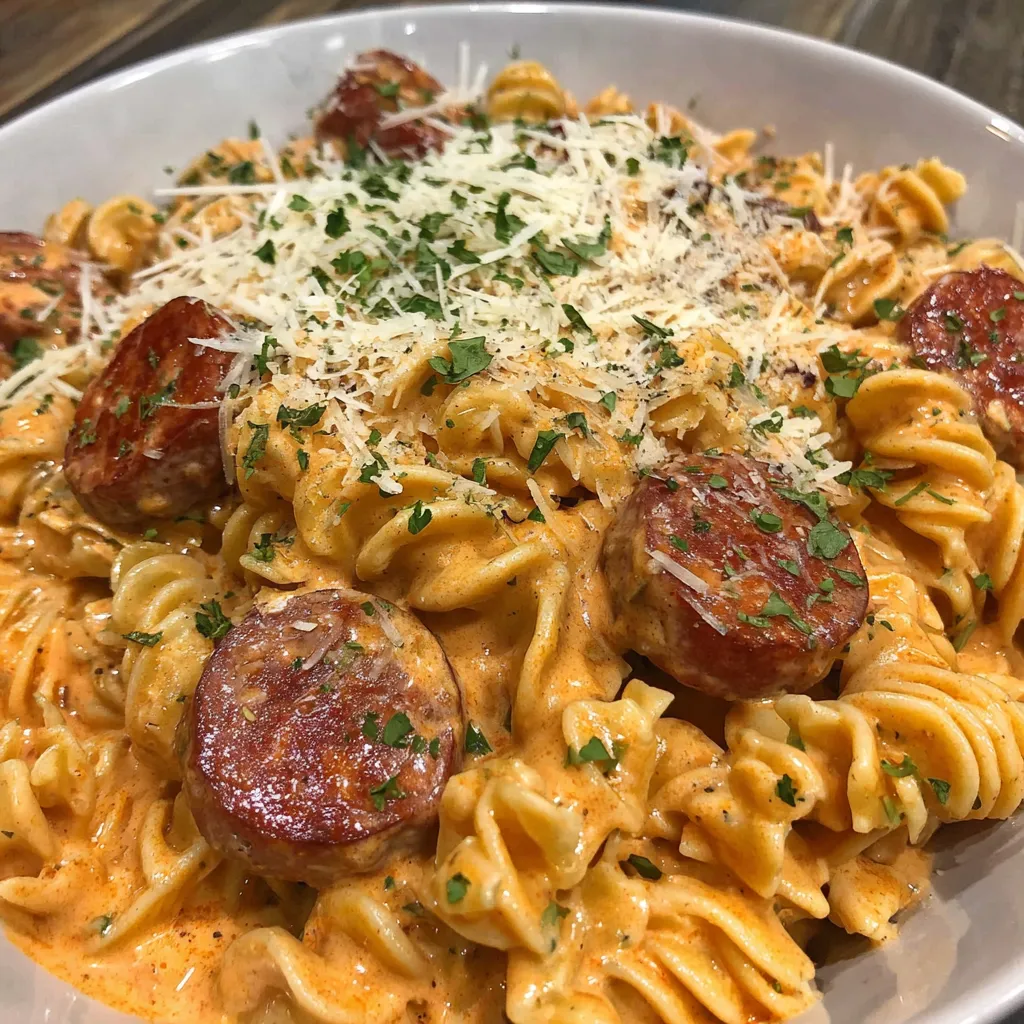
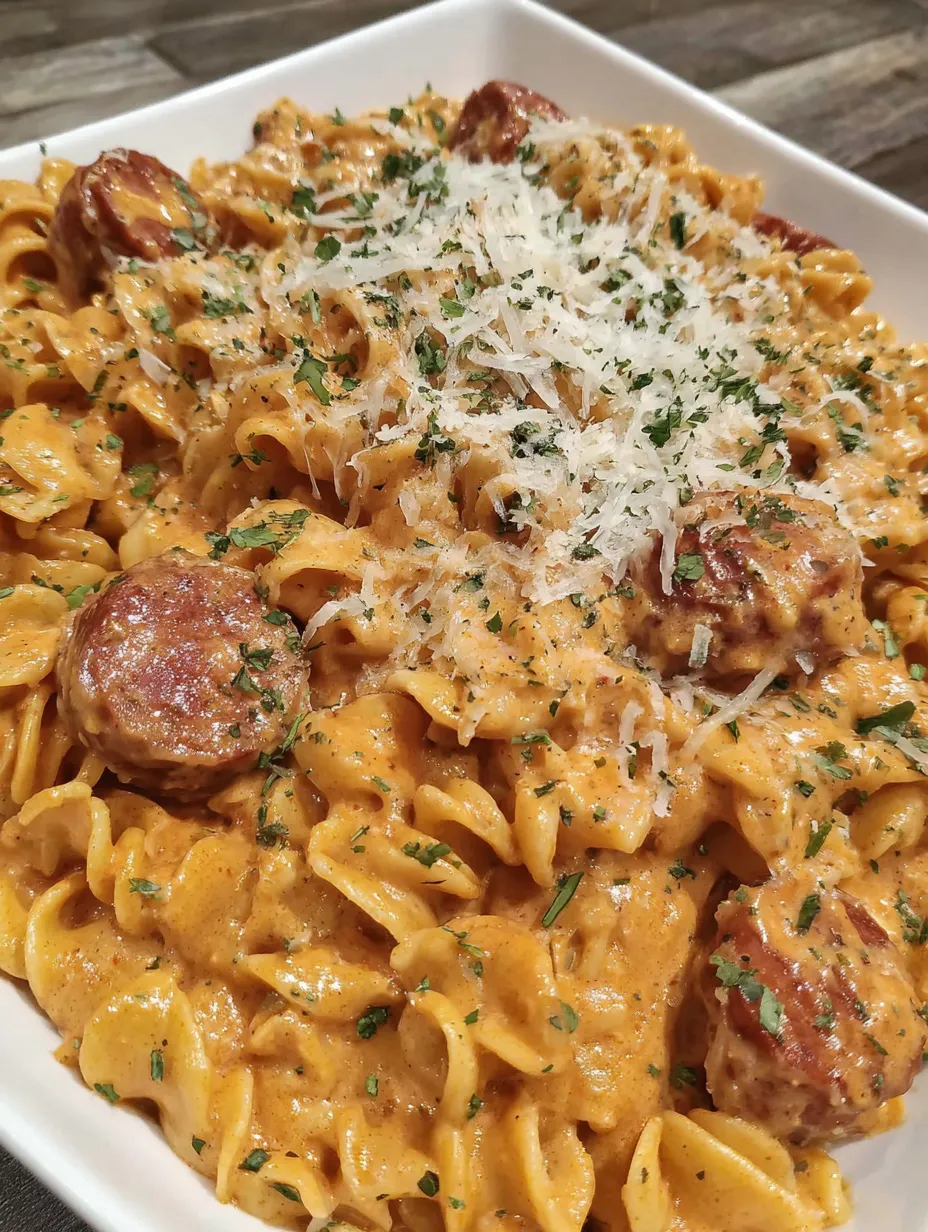
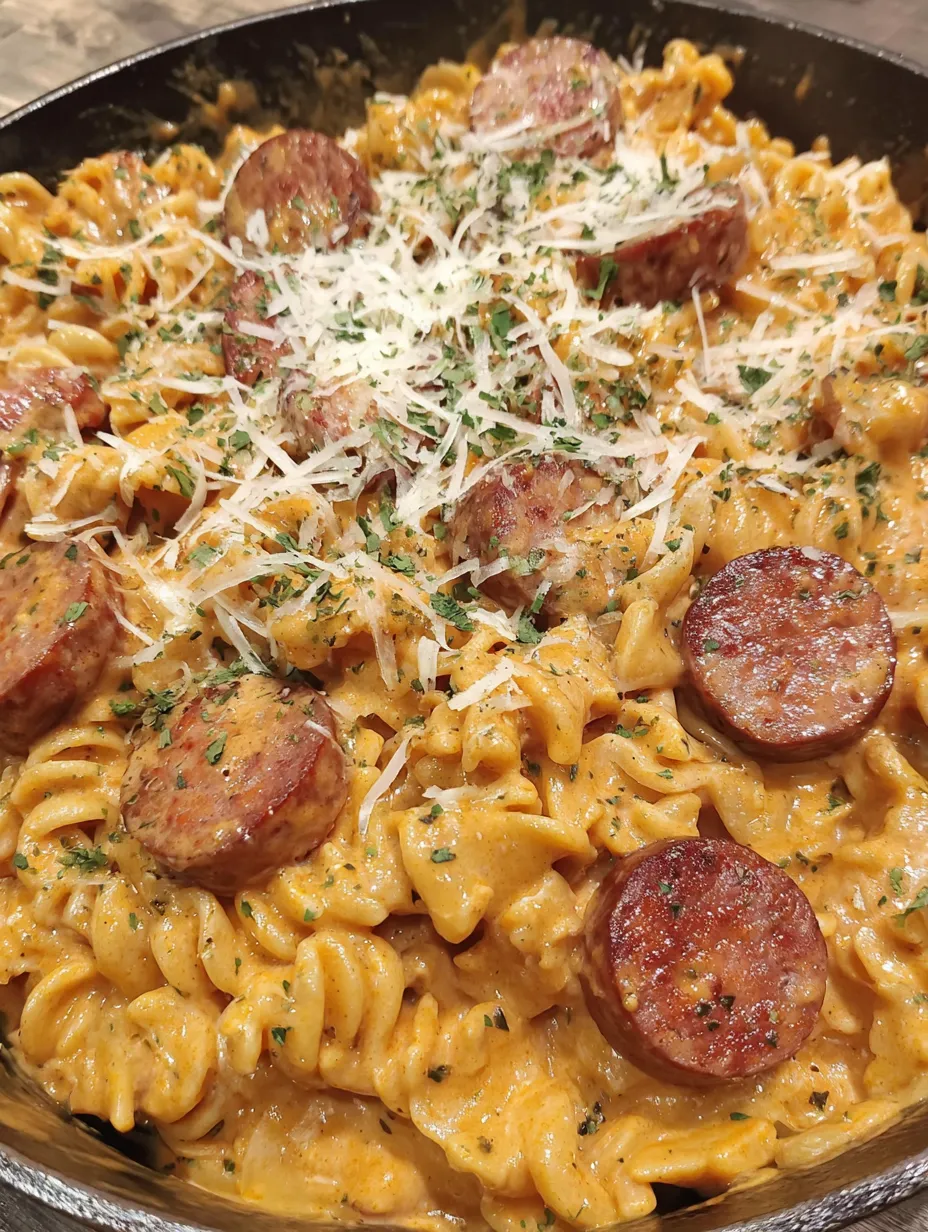
Creamy smoked sausage pasta is the ultimate weeknight savior, delivering restaurant-quality comfort in just thirty minutes. This recipe pairs the robust, smoky flavor of browned kielbasa with tender pasta shells and a luscious pink Parmesan cream sauce. By utilizing simple pantry staples like tomato sauce and heavy cream, you can create a meal that feels intentional and sophisticated without the stress of a long ingredient list. It is a hearty, family-approved dish that balances savory, tangy, and creamy notes perfectly, proving that a satisfying homemade dinner is achievable even on your busiest days.

Love This Recipe

  • Thirty-Minute Timeline: Goes from prep to table in half an hour, making it ideal for the post-work rush.
  • One-Pot Potential: Minimizes cleanup by using the same pan for browning and sauce building.
  • Pantry-Friendly: Relies on staples like pasta, tomato sauce, and dried herbs that you likely already have on hand.
  • Crowd-Pleaser: The mild, creamy tomato base is a hit with children and picky eaters alike.
  • Scalability: The recipe is easily doubled for large families or intentional meal-prep leftovers.

I shared this recipe with my neighbor Tom, a single dad who was struggling to find the energy to cook real meals after work. It quickly became his “dad win” meal—fast enough to prevent toddler meltdowns but delicious enough to feel like a culinary success. Now, it’s a staple in his rotation and has even spread through his office. It’s a testament to how the simplest combinations often yield the most satisfying results.

Essential Ingredients Breakdown

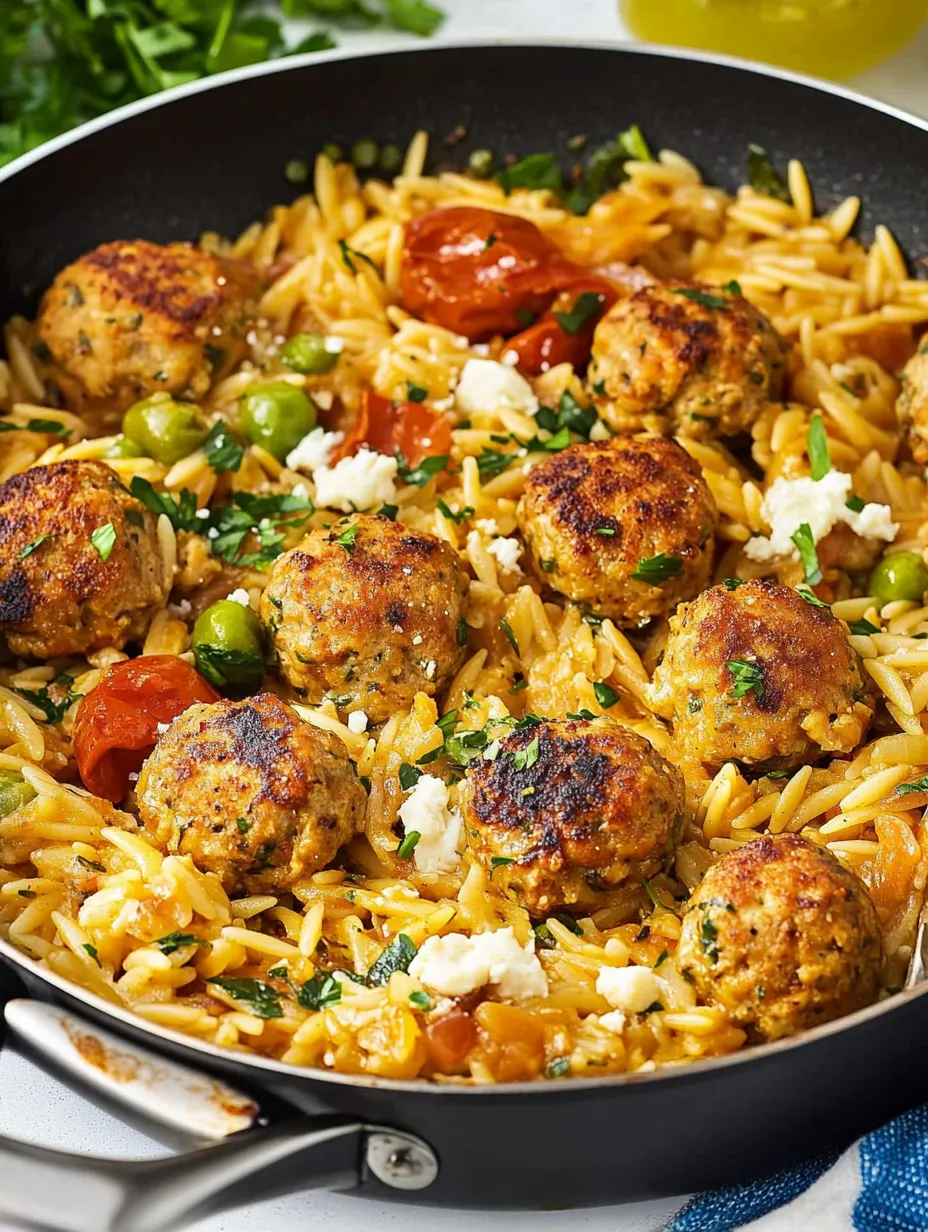
  • Kielbasa Sausage: Provides the smoky protein core. Slicing into half-inch rounds and browning them is the secret to a deep, caramelized flavor.
  • Pasta: Short shapes like penne or rotini are best for trapping the thick sauce within their ridges.
  • Heavy Whipping Cream: Creates the luxurious “pink sauce” texture; avoid substituting with milk to prevent curdling.
  • Tomato Duo: Plain tomato sauce provides the base, while three tablespoons of tomato paste intensify the flavor and help the sauce cling to the noodles.
  • Parmesan Cheese: Freshly shredded Parmesan acts as a natural thickener and adds a salty, nutty complexity.
  • Italian Seasoning: A one-teaspoon shortcut to a perfectly balanced herb profile of basil, oregano, and rosemary.
Creamy Smoked Sausage Pasta

Creating Perfect Pasta

The Searing Phase:Brown the kielbasa slices in a large skillet over medium-high heat until they develop crispy, dark edges. This caramelization is vital for flavor depth. Transfer them to a plate and use the same pan—and all those flavorful browned bits—to start your sauce.Building the Sauce:Sauté minced garlic in butter for 30 seconds, then whisk in the cream, tomato sauce, and tomato paste. Add the Parmesan and herbs, simmering for 5–10 minutes until the sauce thickens and coats the back of a spoon. If it becomes too thick, use a splash of reserved pasta water to reach your desired consistency.The Final Toss:Add the al dente pasta and the browned sausage back into the skillet. Toss thoroughly to ensure every noodle is encased in the creamy sauce. Let it sit for one minute before serving to allow the pasta to absorb the flavors.

You Must Know

  • Don’t Rinse: Keep the starch on your pasta; it’s the “glue” that helps the cream sauce adhere.
  • Reserve Water: Always save a cup of pasta water before draining to adjust the sauce thickness later.
  • Simmer is Key: A 10-minute simmer allows the tomato acidity and cream to meld into a unified, silky texture.
  • Browning Matters: Warming the sausage isn’t enough; you need that sear for authentic smoky depth.

Through trial and error, I discovered that substituting heavy cream with milk is the biggest mistake you can make. The acidity in the tomatoes often causes lower-fat milks to break and curdle, leaving you with a grainy sauce. Stick to the heavy cream for that velvety, restaurant-style finish. I also found that adding a pinch of sugar can help if your brand of tomato sauce feels a little too acidic.

Delicious Flavor Variations

For a spicy kick, swap the kielbasa for andouille sausage and add a pinch of red pepper flakes. If you want to add some greens, stir in two handfuls of fresh spinach at the very end until wilted. You can also elevate the dish by adding sautéed mushrooms or sun-dried tomatoes along with the garlic for a more complex, earthy profile.

Keeping It Fresh

Store leftovers in an airtight container for up to 4 days. Because the pasta continues to absorb moisture, you will likely need a splash of milk or cream when reheating on the stovetop or in the microwave. While freezing is possible for up to 2 months, the cream sauce may separate slightly, so a vigorous stir during reheating is recommended to bring back the emulsion.

Creamy Smoked Sausage Pasta

Professional Kitchen Wisdom

  • Cook your pasta for one minute less than the box instructions; it will finish cooking to a perfect al dente in the hot sauce.
  • Use a wide skillet rather than a deep pot for the sauce to encourage even reduction and better coating.
  • Garnish with fresh parsley and a final dusting of Parmesan for a pop of color and freshness.

Ultimately, creamy smoked sausage pasta is a testament to the power of high-impact ingredients. It respects your time while rewarding your palate with a meal that feels genuinely indulgent. Once you pull that first forkful of sauce-drenched pasta and smoky kielbasa, you’ll understand why this has been my most reliable dinner secret for years.

Frequently Asked Questions

→ Can I use a different type of sausage? Yes, Italian sausage, andouille, or even sliced hot dogs would work. Just brown them the same way as the kielbasa.

→ What kind of pasta works best? Any pasta shape works. Penne, rigatoni, or rotini are great because they hold the sauce well.→ Can I make this lighter? You can substitute half-and-half for the heavy cream, though the sauce won’t be quite as rich and creamy.

→ How do I store leftovers? Keep in an airtight container in the fridge for up to 3 days. Reheat on the stove or in the microwave, adding a splash of milk if needed.

→ Can I add vegetables? Absolutely. Spinach, bell peppers, mushrooms, or broccoli would all be great additions. Add them when browning the sausage.

→ Is this spicy? Not particularly. The Italian seasoning adds flavor but not heat. Add red pepper flakes if you want some kick.

Creamy Smoked Sausage Pasta

Serves: 4 Prep Time: 10 Minutes Cooking Time: 20 Minutes 20 Minutes
Nutrition facts: 350 calories 40 fat
Rating: 5.0/5
( 1 voted )
Pin
Print

Ingredients

 12 oz package kielbasa sausage
 16 oz box pasta
 2 tablespoons butter
 2 tablespoons minced garlic
 1 cup heavy whipping cream
 2 cans (8 oz each) tomato sauce
 3 tablespoons tomato paste
 ½ cup shredded parmesan cheese, plus more for serving
 1 teaspoon Italian seasoning
 1 teaspoon garlic powder
 ½ teaspoon salt
 ½ teaspoon black pepper
 Dried parsley for garnish

Instructions

Cook the pasta according to package directions. Drain and set aside. Slice the kielbasa and brown it in a large pan over medium heat. Once browned, remove from the pan and set aside. In the same pan over medium heat, add the butter and minced garlic. Once the butter melts, add the heavy cream, tomato sauce, tomato paste, parmesan cheese, Italian seasoning, garlic powder, salt, and pepper. Mix everything together well. Let the sauce simmer for a few minutes until it thickens slightly, stirring occasionally. Add the drained pasta to the sauce and toss to coat. Add the browned kielbasa back to the pan and mix everything together. Serve topped with extra parmesan cheese and dried parsley.

Notes

  1. This recipe uses simple pantry staples for a quick weeknight meal
  2. You can use any type of pasta you prefer
  3. Kielbasa is a smoked Polish sausage that adds great flavor
  4. The sauce comes together quickly while the pasta cooks
  5. Leftovers reheat well for lunch the next day


Tools You'll Need

  • Large pot for pasta
  • Large skillet or pan
  • Wooden spoon
  • Colander

0 comments
0 FacebookTwitterPinterestPocketEmail
Chicken MealsPasta

Mediterranean Chicken Meatballs and Orzo

by Clare Greco February 15, 2026
written by Clare Greco

The rich aroma of garlic and herbs fills the kitchen as tender chicken meatballs nestle into perfectly cooked orzo pasta. Sun-dried tomatoes add bursts of intense flavor while Castelvetrano olives bring their buttery richness to this one-pan Mediterranean feast. I discovered this recipe during a cooking class in Greece and have tweaked it over the years to create this family favorite.

Why You’ll Love This Recipe

  • Transforms basic chicken into something truly special
  • Creates those magical crispy bits as meatballs brown
  • Makes your kitchen smell like a Mediterranean taverna
  • Looks fancy but uses everyday ingredients
  • Perfect for both weeknights and dinner parties

Watching my daughter learn to roll these meatballs reminds me of cooking with my mom. The slightly sticky mixture always ended up all over our hands, but those imperfect shapes somehow made the best-tasting meatballs.

Ingredients That Shine

  • Ground chicken dark meat: holds moisture better than breast meat – worth the splurge
  • Fresh garlic: needs to be crushed, not chopped, releasing more oils
  • Real breadcrumbs from day-old bread: create tender meatballs
  • Castelvetrano olives: bring subtle brininess without overpowering
  • Quality feta: crumbles into creamy bits rather than staying chalky
  • Fresh dill: adds bright notes that dried herbs just can’t match
Mediterranean Chicken Meatballs and Orzo Recipe

Creating Mediterranean Magic

Meatball Start:Process the chicken mixture until it just comes together – overworking makes tough meatballs.Rolling Glory:Wet your hands with cold water to prevent sticking as you form each golf ball-sized portion.Golden Heaven:Let the meatballs develop a proper crust before turning – patience creates flavor.Orzo Bath:Stir gently but frequently as the pasta absorbs the lemon-scented broth.Final Symphony:Return those golden beauties to the pan, letting everything mingle into deliciousness.

You Must Know

  • Room temperature ingredients blend more smoothly
  • Testing one small meatball helps perfect the seasoning
  • Resting time lets flavors deepen naturally

Growing up, my grandmother insisted on using only oil-packed sun-dried tomatoes. She’d say “the oil carries the flavor” – and after years of cooking this dish, I know she was absolutely right.

Weekend Variations

Some Sundays I add a handful of baby spinach or swiss chard for extra color and nutrients. Other times, I swap ground turkey when that’s what’s in the fridge. Each version brings its own character to the dish.

Perfect Partners

A simple cucumber and tomato salad dressed with good olive oil complements the richness perfectly. Warm pita bread disappears quickly as everyone soaks up the flavorful sauce.

Saving For Later

Keep leftovers covered for up to three days. Add a splash of broth when reheating to bring back the original saucy goodness.

Chef’s Secrets

  • Toast orzo in olive oil before adding liquid
  • Keep meatball mixture chilled between batches
  • Finish with an extra drizzle of your best olive oil

The first time I made this for my in-laws, my mother-in-law asked for the recipe – high praise from someone who rarely cooks anything but her own family recipes. Now it shows up at most family gatherings, each cook adding their own special touch.

Kitchen Notes

Add extra garlic and herbs when mixing meatballs – they’ll turn out flavorful without being overpowering. When shaping them, remember that smaller meatballs cook more evenly and pick up more of that golden crust we’re after.

Mediterranean Touches

During my travels through Greece, I learned that locals often add a pinch of cinnamon to their meatballs. While not traditional in this recipe, a tiny sprinkle adds warmth without tasting distinctly like cinnamon. The combination of sun-dried tomatoes and olives brings authentic Mediterranean character that makes this dish special.

Make-Ahead Magic

The beauty of these meatballs lies in their versatility. Shape them ahead and refrigerate for up to a day, or freeze them uncooked on a baking sheet before transferring to a freezer bag. They’ll keep for three months, ready whenever you need a quick dinner solution.

Quick Fixes

If your orzo seems too dry while cooking, don’t panic. Add warm broth a quarter cup at a time until you reach that perfect creamy consistency. For extra richness, stir in a pat of butter just before serving – it’s not traditional, but it creates a silky finish that’s hard to resist.

Family Gathering Star

This dish has saved countless dinner parties at my house. It’s elegant enough for company but doesn’t keep you stuck in the kitchen all evening. I often prep the meatballs in the morning, then finish everything just before guests arrive.

Mediterranean Chicken Meatballs and Orzo Homemade

Seasonal Switches

Summer brings the opportunity to add fresh cherry tomatoes alongside the sun-dried ones. In winter, I sometimes stir in pieces of roasted red pepper for extra color and sweetness. The recipe adapts beautifully to what’s available and fresh.

Chef’s Final Thoughts

  • Let ingredients reach room temperature for even cooking
  • Fresh herbs make all the difference here
  • Trust your instincts on seasoning levels

Every time I make this dish, it reminds me why simple, good ingredients treated with care create the most satisfying meals. The way the orzo soaks up all those savory flavors while the meatballs stay juicy and tender – it’s home cooking at its finest. Whether you’re making it for a quiet family dinner or a table full of friends, this recipe has a way of bringing people together over good food and conversation.

Frequently Asked Questions

→ Can I make the meatballs ahead? Yes, form meatballs ahead and refrigerate until ready to cook.

→ What if I don’t have a food processor? Finely chop ingredients and mix by hand instead.

→ Can I use different olives? Yes, any pitted olives work, though Castelvetrano gives best flavor.

→ How do I know meatballs are done? Internal temperature should reach 165°F.

→ Can I substitute the orzo? Small pasta shapes like small shells or ditalini can work instead.

Mediterranean Chicken Meatballs and Orzo

Serves: 4 Prep Time: 10 Minutes Cooking Time: 25 Minutes 25 Minutes
Nutrition facts: 300 calories 40 fat
Rating: 5.0/5
( 1 voted )
Pin
Print

Ingredients

 1 pound ground chicken
 1 shallot, roughly chopped
 2 cloves garlic
 1/3 cup breadcrumbs
 1/4 cup sun-dried tomatoes in oil
 1/2 teaspoon dried oregano
 1/2 teaspoon paprika
 2 tablespoons olive oil
 Salt and pepper to taste
 

→ Lemon Garlic Orzo

 2 1/3 cups chicken broth
 1 clove garlic, minced
 Juice of 1/2 lemon
 1 cup dry orzo
 1/3 cup sun-dried tomatoes
 1/3 cup pitted Castelvetrano olives
 

→ Garnish

 Fresh dill
 Feta cheese

Instructions

Process ground chicken, shallot, garlic, breadcrumbs, sun-dried tomatoes, and seasonings in food processor for 30 seconds.

Roll mixture into 12-14 meatballs (2 tablespoons each). Mixture will be sticky.

Sear meatballs in olive oil until golden brown. Remove to plate.

Add broth, garlic, lemon juice and orzo to pan. Boil 3-5 minutes until soft.

Add tomatoes, olives, remaining broth and meatballs. Cook until liquid absorbs and meatballs reach 165°F.

Notes

  1. Can be made ahead
  2. One pan recipe
  3. Mediterranean flavors


Tools You'll Need

  • Large skillet
  • Food processor
  • Meat thermometer
0 comments
0 FacebookTwitterPinterestPocketEmail
30 Minute MealsPastaVegetarian

Creamy Tomato and Spinach Pasta

by Clare Greco February 15, 2026
written by Clare Greco
Creamy Tomato and Spinach Pasta Homemade

Slipping into the kitchen after a long day, this creamy tomato pasta is my secret weapon for getting a real dinner on the table. The cream cheese melts into the tomato sauce, hugging each piece of pasta like a cozy blanket. Fresh spinach wilts in at the end, turning an ordinary pasta dish into something that looks and tastes like it came from that little Italian place downtown. I started making this on busy weeknights when takeout was tempting, but now it’s become the meal my family actually begs for.

Why You’ll Love This Recipe

  • The sauce gets all velvety without using heavy cream
  • Everything comes together in the time it takes to boil pasta
  • Uses stuff you probably already have in your kitchen

Last week my neighbor Sarah came over just as I was finishing up this pasta. She took one bite and wouldn’t leave until I showed her exactly how to make it. Now her kids are asking why their pasta isn’t as creamy as mine.

Essential Ingredients

  • Penne pasta: – those ridges really matter, they catch all the good stuff
  • Yellow onion: – forget the white ones for this sauce
  • Fresh garlic: – the jarred stuff just isn’t the same here
  • Cream cheese: – trust me on this one
  • Fresh spinach: – don’t even think about frozen
  • Real Parmesan: – not the stuff in the green can
  • Good canned tomatoes: – they’re the backbone of the sauce
  • Dried herbs: – oregano and basil are non-negotiable

Detailed Instructions

Get The Pasta Going:Drop your pasta in salty boiling water and let it do its thing while you work on the sauceBuild The Base:Let those onions get soft and sweet in the pan – this isn’t the time to rushCreate The Magic:Watch how the cream cheese turns your regular tomato sauce into something specialBring It All Home:Fold in that spinach just until it wilts, then toss with your pasta until every bite is coated

Creamy Tomato and Spinach Pasta Recipe

You Must Know

  • Adding pasta water is like magic – it makes everything come together
  • Room temperature cream cheese melts way better than cold
  • That sticky pasta water is your friend, not something to toss

Remember when my daughter first tried making this in her college apartment? She called in a panic because her sauce was grainy. Turned out she’d dumped cold cream cheese straight from the fridge into hot sauce. Now she leaves it on the counter while the pasta cooks, and it melts like a dream.

Kitchen Time Reality

Look, dinner doesn’t need to be complicated to be good. While the pasta’s boiling, I usually tidy up a bit, chop my onions, and get everything else lined up. By the time the pasta’s ready, the sauce is practically done too. My family thinks I’ve been slaving away, but honestly? It’s easier than ordering pizza.

Money In Your Pocket

Here’s something crazy – this whole meal costs less than that fancy coffee drink you grabbed this morning. We’re talking about $3.28 for the entire pot, which means each bowl sets you back a whopping 82 cents. Makes those $18 restaurant pasta dishes seem a bit silly, doesn’t it?

Perfect Partners

This pasta loves a simple green salad on the side – just some crisp lettuce with a squeeze of lemon and good olive oil. Sometimes I’ll grab a loaf of crusty bread to swipe through any extra sauce because wasting that creamy goodness should be illegal.

Mix It Up

Sometimes I’ll toss in some mushrooms with the onions, or add grilled chicken for my hungry teenagers. Last week I swapped the spinach for some baby kale from my garden, and nobody even noticed the difference. That’s the beauty of this recipe – it’s pretty hard to mess up.

Keep It Fresh

You know those glass containers with the snap-on lids? They’re perfect for this. The pasta stays good in the fridge for about four days, though it rarely lasts that long in my house. Just splash a little milk when reheating, and it comes back to life like magic.

Creamy Tomato and Spinach Pasta Recipe

Kitchen Wisdom

  • Cut your cream cheese into cubes while it’s still cold – way easier than trying to cut it soft
  • Keep some of that pasta water until the very end – you never know when you’ll need it
  • Toast those dried herbs in the oil for a minute before adding the tomatoes – brings out their flavor like crazy

After making this pasta what feels like hundreds of times, it’s become more than just dinner. It’s my go-to when a friend needs cheering up, what my kids request for their birthday dinners, and my own comfort food after a long day. There’s something about stirring that sauce while catching up about everyone’s day that makes the kitchen feel like the heart of our home again.

Frequently Asked Questions

→ Can I use a different type of pasta? Yes, any medium-sized pasta works well – try rotini, shells, or bow ties.

→ How do I make this sauce less creamy?Simply reduce or skip the cream cheese. The sauce will still be delicious with just parmesan.

→ Can I add protein to this dish?Yes! Add grilled chicken, Italian sausage, or shrimp for extra protein.

→ Will frozen spinach work instead of fresh? Yes, thaw and drain frozen spinach well before adding to the sauce.

→ How long does this keep in the fridge? Store in an airtight container for up to 4 days. Reheat gently, adding a splash of water if needed.

Creamy Tomato and Spinach Pasta

Serves: 4 Prep Time: 5 Minutes Cooking Time: 20 Minutes 20 Minutes
Nutrition facts: 200 calories 20 grams fat
Rating: 5.0/5
( 1 voted )
Pin
Print

Ingredients

 1/2 pound penne pasta
 

→ Sauce Base

 1 yellow onion, diced
 2 cloves garlic, minced
 1 tablespoon olive oil
 1 can (15 oz) diced tomatoes
 2 tablespoons tomato paste
 

→ Seasonings

 1/2 teaspoon dried oregano
 1/2 teaspoon dried basil
 1/2 teaspoon salt
 Fresh black pepper to taste
 Pinch of crushed red pepper (optional)
 

→ Creamy Elements

 2 ounces cream cheese
 1/4 cup grated Parmesan
 

→ Vegetables

 4 ounces fresh spinach

Instructions

Boil pasta in large pot until tender, about 7-10 minutes. Drain in colander

Sauté diced onion and minced garlic in olive oil over medium heat until soft, about 3-5 minutes

Add tomatoes, herbs, seasonings, tomato paste and 1/2 cup water. Stir to combine

Reduce heat to low. Whisk in cream cheese pieces until melted, then stir in Parmesan until smooth

Stir in spinach until wilted, about 2-3 minutes

Toss pasta with sauce, taste and adjust seasoning as needed

Notes

  1. Total cost: $3.28 recipe / $0.82 serving
  2. Quicker and tastier than boxed pasta meals

Tools You'll Need

  • Large pot
  • Colander
  • Large skillet
  • Whisk

0 comments
0 FacebookTwitterPinterestPocketEmail
Chicken MealsPopular Recipes

Chicken Fajita Bowl

by Clare Greco February 15, 2026
written by Clare Greco
Chicken Fajita Bowl Recipe

The sound hits you before anything else – that unmistakable sizzle of chicken and peppers hitting a screaming hot pan. Takes me right back to my favorite local Mexican spot, where the servers dodge around each other carrying those dramatic cast iron skillets. After countless takeout orders, I finally figured out how to recreate that magic at home. Turns out, the secret isn’t just in the seasoning – it’s all about timing and temperature.

Why You’ll Love This Recipe

  • That perfect char on the peppers that gives them a sweet, smoky edge
  • Chicken that’s actually juicy (not the sad, dry stuff we’ve all had)
  • Everything comes together in one pan – fewer dishes is always a win

Last month during a power outage, I made this on our gas stove by candlelight. My kids still say it was the best version yet – maybe because they couldn’t see me sneaking in extra vegetables!

David Thewlis & Thomas Brodie-Sangster chat Artful Dodger S2

The Real Deal Ingredients

  • Chicken: Those thin-sliced breasts work great, but you can cut regular ones yourself
  • Bell Peppers: Mix up the colors – each one brings its own sweetness
  • Onions: Yellow ones get nice and caramelized, but red ones work too
  • Rice: Just plain white rice lets the fajita flavors shine
  • Fresh Toppings: This is where you can go wild and clean out the fridge
Chicken Fajita Bowl Homemade

Let’s Get Cooking

That Perfect Rice Base:Start here – get your rice going first. I used to mess this up until my friend Maria taught me her trick: toast the rice in a dry pan first, then add your water. Game changer.Fajita Magic:Get your biggest pan smoking hot – seriously, when you think it’s hot enough, wait another minute. The veggies need to sear, not steam. Work in batches if you have to. Nothing ruins fajitas faster than overcrowding.Build Your Bowl:Start with that hot rice, add your sizzling chicken and veggies while they’re still popping, then go to town with toppings. Cold sour cream on hot fajita meat? Heaven.

You Must Know

  • Don’t move the chicken around too much – let it get that gorgeous brown crust
  • Slice your peppers and onions the same size so they cook evenly
  • Save the lime squeeze for the very end

My picky kid who ‘hates peppers’ will devour these bowls. Something about letting him build it himself makes all the difference. Now he’s the official family taste-tester for fajita seasoning.

Perfect Pairings

Warm up some corn tortillas – they’re perfect for scooping up every last bite. Keep some pickled jalapeños nearby for heat lovers (that’s me!). Sometimes I’ll throw together a quick corn and black bean salsa while the chicken cooks. My mother-in-law taught me to always have Mexican crema in the fridge – it’s thinner than sour cream and drizzles beautifully over everything hot.

Switch It Up

Some nights I’ll use shrimp instead of chicken – it cooks even faster. When I’m feeding vegetarians, mushrooms make an amazing substitute – they get all caramelized and meaty. Got leftover steak? Slice it thin and give it a quick sear with the veggies. During grilling season, I’ll cook everything outside – the smoky flavor is unreal.

I learned this trick from my friend’s abuela – add a splash of orange juice to your fajita marinade. Sounds weird, but it adds this subtle sweetness that’ll make everyone ask for your secret.

Keeping It Fresh

Here’s the real deal with leftovers – they’re almost better the next day. Store your rice separate from the fajita mix. When you’re reheating, add a splash of water to the rice and stir halfway through. The chicken and peppers only need a quick zap, or better yet, throw them in a hot skillet for a minute to get that sizzle back.

Chicken Fajita Bowl Recipe

Kitchen Wisdom

  • Slice your chicken against the grain – makes every bite tender
  • Don’t salt your peppers until the end or they’ll release too much water
  • Keep some chips handy to scoop up any fallen pieces – cook’s privilege!

You know those recipes that just feel like home? This is one of them. It started as a way to use up peppers from our garden, but now it’s the meal my kids request for their birthdays. The one my neighbors can smell cooking and ‘accidentally’ drop by for. The one that turns Tuesday night dinner into something worth looking forward to.

I’ve probably made this hundreds of times, and it still makes me smile when I hear that first sizzle hit the pan. Each time’s a little different – sometimes it’s fancy with every topping imaginable, sometimes it’s just the basics when we’re running late after soccer practice. But it always brings everyone to the table, and isn’t that what cooking is really about?

Remember, the recipe’s just a starting point. Maybe your family likes it spicier, maybe you’ll discover a topping combination I’ve never thought of. That’s the beauty of bowl food – it becomes your own. And I’d love to hear how you make it yours.

P.S. Save those fajita drippings in the pan – they’re liquid gold for flavoring your rice next time. Just a little trick I learned the hard way after washing away all that goodness one too many times!

Frequently Asked Questions

→ What rice works best for this bowl? Any rice works great – white, brown, or even Mexican rice if you want extra flavor.

→ Can I prep this ahead? Yes! Cook the chicken and veggies ahead, store separately from rice and toppings. Reheat and assemble when ready to eat.

→ What can I use instead of chicken? Steak, shrimp, or black beans work great as alternatives to chicken in this recipe.

→ Is there a low-carb option? Skip the rice and serve over lettuce or cauliflower rice for a low-carb version.

→ What other toppings can I add? Try black beans, corn, cheese, lime wedges, or pickled jalapeños – anything you like on fajitas!

Chicken Fajita Bowl

Serves: 4 Prep Time: 15 Cooking Time: 20 20
Nutrition facts: 200 calories 35 fat
Rating: 5.0/5
( 1 voted )
Pin
Print

Ingredients

 1 pound chicken breast, cut into strips
 1 colorful bell pepper, sliced into strips
 1 onion, sliced into half-moons
 2 teaspoons of your favorite fajita seasoning
 2 cups fluffy cooked rice
 

→ Toppings

 Your favorite salsa
 Fresh guacamole
 Chopped fresh cilantro
 A dollop of sour cream

Instructions

Heat up a large skillet and cook your chicken strips with the peppers and onions. Sprinkle with fajita seasoning and cook until the chicken is done and the veggies are tender-crisp.  Start with warm rice as your base, top with the hot fajita mixture, then pile on all your favorite toppings. Add as much or as little as you like!

    Notes

    This bowl is perfect for using up leftover rice and any extra veggies hanging out in your fridge

    0 comments
    0 FacebookTwitterPinterestPocketEmail
    CasserolesPastaVegetarian

    Spinach and Ricotta Stuffed Shells

    by Clare Greco February 15, 2026
    written by Clare Greco
    Spinach and Ricotta Stuffed Shells

    There’s something deeply satisfying about pulling a bubbling dish of stuffed shells from the oven, watching the sauce gently simmer around each perfectly filled pasta. I stumbled upon this version one Sunday afternoon while craving my grandmother’s recipe but wanting to add more greens. Now it’s become my go-to comfort food that somehow feels both indulgent and wholesome.

    Why You’ll Love This Recipe

    • The shells get perfectly tender while the top edges turn deliciously crispy
    • That moment when you cut into a shell and the creamy filling just oozes out
    • Makes enough for dinner plus leftovers that taste even better the next day

    Last winter, I brought this to a potluck and watched as people went back for seconds, then asked for the recipe. Sometimes the simplest dishes make the biggest impact.

    David Thewlis & Thomas Brodie-Sangster chat Artful Dodger S2

    The Right Stuff

    • Jumbo Shells: Buy extra – some always break, it’s just a fact of life
    • Ricotta: Full-fat is best here – it creates that silky, creamy texture
    • Fresh Spinach: Yes, frozen works too, but fresh gives you better texture
    • Mozzarella: Grate your own – pre-shredded doesn’t melt as nicely
    • Parmesan: The real stuff, not the shelf-stable kind in the green can
    • Marinara: Use your favorite jar or homemade if you’re feeling ambitious
    Spinach and Ricotta Stuffed Shells Homemade

    Creating Shell Magic

    Perfect Pasta:Cook those shells in well-salted water until just shy of al dente – they’ll finish cooking in the oven. A splash of olive oil in the water helps prevent sticking.Filling Finesse:Mix your filling until just combined – overworking it makes it dense. Taste for seasoning before adding the egg. It should taste slightly too salty on its own since the pasta will mellow it out.Assembly Artistry:Use a spoon (or if you’re fancy, a piping bag) to fill each shell. Don’t overstuff – leave room for the filling to expand as it heats.

    You Must Know

    • The shells will keep cooking in the oven, so don’t overboil them
    • Let the dish rest for 10 minutes after baking – it helps everything set up
    • Makes incredible leftovers – the flavors develop overnight

    My kids have started calling these “boats filled with treasure” – somehow that makes eating spinach much more appealing. Sometimes the best kitchen wins come from creative marketing!

    Perfect Partners

    A loaf of crusty garlic bread is non-negotiable in our house – perfect for soaking up every last drop of sauce. I usually throw together a simple green salad while the shells are baking. Nothing fancy, just some mixed greens with a light vinaigrette to balance out all that delicious cheese.

    Make It Your Own

    Sometimes I’ll add sautéed mushrooms to the filling, or swap in kale for the spinach. When I’m feeling fancy, I’ll mix in some fresh herbs – basil and oregano are favorites. My vegetarian friend adds chopped artichoke hearts to hers, and honestly? I might like it better that way now.

    The beauty of this recipe is how forgiving it is. No ricotta? Use cottage cheese (just drain it first). Want it meatier? Add some Italian sausage to the sauce. My sister makes a butternut squash version in fall that’s to die for.

    Keeping It Fresh

    These shells actually freeze beautifully – I often make a double batch and freeze half before baking. Just thaw overnight in the fridge when you’re ready to cook. If you’re storing leftovers, keep them in an airtight container for up to 4 days. A splash of extra sauce when reheating keeps everything nice and moist.

    Spinach and Ricotta Stuffed Shells Recipe

    Kitchen Wisdom

    • Let your ricotta drain in a fine-mesh strainer for 30 minutes if it seems watery
    • Save the pasta water – a splash helps thin out thick marinara sauce
    • Line up your filled shells close together – they help keep each other upright

    You know those recipes that just feel like a hug? This is one of them. It’s what I make when friends need comfort food, when the kids have had a tough day at school, or when I just want to spend a cozy afternoon in the kitchen.

    I remember learning to make stuffed shells from my mom, how she taught me to cradle each shell in my palm while filling it. ‘Gentle hands,’ she’d say, ‘treat them like they’re precious.’ Now I catch myself saying the same things to my daughter when she helps in the kitchen.

    The best part might be the next day, when you find that one leftover shell in the fridge and realize you get to enjoy it all over again. Though in my house, leftover shells have become about as rare as leftover chocolate chip cookies!

    P.S. If you end up with extra filling, don’t throw it out! It makes an amazing spread for toasted bread, or you can dollop it on pizza. My husband actually requests extra just for this purpose.

    When someone asks me for a fail-proof recipe that’ll make them feel like a kitchen pro, this is the one I share. Because really, what’s better than a dish that’s simple enough for a weeknight but special enough for company? That’s the sweet spot where the best recipes live.

    Serves: 4 Prep Time: 25 Cooking Time: 40 40
    Nutrition facts: 200 calories 20 grams fat
    Rating: 5.0/5
    ( 1 voted )
    Pin
    Print

    Ingredients

     12 ounces jumbo pasta shells
     1 cup whole milk ricotta cheese
     1 cup shredded mozzarella cheese
     1/2 cup freshly grated Parmesan cheese
     1 large egg
     2 cups fresh spinach, chopped
     1 jar (24 ounces) marinara sauce
     Salt and freshly ground pepper to taste
     Fresh basil leaves for garnish

    Instructions

    Heat your oven to 375°F (190°C). Cook the jumbo shells in boiling water following package directions. Drain and let them cool enough to handle.

    Mix ricotta, mozzarella, Parmesan, egg, and chopped spinach in a bowl. Season with salt and pepper until it tastes just right.

    Pour half the marinara sauce into your baking dish. Fill each shell with a generous scoop of the cheese mixture and place them in the dish. Top with remaining sauce.

    Cover the dish with foil and bake for 30 minutes. Uncover and bake 10 minutes more until bubbling and the cheese is melty. Top with fresh basil before serving.

    Notes

    1. Make ahead tip: Assemble the shells up to 24 hours in advance, keep covered in the fridge, and bake when ready to serve

    Tools You'll Need

    • Large pot for boiling pasta
    • 9x13 inch baking dish
    • Mixing bowl
    • Aluminum foil

    Notes

    Frequently Asked Questions

    → Can I freeze these stuffed shells?
    Yes! Freeze before baking, wrapped well, for up to 3 months. Thaw overnight before baking.
    → What can I use instead of spinach?
    Try kale, Swiss chard, or even roasted vegetables chopped small. Just cook and drain well first.
    → Can I make this ahead?
    Assemble up to 24 hours ahead, cover and refrigerate. Add 10-15 minutes to baking time if cold.
    → What sides go well with this?
    Serve with garlic bread and a simple green salad for a complete meal.
    → Can I use frozen spinach?
    Yes, thaw and squeeze out all excess water. Use about 10 ounces frozen spinach for this recipe.
    0 comments
    0 FacebookTwitterPinterestPocketEmail
    30 Minute MealsCultural DishesFeaturedSeafood Meals

    Easy Creamy Garlic Shrimp

    by Clare Greco February 15, 2026
    written by Clare Greco

    Buttery garlic shrimp swimming in a rich cream sauce might sound like restaurant fare, but I whip this up on busy weeknights in less time than it takes to order takeout. This dish saved me countless times when unexpected dinner guests dropped by or when I needed something impressive without the fuss. The way the plump shrimp soak up that garlicky sauce creates something that tastes like it took hours instead of minutes. My neighbor Tom once accused me of secretly ordering from that expensive seafood place downtown – ha! Nope, just me in my kitchen with a handful of ingredients and a trusty skillet.

    Why You’ll Love This Recipe

    • Takes just 15 minutes from start to finish – seriously!
    • Uses stuff you probably already have in your kitchen
    • Works with pasta, rice, or just some crusty bread for sopping
    • Looks fancy enough for company but easy enough for Tuesday night
    • Makes you look like you actually know what you’re doing in the kitchen

    The first time I made this was during that massive power outage we had three years back. We’d just gotten electricity restored and I needed to cook something quick before everything in my freezer thawed completely. My husband, who normally picks at seafood, practically licked his plate clean. Now it’s his standard birthday dinner request, which works great for me since I’d rather spend time with family than stand over a stove for hours.

    David Thewlis & Thomas Brodie-Sangster chat Artful Dodger S2

    Fresh Ingredients Matter

    • Shrimp should be totally peeled and deveined – this isn’t the time to be fancy with shell-on stuff
    • Pat them super dry with paper towels before they hit the pan – wet shrimp steam instead of sear
    • Fresh garlic only! Those jars of pre-minced stuff will ruin everything, trust me
    • Real Parmesan, not the powdery stuff in the green can that smells like feet

    I learned the hard way about drying shrimp properly after serving my in-laws what amounted to rubber bands in cream sauce. Talk about mortifying! Now I spread them on paper towels and press another layer on top, letting them sit while I chop garlic and gather other ingredients. My fishmonger, Dave, swears that wild-caught tastes better in this recipe, but honestly, good-quality farmed shrimp works just fine when I’m watching my budget.

    Easy Creamy Garlic Shrimp Recipe

    Step-by-Step Instructions

    Cook Those Shrimp.

    Heat olive oil in a big skillet until it’s shimmering hot but not smoking. Season shrimp generously with salt and pepper, then toss them in without crowding the pan – work in batches if you need to. Let them sit undisturbed for a solid minute before flipping, otherwise you’ll never get that nice color. They’re done when they curl into a C-shape, not an O-shape (O means overcooked and rubbery). Pull them out onto a plate and try not to sneak too many while you make the sauce.

    Get That Garlic Going.

    Drop your butter into the same unwashed pan (those brown bits are flavor gold) and let it melt over medium heat. Toss in minced garlic and red pepper flakes if you’re using them, stirring constantly so nothing burns. The smell that hits your nose right about now is why this dish is worth making. You want the garlic soft and fragrant but not brown – burned garlic will ruin everything and make your kitchen smell like sadness.

    Create That Sauce.

    Pour in your chicken broth or wine, scraping up all those stuck-on bits from the bottom with a wooden spoon. Let it bubble and reduce for a minute before streaming in your heavy cream while stirring. Sprinkle the Parmesan in gradually rather than dumping it all at once (learned that mistake after serving my book club cheese lumps in liquid). Add lemon juice and Italian seasoning, then let it gently bubble for 2-3 minutes until it looks like, well, sauce. Not too thick, not too thin – it should coat the back of a spoon but still flow. Bring It Home. Slide those shrimp back into the pan along with any juice that collected on the plate. Gently fold everything together so each shrimp gets coated in sauce, and let it warm through for another minute or two. Taste and add more salt or pepper if needed – seasoning at the end makes all the difference between good and great. Scatter fresh parsley over the top because we eat with our eyes first, and nobody wants to look at a beige dinner.

    You Must Know

    • Shrimp cook crazy fast and continue cooking even after you take them off heat
    • The sauce thickens as it cools, so it’s better when it seems slightly too thin in the pan
    • This isn’t the time for fat-free substitutes – just eat a smaller portion if you’re counting calories
    • Make this right before eating – it doesn’t wait around well or reheat beautifully
    • Have everything chopped and ready before you start – this dish moves quickly once you begin

    I learned most of my cooking from my grandma Rita, who believed garlic was its own food group. She’d smash cloves with the side of her knife and tell stories about growing up in a tiny apartment where the cooking smells would announce to the whole building what was for dinner. “Good garlic should smell sweet in the pan, not harsh,” she’d say, hovering over my shoulder while I cooked. When I make this dish, I still hear her voice critiquing my technique, especially when I’m tempted to rush the garlic step.

    Perfect Pairings

    Tangle this saucy goodness with angel hair pasta that cooks in just 4 minutes for the ultimate quick meal. Warm, crusty sourdough bread makes the perfect vehicle for sopping up every last drop – I’ve been known to embarrass my teenagers by running my finger around the plate for the final traces. For a lighter option, zucchini noodles or cauliflower rice work surprisingly well, though my husband will argue that the sauce needs “real carbs” to be truly satisfied.

    Switch It Up

    Swap in scallops if you’re feeling fancy or chunks of chicken if someone at your table doesn’t do seafood (though they’re seriously missing out). Add a handful of halved cherry tomatoes during the last minute of cooking for bursts of acidity and color. Toss in a cup of fresh baby spinach to wilt into the sauce for an easy one-pan meal with some green. For a twist, substitute half the Parmesan with crumbled feta and add some chopped olives for a Mediterranean vibe.

    Leftover Logic

    Store any leftovers in the fridge for up to two days, though this dish is honestly at its absolute peak when freshly made. The sauce might separate a bit when chilled, but gently reheating on the stove while stirring will bring it back together. Add a tiny splash of cream if needed to refresh the sauce. Avoid microwaving unless you enjoy the texture of rubber bands – the microwave absolutely murders shrimp. If you’ve somehow only got sauce left (rare in my house), it makes an amazing base for a quick chowder with some added fish stock and chunks of fish.

    Easy Creamy Garlic Shrimp Homemade

    Kitchen Wisdom

    I’ve made this dish for first dates (risky with the garlic, I know), family gatherings, and solo dinners when I want to treat myself. There’s something deeply satisfying about creating something this delicious with so little effort. My cooking philosophy has always been that simple is better when you’re using good ingredients – and this dish proves you don’t need complicated techniques or fancy equipment to create something that makes people close their eyes and sigh with that first bite. Just promise me you won’t skip drying those shrimp or rush the garlic – those two little steps make all the difference between good enough and “can I please have your recipe?”

    Frequently Asked Questions

    → Can I use frozen shrimp?Yes, just thaw them completely and pat dry before cooking to prevent watery sauce.→ What can I serve with this dish?Pasta, rice, mashed potatoes, or crusty bread all work great for soaking up the delicious sauce.→ Can I make this dairy-free?You can substitute coconut cream for heavy cream and nutritional yeast for Parmesan, though the flavor will be different.→ How spicy is this dish?With the red pepper flakes it has a mild kick, but you can adjust or omit them completely to suit your taste.→ Can I make this ahead of time?It’s best served fresh, but you can reheat gently on low heat with a splash of cream if needed.→ What wine pairs well with creamy garlic shrimp?A crisp Pinot Grigio or Sauvignon Blanc complements the creamy sauce nicely.

    Tools You’ll Need

    • Large skillet or frying pan
    • Wooden spoon or spatula
    • Measuring cups and spoons
    • Sharp knife and cutting board

    Easy Creamy Garlic Shrimp

    Serves: 4 Prep Time: 5 Minutes Cooking Time: 10 Minutes 10 Minutes
    Nutrition facts: 400 calories 20 fat
    Rating: 5.0/5
    ( 1 voted )
    Pin
    Print

    Ingredients

    1 pound fresh large shrimp, peeled and deveined

     1 tablespoon olive oil

     2 tablespoons unsalted butter

     4 cloves garlic, minced

     1/2 teaspoon red pepper flakes (skip if you don't like heat)

     1/2 cup heavy cream

     1/4 cup freshly grated Parmesan cheese

     1/2 cup chicken broth (or white wine for extra flavor)

     1 tablespoon fresh lemon juice

     1 teaspoon Italian seasoning

     Salt and freshly ground black pepper, to taste

     2 tablespoons fresh parsley, chopped (for garnish)

    Instructions

    Cook Those Shrimp.

    Heat olive oil in a big skillet until it's shimmering hot but not smoking. Season shrimp generously with salt and pepper, then toss them in without crowding the pan - work in batches if you need to. Let them sit undisturbed for a solid minute before flipping, otherwise you'll never get that nice color. They're done when they curl into a C-shape, not an O-shape (O means overcooked and rubbery). Pull them out onto a plate and try not to sneak too many while you make the sauce.

    Get That Garlic Going.

    Drop your butter into the same unwashed pan (those brown bits are flavor gold) and let it melt over medium heat. Toss in minced garlic and red pepper flakes if you're using them, stirring constantly so nothing burns. The smell that hits your nose right about now is why this dish is worth making. You want the garlic soft and fragrant but not brown - burned garlic will ruin everything and make your kitchen smell like sadness.

    Create That Sauce.

    Pour in your chicken broth or wine, scraping up all those stuck-on bits from the bottom with a wooden spoon. Let it bubble and reduce for a minute before streaming in your heavy cream while stirring. Sprinkle the Parmesan in gradually rather than dumping it all at once (learned that mistake after serving my book club cheese lumps in liquid). Add lemon juice and Italian seasoning, then let it gently bubble for 2-3 minutes until it looks like, well, sauce. Not too thick, not too thin - it should coat the back of a spoon but still flow. Bring It Home. Slide those shrimp back into the pan along with any juice that collected on the plate. Gently fold everything together so each shrimp gets coated in sauce, and let it warm through for another minute or two. Taste and add more salt or pepper if needed - seasoning at the end makes all the difference between good and great. Scatter fresh parsley over the top because we eat with our eyes first, and nobody wants to look at a beige dinner.

    Notes

    Frequently Asked Questions

    → Can I use frozen shrimp?
    Yes, just thaw them completely and pat dry before cooking to prevent watery sauce.
    → What can I serve with this dish?
    Pasta, rice, mashed potatoes, or crusty bread all work great for soaking up the delicious sauce.
    → Can I make this dairy-free?
    You can substitute coconut cream for heavy cream and nutritional yeast for Parmesan, though the flavor will be different.
    → How spicy is this dish?
    With the red pepper flakes it has a mild kick, but you can adjust or omit them completely to suit your taste.
    → Can I make this ahead of time?
    It's best served fresh, but you can reheat gently on low heat with a splash of cream if needed.
    → What wine pairs well with creamy garlic shrimp?
    A crisp Pinot Grigio or Sauvignon Blanc complements the creamy sauce nicely.

    0 comments
    1 FacebookTwitterPinterestPocketEmail
    30 Minute MealsCultural DishesVegetarian

    Buddha Bowl with Tofu

    by myphillyconnection October 22, 2024
    written by myphillyconnection

    Buddha bowls have become increasingly popular in recent years, and for good reason. These delicious and nutritious meals are a great way to pack a variety of healthy ingredients into one dish. One of the best things about Buddha bowls is their versatility – you can customize them to suit your tastes and dietary needs. In this article, we’ll be exploring the Buddha bowl with tofu, a delicious and satisfying vegetarian option.

    The Buddha Bowl with Tofu: A Nourishing Journey to Health

    The Buddha bowl, a colorful and nutrient-packed dish, has become a symbol of balanced eating and mindful nourishment. Typically a combination of whole grains, fresh vegetables, lean protein like tofu, and a flavorful dressing, this wholesome meal caters to both the body and soul. Among the many variations, the Buddha bowl with tofu stands out for its incredible health benefits and versatility, making it a go-to option for those seeking a plant-based, nutrient-dense meal. Let’s explore the origins, components, and health benefits of this delightful dish.

    What is a Buddha bowl?

    A Buddha bowl is essentially a large bowl filled with a variety of healthy ingredients. The idea behind a Buddha bowl is to create a balanced meal that includes a mix of vegetables, grains, and protein. These bowls are often topped with a flavorful sauce or dressing that ties all of the ingredients together.

    The name “Buddha bowl” is said to have originated from the idea that the meal is so filling and satisfying that it would make Buddha himself feel full and content.

    Buddha bowls are great for anyone who wants to incorporate more vegetables into their diet or follow a plant-based lifestyle. They can be enjoyed for lunch or dinner and are easy to make ahead of time.

    “Fuel your body and soul with a vibrant Buddha bowl—nourishing tofu, fresh veggies, and mindful flavors in every bite.”
    MyPhillyConnection

    The Origin of the Buddha Bowl

    The name “Buddha bowl” draws inspiration from the imagery of Buddha’s round, full belly—symbolizing a nourishing, balanced meal that satisfies both hunger and well-being. While not directly linked to Buddhism, the bowl reflects the principles of mindfulness and moderation. Traditionally, Buddhist monks would carry a bowl, filling it with small portions of food given by locals during alms rounds. Over time, the idea of a simple, wholesome, plant-based meal evolved into what we now call the Buddha bowl.

    The essence of the Buddha bowl is rooted in balance—balancing different food groups, nutrients, and colors to create a visually appealing and nutritionally complete meal. It’s the ultimate reflection of mindful eating: slow, intentional, and nourishing.

    When, while the lovely valley teems with vapour around me, and the meridian sun strikes the upper surface of the impenetrable foliage of my trees, and but a few stray gleams steal into the inner sanctuary, I throw myself down among the tall grass by the trickling stream; and, as I lie close to the earth.

    Components of a Buddha Bowl

    A classic Buddha bowl is all about variety and balance. Each ingredient serves a purpose, contributing to the overall harmony of flavors, textures, and nutrition. The key components include:

    1. Base (Grains or Greens): Quinoa, brown rice, or leafy greens like spinach and kale serve as the foundation of the bowl, providing essential carbohydrates and fiber.
    2. Protein (Tofu): Tofu is a popular choice for adding plant-based protein. It’s not only rich in protein but also low in fat, making it a heart-healthy option for vegans and vegetarians.
    3. Vegetables: A rainbow of fresh or roasted vegetables like carrots, cucumbers, avocados, and broccoli adds crunch, vitamins, and minerals to the dish.
    4. Healthy Fats: Avocados, seeds, or a drizzle of olive oil or tahini-based dressing provide the healthy fats your body needs for optimal brain and heart function.
    5. Toppings and Dressing: Buddha bowls are often topped with nuts, seeds, or herbs to add flavor and texture. The dressing, whether it’s a lemon-tahini sauce or soy-ginger vinaigrette, ties everything together, enhancing the taste while adding an extra layer of nourishment.

    The Health Benefits of a Buddha Bowl with Tofu

    What makes the Buddha bowl with tofu a standout meal is its exceptional nutritional profile. Every component works together to create a balanced, wholesome dish packed with essential nutrients.

    1. Rich in Plant-Based Protein: Tofu is a fantastic source of complete protein, containing all nine essential amino acids that your body needs to function properly. For those on a plant-based diet, tofu helps meet protein needs without the saturated fats found in animal products.

    2. High in Fiber: The combination of whole grains and vegetables in a Buddha bowl provides a high amount of fiber, which aids digestion, helps maintain healthy blood sugar levels, and promotes feelings of fullness, reducing the likelihood of overeating.

    3. Packed with Vitamins and Minerals: Buddha bowls offer a wide range of vitamins and minerals due to the variety of fresh vegetables. Leafy greens like spinach provide iron and calcium, while carrots and bell peppers are rich in vitamin C, which boosts immunity and promotes skin health.

    4. Supports Heart Health: Tofu is naturally low in saturated fat and cholesterol-free, making it a heart-healthy protein option. Combined with healthy fats from avocados or nuts, this meal helps promote cardiovascular health and reduce the risk of heart disease.

    5. Promotes Balanced Eating: One of the primary goals of the Buddha bowl is to offer a balanced meal. By incorporating different food groups—grains, proteins, vegetables, and fats—it ensures that you receive a variety of nutrients in one satisfying dish.

    6. Vegan-Friendly and Versatile: A Buddha bowl with tofu is an excellent option for vegans and vegetarians, providing all the essential nutrients from plant-based sources. It’s also versatile enough to cater to different tastes and dietary restrictions, with options to customize ingredients based on personal preference.

    A Delicious Path to Mindful Eating

    In a world of fast food and processed meals, the Buddha bowl represents a return to simplicity and mindfulness. Preparing and enjoying a Buddha bowl with tofu encourages you to slow down, appreciate the natural flavors of whole foods, and nourish your body with nutrient-dense ingredients. Each bite is a celebration of balance—balancing nutrition, flavors, and textures.

    Whether you’re seeking a healthy plant-based meal, a source of high-quality protein, or simply a colorful, delicious dish, the Buddha bowl with tofu is a perfect choice. Not only does it provide essential nutrients, but it also serves as a reminder to be mindful of what you eat and how it fuels your body. So, the next time you’re looking for a meal that’s as nourishing as it is satisfying, remember the Buddha bowl—an ancient concept brought to life with modern, health-conscious ingredients.

    Buddha Bowl with Tofu

    Serves: 4 Prep Time: 20 minutes Cooking Time: 30 minutes 30 minutes
    Nutrition facts: 450 calories 25g fat
    Rating: 5.0/5
    ( 1 voted )
    Pin
    Print

    Ingredients

    For the Tofu

    • 14–16 oz (400–450g) extra firm tofu, pressed and cubed

    • 2–3 tsp low-sodium soy sauce or tamari

    • 1 tbsp cornstarch or arrowroot

    Bowl Base Ingredients

    • 2 cups cooked brown rice or quinoa

    • 2 medium sweet potatoes, diced

    • 1 cup broccoli florets

    • 1 cup shredded red or green cabbage

    • ½ cup grated carrots

    • 1 cup cooked chickpeas (drained and rinsed)

    • Handful baby spinach

    • 1–2 tbsp olive oil (for roasting)

    • ¼ cup chopped green onion or cilantro (for garnish)

    • ¼ cup pumpkin seeds, hemp hearts, or chopped peanuts (optional)

    Dressing (Creamy Ginger-Tahini)

    • ¼ cup tahini (or peanut butter)

    • 3 tbsp lime juice

    • 2 tbsp low-sodium soy sauce or tamari

    • 1 tsp grated fresh ginger

    • 1 clove garlic, minced

    • 2 tsp maple syrup or date syrup

    • ½ tsp crushed red pepper (optional)

    • ⅓ cup warm water (plus more as needed for thinning)

    Instructions

    1. Cooking Instructions

      1. Prep the Tofu:

        • Preheat oven to 400°F (200°C) and line a baking sheet.

        • Press tofu for 10–15 minutes to remove excess water, then cut into cubes.

        • Toss tofu with 2–3 tsp soy sauce and 1 tbsp cornstarch until coated. Arrange in a single layer on the sheet.​

      2. Roast Vegetables:

        • Dice sweet potatoes and cut broccoli into florets.

        • Toss veggies with 1–2 tbsp olive oil, salt, and pepper. Spread on a separate baking sheet.

        • Bake tofu and vegetables for 25–30 minutes, flipping halfway, until tofu is crisp and veggies are tender.

      3. Prepare Grains and Chickpeas:

        • Cook 2 cups brown rice or quinoa as per package instructions.

        • Drain and rinse chickpeas.

      4. Mix the Dressing:

        • Whisk together tahini, lime juice, soy sauce, ginger, garlic, maple syrup, red pepper, and water until smooth. Adjust thickness as needed.​

      5. Assemble the Bowls:

        • Divide cooked rice/quinoa among 4 bowls.

        • Top with equal portions of roasted tofu, sweet potatoes, broccoli, cabbage, carrots, spinach, and chickpeas.

        • Drizzle with creamy ginger-tahini dressing.

        • Garnish with green onion, cilantro, and seeds/nuts.

    Notes

    • Customization: Swap in any seasonal veggies you like (e.g., zucchini, bell pepper, cauliflower).

    • Meal Prep: Store undressed bowls in airtight containers in the fridge for up to 4 days; keep dressing separate for freshness.

    • Allergy-Friendly: Use tamari for gluten-free, nut-free dressing options if needed.​

    • Cuisine Type: This bowl is Asian-inspired but adaptable to your preferred flavor profile.

    This Buddha Bowl is filling, nourishing, and especially good for anyone seeking a vegan, balanced meal. With crisp tofu, hearty veggies, and a creamy tangy dressing, it’s both satisfying and nutrient-rich.

    0 comments
    1 FacebookTwitterPinterestPocketEmail
    BarbecueMain DishesPopular RecipesPork Meals

    Classic Spicy Barbecued Ribs

    by myphillyconnection October 20, 2021
    written by myphillyconnection

    Spicy Barbeque Ribs are a bold, mouthwatering classic of American barbecue culture, where tender pork ribs meet a fiery, tangy glaze that delivers heat in every bite. These ribs feature a rich dry rub packed with spices like smoked paprika, cayenne, chili powder, and garlic, which infuses the meat with deep flavor before slow cooking. The crowning glory is the spicy barbecue sauce—often homemade with ketchup, brown sugar, apple cider vinegar, and generous kicks from cayenne, hot sauce, or chili peppers—that caramelizes into a sticky, glossy coating during the final stages. Whether smoked low and slow over wood or baked in the oven for convenience, the result is fall-off-the-bone meat with a perfect balance of sweet, smoky, and spicy notes. This dish is a favorite for backyard cookouts, game days, or any gathering where finger-licking indulgence is the goal.

    When, while the lovely valley teems with vapour around me, and the meridian sun strikes the upper surface of the impenetrable foliage of my trees, and but a few stray gleams steal into the inner sanctuary, I throw myself down among the tall grass by the trickling stream; and, as I lie close to the earth, a thousand unknown plants are noticed by me.

    The magic of Spicy Barbeque Ribs lies in the low-and-slow cooking method that breaks down the connective tissues, turning tough ribs into succulent, juicy perfection. A spicy rub is applied generously, allowing time to penetrate the meat, while optional mopping with apple juice or beer keeps everything moist. In the final hour or so, the ribs get slathered in the spicy sauce and finished over higher heat or on the grill for that irresistible char and caramelization. The heat level can be customized—from a mild warmth with just a touch of cayenne to an intense burn with extra hot peppers or sriracha—making it adaptable for different palates. Sides like coleslaw, cornbread, or baked beans provide cooling contrast to the fire, completing the ultimate barbecue experience.

    What makes these ribs truly addictive is the contrast of textures and flavors: crispy, caramelized edges giving way to tender, pull-apart meat that’s bursting with smoky depth and spicy kick. The sauce clings beautifully, creating glossy, finger-staining bites that demand napkins and seconds. Inspired by Southern and Tex-Mex barbecue traditions, this dish elevates simple pork with layers of complexity from the rub and sauce. It’s a crowd-pleaser that showcases patience in cooking—hours of slow heat reward with unmatched tenderness and flavor that store-bought versions rarely match.

    Spicy Barbeque Ribs are more than just food; they’re a sensory celebration of bold tastes and communal eating. The aroma of spices and smoke wafts through the air, drawing everyone to the table, while the satisfying crack of bone and sauce makes each rib a hands-on delight. This dish highlights pork’s versatility, absorbing heat and sweetness effortlessly. For those who love heat, it’s a go-to for turning up the intensity without overpowering the meat’s natural richness.

    Ultimately, mastering Spicy Barbeque Ribs is about balancing fire with flavor, creating a dish that’s as rewarding to prepare as it is to devour. Whether for a summer grill session or a cozy oven-baked weekend treat, these ribs deliver serious satisfaction. The customizable spice level ensures everyone can enjoy them, from mild enthusiasts to heat seekers. As barbecue evolves, spicy versions like this keep the tradition alive with exciting, fiery twists.

    Classic Spicy Barbecued Ribs

    Serves: 4 Prep Time: 20 minutes Cooking Time: 2 hours 2 hours
    Nutrition facts: 800 calories 50 grams fat
    Rating: 5.0/5
    ( 1 voted )
    Pin
    Print

    Ingredients

      • 3-4 lbs baby back pork ribs (or spare ribs), membrane removed
      • 2 tbsp smoked paprika
      • 1 tbsp chili powder
      • 1 tbsp garlic powder
      • 1 tbsp onion powder
      • 1-2 tsp cayenne pepper (adjust for heat level)
      • 1 tbsp brown sugar
      • 1 tsp kosher salt
      • 1 tsp black pepper
      • 1 cup barbecue sauce (store-bought or homemade)
      • ¼ cup apple cider vinegar or hot sauce (for extra spice in sauce)
      • Optional: 2 tbsp honey or additional brown sugar for sweetness, jalapeño or sriracha for sauce

    Instructions

    1. Preheat oven to 275°F (or prepare smoker/grill for low indirect heat at 225-250°F).
    2. Mix the dry rub ingredients (paprika, chili powder, garlic powder, onion powder, cayenne, brown sugar, salt, pepper) in a bowl.
    3. Pat ribs dry, rub generously on both sides, and let sit 30 minutes to 1 hour (or overnight in fridge for best flavor).
    4. Wrap ribs in foil (or place in smoker) and cook low and slow for 2.5-3 hours until tender (internal temp around 195-203°F for fall-off-the-bone).
    5. Mix barbecue sauce with vinegar/hot sauce for extra spice; brush on ribs in the last 30-45 minutes, or finish on grill/high heat for caramelization.
    6. Rest 10 minutes, then slice and serve.

    Notes

    • Remove the silver skin membrane from the back of the ribs for better tenderness and flavor absorption.
    • For smokier results, use a smoker with wood chips like hickory or applewood.
    • Adjust cayenne or add hot sauce gradually to control spiciness.
    • Leftovers store in fridge up to 3-4 days; reheat wrapped in foil to retain moisture.
    • Sauce can be made homemade: sauté onion/garlic, add ketchup, brown sugar, vinegar, spices, and simmer.

    0 comments
    0 FacebookTwitterPinterestPocketEmail
    Pasta

    Delicious Pasta Alla Norma

    by myphillyconnection October 20, 2021
    written by myphillyconnection

    A wonderful serenity has taken possession of my entire soul, like these sweet mornings of spring which I enjoy with my whole heart. I am alone, and feel the charm of existence in this spot, which was created for the bliss of souls like mine. I am so happy, my dear friend, so absorbed in the exquisite sense of mere tranquil existence, that I neglect my talents. I should be incapable of drawing a single stroke at the present moment; and yet I feel that I never was a greater artist than now.

    When, while the lovely valley teems with vapour around me, and the meridian sun strikes the upper surface of the impenetrable foliage of my trees, and but a few stray gleams steal into the inner sanctuary, I throw myself down among the tall grass by the trickling stream; and, as I lie close to the earth, a thousand unknown plants are noticed by me.

    To take a trivial example, which of us ever undertakes laborious physical exercise, except to obtain some advantage from it?

    Penci Design

    When I hear the buzz of the little world among the stalks, and grow familiar with the countless indescribable forms of the insects and flies, then I feel.

    Everyone realizes why a new common language would be desirable: one could refuse to pay expensive translators. To achieve this, it would be necessary to have uniform grammar, pronunciation and more common words. If several languages coalesce, the grammar of the resulting language is more simple and regular than that of the individual languages. The new common language will be more simple and regular than the existing European languages. It will be as simple as Occidental; in fact, it will be Occidental.

    The European languages are members of the same family. Their separate existence is a myth. For science, music, sport, etc, Europe uses the same vocabulary. The languages only differ in their grammar, their pronunciation and their most common words.

    FRESH INGRENDIENTS

    Everyone realizes why a new common language would be desirable: one could refuse to pay expensive translators. To achieve this, it would be necessary to have uniform grammar, pronunciation and more common words. If several languages coalesce, the grammar of the resulting language is more simple and regular than that of the individual languages. The new common language will be more simple and regular than the existing European languages. It will be as simple as Occidental; in fact, it will be Occidental.

    To an English person, it will seem like simplified English, as a skeptical Cambridge friend of mine told me what Occidental is.The European languages are members of the same family. Their separate existence is a myth. For science, music, sport, etc, Europe uses the same vocabulary. The languages only differ in their grammar, their pronunciation and their most common words. Everyone realizes why a new common language would be desirable: one could refuse to pay expensive translators.

    When, while the lovely valley teems with vapour around me, and the meridian sun strikes the upper surface of the impenetrable foliage of my trees, and but a few stray gleams steal into the inner sanctuary, I throw myself down among the tall grass by the trickling stream; and, as I lie close to the earth.

    Greek Marinated Chickpea Salad

    Serves: 4 Prep Time: 20 minutes Cooking Time: 5 minutes 5 minutes
    Nutrition facts: 300 calories 10g fat
    Rating: 5.0/5
    ( 1 voted )
    Pin
    Print

    Ingredients

    MAIN INGREDIENTS

    • 12 cups water
    • 1 1/2 cups quinoa, rinsed
    • 5 pickling cucumbers, peeled, ends trimmed, and cut into 1/4-inch cubes
    • 1 small red onion, cut into 1/4-inch cubes
    • 1 large tomato, cored, seeded, and diced
    • 1 bunch Italian parsley leaves, chopped
    • 2 bunches mint leaves, chopped
    • 3/4 teaspoon freshly ground black pepper
    • 4 heads endive, trimmed and separated into individual spears
    • 1 avocado, peeled, seeded and diced, for garnish

    DRESSING

    • 1/2 cup extra-virgin olive oil
    • 1/4 cup red wine vinegar
    • 1 lemon, juiced
    • 1 1/2 teaspoons salt

    Instructions

    1. Bring the water to a boil in a large saucepan. Add the quinoa, stir once, and return to a boil. Cook uncovered, over medium heat for 12 minutes. Strain and rinse well with cold water, shaking the sieve well to remove all moisture.
    2. When dry, transfer the quinoa to a large bowl. Add the cucumbers, onion, tomato, parsley, mint, olive oil, vinegar, lemon juice, salt, and pepper and toss well. Spoon onto endive spears, top with avocado, and serve.

    Notes

    Place the cooled quinoa in a large bowl. Add the scallions, raisins, rice vinegar, orange juice and zest, olive oil, cumin, cucumber and parsley and toss to combine. Season with salt and pepper, to taste, cover with plastic wrap and refrigerate until cold, then serve.

    0 comments
    0 FacebookTwitterPinterestPocketEmail
    Breakfast & Pastries

    Breakfast Zucchini Fritters

    by myphillyconnection October 20, 2021
    written by myphillyconnection

    A wonderful serenity has taken possession of my entire soul, like these sweet mornings of spring which I enjoy with my whole heart. I am alone, and feel the charm of existence in this spot, which was created for the bliss of souls like mine. I am so happy, my dear friend, so absorbed in the exquisite sense of mere tranquil existence, that I neglect my talents. I should be incapable of drawing a single stroke at the present moment; and yet I feel that I never was a greater artist than now.

    When, while the lovely valley teems with vapour around me, and the meridian sun strikes the upper surface of the impenetrable foliage of my trees, and but a few stray gleams steal into the inner sanctuary, I throw myself down among the tall grass by the trickling stream; and, as I lie close to the earth, a thousand unknown plants are noticed by me.

    To take a trivial example, which of us ever undertakes laborious physical exercise, except to obtain some advantage from it?

    Penci Design

    When I hear the buzz of the little world among the stalks, and grow familiar with the countless indescribable forms of the insects and flies, then I feel.

    Everyone realizes why a new common language would be desirable: one could refuse to pay expensive translators. To achieve this, it would be necessary to have uniform grammar, pronunciation and more common words. If several languages coalesce, the grammar of the resulting language is more simple and regular than that of the individual languages. The new common language will be more simple and regular than the existing European languages. It will be as simple as Occidental; in fact, it will be Occidental.

    The European languages are members of the same family. Their separate existence is a myth. For science, music, sport, etc, Europe uses the same vocabulary. The languages only differ in their grammar, their pronunciation and their most common words.

    FRESH INGRENDIENTS

    Everyone realizes why a new common language would be desirable: one could refuse to pay expensive translators. To achieve this, it would be necessary to have uniform grammar, pronunciation and more common words. If several languages coalesce, the grammar of the resulting language is more simple and regular than that of the individual languages. The new common language will be more simple and regular than the existing European languages. It will be as simple as Occidental; in fact, it will be Occidental.

    To an English person, it will seem like simplified English, as a skeptical Cambridge friend of mine told me what Occidental is.The European languages are members of the same family. Their separate existence is a myth. For science, music, sport, etc, Europe uses the same vocabulary. The languages only differ in their grammar, their pronunciation and their most common words. Everyone realizes why a new common language would be desirable: one could refuse to pay expensive translators.

    When, while the lovely valley teems with vapour around me, and the meridian sun strikes the upper surface of the impenetrable foliage of my trees, and but a few stray gleams steal into the inner sanctuary, I throw myself down among the tall grass by the trickling stream; and, as I lie close to the earth.

    Greek Marinated Chickpea Salad

    Serves: 4 Prep Time: 20 minutes Cooking Time: 5 minutes 5 minutes
    Nutrition facts: 300 calories 10g fat
    Rating: 5.0/5
    ( 2 voted )
    Pin
    Print

    Ingredients

    MAIN INGREDIENTS

    • 12 cups water
    • 1 1/2 cups quinoa, rinsed
    • 5 pickling cucumbers, peeled, ends trimmed, and cut into 1/4-inch cubes
    • 1 small red onion, cut into 1/4-inch cubes
    • 1 large tomato, cored, seeded, and diced
    • 1 bunch Italian parsley leaves, chopped
    • 2 bunches mint leaves, chopped
    • 3/4 teaspoon freshly ground black pepper
    • 4 heads endive, trimmed and separated into individual spears
    • 1 avocado, peeled, seeded and diced, for garnish

    DRESSING

    • 1/2 cup extra-virgin olive oil
    • 1/4 cup red wine vinegar
    • 1 lemon, juiced
    • 1 1/2 teaspoons salt

    Instructions

    1. Bring the water to a boil in a large saucepan. Add the quinoa, stir once, and return to a boil. Cook uncovered, over medium heat for 12 minutes. Strain and rinse well with cold water, shaking the sieve well to remove all moisture.
    2. When dry, transfer the quinoa to a large bowl. Add the cucumbers, onion, tomato, parsley, mint, olive oil, vinegar, lemon juice, salt, and pepper and toss well. Spoon onto endive spears, top with avocado, and serve.

    Notes

    Place the cooled quinoa in a large bowl. Add the scallions, raisins, rice vinegar, orange juice and zest, olive oil, cumin, cucumber and parsley and toss to combine. Season with salt and pepper, to taste, cover with plastic wrap and refrigerate until cold, then serve.

    0 comments
    0 FacebookTwitterPinterestPocketEmail
    • 1
    • …
    • 6
    • 7
    • 8
    • 9
    • 10

    Search

    Follow Us

    279.4K Fans
    twitter
    instagram
    pinterest

    Recent Posts

    • Mexican Chicken With Cheese Sauce

      March 24, 2026
    • Chocolate Bread

      March 22, 2026
    • Bojangles Biscuits

      March 22, 2026
    • Braided Cherry Danish

      March 21, 2026
    • Strawberry Pop Tarts

      March 21, 2026
    • Creamy Cajun Chicken Pasta

      March 10, 2026
    • Sausage & Egg Burritos

      March 9, 2026

    Categories

    • 30 Minute Meals (35)
    • Barbecue (2)
    • Beef Meals (11)
    • Breakfast & Pastries (15)
    • Casseroles (9)
    • Cheesesteak (2)
    • Chicken Meals (19)
    • Cultural Dishes (12)
    • Featured (8)
    • Fish Meals (6)
    • Fresh Baked Breads (2)
    • Main Dishes (7)
    • Other Meals (1)
    • Pasta (21)
    • Pizza (4)
    • Popular Recipes (9)
    • Pork Meals (8)
    • Seafood Meals (19)
    • Soups & Salads (13)
    • Turkey Meals (7)
    • Vegetarian (17)

    Popular Posts

    • 1

      Buddha Bowl with Tofu

      October 22, 2024
    • 2

      Delicious Pasta Alla Norma

      October 20, 2021
    • 3

      Classic Spicy Barbecued Ribs

      October 20, 2021
    • 4

      Breakfast Zucchini Fritters

      October 20, 2021
    • 5

      Roasted Salmon with Herbs

      October 20, 2021

    About Me

    At MyPhillyConnection, we specialize in recipes for Philly favorites and lots of other popular dishes and cuisines.

    Phone: (215) 554-7326
    Email: info@myphillyconnection.com

    Useful Links

    • Beef Meals
    • Chicken Meals
    • Fish Meals
    • Recipes
    • Recipe Submission

    Breakfast Recipes

    • Mexican Chicken With Cheese Sauce

      March 24, 2026
    • Chocolate Bread

      March 22, 2026

    Recent Posts

    • Mexican Chicken With Cheese Sauce

      March 24, 2026
    • Chocolate Bread

      March 22, 2026
    • Facebook
    • Twitter
    • Instagram
    • Pinterest
    • Linkedin
    • Tiktok

    Copyright © 2026 - MyPhillyConnection / All Rights Reserved.

    Philadelphia Food Network and Recipes
    • Home
      • Main Website
    • Recipes
    • Meals
      • 30 Minute Meals
      • Beef Meals
      • Breakfast & Pastries
      • Chicken Meals
      • Fish Meals
      • Pork Meals
      • Seafood Meals
      • Turkey Meals
      • Vegan & Vegetarian Meals
      • Other Meals
    • Categories
      • Barbecue
      • Casseroles
      • Cheesesteak
      • Cultural Dishes
      • Desserts & Treats
      • Featured
      • Fresh Baked Breads
      • Grilling
      • Pasta
      • Pizza
      • Popular Recipes
      • Side Dishes
      • Soul Food
      • Soups & Salads
    • About Us
    • Contact Us
    • Submit Your Recipe
    Sign In

    Keep me signed in until I sign out

    Forgot your password?

    Do not have an account ? Register here

    Password Recovery

    A new password will be emailed to you.

    Have received a new password? Login here

    Register New Account

    I Agree to the Terms of Service and Privacy Policy

    Have an account? Login here